Plate masks are used to hide autoflorescence that occurs in certain plate types for more accurate Auto Scoring results. Although it is called a plate mask, you will set the mask using a particular drop on the plate. Once you set the plate mask for a single drop, the mask will apply to all drop locations on the plate.
You will be imaging the plate with UV or UV-TPEF imaging types.
You want to improve Rock Imager Processor’s Auto Scoring results.
You have Rock Maker 2.7 or newer.
You have already tuned the drop positions for the plate.
Your plate is already inside the imager.
Go to the File menu and select Plate Type Editor to open the Plate Type Editor.
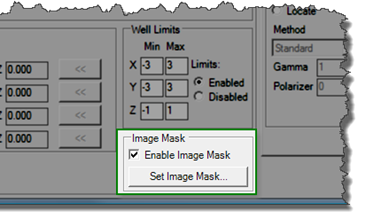
Check the Enable Image Mask checkbox.

Enable Image Mask
Click Set Image Mask.

Set Image Mask
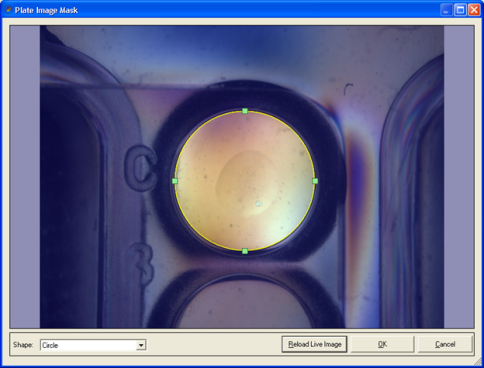
Tip: If the image of your drop is not clear enough, click Cancel and adjust the view of your drop on the Live Image tab using the manual imaging controls (see Manually Inspecting Plates for assistance). Then, repeat the process above. When you arrive at the Plate Image Mask window, click Reload Live Image and the latest view from the Live Image tab will appear on your screen.
Select a shape for your plate mask from the Shape list. Options include circle, ellipse, square, rectangle, and rounded square/rectangle.
Set the size and position of the plate mask on the image with your mouse. The irrelevant part of the plate should be outside the region you set.
When you are satisfied with the plate mask, click OK.
On the Plate Type Editor, click Apply.

|
|
| RIC-V34R017 |