You can mark a point within a drop as a "point of interest" (POI) using the Point of Interest tool ![]() . This tool is available when you are working in Drop or Well view.
. This tool is available when you are working in Drop or Well view.
Each POI contains coordinates which can be exported as a .CSV file. There are two types of .CSV files you can generate with POI in ROCK MAKER: Drop Based files or Plate Based files. Drop Based files include the coordinates taken from the selected drops, while Plate Based files include the coordinates for all of the drops in the selected plate(s). The generated .CSV file can then be read by a third party software to either collect diffraction data or dispense into those specific regions within the drop.
In this section, you will learn about how to use the Point of Interest tool, including creating, deleting, exporting the coordinates, and the related system properties.
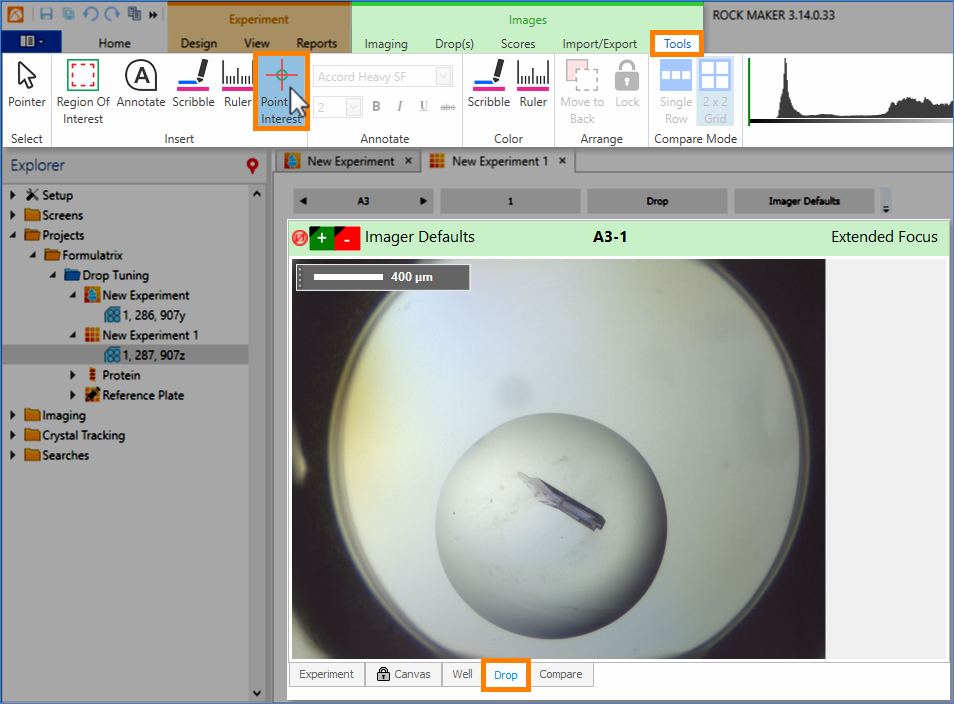
Selecting the Point of Interest Button in Drop View
OR
Right-click on any area of the image, point to Image Tools, and select Point of Interest.
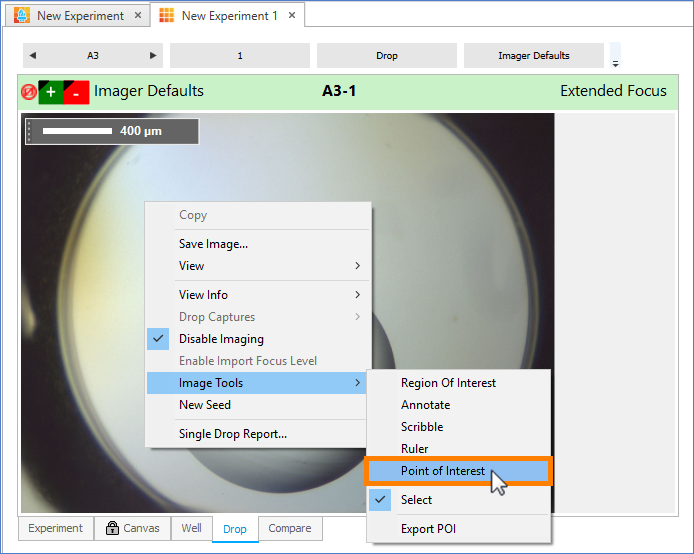
Right-clicking to Select the Point of Interest Option
 in the Tools tab of the Images tab set.
Note: Each POI is identified as Pn, where n is the number representing the order in which each POI was created in a drop. For example, the first POI created is P1, the second is P2, and so on.
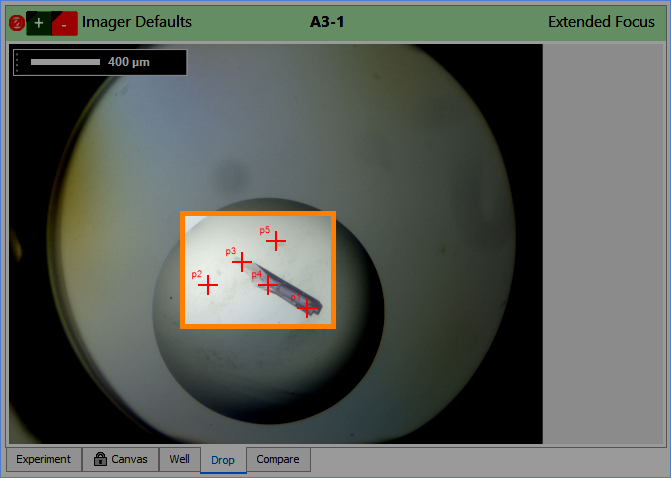
Points of Interest Shown on an Image
Tip: To move a POI, just click on the POI and drag it to the desired position.
Important: You must have already created at least 1 POI in a drop before you can export the coordinates.
.png)
Exporting Points of Interest by Right-clicking on the Experiment Node (Left) and by Right-clicking the Plate Node (Right)
OR
Open an imaged experiment in either Drop or Well view, right-click on any area within the desired drop, point to Image Tools, then select Export POI.
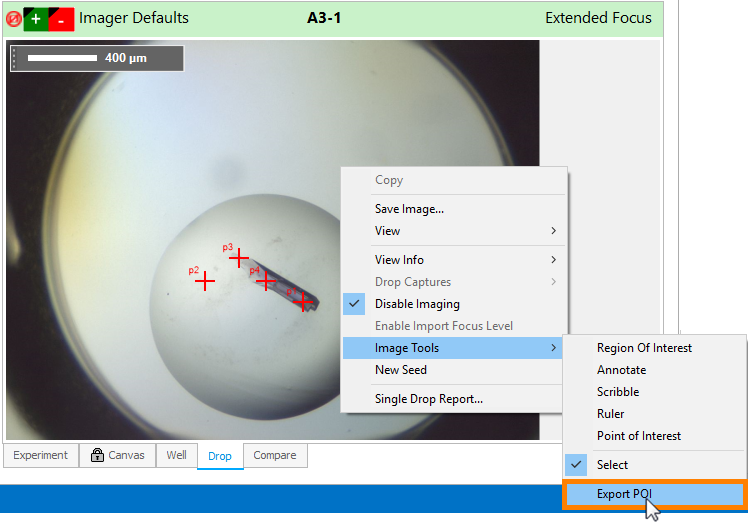
Exporting Points of Interest by Right-clicking on a Drop Image
OR
Open an imaged experiment in either Drop or Well view, then click the Export POI button
in the Tools tab of the Images contextual tab set.
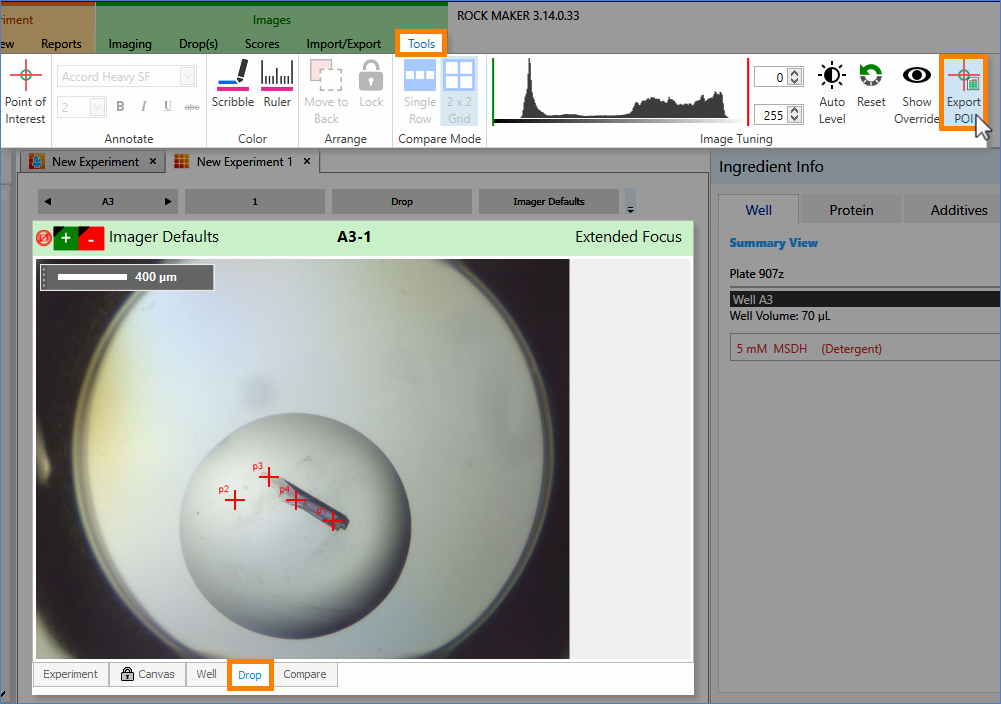
Exporting Points of Interest by Using the Export POI Button
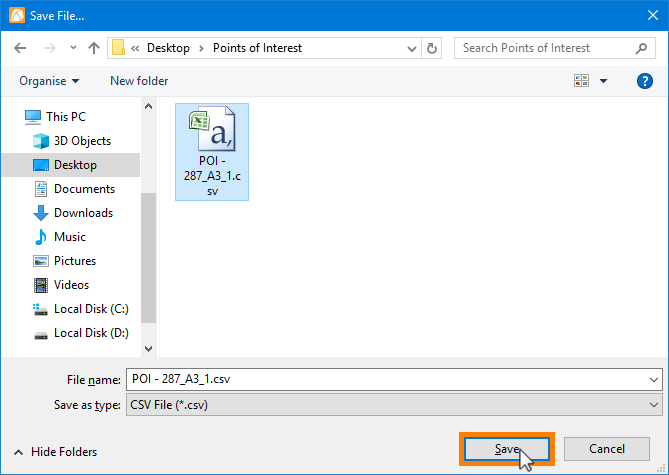
Saving the .CSV File
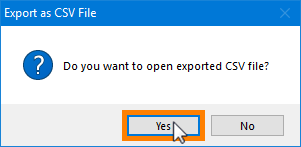
Dialog Message to Open the Exported .CSV File
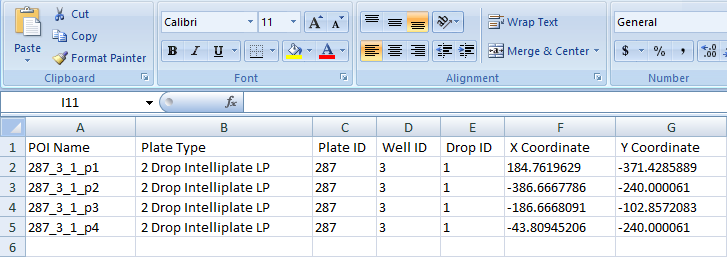
The Exported .CSV File
System Properties are where you can change behind-the-scenes ROCK MAKER behaviors, such as customizing the Point of Interest crosshair color. For more information, please read System Properties.

|
|
| RMC-V315R219 |