Open topic with navigation
Group Selection
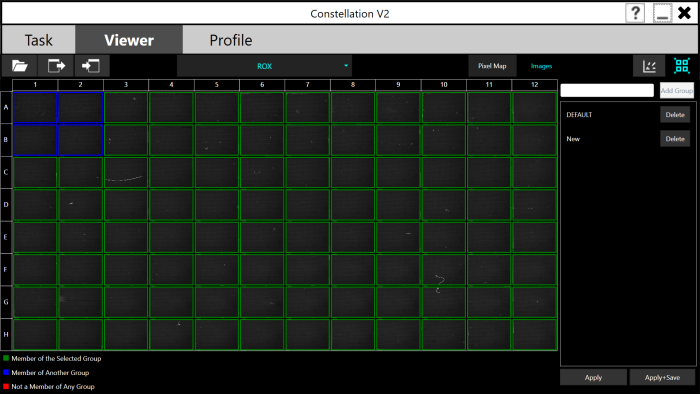
The Group screen can be accessed by tapping the button on the top toolbar. On the Group screen, you can define experiment groups for each plate. Each experiment group contains separate threshold values. This feature can be useful if the brightness or background fluorescence of your assays is variable across the plate, which might occur due to the use of different master mixes or a DNA-binding dye with different amplicon lengths.
By default, each well belongs to the Default experiment group. The menu on the right displays a list of groups. The image on the left displays all 96 wells. Wells belonging to the current group are colored green. Wells that belong to a different group are colored blue. Wells that are not assigned to any group are colored gray. All wells must be assigned to an experiment group to view results.

The Group Screen
To assign wells to another experiment group:
-
Tap the desired well(s) that you wish to put into a different group. Your selected well(s) will be in a red box.
-
Type a name for your new group in the box above the group list.
-
Tap the Add Group button to define another experiment group.
-
Select the new group, and then select the well(s) that you wish to add to the new group. Your selected well(s) will be in a green box. This process can be repeated to create as many distinct experiment groups as necessary.
-
Tap the Apply button to update the wells.
OR
Tap the Apply + Save button to save the changes to the results file for future review.
By default, a new experiment group will have the same thresholds as the default experiment group.
Related Topics
|
|

|
| COC-V20R018
|
|
 button on the top toolbar. On the Group screen, you can define experiment groups for each plate. Each experiment group contains separate threshold values. This feature can be useful if the brightness or background fluorescence of your assays is variable across the plate, which might occur due to the use of different master mixes or a DNA-binding dye with different amplicon lengths.

