Click the Scan All RFID Chip Inputs button in the Input Control Panel for instant scanning.
OR
If your MANTIS includes Radio-Frequency Identification (RFID) functionality, you can use the RFID to access the history of a chip, such as chip usage and dispense information. In this tutorial, you will learn how to scan RFID chips (either all chips or an individual chip) and open the chip dispense history.
Scanning RFID chips during Startup
MANTIS now supports automatic RFID scanning during startup. This feature is useful for you to get the most up to date chip information, especially after setting up new instrument. To enable or disable this feature, follow these steps:
On the Tools menu, click Options.
Click the Advanced Options tab and locate the RFID option.
On the Scan Inputs During Startup option, select True to activate RFID chip scanning during startup. To deactivate the scanning, select False.
Click OK to apply the changes.
Scanning RFID chips manually
You can manually scan your RFID chip(s) in two different ways: either by scanning all chips at once or scanning an individual chip.
Click the Scan All RFID Chip Inputs button in the Input Control Panel for instant scanning.
OR
Go to the Tools menu, and select Scan Inputs for RFID chips.
Click Start Scan in the Scan MANTIS Inputs window.
 This icon indicates that the RFID chip is available.
 MANTIS will tell you if an RFID chip is not available during the scanning process. To overcome this, please check whether you are using an RFID chip or not. If not, replace the chip with the desired RFID chip and try again. If you are already using an RFID chip but it is undetected, please contact support@formulatrix.com.
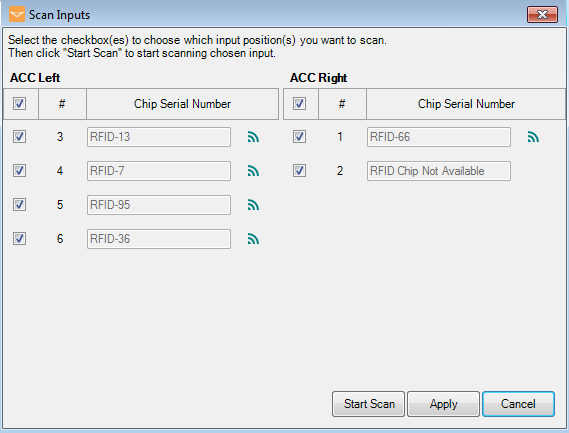
RFID Scanning
Select Apply to apply the scanning result to the MANTIS inputs and then click Yes when the confirmation message appears.
OR
Select Cancel if you do not want to apply the scanning result to the MANTIS inputs.
Click the Scan RFID Chip button on the desired Input box for instant scanning.
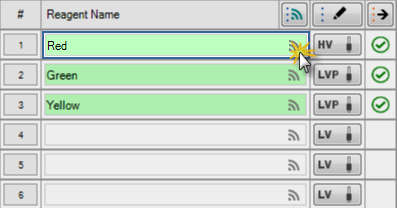
Individual Chip Scanning with Scan RFID Button
OR
Click the Input button in the Input Control Panel.
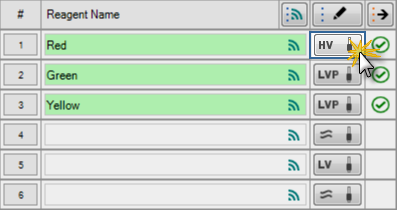
Individual Chip Scanning
Select the Scan Chip button in the Chip Serial Number box. You can also clear the input scan result by clicking the Clear RFID Input button
 .
.
When the scanning process is finished, click OK.
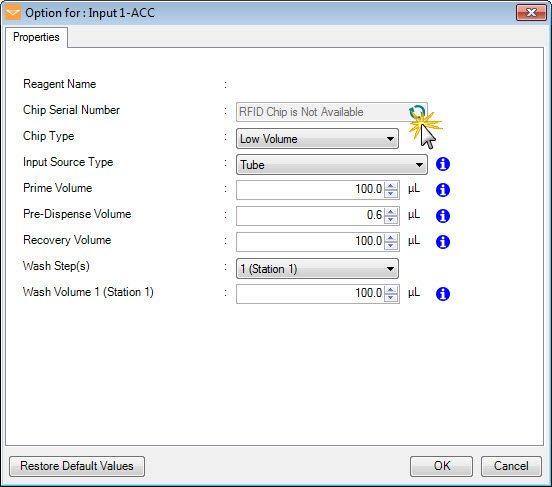
Input Option Window
Besides scanning the RFID chips, you can also open the chip dispense history to review the chip usage and dispense information.
The RFID chip has been dispensed before.
Click the Input button .
.
Go to Chip Dispense History tab.
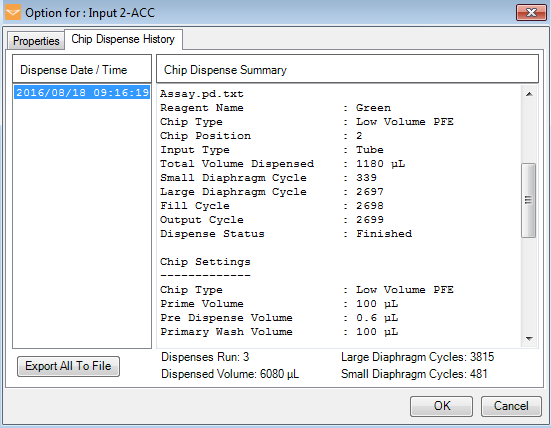
Dispense History Window
To export the chip dispense history, click the Export All to File button.
Change the file name if desired.
Click Save, and then click OK.
To close the window, click OK.

|
|
| MAC-V45R721 |