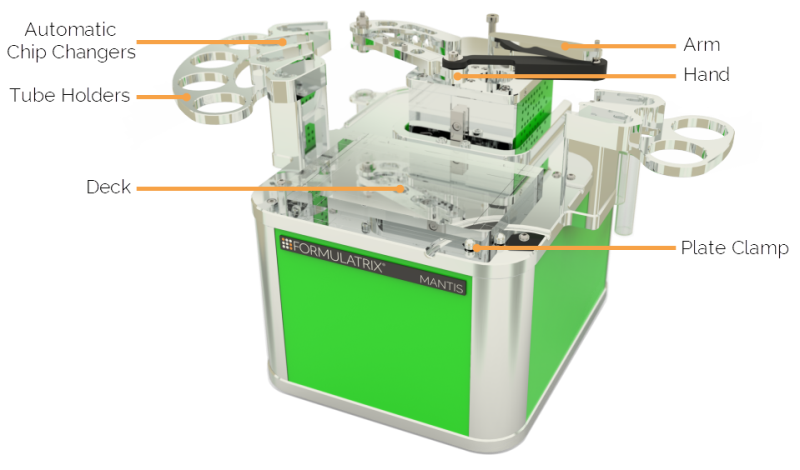
This quick start guide is designed for the beginner or casual user who may need a refresher course on how to use the MANTIS Radio-Frequency Identification (RFID) feature. Read each section below for quick steps to operate MANTIS.

Front View of MANTIS V3.3

High Volume Chip with RFID Tag
You can manually scan your RFID chip(s) two different ways: either by scanning all chips at once or by scanning an individual chip.
To scan all chips:
Click the Scan All RFID Chip Inputs button in the Input Control Panel for instant scanning.
OR
Go to the Tools menu, and select Scan Inputs for RFID chips.
Click Start Scan in the Scan MANTIS Inputs window.
Select Apply to apply the scanning result to the MANTIS inputs and then click Yes when the confirmation message appears.
To scan an individual chip:
Click the Scan RFID Chip button  on the desired Input box for instant scanning.
OR
Click the Input button in the Input Control Panel.
Select the Scan Chip button in the Chip Serial Number box. You can also clear the input scan result by clicking the Clear RFID Input button
  .
.
When the scanning process is finished, click OK.
Besides scanning the RFID chips, you can also open the chip dispense history to review the chip usage and dispense information.
Click the Input button .
.
Go to the Chip Dispense History tab.
To export the chip dispense history, click the Export All to File button.
Change the file name if desired.
Click Save, and then click OK.
To close the window, click OK.
Designing a dispense involves adding reagents to the dispense list, and then assigning each reagent to a chip position.
To design a dispense:
Choose from the following options:
Create a new dispense list: Click the New Dispense List button  on the Dispense List panel. Select a plate type and click OK. Then, proceed to step 2.
OR
Load an existing dispense list: Click the Open Dispense List button  on the Dispense List panel. Find your dispense list and click Open. Then, proceed to step 5.
Click and drag your mouse over a group of wells to select them, or select a pattern from the Selection group under the plate designer.
For a constant volume, type in a volume and press Enter on your keyboard.
To use a gradient design, click the Grid button  , and choose a horizontal gradient, a vertical gradient, a forward diagonal gradient, or a backward diagonal gradient.
To add a backfill volume, click the Grid button  , and then click the Backfill button
  .
.
When you are done, click the Save Dispense List button to save the dispense list.
Then, choose from the following options:
To assign the Dispense List to an existing category, select the desired category from the list.
OR
To add a new category, click on the name of the category under which you would like to add the new category label. Click New Category, and type a name in the Category Name box. Then click Add to add the new category to the category list.
Define the Dispense List Name, and select the file type from the Save as type list from the following options:
Click Save when you’re done.
Click the Input button  next to each reagent input. Select the Chip Type (Low Volume, High Volume, High Volume PFE, Low Volume PFE, High Volume 3PFE, Low Volume 3PFE, or High Volume Continuous Flow chip), and enter the Prime Volume (optional), Primary Wash Volume, Secondary Wash Volume (optional), Recovery Volume, and Pre-Dispense Volume.
Drag the reagent name from the Dispense List to either the text box next to the chip position, or the chip position on the image of the MANTIS. OR click the Assign To Input button  to assign all reagents from the Dispense List at once.
Click the Run Dispense button ![]() or press F5.
or press F5.
It’s important to clean the chips after each use to prevent cross-contamination and dried reagent buildup. Before you begin, remove any reagent tubes from the reagent bottles and direct them to a waste container.
To clean all diaphragm chips:
To clean an individual diaphragm chip:
To clean a Continuous Flow chip:
Remove the Continuous Flow cap from your reagent bottle and screw it onto a different reagent bottle containing your wash solution.
Attach the chip to the MANTIS hand.
Click the Prime Input button .
.

|
|
| MAOWH-V47R722 |