Image Tuning
Image Tuning is used to adjust the image brightness and contrast of your images. This ability is particularly important for UV and SONICC images. You can adjust levels on a per-plate basis, or a per-drop basis, depending on if you are viewing the entire plate with the Canvas tab, or a single drop on the Drop tab.

Example of Tuned Images
Image tuning settings can be defined at three levels in ROCK MAKER: at the global level, at the plate level, and at the drop level. Settings for the uppermost or global level are defined in the Imaging Settings node under the Imaging node in the tree. Global level settings are defined per imaging setting and will be applied every time a plate or drop is imaged with that imaging setting. By default, no imaging settings have tuning settings, as we want to preserve to original image as much as possible. However, you can create custom imaging settings that will apply tuning automatically, saving you time when you view images.
You can override global image tuning settings of a imaging tuning for images of a particular experiment at following two levels:
| Defining Image Tuning On... | Tuning applies to... | Overrides |
|---|---|---|
| Canvas tab | All of the images of the current experiment belonging to the selected imaging setting. | The global image tuning settings of an imaging setting. |
| Drop tab | The selected region’s image from the current inspection and all of its focus level images | Both the global and experiment level image tuning settings of an imaging setting. |
Tuning Images
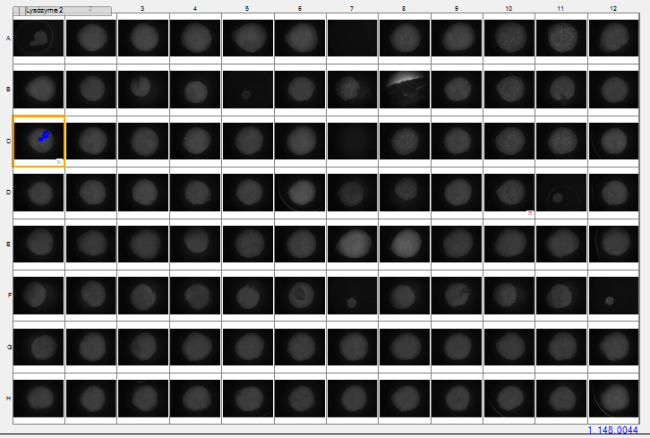
This is an example of a UV plate that has not been tuned:

LCP UV Drops
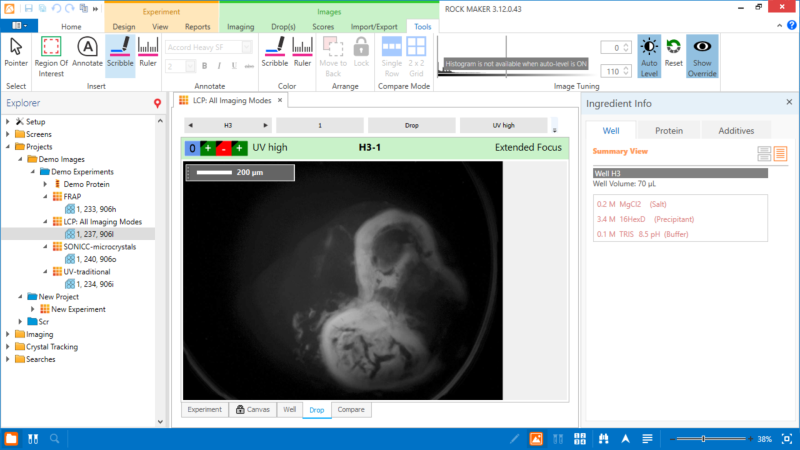
To adjust the brightness and contrast so as to better see the contents of the drops, use Image Tuning.
- Click the Tools tab in the Images tab set.

Tuning
- To level the images, drag the green line to the left of the histogram, and the red line to the right of the histogram. Keep moving the lines until you are satisfied with the image(s) on your screen. Moving the green line further to the right will remove any noise visible from the plate.

Tuned Images
- You can also level images automatically using the Auto Level button to the right of the Image Tuning histogram. When the Auto Level button is active, the histogram will be disabled. If you want to reset all changes made to the default settings, click the Reset button.

Auto Level Button Next to Image Tuning Histogram

Auto Leveling
Viewing and Ignoring Overrides
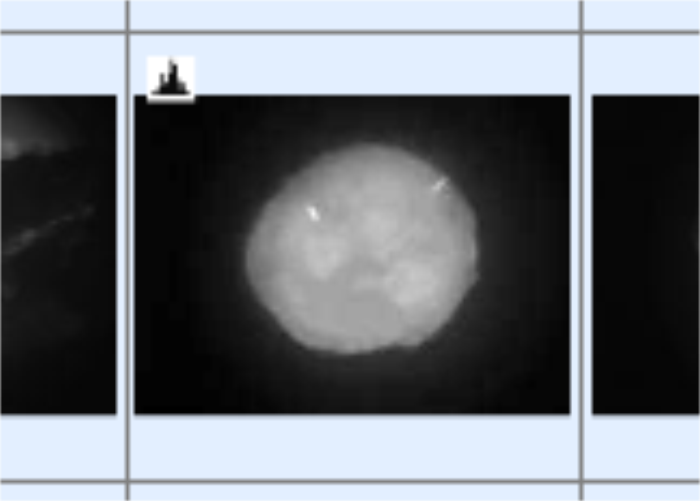
On the Canvas and Navigator, images with individual image-level overrides appear with a histogram button at their top-left corner as shown below. "Override" means that the image has been tuned, and you are not viewing the original image.

Drop with Leveling Override
If you want to ignore the override settings for your images and view the original images, you can toggle the Show Overrides button in the Tuning group. If you are viewing leveled images, the Show Overrides button appears in blue. If you are viewing the original images, it appears in gray. Toggling this button does not clear leveling from the images.
Resetting Image Tuning and Clearing Experiment Level Overrides
You can use the Reset button to reset tuning settings to their default values so that all image tuning is removed, and to clear the image tuning for an experiment that has Override settings in place.
If you are on the Drop tab, clicking Reset will clear region image level override settings, if any. If there are no override settings for the current image, tuning settings will be reset to their default values.
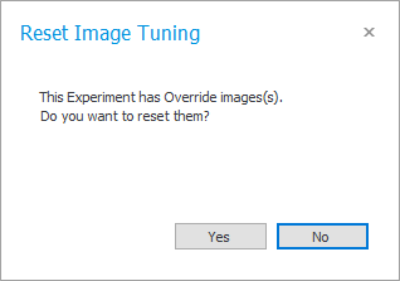
If you are on the Canvas tab and you have override images, clicking Reset will bring up the following dialog:

Reset Image Tuning
If you are sure you want to reset the Image Tuning with Override Image(s) in it, select Yes. If you are unsure, select No.
Related Topics
 | |
| RMC-V317R221 |