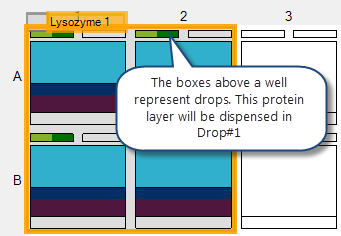
A protein layer specifies the protein formulation that will be used in one of the drops in each well of the layer. Each protein layer applies only to one drop per well. When working with plates that allow for multiple drops, you will need to create a protein layer for each drop.
Protein layers can span multiple other layers. For example, if you design an experiment that contains a screen layer, a random layer, and a grid layer, you can use the same protein formulation in all three layers by drawing a protein layer that encompasses all of them.
On the canvas, a protein layer is represented graphically by shading in one of the drops located above each well, as illustrated in the following example.

Protein Layer
Rock Maker allows you to define how the volumes of the protein formulation and well solution that make up the drop will vary across the layer.
Note: By default, a protein formulation's drop volumes will be the same in every well of the layer. If you do not want the volumes to vary, you can leave the default values as is.
Under Well Solution Volume, select an option from the Vary list.
Type the starting volume into the Start box.
Type the ending volume into the Stop box.
Note: If you select Well Number, variation will occur from well to well. To determine the increment, Rock Maker looks at the total number of wells in the grid, as well as all wells in any sub-layers. The first well of the grid will receive the start value, and the last well of the grid or sub-layer will receive the stop value. All wells in between will be incremented in even steps. The following example illustrates this using a single grid.
Under Protein Volume, select an option from the Vary list.
Type the starting volume into the Start box.
Type the ending volume into the Stop box.
 | |
| RMC-V38R016 |