-
Download MARCO Linux Ubuntu Virtual Machine .ZIP file from this link: https://formulatrix.com/downloads/marco/formulatrix-autoscoring-host.zip.
-
Right-click the .ZIP file and select Extract All as shown below.
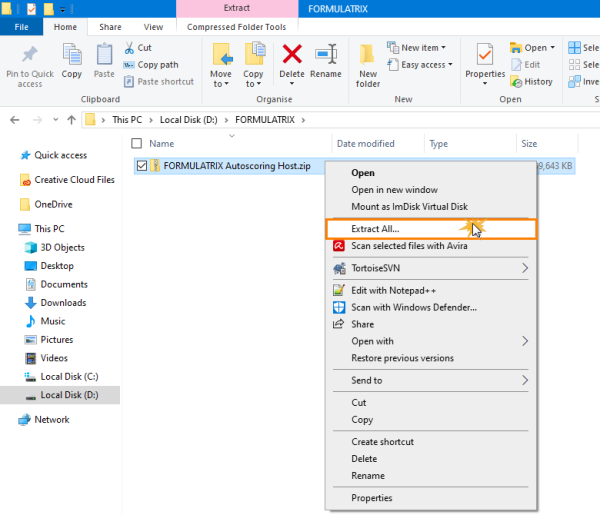
Selecting the Extract All Option
-
Now that you have successfully extracted the MARCO .OVA file, open the VirtualBox application on your computer.
-
Go to the File menu, and select Import Appliance to import the FORMULATRIX Autoscoring Host to VirtualBox.
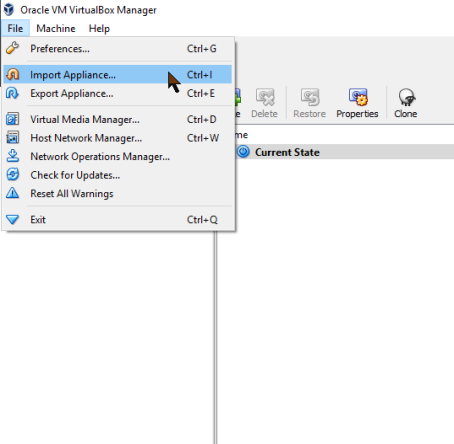
Selecting Import Appliance to Import the FORMULATRIX Autoscoring Host to VirtualBox
-
Locate the FORMULATRIX Autoscoring Host directory, then click Next.
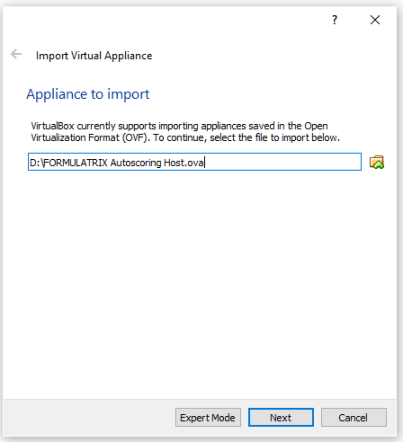
Locating the FORMULATRIX Autoscoring Host Directory
-
Then a list of all of the hardware specifications from the FORMULATRIX Autoscoring Host will appear. Click Import.
Note: Do not alter any settings in this window, unless you are an advanced user and are sure of what to do here.
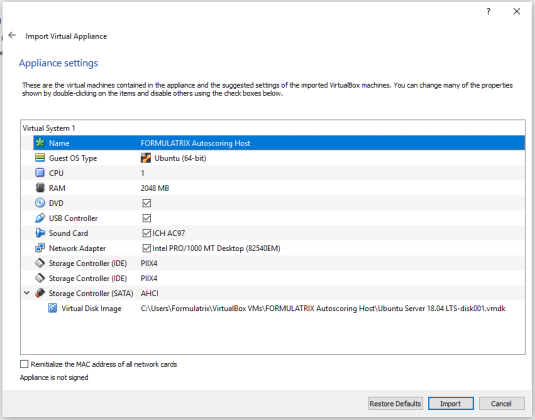
Importing the FORMULATRIX Autoscoring Host Directory
- Please wait for a few moments while the VirtualBox imports the FORMULATRIX Autoscoring Host.
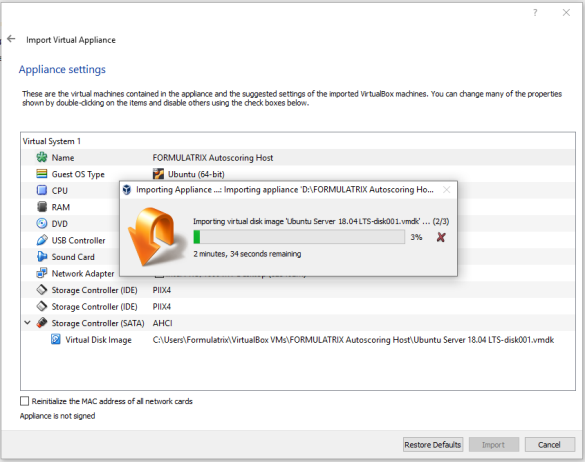
The FORMULATRIX Autoscoring Host Is Being Imported
- When the import is complete you will be redirected to the Home page of the VirtualBox application. Ensure that the FORMULATRIX Autoscoring Host has been successfully installed in your virtual machine by checking the top-left corner of the application window, as shown below.
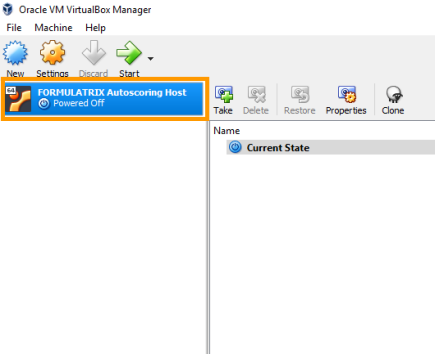
The FORMULATRIX Autoscoring Host Has Been Successfully Installed in Your Virtual Machine
-
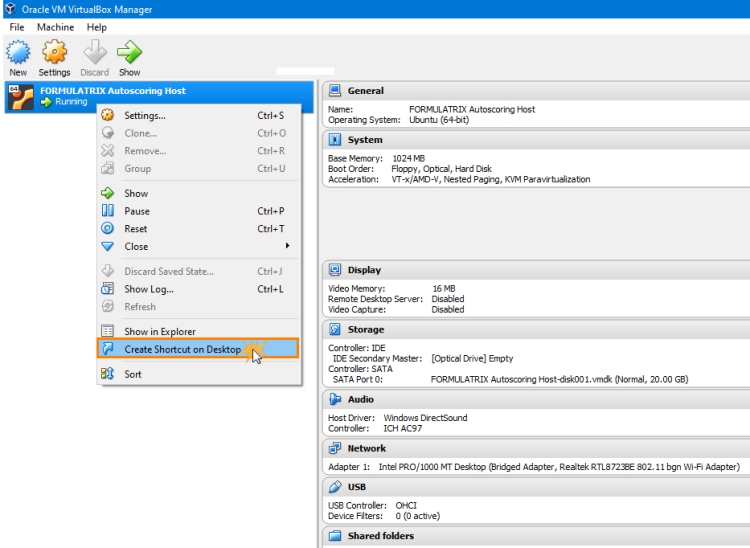
Right-click FORMULATRIX Autoscoring Host and select Create Shortcut on Desktop, as shown below.
- Then, click the downward arrow next to Start and select Headless Start. This will enable MARCO to run automatically in the background.
Creating a Desktop Shortcut for the FORMULATRIX Autoscoring Host
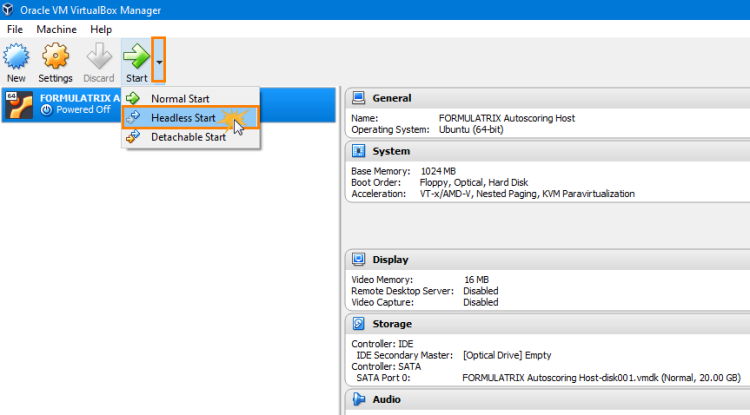
Selecting Headless Start to Run MARCO in the Background
-
If the Windows Security Alert dialog box appears, select Allow access.
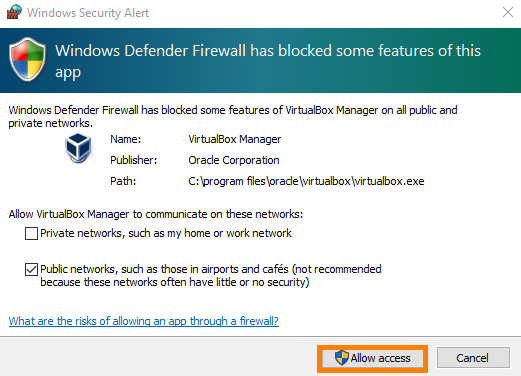
Selecting Allow Access in the Windows Security Alert Dialog Box
-
Then, you need to obtain the computer name on which MARCO is installed to configure the MARCO Server URL. To find out your computer name, open File Explorer, right-click This PC, and select Properties. Remember your computer name as you will need to enter it in the next step.
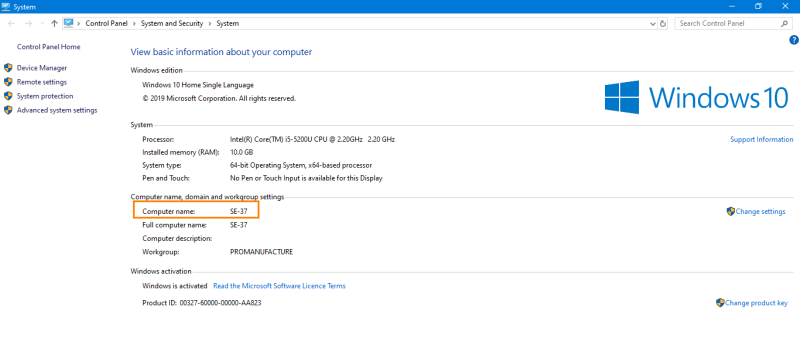
Obtaining the Computer Name on which MARCO is Installed
- Open your ROCK MAKER application, click the Application Menu button, point to Setup, and select Global Preferences.
-
Go to the General tab and select the Scoring properties.
-
Locate and select the Enable MARCO Auto Score option. Then, type your computer name in the MARCO Scorer Server URL field.
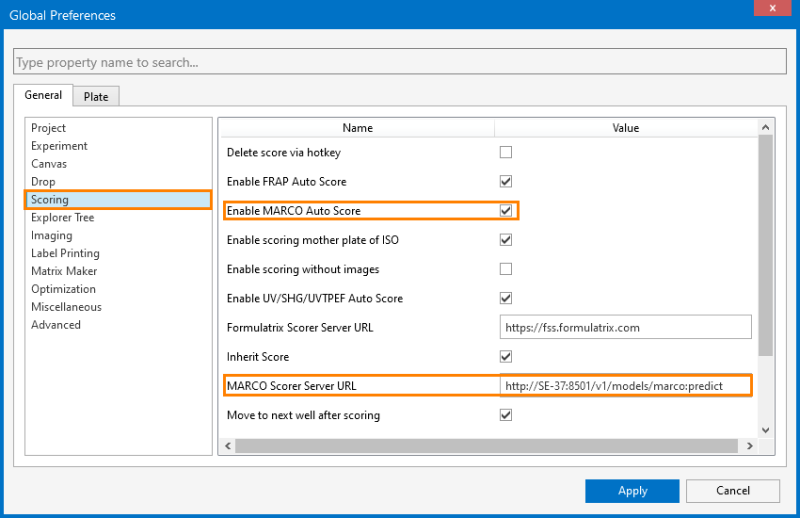
Configuring the Default MARCO Scorer Server URL
Note: You must type the computer name in the space between // and :8501.

Entering the Computer Name in the MARCO Scorer Server URL Field
-
Click Apply.
-
Restart ROCK MAKER and the Send to MARCO button will appear in the Auto Score group of the Scores tab in the Images contextual tab set.
OR
You can also expand the Projects node in the Explorer, and right-click on the experiment or plate that you want to score. Then select Send to MARCO.
Note: The Send to MARCO button should only be used for images collected before you enabled MARCO in ROCK MAKER. MARCO will automatically score any new images without having to click the Send to MARCO button or select Send to MARCO from the right-click menu.
