A protocol in the FLO i8 software is comprised of a sequence of steps that will perform common pipetting operations such as aspiration, dispense, and dilution.
A pipetting step list is a list of step(s) in a protocol. A pipetting step consists of pipetting actions or experiment modes such as Simple Transfer, Serial Dilution, or any sequence of these two experiment modes. You can also add Time Delay and User Confirmation steps.
Labware is the equipment used to hold reagents, and can include plates, bottles, tubes, and tip boxes compatible with the FLO i8 deck. The FLO i8 software already includes some standardized SBS labware definitions that you can use. You can also add or modify labware definitions, as needed.
Important: Any new labware added to FLO i8 must meet the ANSI/SLAS Microplate Standards. For more information, contact FORMULATRIX support.
There are two experiment modes:
Simple Transfer — This is a basic mode that emulates hand pipetting, and enables you to quickly aspirate and dispense using the FLO i8 intelligent pipetting features. Select this mode to create a pipetting step by simply selecting the source, transfer volume, and destination.
Serial Dilution — Select this mode to design a pipetting step to dilute your samples.
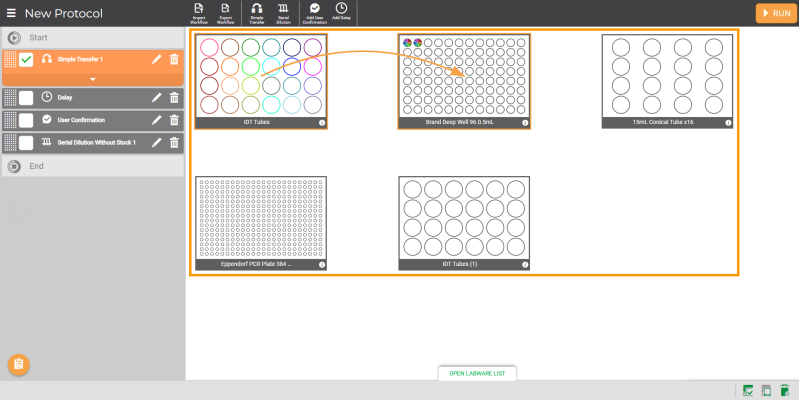
The virtual deck is located on the Protocol Editor and the Preparing Required Labware pages. On the Protocol Editor page, the virtual deck is referred to as the Virtual Bench. The Virtual Bench is where you can select or add the labware you want to use and define your pipetting steps.

Virtual Deck in the Protocol Editor Page
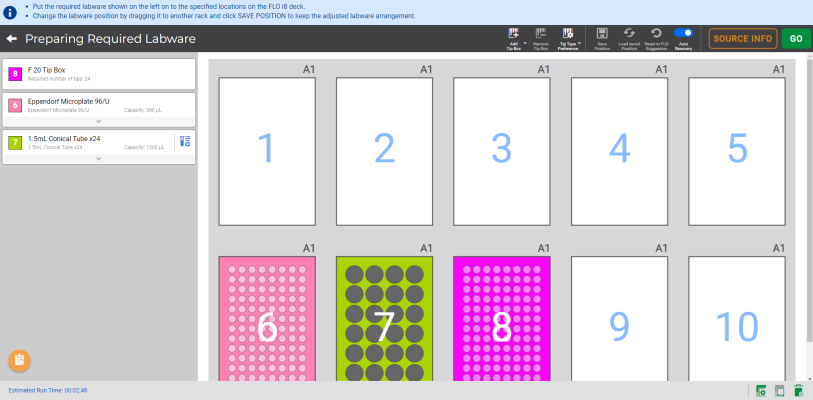
The Virtual Deck in the Preparing Required Labware page, referred to as the Deck Layout Screen, will also be displayed before the protocol is executed. Here you see where FLO i8 recommends you place your labware on the actual deck, and then place the pieces accordingly.

The Required Labware on the Preparing Required Labware Page
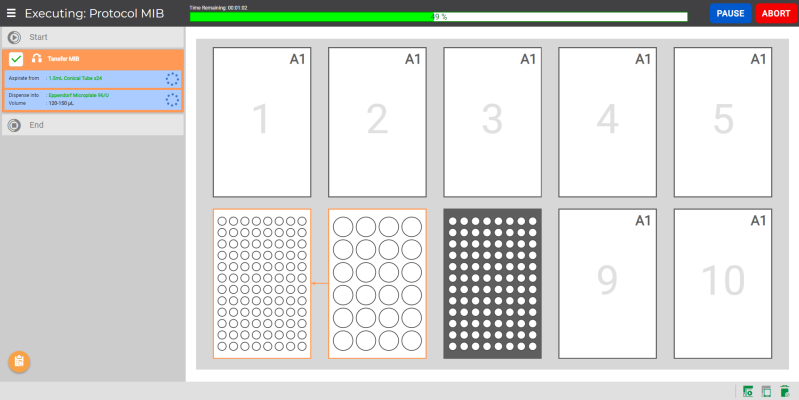
The Executing page displays the list of pipetting steps and whether or not are completed, the Deck Layout Screen, and a running status bar for the current protocol. You can pause the running protocol by clicking the PAUSE button or abort the protocol execution by clicking the ABORT button.

The Executing Page During a Protocol is Execution
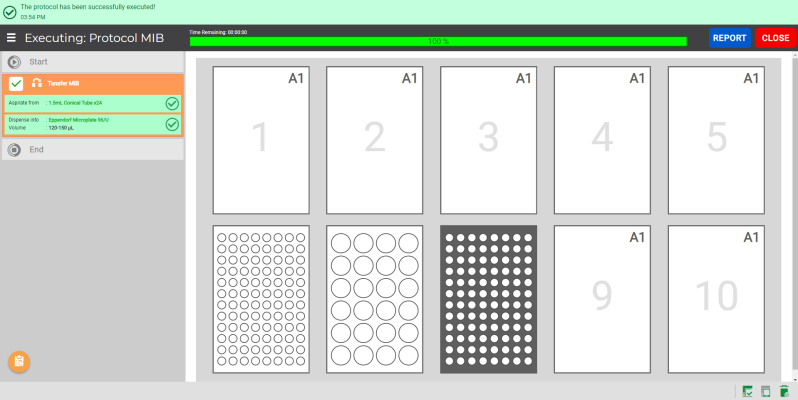
After the protocol has been executed, you can check the dispense report by clicking the REPORT button, or close the Executing page and go back to the Explorer page by clicking the CLOSE button.

The Executing Page After Running the Protocol

|
|
| FLOWH-V28R025
|
Unit 6, Level 13, Gate District, Gate Building Dubai International Financial Centre |