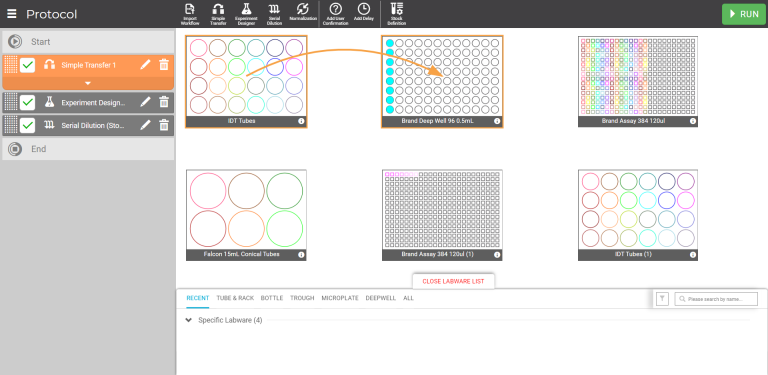
To run an experiment, you must first create a protocol by selecting the labware and adding pipetting steps.

Protocol Sample in the Protocol Editor Page
Within a protocol, you can perform a Simple Transfer, design a more complex transfer with Experiment Designer, perform a Serial Dilution, or combine any and all of these operations in a multi-mode protocol. You can also add a delay and/or user confirmation in between your pipetting steps, if you need to pause at a certain time.
To determine the most appropriate mode(s) for your protocol design, read the following descriptions:
For even faster protocol design using Simple Transfer mode, you can use the Import Workflow Feature, which allows you to import pipetting steps defined in .CSV format.
All existing protocols are accessible from the Protocol Explorer page. Besides creating a new protocol, you can also organize the protocols in folders, modify the protocols list, and remove obsolete protocols in this page.

Protocol Explorer Page
Follow the instructions below to create a new protocol.
In the Protocol Explorer page, click the New Protocol button on the Navigator Bar.
Note: You can create a folder to save your protocols in the Explorer page. To do so, click the New Folder button  .
.
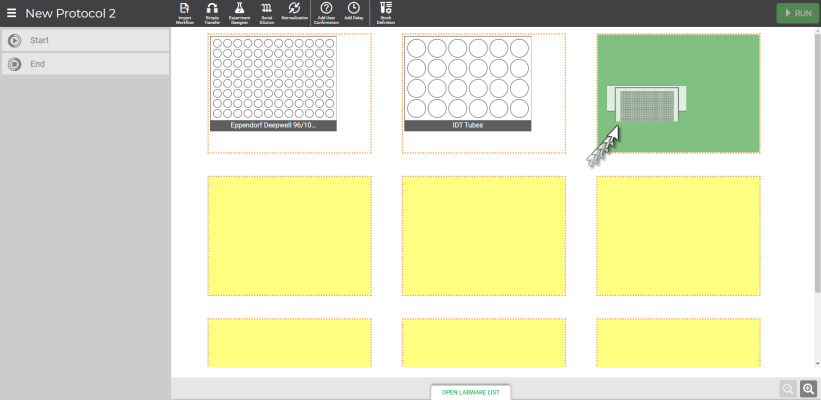
In the Protocol Editor page, click Open the Labware List and drag the desired labware from the list to the virtual deck. Repeat this step to add more labwares.

Selecting Labware on the Protocol Editor Page
Begin to create pipetting steps by choosing from the following options:
If you have a predefined protocol in a .CSV file format, import your protocol by selecting the Import Workflow button on the Navigator Bar.
Important: If you import a workflow, the labware selection in the virtual deck must match with the labware name listed in the predefined workflow file. See Using the Import Workflow Feature for more information.
Add pipetting steps to the protocol by selecting the desired operation mode on the Navigator Bar: Simple Transfer, Experiment Designer, and/or Serial Dilution. Follow the on-screen instructions to complete the pipetting steps.
Click FINISH to save the pipetting steps and return to the Protocol Editor page.
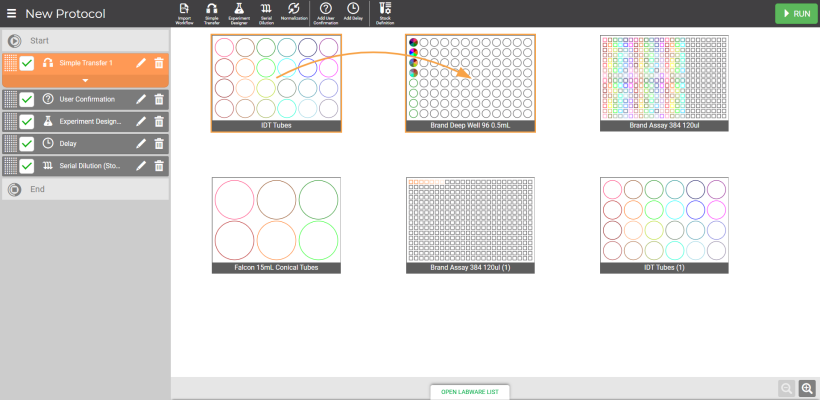
You can add a user confirmation and delay between your pipetting steps by selecting the Add Delay or Add User Confirmation button
 .
.
You can also change the pipetting steps’ order by clicking and dragging the selected step to the desired position, indicated by the priority number in each step. You can also revert, undo, or redo the modified order.
Click Apply to confirm the changes. It may take a moment for the FLO i8 software to update the step order.
Changing the Step Order
Note: FLO i8 will execute the protocol based on the pipetting steps order, starting from the first step at the top of the list to the last step at the end of the list accordingly.
OPTIONAL: Click the  icon to edit the step, OR click the
 icon to remove the step.

The Protocol is Ready to Execute
Important: You might find a warning icon on your protocol(s) in the Protocol Explorer page to indicate that there is an error occurring within your protocol. In general, errors occur because the assigned pipetting parameters in your protocol have been removed and are no longer available in the FLO i8 database. Another case is that the assigned has been removed or updated. You can still open the protocol, and see the error by clicking the warning icon of the invalid step in the Protocol Editor page.
Make sure to change the pipetting parameters and/or update the invalid stock in the corresponding step to continue the protocol execution. If the problem persists, contact support@formulatrix.com for further assistance. For more information, see Pipetting Parameters.
![]()
Warning Icon on the Existing Protocols
| FLOi8Q-V20R021
|