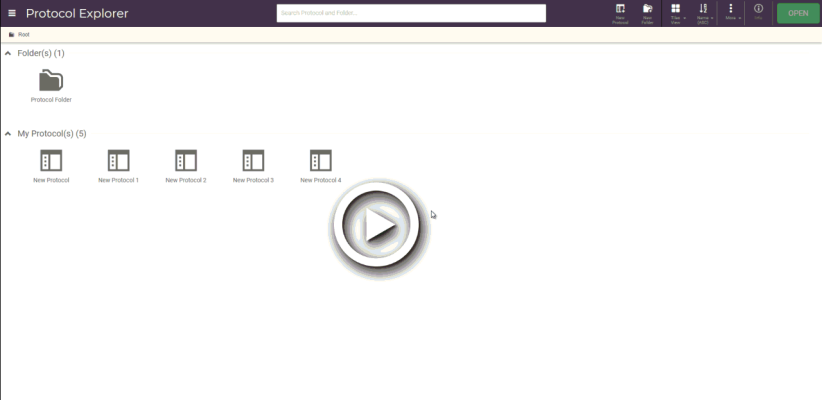
The Serial Dilution mode enables you to dilute sample stocks using the diluent of your choice. Follow the instructions below to create a pipetting step using the Serial Dilution mode.
Creating a Serial Dilution Pipetting Step
On the Navigator Bar, click the Serial Dilution button .
.
Select the Serial Dilution type (WITH STOCK or NO STOCK) and follow the steps accordingly.
Click the WITH STOCK option to create a serial dilution pipetting step using predefined stocks and samples from the Stock Setup window.
Select a labware on the virtual deck on which you want to set up the Serial Dilution and click NEXT.
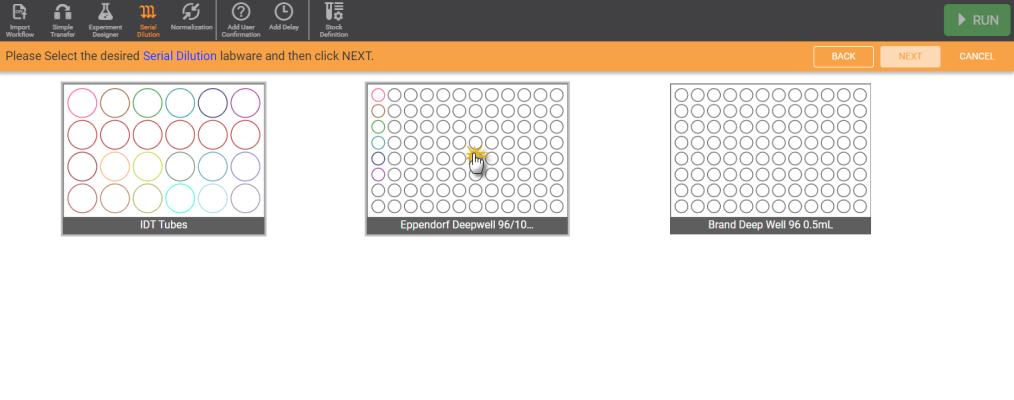
Select the Serial Dilution Labware in the Virtual Deck
Note: Serial dilutions cannot be created in wells that already contain stocks. The wells that already contain stocks are indicated by the different colors in the labware preview.
In the Serial Dilution window, set the diluent stock by clicking the ADD DILUENT button, and then select a stock from the Stock list.
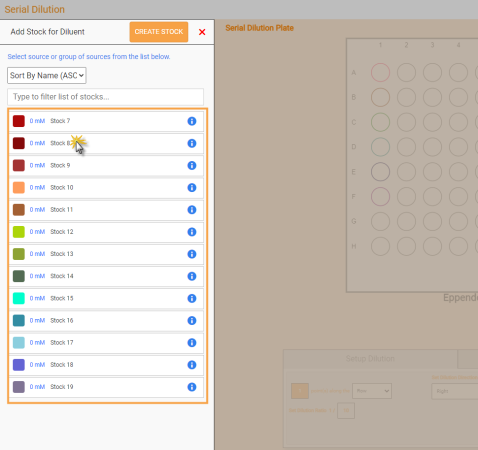
Selecting a Diluent from the Stock List
Set the sample stock by clicking the ADD SAMPLE button, and select the sample stock or group of stocks from the Stock list.
Note: Alternately, you can create a new stock or group of stocks during the diluent and sample stocks selection process from the available well source. To do so, click the CREATE STOCK button and define the stocks in the Stock Setup window. The defined stocks will be automatically added into the Stock list. For more information, see Setting Up a Stock Definition.
OPTIONAL: To change the diluent or sample stock, click CHANGE DILUENT or CHANGE SAMPLE button.
Map the sample stocks into the Serial Dilution Plate:
To deselect the destination location, click the well second time.
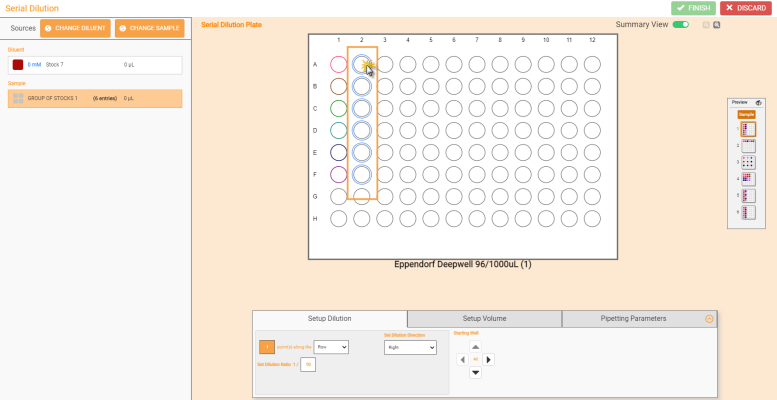
Click on a Well to Select the Mapping Location
Continue to step 3.
Click the NO STOCK option to create a serial dilution without using defined stocks. Instead, simply select the labware and wells which contain your diluent and sample(s).
Select the labware from the virtual deck that contains the diluent, and click NEXT. Repeat this step to select the labware containing the sample(s).
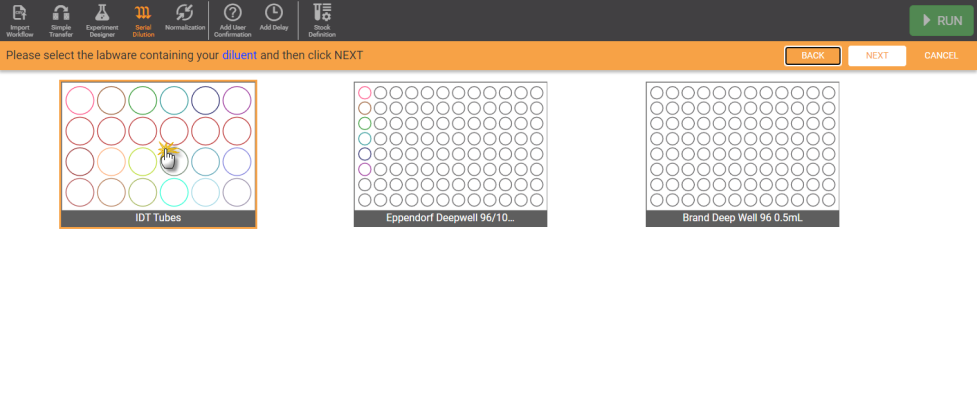
Select the Diluent Labware in the Virtual Deck
Select the labware from the virtual deck on which you want to create the serial dilution, and click NEXT.
In the Serial Dilution window, set the diluent and sample locations. Follow the steps below.
To set the diluent:
Select the well(s) containing diluent in the Diluent Plate by one of the following methods.
Click on a well, or drag over multiple wells.
Use the Row, Column, or Diagonal arrow buttons to select multiple wells at once.
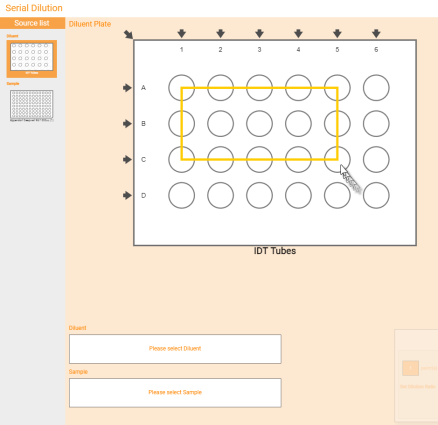
Select the Multiple Well Locations in the Diluent Plate
OPTIONAL: To deselect wells, click and/or drag on them again or re-click the arrow buttons of the selected stocks. You can also click the Delete button in the Diluent stock list to reset the selection. Click Undo to undo this action.
Continue to step ii.
Click on the Sample labware preview at the left side of the Serial Dilution window.
Select the location in the Sample Plate by clicking on a well to select a single stock or select multiple stocks by clicking the Row or Column arrow.
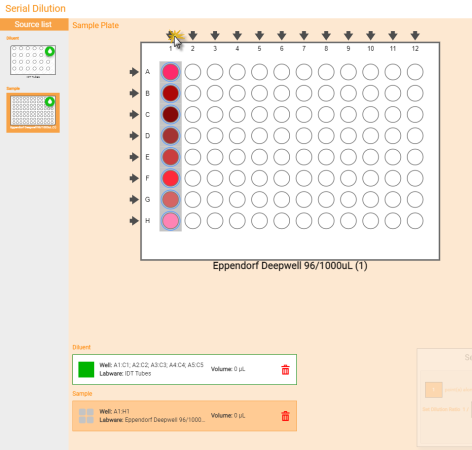
Select the Stock Well Locations in the Sample Plate
OPTIONAL: To delete the selected stocks, click and/or drag the desired wells or click the Delete button to remove all stocks in the Sample Plate. Click Undo to undo the deleting stocks.
Continue to step d.
Click the arrow button between the labware or click anywhere on the Serial Dilution Plate. Then, map the diluent and sample stocks to the Serial Dilution Plate by clicking a well on the labware as the starting well. The FLO i8 will automatically set the mapped locations starting from the selected starting well, and inform if the location is invalid. Any of this information will be displayed under the labware preview.
Note: If you want to get back to the Diluent and Sample Plate to modify the stocks, click the arrow button or click anywhere on the Sample or Diluent Plate. Repeat step d to map the stock.
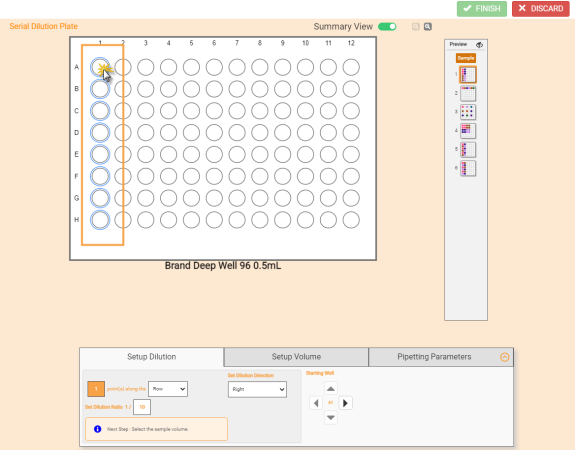
Map the Diluent and Sample Stocks in the Serial Dilution Plate
Continue to step 3.
Tip: Click the Zoom In button  at the top side of the plate preview for a bigger labware display. Use the Up
  , Down
  , Right
  , or Left arrow button
  to shift the plate display to the right, left, top, or bottom side. Click the Zoom Out button
  to zoom out or Fit to deck button to reset the labware display.
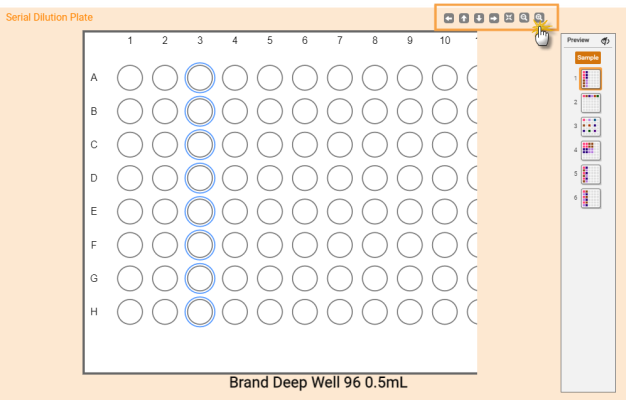
Plate View Options
Define the sample dilution and volume setup, by following the steps below:
OPTIONAL: Select the available mapping pattern from the Sample panel at the right side of the plate. The mapping pattern selections are only available if you have a group of stocks in the Sample Plate. Fore more information, see Mapping Pattern Selections.
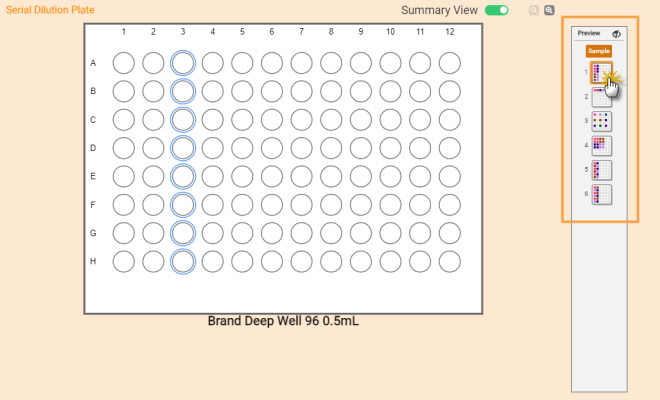
Select the Well Pattern in the Sample Panel
Under the Setup Dilution tab:
Define the dilution step in the provided field to fold along Row, Column, or Quadrant.
Set the dilution ratio in each Row, Column, or Quadrant in the provided field.
Define the dilution direction under the Set Diluent Direction panel.
OPTIONAL: The starting well of the destination locations in the Serial Dilution Plate is A1 by default. You can change this starting point by clicking on the desired well or set the position by clicking the arrow in the Starting Well option.

The Starting Well Panel Under the Setup Dilution Tab
Define the sample volume in mL or μL under the Setup Volume tab. The FLO i8 software will automatically calculate the diluent volume and display it under the volume field. Click APPLY SAMPLE VOLUME when you’re done.

Setup Volume Tab
OPTIONAL: Modify the pipetting parameters as needed by choosing from the following options:
Important: Please ensure you check the pipetting profile before modifying, as it might affect the corresponding steps that are using the current profile in other protocols.
Change the current pipetting parameters with an available pipetting profile listed under the Pipetting Parameters tab. Click APPLY when you’re done.
Important: The FLO i8 software has assigned the Factory SD Profile as the default pipetting parameters for the Serial Dilution step. This default profile cannot be modified. You will need to create at least one new pipetting profile that can be modified. For more information, see Using the Pipetting Parameters.

Change the Pipetting Profile from the Pipetting Parameters Tab
Edit the current pipetting parameters as you design the step. To do so, click on the Expand button of the Pipetting Parameters tab, and then edit the settings based on your preference. Click APPLY when you’re done. The edited pipetting profile will be automatically saved in the Pipetting Profiles Explorer page.
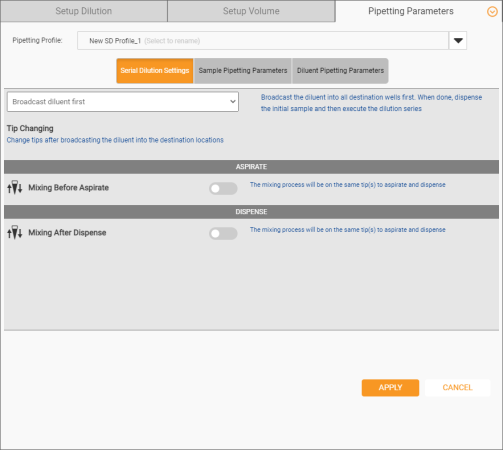
Edit the Current Pipetting Parameters
Create a new pipetting profile from the Pipetting Parameters tab:
Click on the Expand button of the Pipetting Parameters tab.
Select the Creating New Pipetting Profile option on the Pipetting Profile field.

Create a New Pipetting Profile
Type a new name, and then set the pipetting parameters based on your preference.
Click APPLY when you’re done. The new pipetting profile will be automatically assigned to the current step and saved in the Pipetting Profiles Explorer page.
Click FINISH to save the pipetting step and return to the Protocol Editor page.
If you want to create more Serial Dilution pipetting steps, repeat steps 1-4. If you want to edit the pipetting step, follow the steps below:
Click the Edit Card button on the desired pipetting step in the Protocol Editor page.
Important: Make sure you check the steps before modifying. Modifying a saved pipetting step cannot be undone and it might affect all associated steps in that protocol, especially if you reset the pipetting steps order. Click CONTINUE in the Pipetting Task Dependency dialog box to continue.
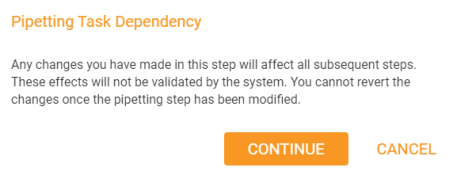
Pipetting Task Dependency Dialog Box
Modify the current step as needed.
Click FINISH when you’re done, or DISCARD and YES, DISCARD to cancel the changes.
Important: If the edited step affects the associated steps within the protocol, a warning icon ![]() will automatically appear in the corresponding step, and the protocol cannot be executed. Check and edit the associated steps to continue.
will automatically appear in the corresponding step, and the protocol cannot be executed. Check and edit the associated steps to continue.
Click RUN to directly execute the Serial Dilution step. If you want to add more pipetting step(s), please see the Simple Transfer and Experiment Designer section. For more information, see Executing a Protocol.
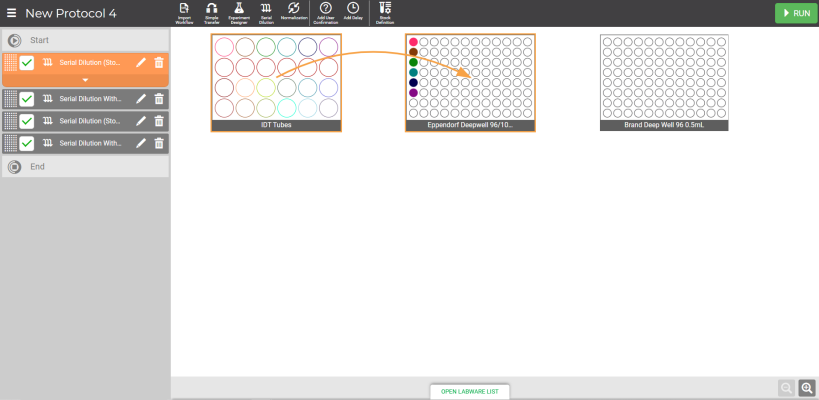
The Serial Dilution Step in the Protocol Editor Page
| FLOi8Q-V20R021
|