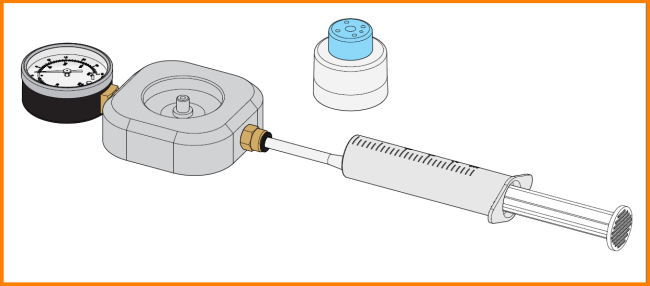
If the FORMULATOR is no longer dispensing the correct amount of reagent, it could be because there is something wrong with the check valve in the septa cap. To test a septa cap’s function, follow the steps below.
1 septa cap test fixture with pressure/vacuum gauge, included in the septa cap tester kit.
1 plastic syringe with flexible tubing attached, included in the septa cap tester kit.
A clean and dry septa cap.

Pressure Vacuum Gauge
Connect the flexible tubing of the syringe to the septa cap test fixture.
Attach a clean, dry septa cap to the test fixture.
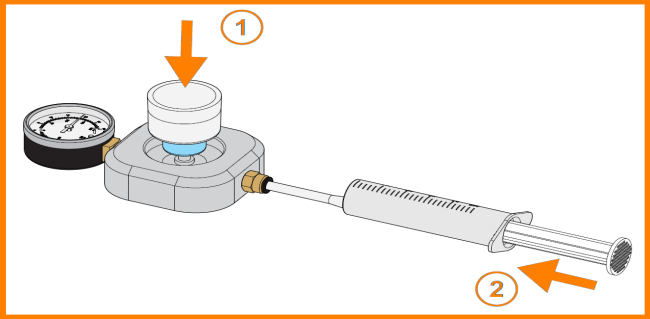
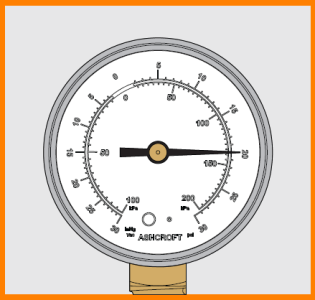
Hold the cap on the fixture (see 1 in the image above) and push the plunger into the syringe (see 2 in the image above) while watching the pressure gauge. The pressure reading should rise to about 20 psi, at which point the pressure will force the valve in the septa cap open.
If the gauge pressure reaches a maximum lower than 20 psi, there is a problem with your check valve. Be aware that this failure means it’s possible that wash solution was pushed into the reagent bottle, and your reagent(s) may be contaminated. Contact FORMULATRIX Support and request replacement septa caps.

The Pressure Reading Rises to About 20 Psi
Slowly pull the plunger back out of the syringe while observing the vacuum gauge to perform the “Cracking” Pressure (Vacuum) Test. The cap should “crack” within the range of 4 to 7 inHg.
If the cap cracks outside this range, then the septa cap’s check valve is not opening when it should, causing the FORMULATOR to dispense too little reagent. Contact FORMULATRIX support and request replacement septa caps.

The Cap "Cracks" within the Range of 4 to 7 in Hg

|
|
| FOOWH-V115R623 |