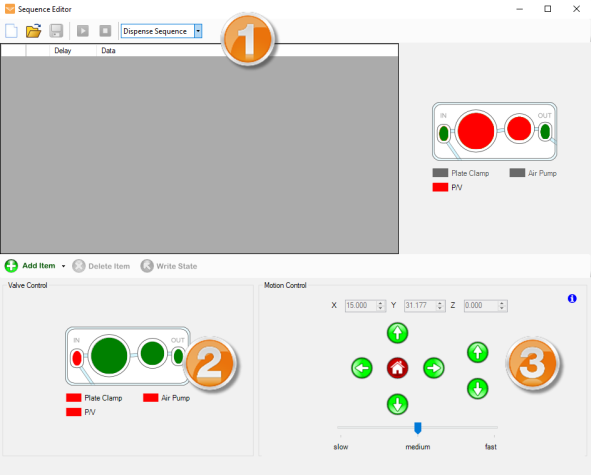
The Sequence Editor window consists of three panels: Sequence Editor Panel (1), Valve Control Panel (2), and Motion Control Panel (3).

Sequence Editor Window
The sequence editor panel is divided into four areas:
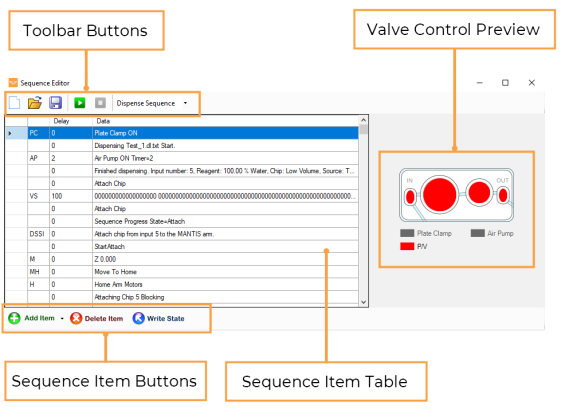
Sequence Editor Panel
At the top of the panel, you can access the Create New Sequence  , Load Sequence
  , Save Sequence
  , Run / Pause Sequence
 ![]() , and Stop Sequence
, and Stop Sequence![]() buttons. Next to the buttons is the Sequence Type option, where you can load basic Dispense Sequence, Prime, Wash, and Recovery.
buttons. Next to the buttons is the Sequence Type option, where you can load basic Dispense Sequence, Prime, Wash, and Recovery.
Once you have a sequence open, you’ll see a list of commands identified by the following codes:
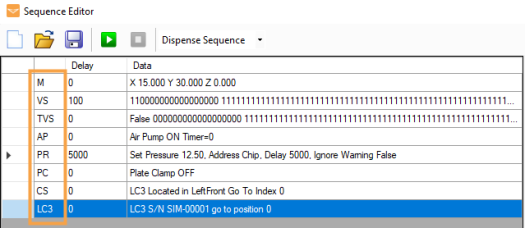
Sequence Item Code Column
M (Move)
VS (Valve State)
TVS (Timed Valve Sequence)
Note: The valve state consists of a series of 1’s and 0’s. These numbers indicate the pressure and vacuum activities:
· 0: Close/Pressure
· 1: Open/Vacuum
See the image below for detailed valve state digit assignments.
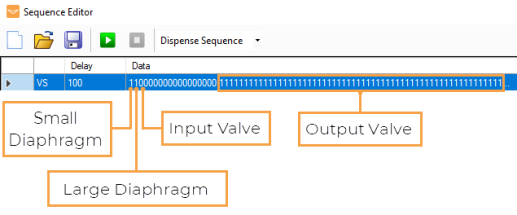
The Valve State Digits Which Represent Valve/Diaphragm
AP (Air Pump)
PC (Plate Clamp)
PR (Pressure Regulator)
CS (Carousel State)*
LC3*
*Available only if MANTIS is connected to an LC3.
The Delay column shows the time (in milliseconds) spent on each sequence item. Move (M) commands are run at a constant speed without delays.
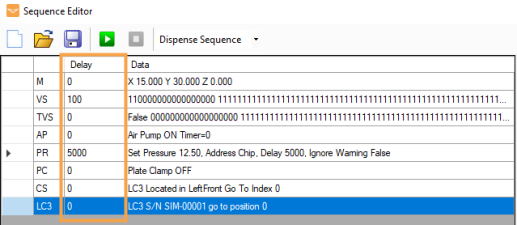
Sequence Delay
The Data column is populated with the Cartesian coordinates of the move or the state of each valve sequence.
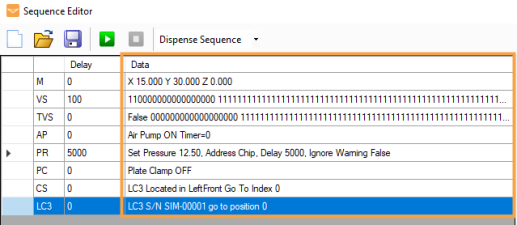
Sequence Data
| Name | Description |
|---|---|

|
Click the Add Sequence Item button to add more items to the Sequence Item Table. The available selections are:
Add Item Selections
|

|
Click the Delete Sequence Item button to remove the selected item from the Sequence Item Table. |

|
Click the Write State button to apply the valve state from the GUI to the selected Valve sequence item. |
The Valve Control Preview displays the microfluidic chip valve state for the selected item.
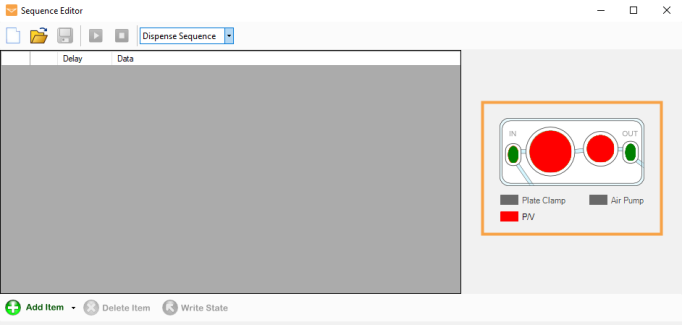
Valve Control Preview
Valve Control Panel provides visual representations of the chip, including Small Diaphragm, Large Diaphragm, Output valve, and Input valve. Click on the diaphragms and valves to cycle them from open (green) to close (red).
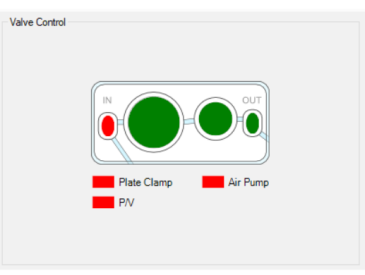
Valve Control Panel
Motion Control Panel is where you can move the MANTIS hand to positions along the X, Y, and Z axis. You can also set the speed of the arm movement by using the Velocity Control slider.
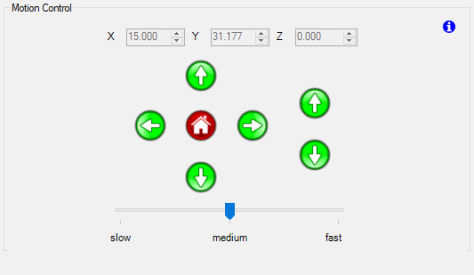
Motion Control Panel

|
|
| MAOWH-V48R824 |