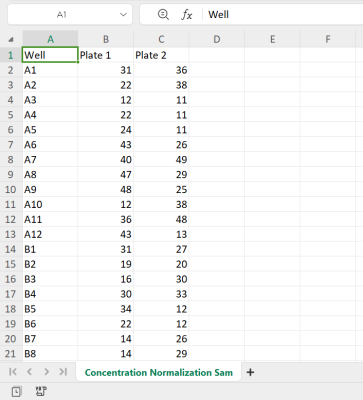
MANTIS normalizes sample concentrations by calculating and dispensing the necessary diluent volume for each well. Normalizing concentration requires a CSV data file which must contain well locations and concentration volumes (see the sample below).

The Concentration Data Sample
MANTIS provides the concentration data file sample in the Concentration Normalization wizard and the following directory of the MANTIS database: Data\System\Sample File. You can copy this sample file to your drive and modify it as needed.

Sample File Folder in the Software Database
Follow the instructions below to normalize your concentration data.
Go to the File menu, and select Concentration Normalization.
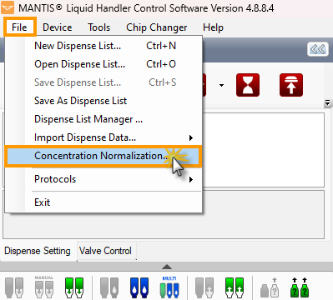
The Concentration Normalization Option
To get the concentration data file sample, hit this button: Click here to show the Concentration Normalization .CSV sample file. Otherwise, click Next to proceed.
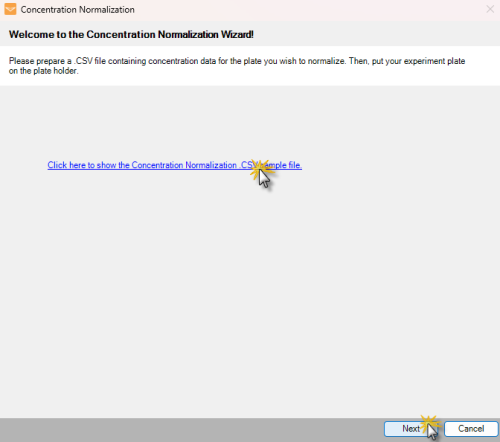
Get the CSV Sample File
Click the Browse File... to locate and import the concentration data file.
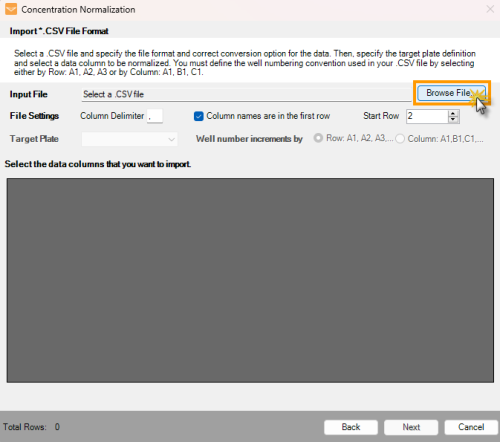
Click the Browse File… Button
In the File Settings option:
The Column Delimiter determines the separator between values in the CSV file. Type the separator used in your file.
If your plate or reagent names are in the first row, select the Column names are in the first row box. If not, deselect the option.
Select or type the row number you want to start with in the Start Row box.
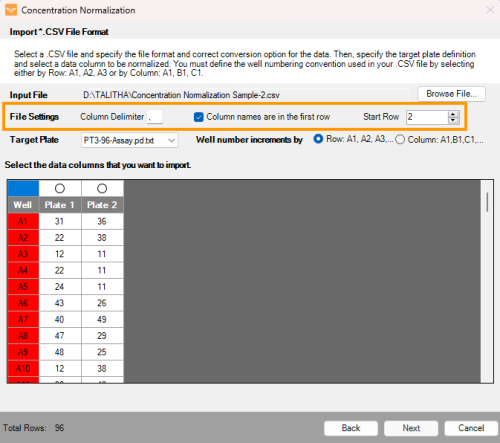
Modifying the File Settings
In the Target Plate option:
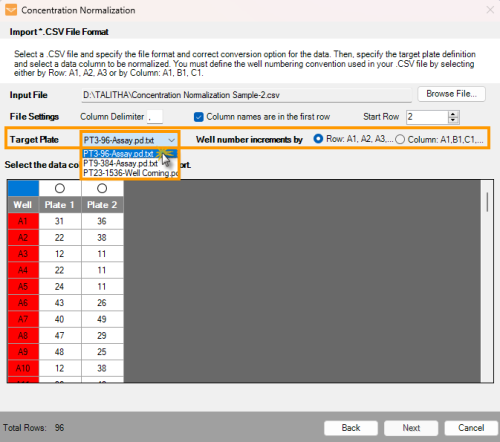
Modifying the Target Plate
Select the plate type you want to use for a dispense from the plate list.
Determine the well numbering convention by selecting either the Well number increments by Row: A1, A2, A3, etc. or by Column A1, B1, C1, etc. option.
Well increments by Row: A1, A2, A3 means that the wells in your plate design are numbered left-to-right in rows. For example, wells A1 through A12 are numbered 1 to 12 and are represented by the first 12 data rows of your CSV file. Wells B1 through B12 are numbered 13 to 24 and so on.
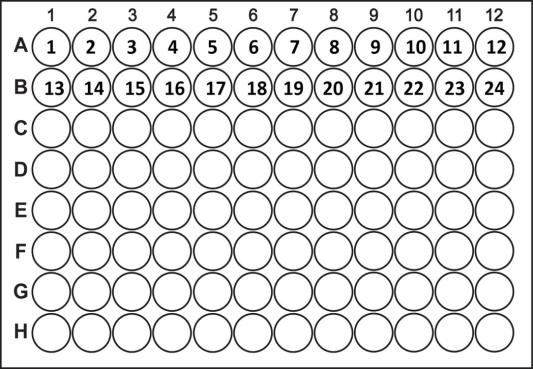
Well Number Incrementing by Row
Well increments by Column: A1, B1, C1 means the wells in your plate design are numbered top-to-bottom in columns. For example, wells A1 through H1 are numbered 1 to 8 and are represented by the first 8 data rows of your CSV file. Wells the next column A2 through H2 are numbered 9 to 16 well, and so on.
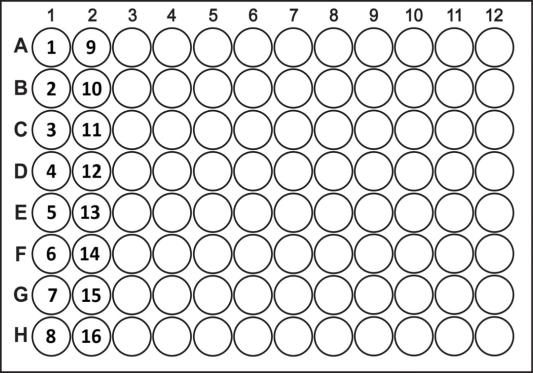
Well Number Incrementing by Column
Select the concentration volume data from the available columns. Then, click Next.
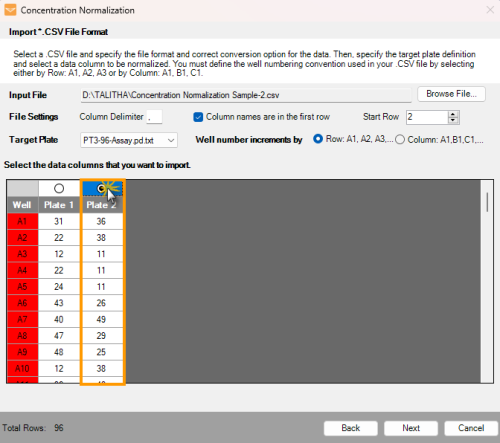
Select the Volume Data
Note: You cannot select a data column containing errors (such as letters, negative numbers, or special characters). To continue, edit the CSV file, and reupload it.
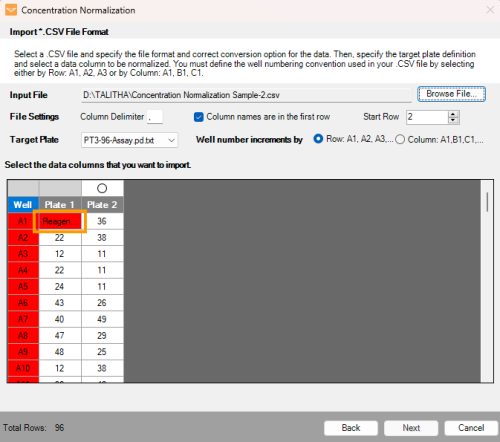
Data Column Containing Errors
In the Data Preview, specify the values:
Target Concentration: Defines the concentration volume to achieve in each well.
Note: Any wells with lower concentration volume than Target Concentration are highlighted in orange, and will be excluded from the normalization process.
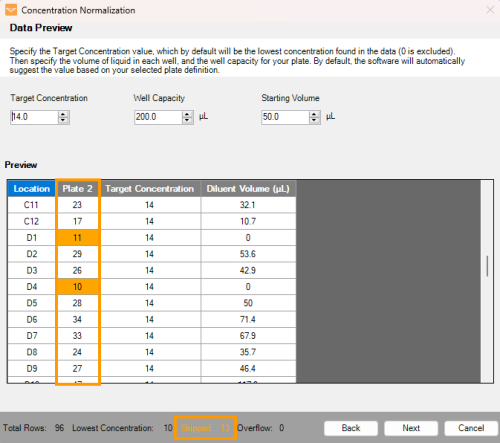
Lower Volume than Target Concentration
Well Capacity: Determines the maximum well volume on the plate.
Starting Volume: Determines the concentration volume of each well before normalization.
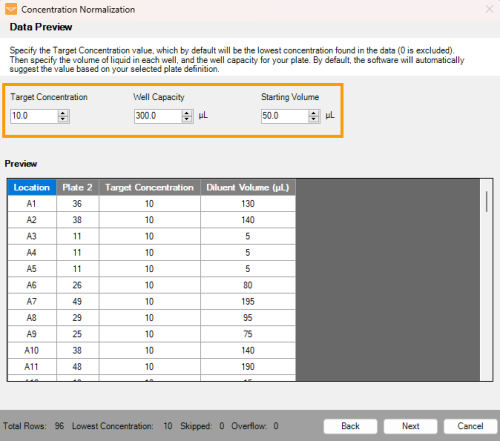
Specify the Target Concentration, Well Capacity, and Starting Volume
Important: MANTIS will automatically calculate the Diluent Volume (μL) based on the target concentration and starting volume values. If the diluent volume + starting volume exceeds the maximum well capacity (highlighted in red), adjust the values in your CSV file. See the number well status at the lower section of the wizard.
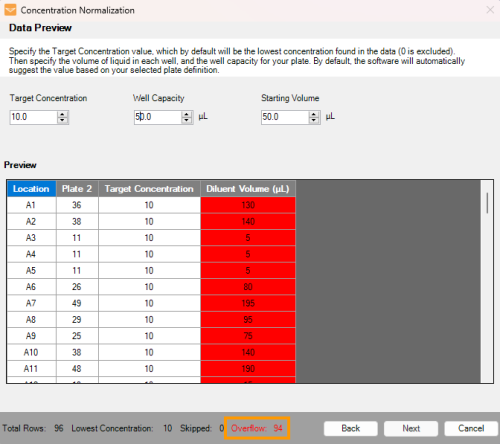
The Overflow Diluent Volume in Red
Click Next to proceed.
Choose the diluent name from the available options in the Diluent Name field.
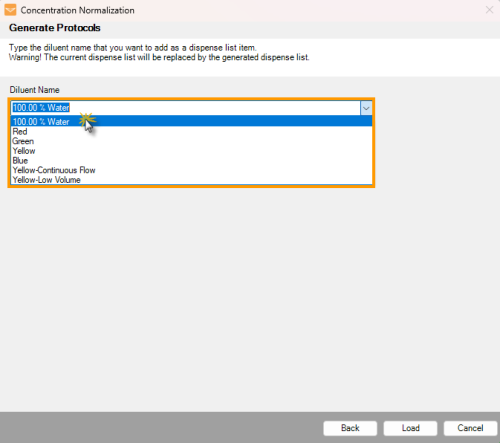
Select the Diluent Name
OPTIONAL: Select the Use Multi Chips option to choose the preferred chip types to dilute the reagent concentration.
Tips: Combine the CF and low-volume chip types for a faster dispense while maintaining the low-volume precision from the LV chip. Make sure to calibrate the selected CF chip before using it as the diluent chip selection. See Calibrating Continuous Flow Chips for more information.
Select the Use Multi Chips Option
Click Load to create a dispense list based on the concentration data configuration.
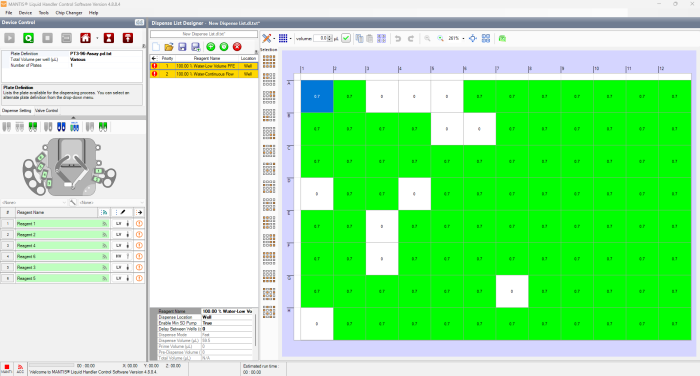
Concentration Normalization Dispense List
Click Run Dispense ![]() to start the normalization process.
to start the normalization process.
 | |
| MAOWH-V48R824 |