Open the Sequence Editor window by using the Ctrl+Shift+O shortcut on your keyboard OR click Sequence Editor option from the Tools menu.
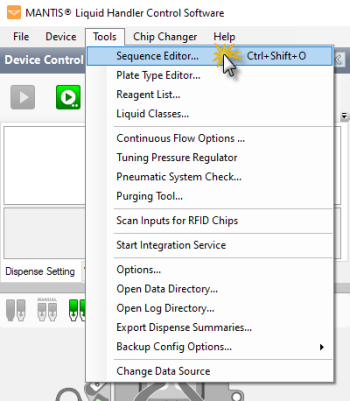
Select the Sequence Editor Option from the Tools Menu
In the Sequence Editor window, click the Load Sequence button  .
.
Locate the Common folder from the Specify File to Open window (Mantis\Data\System\Sequences\Common), and then open the MoveToWashStation1.seq file.
Important: Make sure to select and edit the correct sequence file (MoveToWashStation1 sequence file). If you edit the incorrect sequence file, it might cause damage to the MANTIS chips and/or instrument.
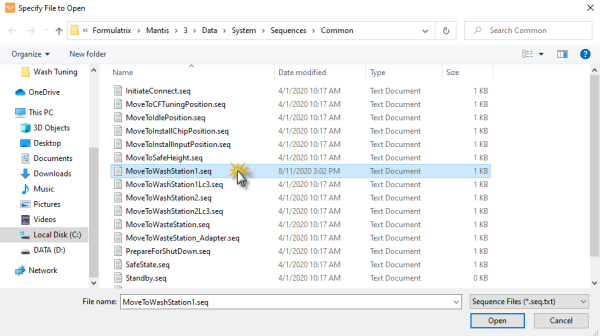
Open the MoveToWashStation1.seq File
Write down or take a screenshot of the original X, Y, and Z coordinates in the bottom line of the selected wash sequence file, as shown in the orange box in the image below, so you can return to those values later if necessary.
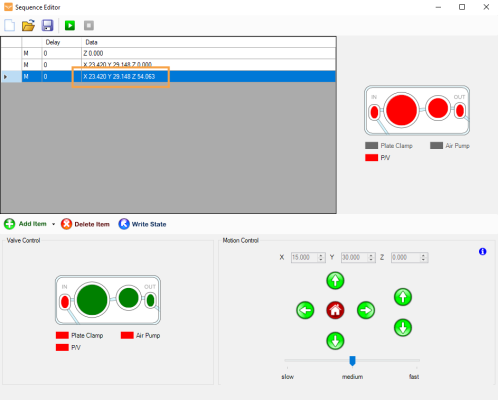
The X, Y, and Z Coordinates in the Bottom Line of the Selected Wash Sequence File
For fine tuning, it is recommended to set the velocity control to slow.
Next, put a chip on the MANTIS hand, and then click the Run/Pause Sequence button ![]() . At this stage, the MANTIS hand will move to the wash position.
. At this stage, the MANTIS hand will move to the wash position.
Adjust the MANTIS hand position above the Wash Station 1 by raising the height of the chip a little bit. To do so, click the Move Up button  in the Motion Control pad a few times to expose the chip nozzle above the wash station, as shown in the image below.
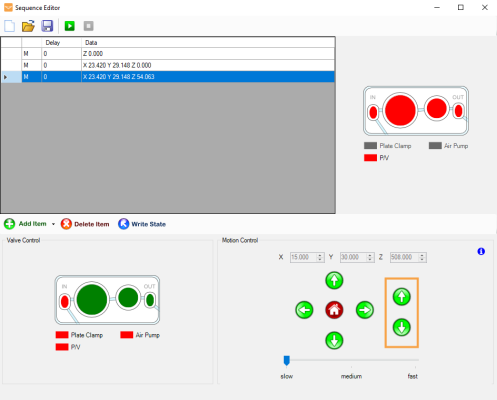
The Move Up and Move Down Buttons in the Motion Control Pad
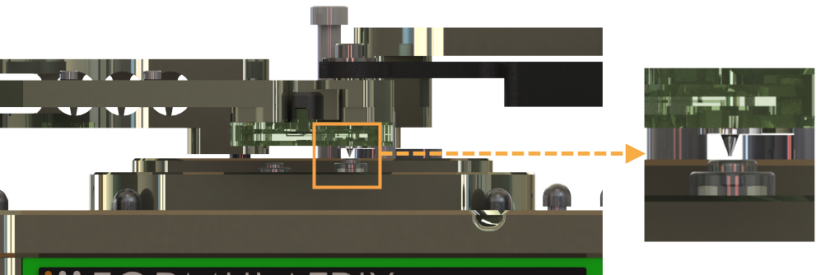
Position the Nozzle Chip Above Wash Station 1
Make sure that the nozzle tip is centered above the Wash Station 1. Check the nozzle position from different angles to ensure that the nozzle is properly aligned in both X and Y directions. To adjust the proper nozzle position from the X and Y directions, use the Move Right  , Move Left
  , Move Forward
 or Move Backward
  buttons in the Motion Control pad.
Tip: You can also control the X and Y movement by using the W, S, A, or D keys on your keyboard.
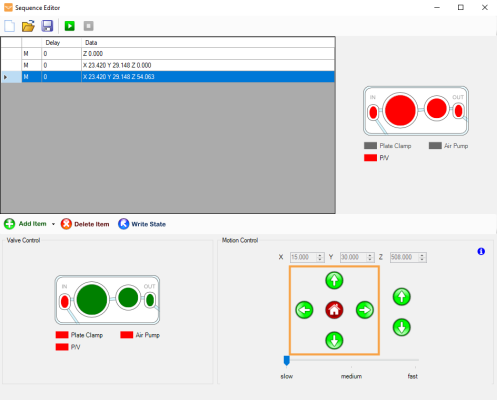
Adjust the X and Y Directions Using Arrow Buttons in the Motion Control Pad
After the chip nozzle position is properly aligned above the Wash Station 1, move the hand down to the Wash Station 1. To do so, lower the Z height back down by using the Move Down button  in the Motion Control pad until the chip is pressed against the Wash Station 1, as shown in the image below.
Important: Make sure that the chip nozzle is pressed tightly to the wash station to form a good seal, but not too tight. Otherwise, the MANTIS arm will start to flex and cause damage to the instrument.

The Nozzle Chip Is Pressed Against the Wash Station 1
Tip: You can use the keyboard control to adjust the Z directions by using the R and F keys.
When the chip nozzle is properly pressed into the wash station, double click the bottom line of the sequence in the Sequence Editor window. Then, click Copy Position to copy the updated X, Y, and Z values to the current wash station sequence file, and click OK to continue.
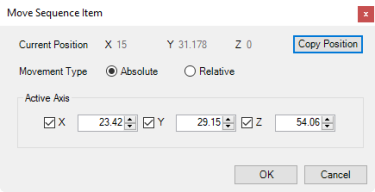
Copy the X, Y, and Z Values of the Active Axis
At this stage, compare the new coordinates with the original coordinates. The values should likely be similar (0,5 mm would be a large tuning change at this scale).
Important: If the wash tuning values change by >0,5 mm that might indicate a more extensive alignment issue. Contact FORMULATRIX support for assistance.
Save the new coordinates by clicking the Save Sequence button, locate and select the MoveToWashStation1.seq file, and then click Save.
Important: Make sure to select the correct file before saving the coordinates. The new values will overwrite the previous values within the file.
To tune the Wash Station 2, repeat steps 2-10 by using the MoveToWashStation2.seq file instead of MoveToWashStation1.seq.
