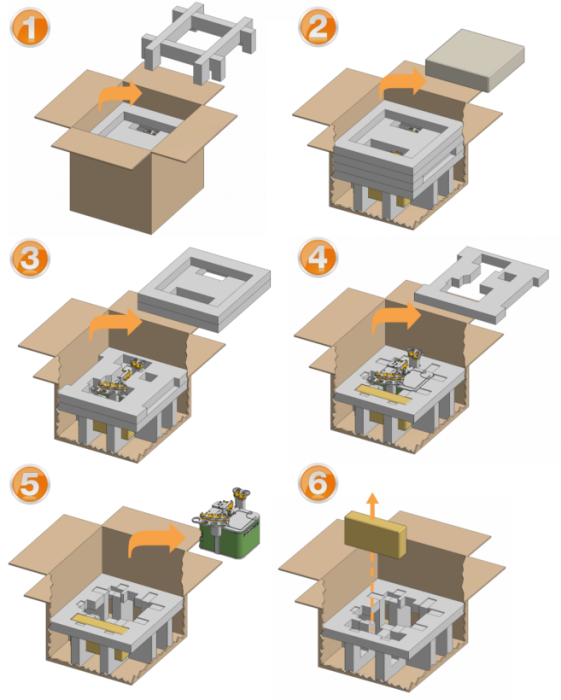
Read the following sections carefully before use.
Note: Please keep all packaging materials for service and support shipments.

Important: Please remove the shipping bolt before operating the MANTIS instrument to avoid damaging the pump.
Carefully flip over the MANTIS instrument.
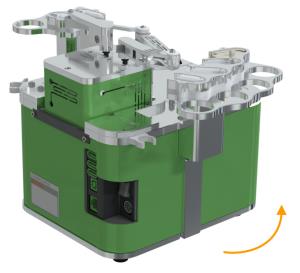
Flip the MANTIS V4 Instrument
Underneath the instrument, locate the shipping bolt (black thumbscrew) and remove it gently.
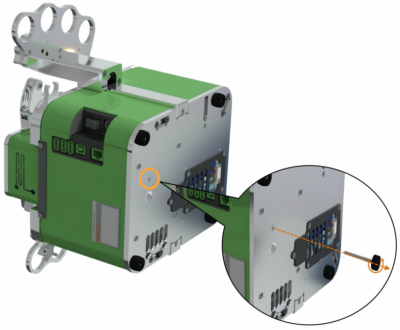
Locate and Remove the Shipping Bolt
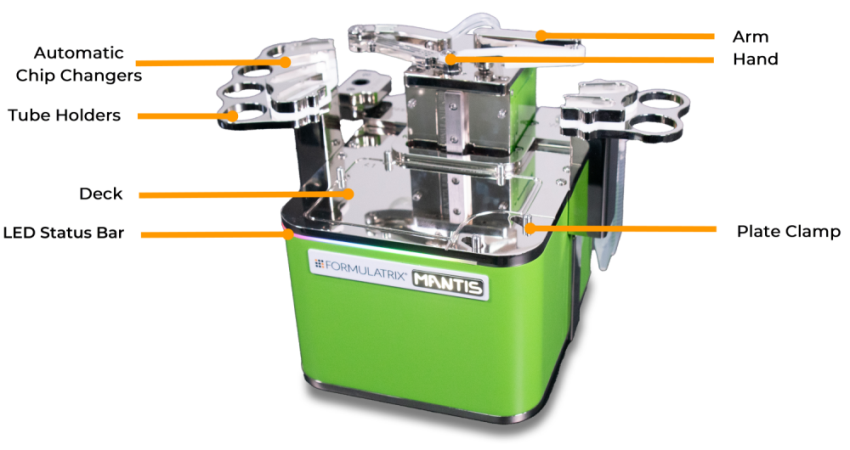
MANTIS V4 Front View
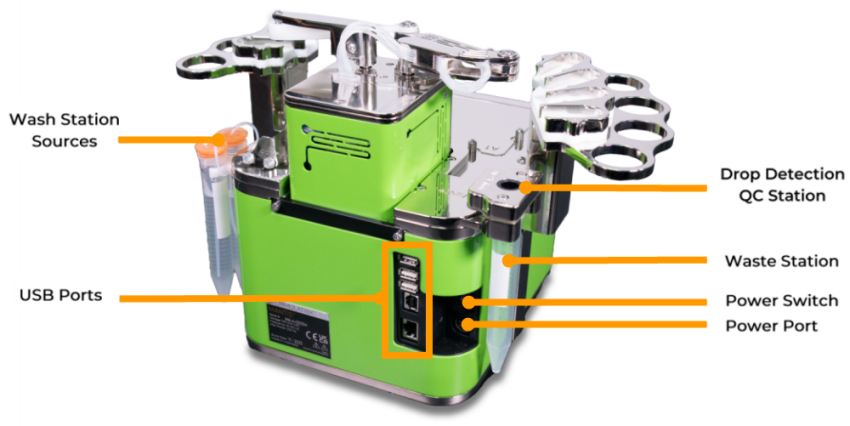
MANTIS V4 Back View
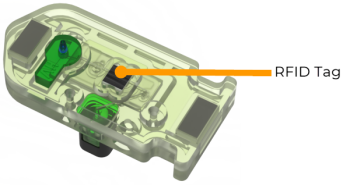
HV Chip with RFID Tag
We provide the waste and wash accessories that you need to place on the MANTIS. Locate the plastic tubular waste and wash containers that were in your accessory kit.
Note: It is recommended to cut your input tubing to a length of 45 cm for High Volume and Low Volume chips.
The available MANTIS chip types are:
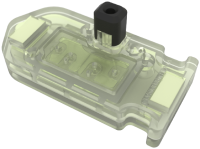
|
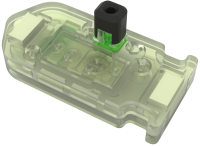
|
| LV Chip | HV Chip |
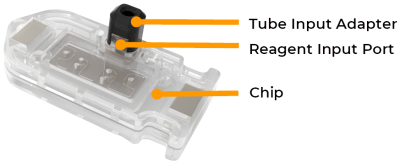
LV PFE Chip Assembly
Note: The Tube Input Adapter comes attached to the chip. Remove this part for dispenses that use pipette tips.
Continuous Flow (CF)
When you attach the CF chip, you need to insert the tubes into the holes in the chip and then tighten the screw in the CF chip. To do so, turn the screw using a 1.5 mm screwdriver.
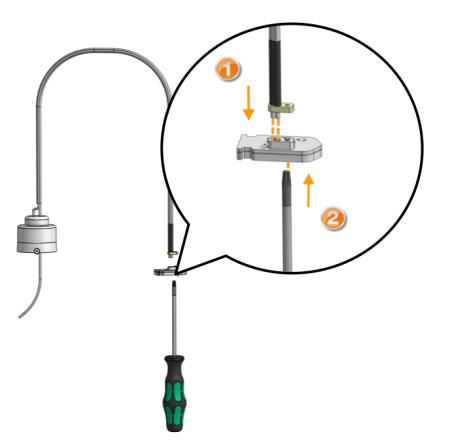
Attaching CF Chip
Before you can use the MANTIS, you must install two drivers to your PC. The installer files for the drivers are located on the MANTIS on-board USB drive. You will need the USB cord and the power cord.
Connect the power cable to the MANTIS and plug it into an available outlet.
Make sure the power supply adapter is ON. Find the switch at the back of the power supply adapter.
Connect the USB cable to the MANTIS and plug it into your computer.
Find the power switch at the back of the MANTIS and turn the MANTIS ON.
Once your computer detects the MANTIS, open Windows Explorer and locate the MANTIS USB drive. Look for MANTIS-XXXX (the X’s represent your serial number).
Double-click the MANTIS USB drive to display its contents.
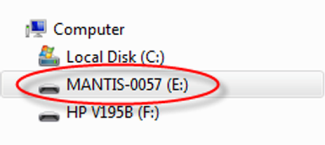
MANTIS USB Drive
Double-click the Prerequisites folder. You will see the dotNET and CDM20824_Setup.exe (FTDI driver). Install the dotNET driver and the FTDI driver. You will be asked to restart your computer once you install the FTDI driver.
Note: If you have Windows 7 or newer and you are connected to the Internet, you will only need to manually install the dotNET driver. Windows will automatically download and install the FTDI driver, and ask you to restart your computer.
If you would like to have a shortcut for the MANTIS software on your desktop, open the Mantis folder, then open the Bin folder. Right-click the MANTIS software icon MANTIS Software icon  , then point to Send to and select Desktop (create shortcut).
Note: The shortcut is dependent upon the drive letter dictated by the MANTIS USB connection. If at any time you disconnect the MANTIS and plug it into a different USB port, the original desktop shortcut will no longer work.
Congratulations! You can now begin designing dispenses with MANTIS.
What’s a Dispense List?
A Dispense List is a list of reagents and dispense volumes that will be used in a particular plate dispense. For more information, see Dispense List.
What liquid classes can the MANTIS dispense?
The MANTIS is usually capable of handling liquids with viscosities up to approximately 20 cP. When using HV chips, the MANTIS can dispense liquids up to a viscosity of 25 cP with the 21-25 cP liquid class settings. For more information, see Managing Liquid Classes.
I’m having trouble getting the MANTIS up and running. How do I contact support?
The best way to contact the FORMULATRIX support team is by emailing support@formulatrix.com. You can also call +1-781-788-0228 extension 1.
The MANTIS software is on but my computer can’t find the MANTIS instrument. What should I do?
Exit the software, unplug the MANTIS from your computer and turn the MANTIS off. Then, reconnect the USB cable to your computer. Finally, power-on the MANTIS. The software should see the device. If this procedure doesn’t resolve the issue, please contact support.
Note: The instrument must be powered-on before the software in order for the software to recognize the instrument.
Can I use Excel to edit a dispense design?
Yes. Click the Excel button above the plate designer.
My dispense list shows a warning symbol next to one of my reagents. What should I do?
If you hover your mouse over the warning symbol, the software will help you fix the issue. Usually, you have to assign the reagent to a chip by dragging it to the reagent’s text box on the bottom of the Device Control panel.
The pipette tip won’t fit into the chip input. Help!
You need to remove the black adapter from the chip input. The black adapter is used for tube inputs, which you use when dispensing from reagent bottles.

|
|
| MAOWH-V5R124 |