Lubricating the Plate Copy Plungers
Lubricating the plate copy plungers is an important maintenance step that should be done every 6 months or as needed. If you are noticing aspiration or dispense issues when trying to perform a plate copy (also known as creating daughter plates from a deep well block), you should perform the actions in this tutorial as a troubleshooting step. The estimated time required to lubricate the plate copy plungers is 30 minutes.
Before you begin, please make sure there are no Low Volume tips attached to the NT8's head.
You will need:
- The hex keys (shipped in your accessory kit).
- A small paint brush (shipped in your accessory kit).
- Grease (shipped in your accessory kit).
- A deep well block filled about half way with water colored with food dye.
- A daughter plate.
- A High Volume tip caddy with 8 HV tips.
- The PCTesting.msq script file (starting with NT8 v2.5, this file is located at C:\ProgramData\FORMULATRIX\NT8\{serial_number}\Data\User\Scripts. If not, you can email support@formulatrix.com and request the file).
- Access to the Script View.
Removing the NT8’s Covering
-
Make sure the NT8 is powered off and unplugged.
-
Open the hood to expose the NT8’s head and deck.
-
Using your hands, gently move the head to the center of the NT8.
-
Select an appropriately sized hex key from the hex key set, and remove the four screws that attach the dark gray cover to the NT8’s head. There are two screws on the right and two on the left.
-
Gently remove the cover to expose the inner workings of the NT8’s head.
Lubricating the Plate Copy Plungers
-
Plug the NT8 into a power supply and power it on.
-
Start the NT8 Control Software and wait for it to connect to the NT8 hardware.
-
Go to the Script view on the toolbar.
-
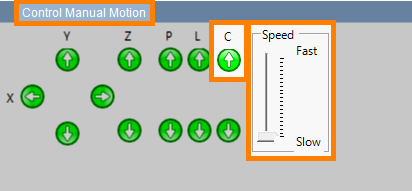
Go to the Control Manual Motion and click the UP arrow below C, using a medium speed. The plate copy plungers will move up, exposing eight metal cylinders.

Move the Plate Copy Plungers
-
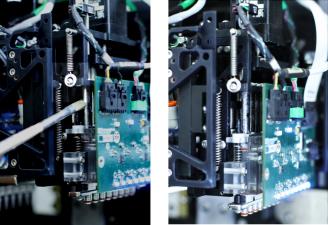
Using the paintbrush, lightly but evenly apply grease to the surface of each of the 8 metal cylinders. Try to reach the back side of the cylinders as well.

Apply Grease to the Cylinders
-
Back in the software, click the Load Script button
 .
. -
Locate and open the PCTesting.msq script.
-
Click the Start Script Execution button
 .
. -
The 8 metal cylinders should now move up and down in a plunging motion, lubricating the inside of the plungers with the grease you applied.
-
When the script finishes, repeat steps 4-8 once again to optimize the result.
-
After all steps are complete, continue with Running a Plate Copy Test below.
Running a Plate Copy Test
-
Click the Open Task List button
 in the Task List panel and open the Sample folder.
 -
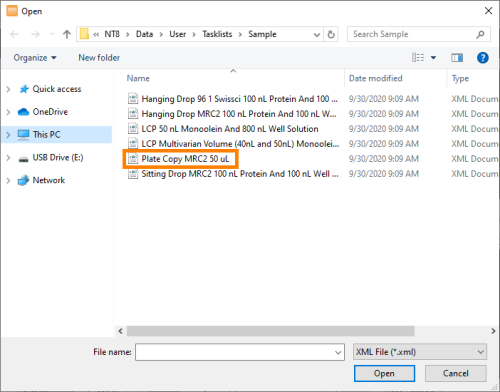
Select Plate Copy MRC2 50 uL.xml and click Open. The Task List will update.

Opening Plate Copy MRC2 50 µL.xml
-
Run the task list by clicking the Run Task List button
 .
. -
Watch closely to verify that the Plate Copy head picks up the HV tips, and that each of the tips aspirates 100 μL from the Deep Well block. The amount aspirated into the tip should form an equal horizontal line across each of the tips. Check again to make sure that each tip dispensed all of the solution to the daughter plate, and that the tips were returned to the HV tip caddy.
Reinstalling the NT8 Head's Cover
-
Exit the software, power-off the NT8, and unplug it.
-
Manually move the head to the center of the NT8.
-
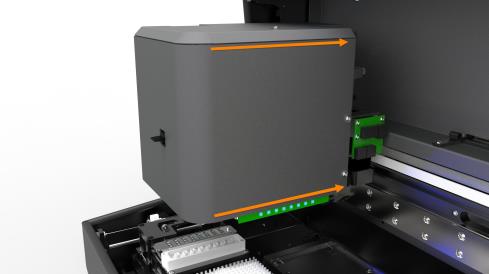
Put the head cover back on the NT8’s head. Make sure to push the thick white cable on the right side of the head into the head to make sure it goes inside the head cover.

Put the Head Cover Back
-
Using the hex key, screw the four screws back in to the side of the NT8 (two on the left, two on the right).
Related Topics:

|
|
| NTC-V43R022 |