In Container setup (found in the Setup node on the Explorer), you can manage information about the various microplate formats used in your experiments. By default, one experiment plate and one screen lot plate are already defined on this screen. These containers, along with any that you define yourself, are available for use when you are creating screens and designing experiments.
Container Configurations
Note: Rock maker refers to plates as containers.
The table below describes the columns found in the Containers table:
| Column Name | Description |
|---|---|
| Name | The name of the plate. This is the name that is used throughout Rock Maker. |
| Rows | The number of rows on the plate. |
| Cols | The number of columns on the plate. |
| Max Well Volume (μL) | The maximum number of microliters that can be dispensed into each well on the plate. |
| Default Well Volume (μL) | The default well volume assigned when an experiment is created. You may modify this setting for each experiment. |
| Default Additive Volume (μL) | The default additive volume assigned when an experiment is created. |
| Max # Drops | The maximum number of drops allowed in each well. |
| Max Drop Volume (μL) | The maximum volume allowed for a drop dispensed into the container. |
| Default Drop Volume (μL) | The default drop volume to be used when an experiment is created. You may modify this setting for each experiment. |
| Type | The container type will be either Experiment Plate, Screen Lot Plate, or Microfluidics Device. Experiment plates are plates in which crystallization experiments are performed, while screen lot plates contain pre-mixed well solutions used to dispense the plates used in the experiments. Experiment plates can be selected on the Experiment tab, and screen lot plates can be selected when you are defining screen lots. The Microfluidics Device plate type is for AutoInspex plates. |
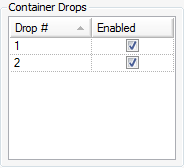
Rock Maker supports containers that allow for multiple drops per well. The Container Drops area lists all drops available in the container that is currently selected from the Containers table. The Enabled check box allows you to enable and disable the drops. When a drop is disabled, it will not be used in any experiments created using the selected plate.

Container Drops
Note: Once a container has been used in an experiment, you can no longer enable or disable its drops.
To use AutoInspex plates in your experiments, you must create a container of the type Microfluidics Device in the Container setup. This container should be 96 rows by 1 column.
Creating and designing layers on an AutoInspex plate involves the same steps as other plate types.
Channel, score, and rank information from the AutoInspex system are displayed on the All Wells tab of the Plate Info tab.
The Images view is especially useful for inspecting data imported from the AutoInspex system.
 | |
| RMC-V37R116 |