Choose from the following options:
-
Create a new dispense list:
-
Click the New Dispense List button
 under the Dispense List panel.
 -
Define the dispense list name in the Name box, and select a plate type.
-
Click OK. Then, proceed to step 2.
OR
-
-
Open an existing dispense list:
-
Click the Open Dispense List button
 on the Dispense List panel.
 -
Select the desired category from the list. Then, locate the desired dispense list and click Open. From here, please proceed to step 3.
Note: TEMPEST will automatically list any unassigned dispense lists in Home. Expand the Home folder to see all of the available dispenses.
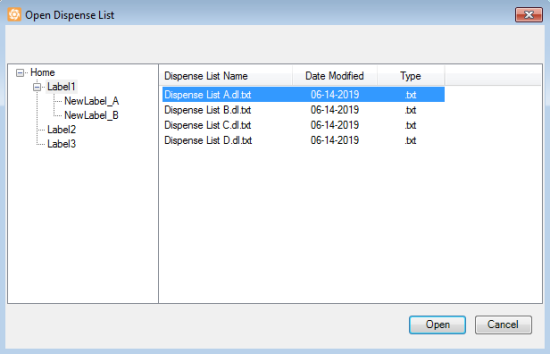
Open the Desired Dispense List
-
In the Add Reagent To Dispense List window, define the Reagent Name. Then, type the Volume per well and click OK.
Begin designing your plate dispense with the plate designer in the Dispense List Designer panel. Click and use your keyboard or mouse to select a group of wells and select a pattern from the Selection group icons below the plate designer:
-
For a constant volume:
-
Directly type in a volume and press Enter on your keyboard.
OR
-
Select the Grid button
 in the Toolbar and choose Constant in the dropdown menu, then type in a volume and press Enter on your keyboard.
-
-
To use a gradient design, click the small down arrow next to the Grid button
 . You may choose a horizontal gradient, a vertical gradient, a forward diagonal gradient, or a backward diagonal gradient. Type in the volume in the begin and end box, then press Enter on your keyboard.
 -
To add a backfill volume, click the small down arrow next to the Grid button
 , and then click the Backfill Volume button
 . Type in the backfill volume, then press Enter on your keyboard.
To add additional reagents to the dispense list, click the Add Dispense List Item button  and repeat steps 2 and 3.
When you are done, click the Save Dispense List button ![]() to save the dispense list.
to save the dispense list.
Then, choose from the following options:
-
Select the desired category to assign the Dispense List.
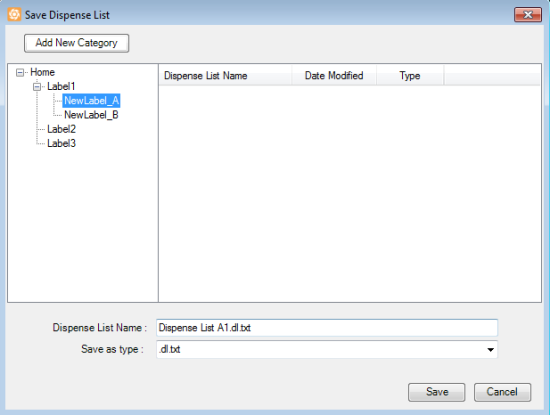
Save Dispense List Window
OR
-
Add a new category to the category list by selecting Home or the desired label as the path label. Click Add New Category, and type a name in the Category Name box. Click Add to add the new category to the category list.
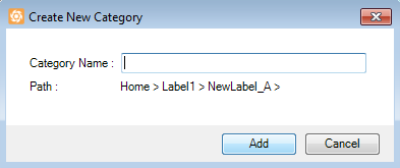
Creating a New Category
Define the Dispense List Name, and select the file type from the Save as type list from the following options:
- .dl.txt to save the dispense list as a text document that can be accessed quickly and easily.
- .dl.xls to save the dispense list as a spreadsheet file that can be edited in greater detail.
Click Save when you’re done.
Note: If you want to categorize an unassigned dispense list, open the desired dispense list from the Home category and modify it as needed. Then, click the small down arrow next to the Save Dispense List button ![]() , and select Save As Dispense List. Select one of the available categories under the Category List, or click Add New Category to create a new category. Define a new dispense list name in the Dispense List Name box and Save as type field, then click Save As when you’re done,
, and select Save As Dispense List. Select one of the available categories under the Category List, or click Add New Category to create a new category. Define a new dispense list name in the Dispense List Name box and Save as type field, then click Save As when you’re done,
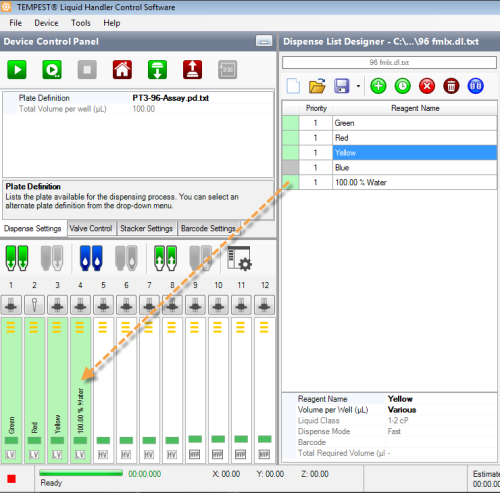
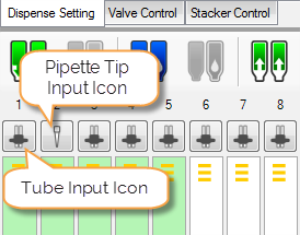
Drag each reagent from the Dispense List to the appropriate location on the Device Control panel.
