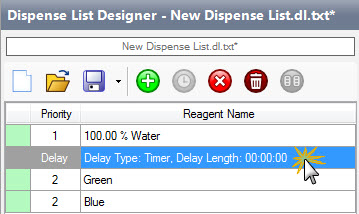
Click a dispense list item to select it.
Click the Add Delay button  .
.
OPTIONAL: Drag the Delay row to a different position in the list, if desired.

Delay Row Selected
Double click on the Delay row to configure the delay settings.
For the Delay Type option, select one of the available types:
-
Timer
-
Select Timer as the Delay Type.
-
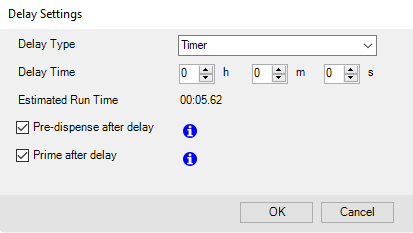
Type the time period using hh:mm:ss format. TEMPEST will automatically calculate the Estimated Run Time.
-
Proceed to step 6.
-
-
UserInput
-
Select UserInput as the Delay Type.
-
Proceed to step 6.
For Timer and UserInput delay, you can also use the Pre-dispense after delay and/or Prime after delay option.
- Select the Pre-dispense after delay to set the TEMPEST to perform a pre-dispense after the delay period. Deselect this option to immediately dispense the next reagent after the delay.
- Select the Prime after delay option to prime the chips following a long delay. TEMPEST will automatically continue to dispense the remaining reagents after the priming process is finished.

The Pre-dispense After Delay and Prime After Delay Options in the Delay Settings Window
-
-
Smart Batch
-
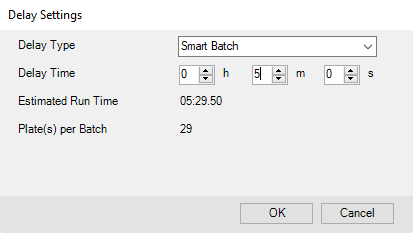
Select Smart Batch as the Delay Type.
-
Type the time period using hh:mm:ss format. TEMPEST will automatically calculate the Estimated Run Time and determine how many plates will be dispensed per batch in the Plate(s) per batch field.
-
Proceed to step 6.
-

Delay Settings
Click OK to apply your changes.
 .
.