 . Go to Importing Labware and Profile CSV for more detailed information.
You're viewing an older version of the aµtoPULSE help. For the latest version, visit online help 1.3.
Creating a protocol in the aµtoPULSE software involves defining labware and creating a profile on the Editor page. Follow the instructions below to create the proper protocol setup.
Note: If you have predefined labware and profile configurations in a CSV file, you can upload them using the Import feature . Go to Importing Labware and Profile CSV for more detailed information.
Defining Stations
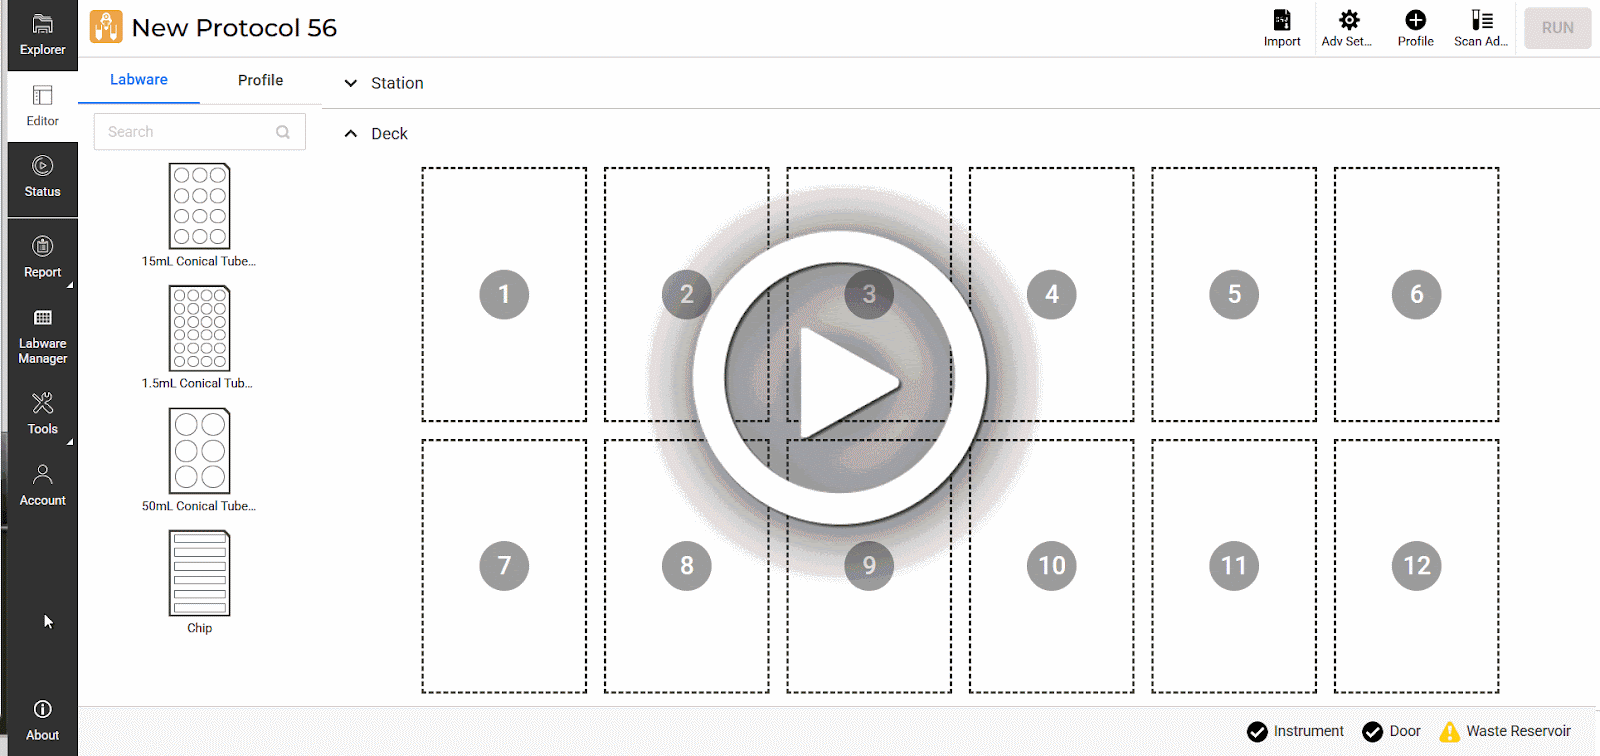
In the Labware tab, go to the Station section. Stations in gray represent Concentration Stations, while blue represents Cleaning Station(s).
Note: The station placement has been defined upon your request. For replacement or adjustment, contact FORMULATRIX support.

Station Card in Labware Tab
Choose from the following options:
Click the SCAN ADAPTERS button  to automatically configure all stations when adapters are in place.

Click Scan Adapters
Click the Edit button on the selected station for manual configuration. Then, specify the following:

Click Edit on the Station Card
Concentration Station: Specify the left and right tube adapters. Click APPLY to save the settings.

Concentration Station Settings
Cleaning Station: Specify each setting needed for cleaning, then click APPLY.

Cleaning Station Settings
Note: For multiple Cleaning Stations, adjust only the Left Tube Adapter and Right Tube Adapter parameters. Other parameters will follow the first Cleaning Station configuration.
Configuring the Deck
For easier identification, the mapped wells are indicated in different colors based on the Tube/Chip and Liquid Type selections. See the image below.

|

|
| Tube Well Details | Chip Well Details |
To configure the deck:
Expand the Deck panel.
Drag the desired labware from the Labware tab onto the virtual deck. The labware-on-deck configuration must match your planned layout on the actual deck.
Dragging Labware to the Deck
Note: Click the Remove button to remove the labware from the deck.

Removing a Selected Labware
Click on each undefined well, and specify the parameters as follows:

Click Undefined Well
![]()
Click Undefined Chip
Tube: If a tube is in place, activate the toggle, then fill in the following parameters:
Liquid Type:
Starting Volume: Specifies the sample or buffer volume in the tube (in mL or g).
Starting Concentration: Applies for Sample only. It specifies the concentration of the sample in mg/mL.
Density: The density of the sample or buffer, which should be between 0.5 and 5 g/mL.
Click APPLY to save the configuration.

Tube Detail Information
Chip: Select the MWCO if a chip is in place. Click APPLY to save the chip’s kDa.

Chip Selections
Once labware is set up, you can create a profile by following the steps below.
At the top right of the Editor page, click the Profile button  .
.

Click Profile Button
OPTIONAL: Click on the profile name at the top to rename the profile, and click on the empty space to save the new name.
Specify the profile parameters as follows:
Note: Settings marked with asterisk (*) are required.

Parameters in the New Profile Page
Select the chip's MWCO size according to your preference.
Specify the Method you want to use:
Concentrate
Buffer Exchange: Define the Buffer Source from the provided options (Reservoir or Tube).

Buffer Source Options
Note: You can still concentrate your sample with the Buffer Exchange method.
Select the labware based on your selected method and deck configuration. The Sample should be on the Left Tube, while the other tubes are optional.

Labware Selection Example
Specify the volume parameters based on your chosen method:
| Parameter | Description | Method | |
|---|---|---|---|
| Concentrate | Buffer Exchange | ||
| Target Value* | The final volume (in mL) or weight (in g) you want the sample to achieve after the process. | ✔ | ✔ |
| Est. Final Concentration* | The estimated concentration (in mg/mL) after concentrating or buffer exchange process. | ✔ | ✔ |
| Start Exchange | The volume at which the system begins adding the new buffer. | X | ✔ |
| Step Size | The amount of buffer added at a time during the buffer exchange. | X | ✔ |
| Exchange Volume |
The total volume of buffer used during the buffer exchange process. Note: Click the Buffer Exchange Calculator button
Buffer Exchange Calculator Window |
X | ✔ |
*Target Value and Est. Final Concentration parameters are linked. You can enter one of the settings and let the system calculate the other.

Volume Parameters Example
OPTIONAL: Use the Advanced Setup panel to customize chip configuration and pressure settings, or create a new setup using the steps below.

Advanced Setup Panel
In the Advanced Setup panel, select a setup you want to use from the available options. Click Edit to start modifying.
Note: The initial setup is Default. It cannot be edited, but you can create new setups by saving a copy.

Select from the Available Setup
OPTIONAL: Enter a new name and use SAVE AS to create a new setup.

Enter a New Setup Name
Open the General and Cycle tab to define the parameters below.
General

General Settings
Cycle

Cycle Settings
Click SAVE or SAVE AS to save the setup using different name.

Click SAVE or SAVE AS
Click CREATE to finish your profile setup. Once a profile is created, it will appear in the Profile list.

A Profile Has Been Created
Repeat steps 1-3 to create more profiles. You can also duplicate an existing profile by clicking the menu button on the selected profile card.

Duplicate a Profile
Note: You can also remove the unused profile from the menu button of the selected profile card.
Your protocol is ready to run. For more information, see Running a Protocol.
If you have multiple profiles, the number of Profiles to Run will appear as you select/unselect the ones you want to run.

Number of Profiles to Run
If a warning icon appears on the profile card, it indicates an error that requires action. To fix this, click VIEW DETAILS to open the profile settings. Then, follow the quick troubleshooting on the affected parameters, highlighted in red. When you’re done, click SAVE. Refer to the defining profile's parameters (step 3) for details.

Profile with Warning Indicator
| APOWH-V12R125 |
 to calculate the exchange volume needed for buffer exchange. Specify each setting, then click APPLY to save the values.