
If you have externally generated a pipetting step design and saved it as a .CSV file, you can easily load it into the FLO i8 software using the Import Workflow feature. Transfers defined in the imported .CSV file are converted into a Simple Transfer pipetting step (or steps).
Note: The FLO i8 software has not supported importing the Serial Dilution step.

Import Workflow Button on the Navigator Bar
The images below show the sample workflow .CSV file in Excel and Notepad.
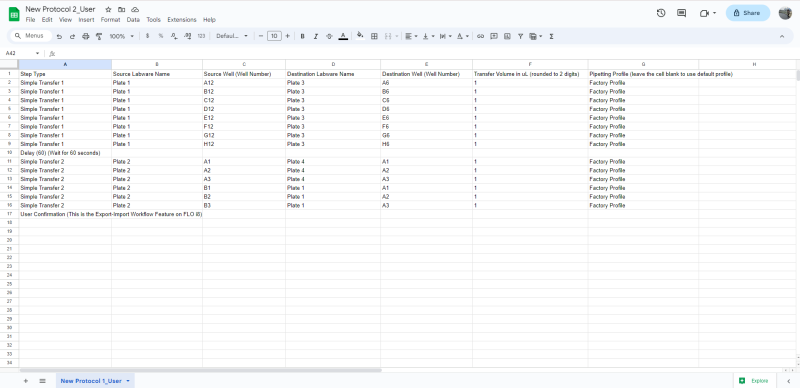
Import Workflow .CSV File Sample in Excel
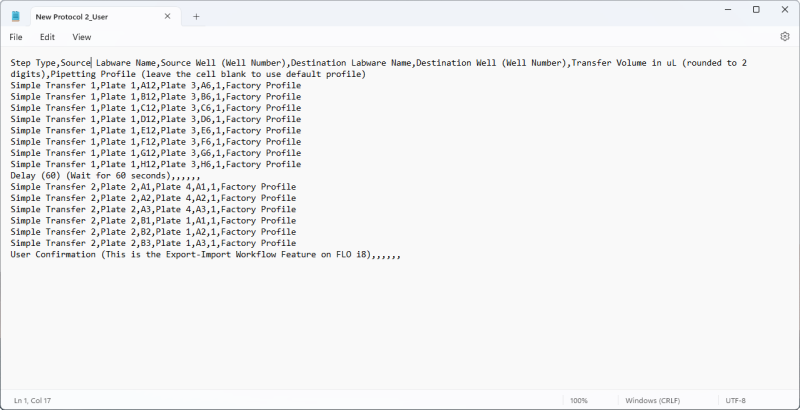
Import Workflow .CSV File Sample in Notepad
The .CSV file should be compiled with the following items:
| Item | Description |
| Step Type |
You can add the following steps:
|
| Source Labware Name |
Specify the source labware name. The FLO i8 software will automatically assign this name to the selected source labware in the Virtual Deck. |
| Source Well | Specify the source well, for example A1. |
| Destination Labware Name | The destination labware name will be automatically assigned to the selected destination labware in the Virtual Deck. |
| Destination Well | Specify the destination well. |
| Transfer Volume in µL |
The desired transfer volume in μL, rounded to 2 digits. Alternatively, you can define the transfer volume as follows:
.CSV File Sample with ‘ALL’ and ‘0’ Transfer Volume Format |
| Pipetting Profile | You can specify an existing pipetting profile by name. If you leave the cell empty, the system will use the default profile. |
Important: To prevent import data failure, please use the default header format as mentioned above and make sure that the source and destination labware names are no longer than 25 characters.
You have defined transfers using the .CSV format. Get the import workflow template from:
Clicking GET TEMPLATE in the Import Workflow dialog box

GET TEMPLATE Button
You have opened a new or existing protocol.
In the Protocol Editor, choose from the following options:
Add the desired labware to the Virtual Deck from the Labware List based on the number of labware assigned in the .CSV file.
OR
Proceed to step 2.
Click the Import Workflow button, and select UPLOAD FILE.
Locate and open the .CSV file you want to import from your local drive. FLO i8 will validate your .CSV file.
Importing a .CSV File
Important: If the .CSV file fails to import, a notification will appear to display a list of errors. To retry, follow the on-screen instructions, and click IMPORT. Click CANCEL to return to the Protocol Editor.
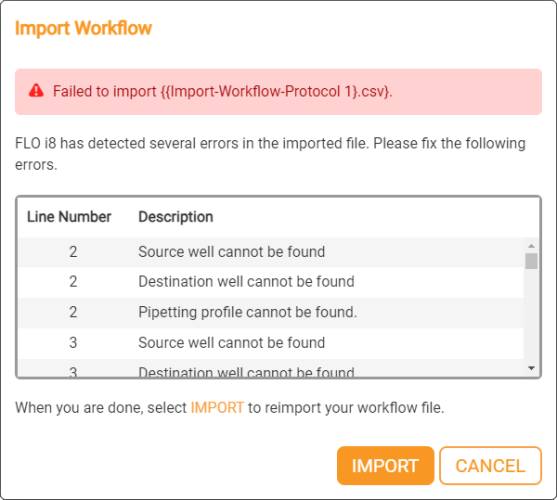
Failed to Import a Workflow
Once it’s verified, assign each labware in the .CSV file to a labware on the Virtual Deck by selecting labware as prompted. Click NEXT to proceed.
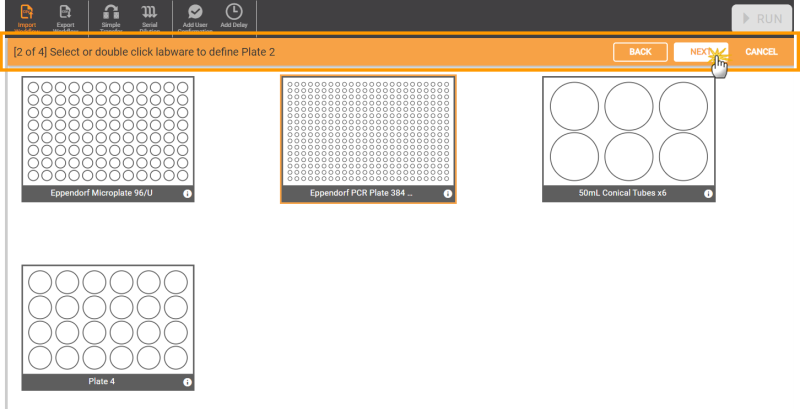
Define the Labware in the Virtual Deck
If you haven’t added any labware to the Virtual Deck, choose from the Labware List.
When the labware has been defined, the imported steps will be listed in the pipetting step list. At this stage, you can directly run the protocol, or modify them according to your needs.
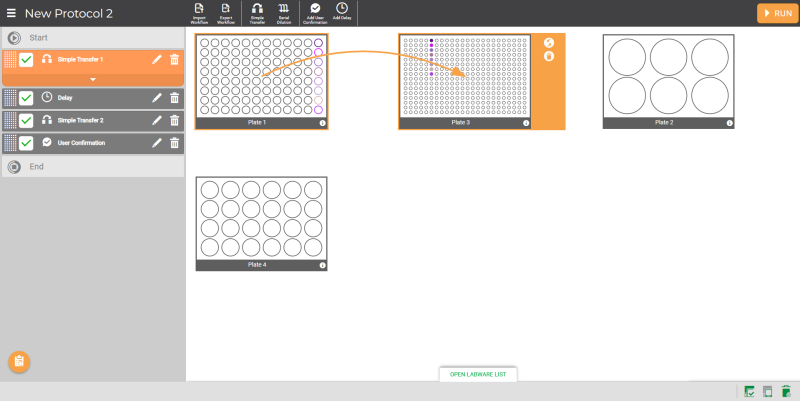
Imported Simple Transfer Workflow
Note: You can rename, switch, and/or remove the assigned labware from the Virtual Deck. This modification will be synched with the .CSV files you are currently working on. You can export the modified file for future use. Read Export Workflow for more details.
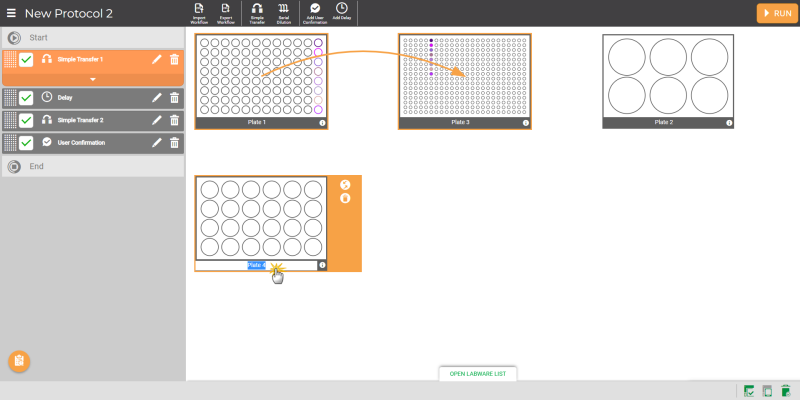
Modifying the Assigned Labware After Importing Workflow

|
|
| FLOWH-V27R124
|
Unit 6, Level 13, Gate District, Gate Building Dubai International Financial Centre |