Choose from the following options:
- Create a new dispense list: Click the New Dispense List button
 . Select a plate type and click OK.
 - Open an existing dispense list: Click the Open Dispense List button
 . Find your dispense list and click Open.
Once you have set up the hardware, you will use the TEMPEST control software to either open a dispense list or design a dispense.
Choose from the following options:
 . Select a plate type and click OK.
 . Find your dispense list and click Open.
Add a reagent to the dispense list. Define the Reagent Name and Volume per well and click OK.
Begin designing your plate dispense with the plate designer:
Click and drag your mouse over a group of wells to select them, or select a pattern from the Selection group under the plate designer.
For a constant volume, type in a volume and press Enter on your keyboard.
To use a gradient design, click the small down arrow next to the Grid button  . You may choose a horizontal gradient, a vertical gradient, a forward diagonal gradient, or a backward diagonal gradient.
To add a backfill volume, click the small down arrow next to the Grid button, and then click the Backfill Volume button .
.
To add additional reagents to the dispense list, click the Add Dispense List Item button  and repeat steps 2 and 3.
Drag each reagent from the Dispense List to the appropriate location on the Device Control panel.
_500x489.png)
Reagents on the Dispense List Designer
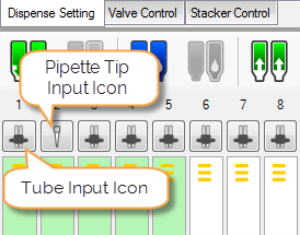
Set the input type for each chip by clicking the button at the top of each chip (refer to image below). This button is a toggle; to change it to from pipette tip to tube input or vice versa, click the button.

Input Buttons
Once you have added all reagents to the dispense list and assigned them to their positions, proceed to the next step, priming the chips.

|
|
| TEC-V32R219
|