Creating Profiles
Once the labware is set up, create profiles by configuring the tube and chip parameters needed in the protocol.
Prerequisite:
To create a profile:
On the Editor page, click Profile
 or NEW PROFILE
  .
.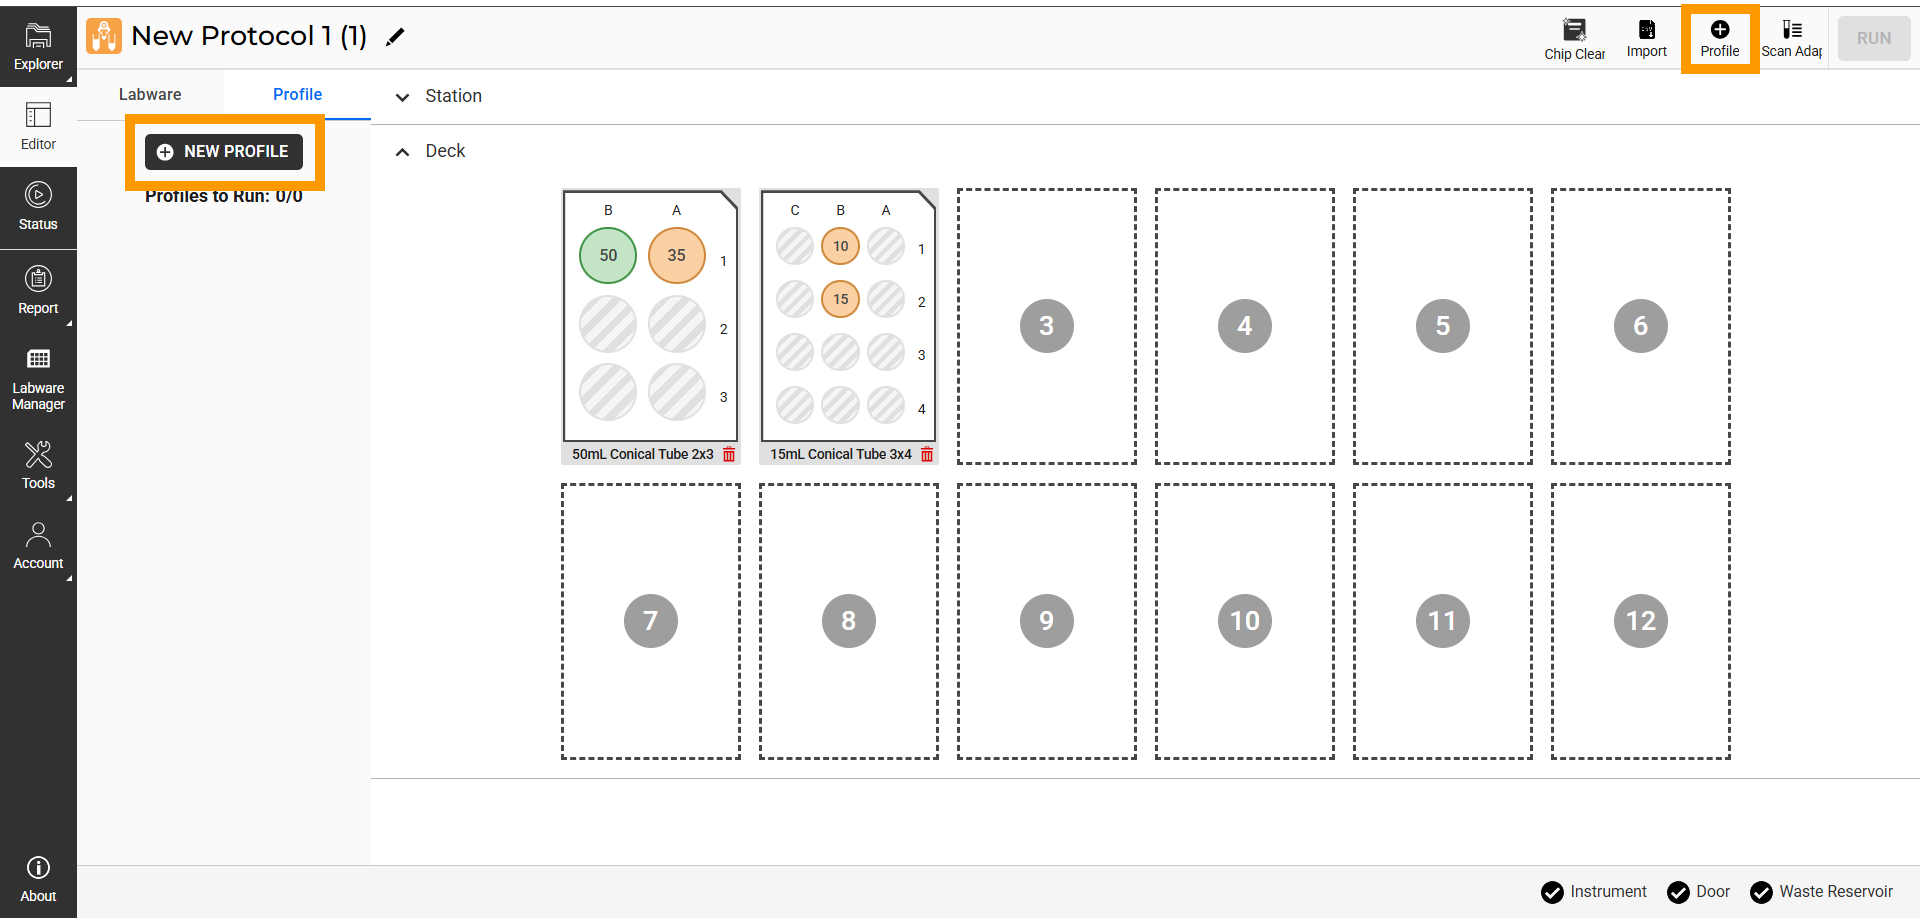
New Profile Button
OPTIONAL: Click the profile name to rename it.
Specify the profile parameters as follows.
Note
Settings marked with asterisk (
*) are required.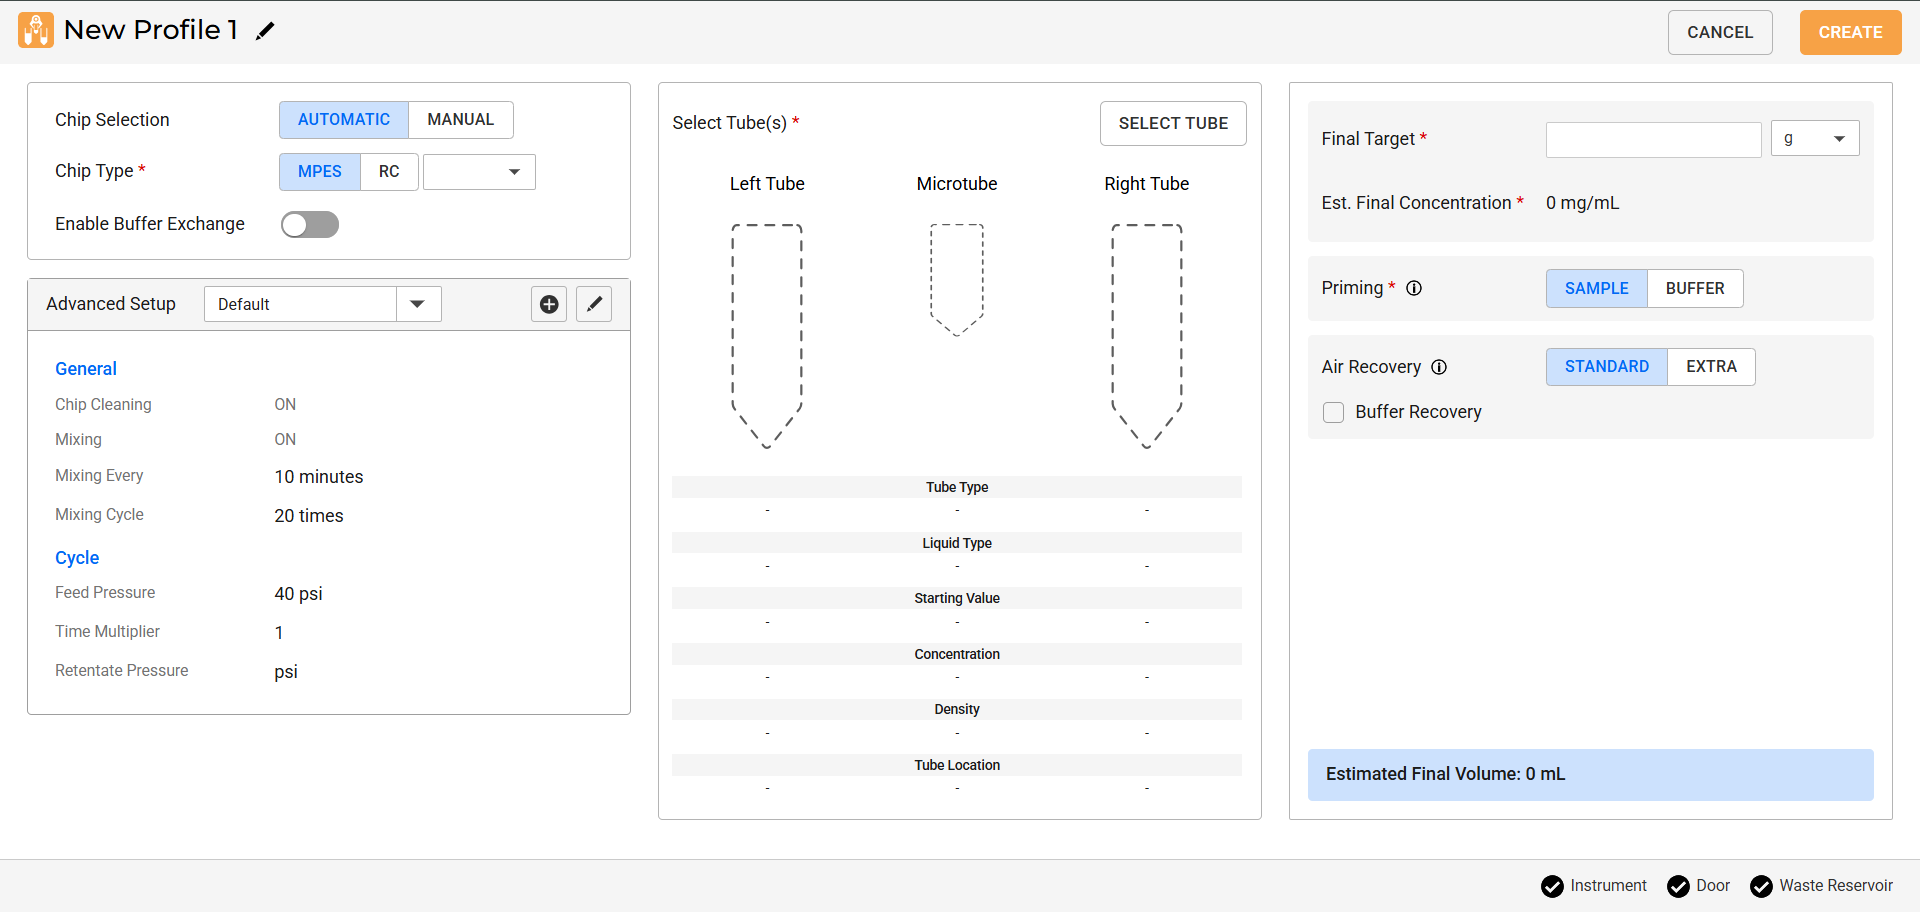
Parameters in the New Profile Page
Define the chip configuration from the Chip Selection and Chip Type options:
AUTOMATIC: Lets the aµtoPULSE pick an available chip on the deck based on your selected Chip Type.
MANUAL: Choose a specific chip directly from the deck by clicking SELECT CHIP.
See the video below for reference.
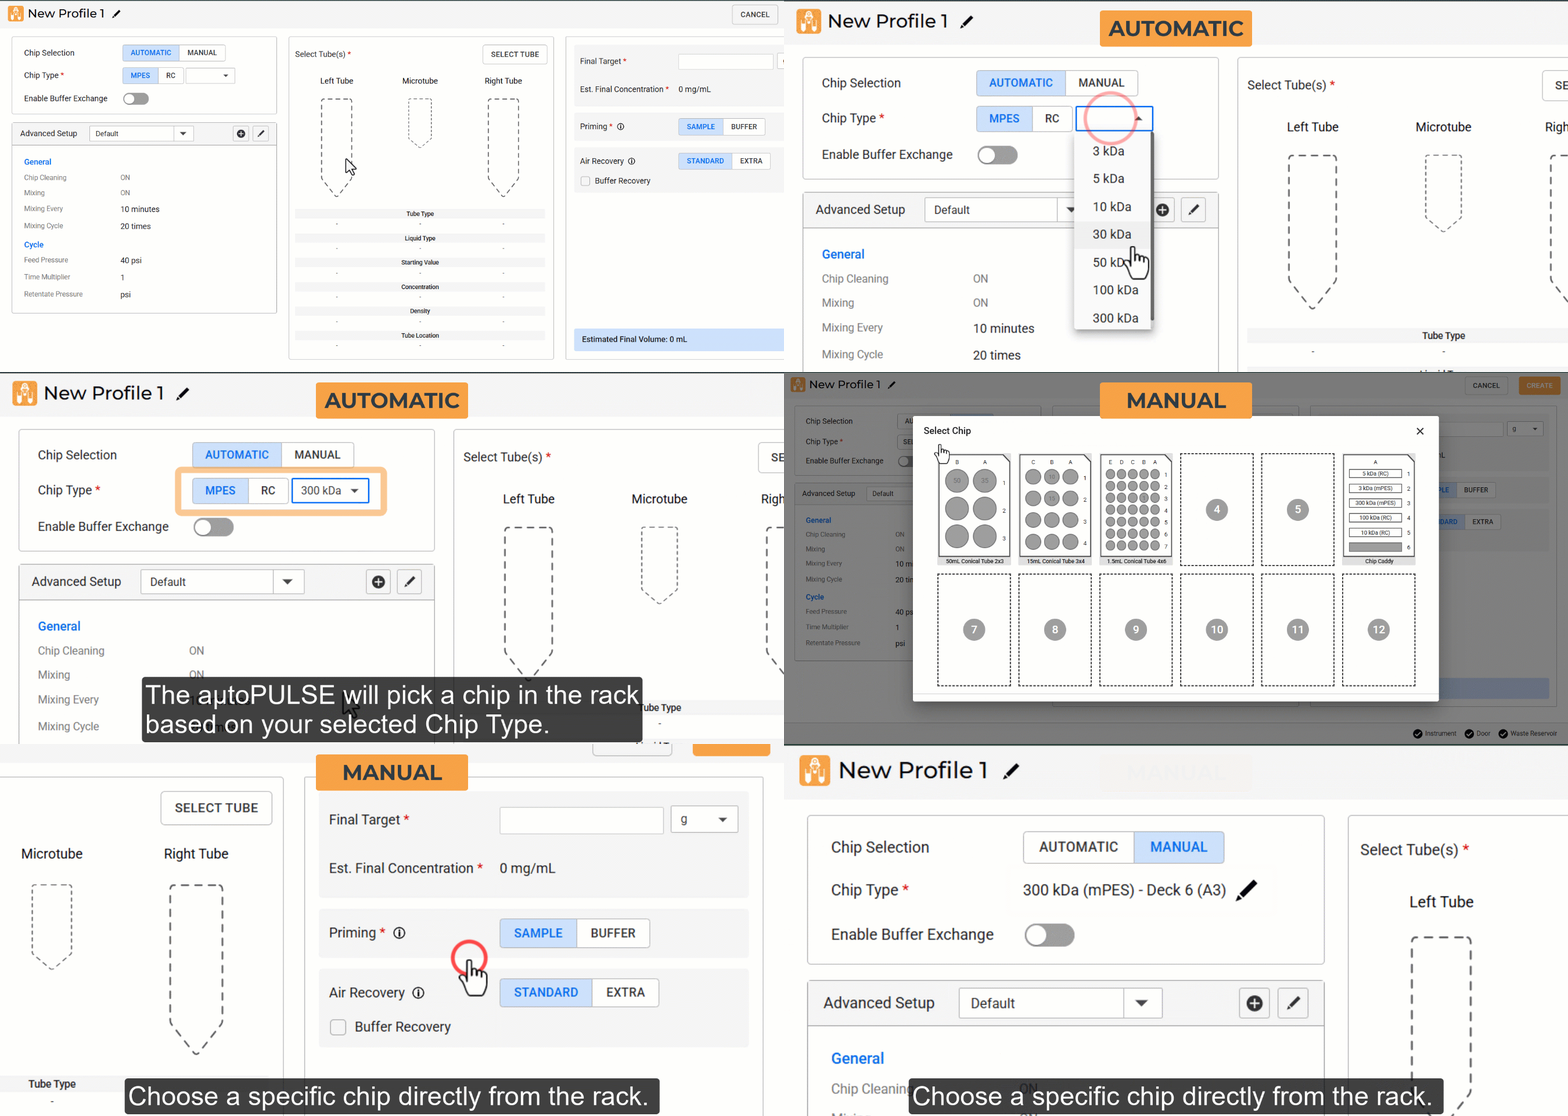
Chip Selection Setup
OPTIONAL: To add a buffer exchange sequence, activate the Enable Buffer Exchange toggle and select the Buffer Exchange Source from the provided options (TUBE or RESERVOIR).
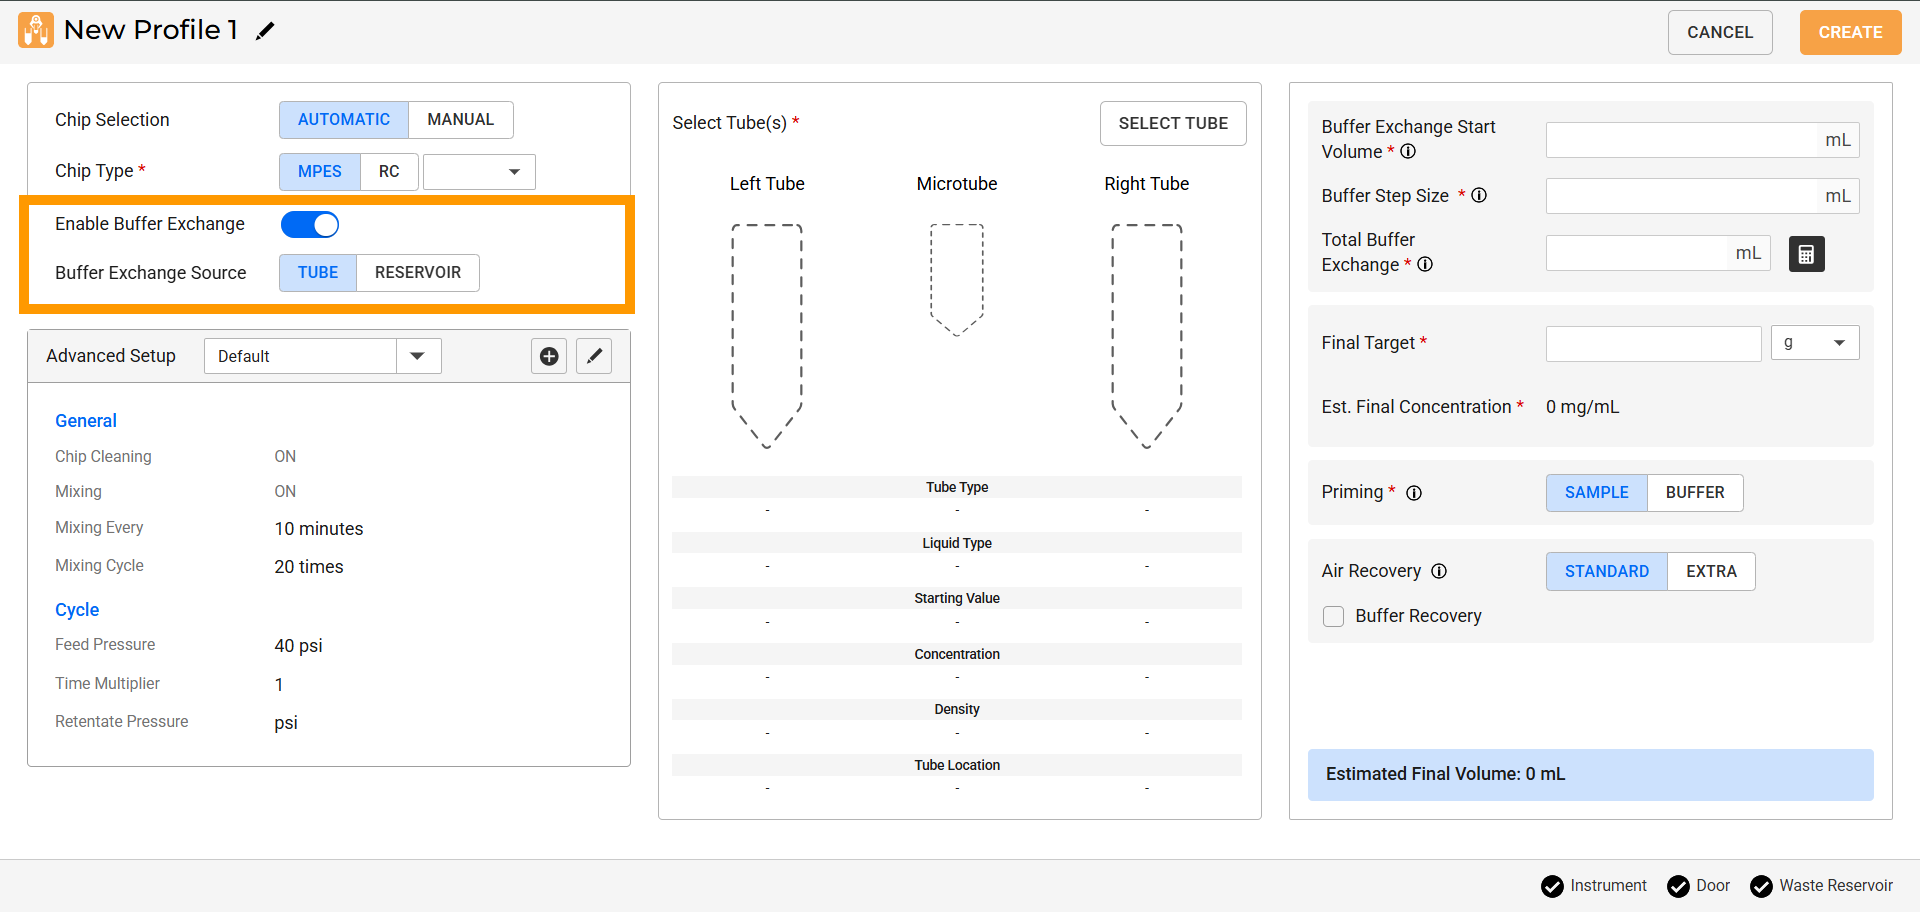
Buffer Exchange Option
OPTIONAL: Assign a custom chip setup from the Advanced Setup panel. If left unchanged, the Default setup will be applied.
Note
You can edit or create new setups from the Advanced Setup page. See Using the Advanced Setup for details.
Click SELECT TUBE to configure the tubes based on your profile requirements and deck layout. For example, assign at least one sample tube, or if Buffer Recovery is enabled, assign a sample tube and a buffer tube.
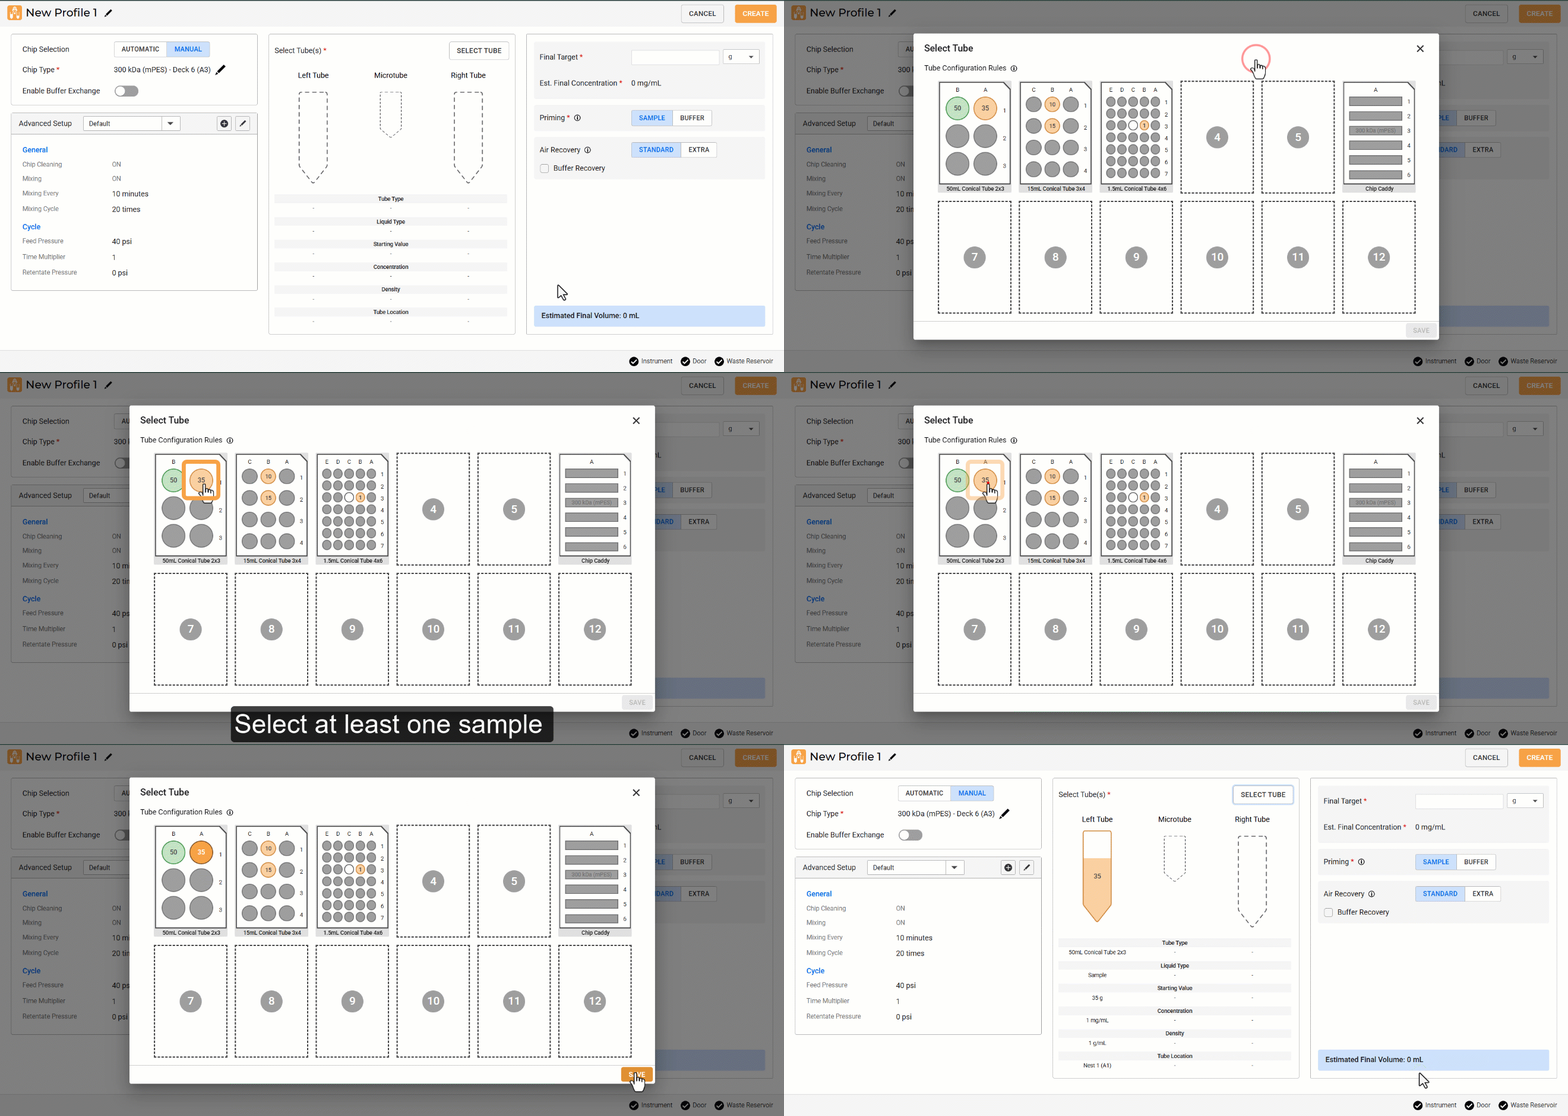
Selecting Tube According to Profile Requirements
Tip
Click an assigned tube again to change or remove the selection.
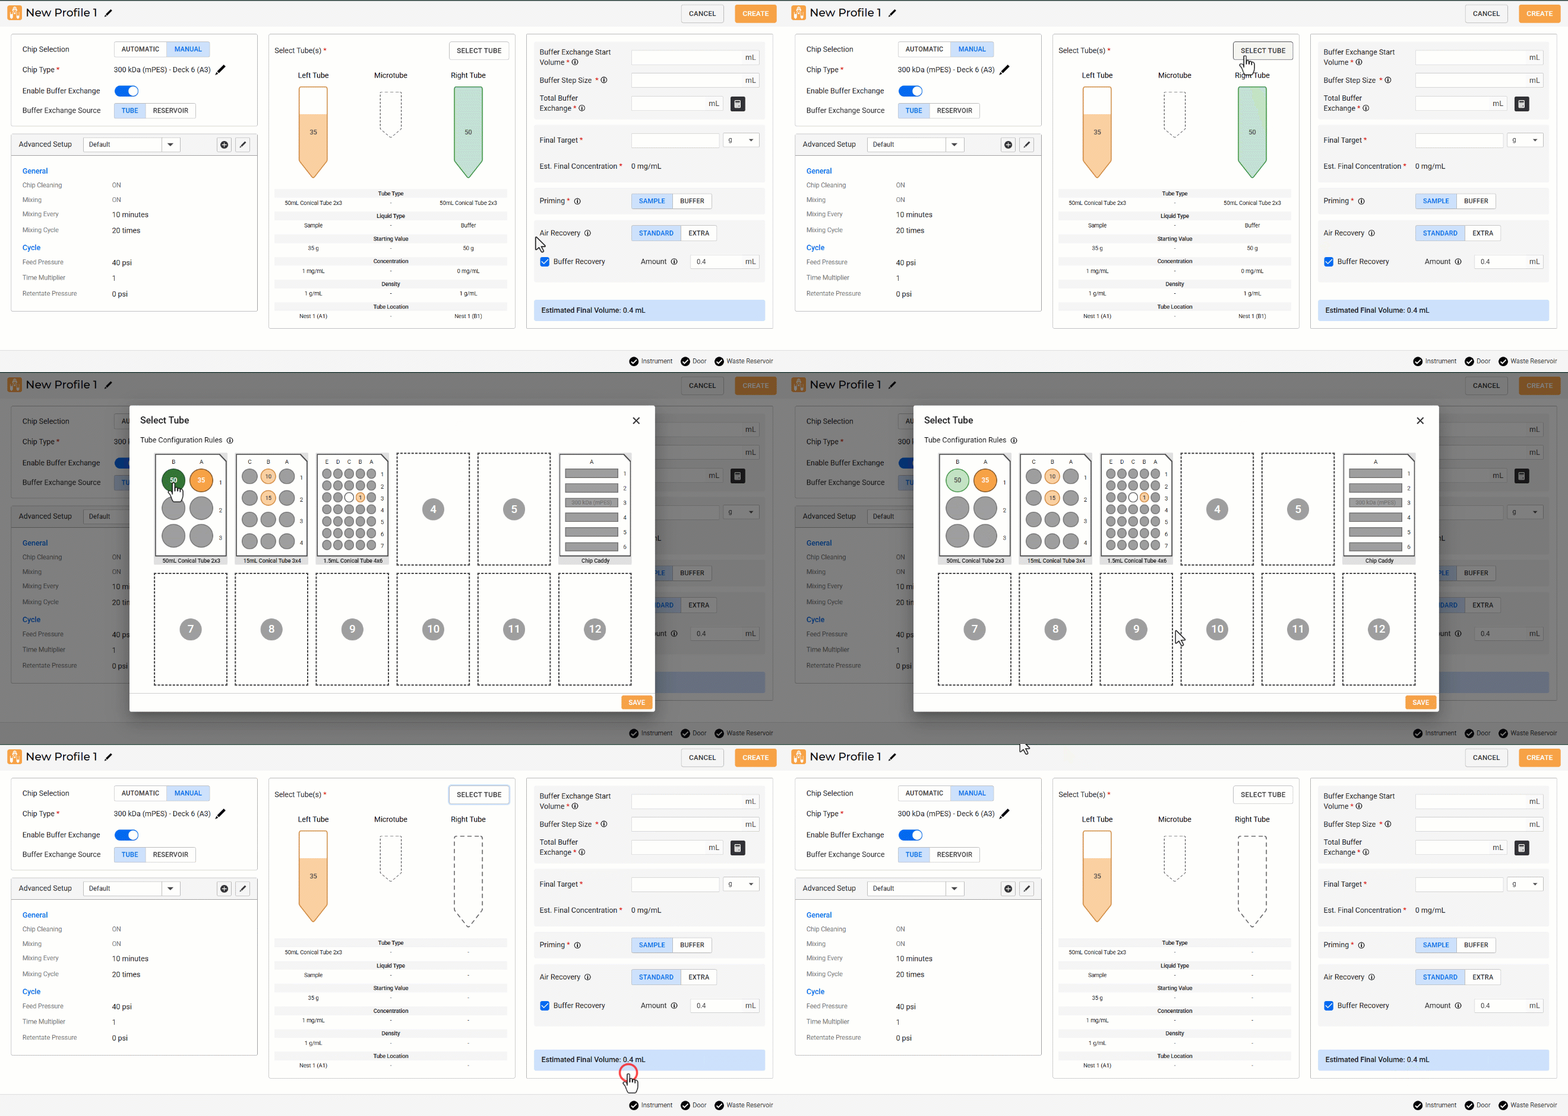
Remove Tube Selection
Specify the volume parameters as follows.
Tip
Click the info icon
 next to parameters to view guidance.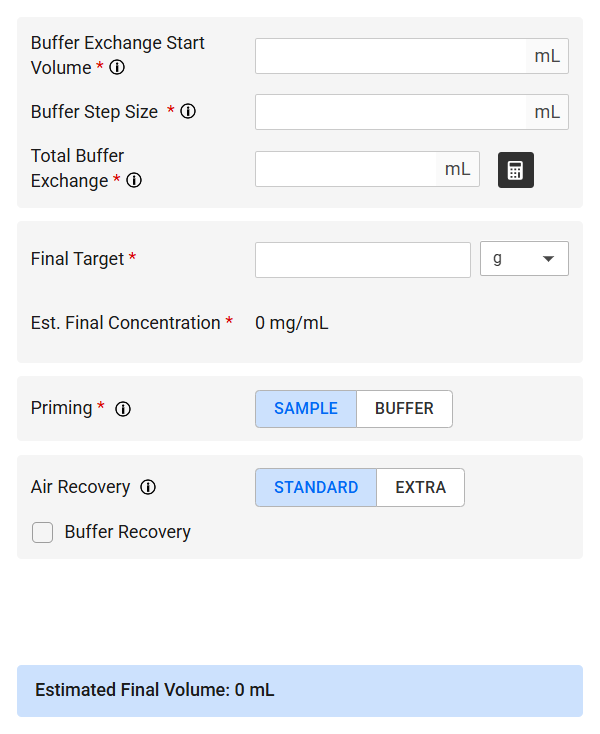
Volume Parameter Panel
Required if Enable Buffer Exchange is selected:
Buffer Exchange Start Volume: The volume at which the system begins adding the new buffer.
Buffer Step Size: The amount of buffer added at a time during the buffer exchange.
Total Buffer Exchange: The total volume of buffer used during the buffer exchange process.
OPTIONAL: Use the Buffer Exchange Calculator
 feature to calculate the required exchange volume for buffer exchange. Specify the parameters in the provided fields, then click APPLY to save the values.
Exchange Percentage: Percentage of buffer relative to the total tube volume (sample + buffer added).
Necessary Total Buffer Exchange (read only): Total buffer volume required to complete the buffer exchange.
Note
Buffer Exchange Start Volume and Buffer Step Size values in Buffer Exchange Calculator are synced with volume parameters for buffer exchange.
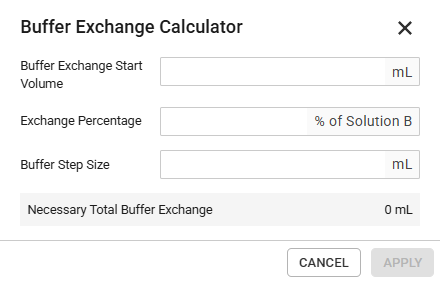
Buffer Exchange Calculator Dialog
Final Target: The final amount (in g or mL) you want the sample to achieve after the process.
Est. Final Concentration (read only): The estimated concentration (mg/mL) after the profile is executed.
Note
Est. Final Concentration is automatically calculated after specifying the Final Target.
Select the Priming option:
SAMPLE: Clears air from the chip using a sample, conditioning the flow paths before the profile runs.
BUFFER: Clears air from the chip using a buffer, conditioning the flow paths before the profile runs. Requires at least 2 mL of available buffer in the Right Tube.
Note
Priming with BUFFER is available on µniPulse chips only and is disabled in V1 software.
Select the Air Recovery option:
STANDARD: The default air recovery setting that uses a fixed pumping cycle.
EXTRA: Adds some air to the sample tube, suitable for higher-viscosity samples.
OPTIONAL: Select the Buffer Recovery option to flush a specified Amount of buffer volume for more efficient recovery.
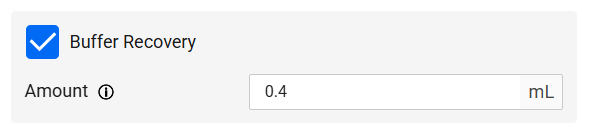
Amount Field on Buffer Recovery Option
Estimated Final Volume: The approximate volume in the target tube after the profile is executed.

Estimated Final Volume Panel
Click CREATE to complete your profile setup. Once a profile is created, it will appear in the Profile tab.
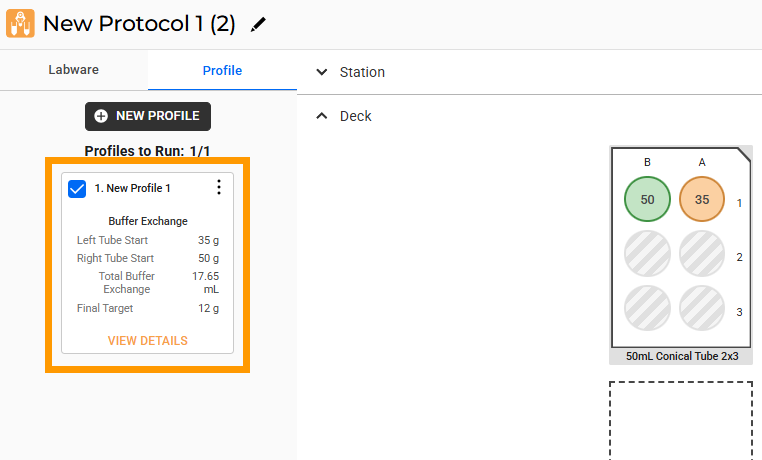
New Profile Created
Repeat steps 1-4 to create more profiles.
Note
You can duplicate and/or remove a profile using the menu button on its card. After duplicating, you will need to update the tube selection to complete the new profile.
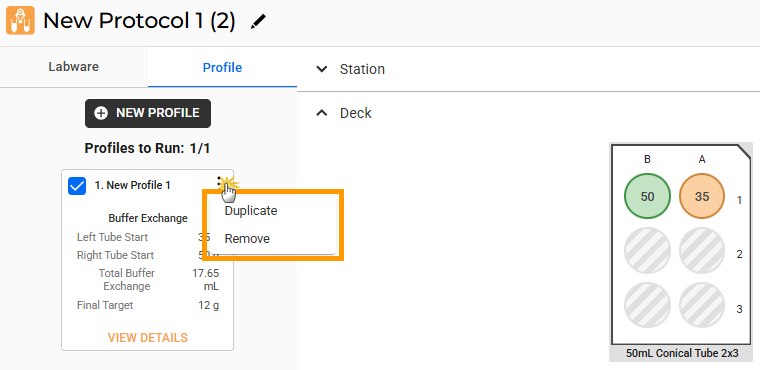
Duplicate or Remove a Profile
Your protocol is ready to run. For more information, see Running a Protocol.
The Profiles to Run indicator updates automatically to show the number of selected profiles out of the total.
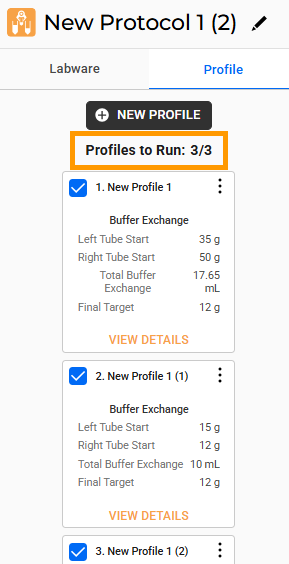
Number of Profiles to Run
A warning icon
on a profile card indicates errors that must be corrected before the profile can run. Click VIEW DETAILS to open, make necessary changes, and then click SAVE. Refer to the specifying profile’s parameters (step 3) for instructions.
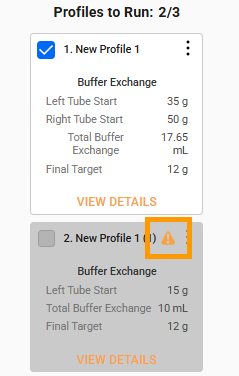
Profile with Warning Indicator