Open topic with navigation
Designing a Multi-Plate Dispense
Once you have set up the instrument, you can either load an existing dispense list or design a new dispense.
Prerequisites
To design a multi-plate dispense:
-
Choose from the following options:
-
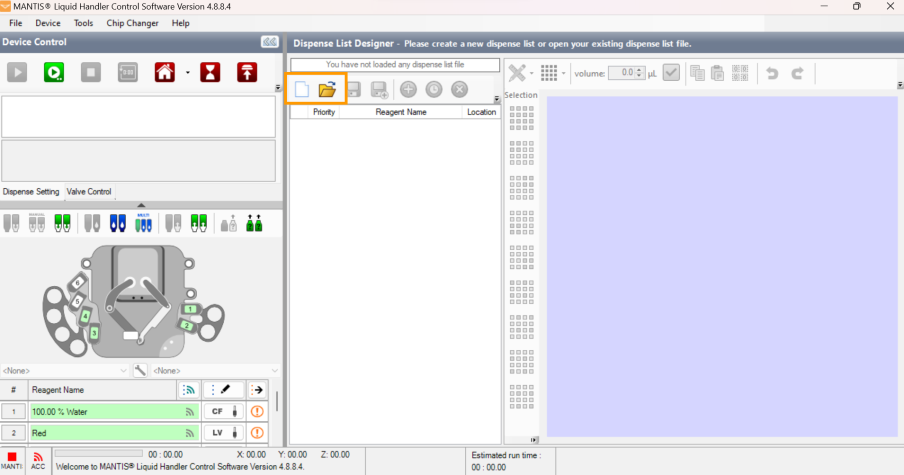
Click the New Dispense List button  to create a new dispense list.
-
Click the Open Dispense List button  to load an existing dispense list. You can modify the dispense list as needed. See Modifying Dispense List for more information.

Active Buttons in the Dispense List Designer Panel
-
Click the Input button  next to each reagent input. Select the Chip Type (Low Volume, High Volume, High Volume PFE, Low Volume PFE, High Volume 3PFE, Low Volume 3PFE, or High Volume Continuous Flow chip), and enter the Prime Volume (optional), Primary Wash Volume, Secondary Wash Volume (optional), Recovery Volume, and Pre-Dispense Volume. See Default Volume and Tubing Length Recommendation.
-
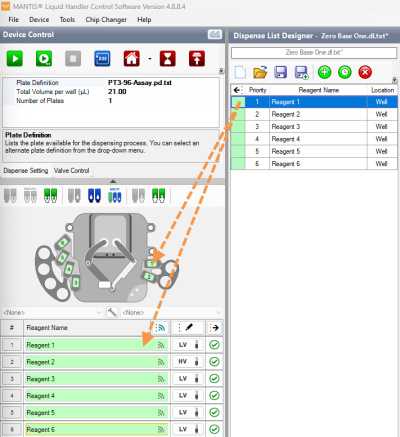
Drag the reagent name from the Dispense List to either the text box next to the chip position, or the chip position on the image of the MANTIS. OR click the Assign To Input button  to assign all reagents from the Dispense List at once.

Drag Reagent to the Device Control Panel
Assign a Dispense List of Reagents to Chip Positions
Note: If the dispense list has more reagents than the amount of the chip stations, the Assign To Input button will not work. The amount of reagents should be less or the same as the amount of the chip stations.
-
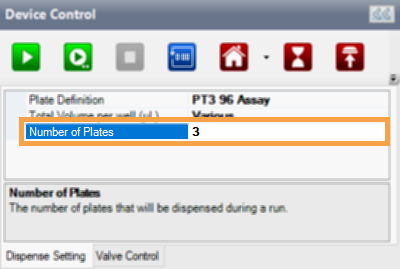
On the Dispense Setting tab, type the amount of plates you want to dispense in the Number of Plates field.

Number of Plates Field
Related Topics
|
|

|
| MAOWH-V48R824
|
|
 to create a new dispense list.
 to load an existing dispense list. You can modify the dispense list as needed. See Modifying Dispense List for more information.
 next to each reagent input. Select the Chip Type (Low Volume, High Volume, High Volume PFE, Low Volume PFE, High Volume 3PFE, Low Volume 3PFE, or High Volume Continuous Flow chip), and enter the Prime Volume (optional), Primary Wash Volume, Secondary Wash Volume (optional), Recovery Volume, and Pre-Dispense Volume. See
  to assign all reagents from the Dispense List at once.
.png)
_580x350.png)

