Serial Dilution View
This feature enables you to gradually decrease the concentration of a sample—such as a reagent, compound, or biological material—in a precise, sequential, and controlled way for downstream applications. At every step, a constant volume of sample is transferred to a well with a diluent and thoroughly mixed. This creates a stepwise concentration reduction by a constant factor.
You can create a serial dilution manually or by importing a serial dilution XML file.
Important
Use plates with at least 8 rows.
Serial Dilution is only prepared in wells. If the plate you use has drop reservoirs, they will be ignored.
Creating a Serial Dilution Manually
Prepare Diluent and Sample
Prepare the diluent and sample in the corresponding plate.
Note
You can use the same plate for both the sample and target location if you want to dilute the sample in the same plate.
Open the Serial Dilution Side Panel
There are two ways to do this.
Open the NT8 Control Software and click the Serial Dilution button
 on the homepage to open the Serial Dilution side panel.
OR
If you have opened an existing Serial Dilution:
In the Serial Dilution side panel, click the New Task List button
 .
.In the Create New Serial Dilution dialog box, select Yes.
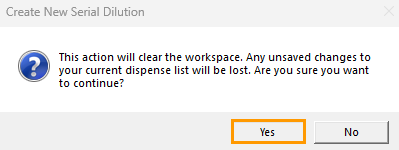
Create New Serial Dilution Dialog Box
Once you click Yes, the current information in the side panel is reset, and you can continue to the next steps to create a serial dilution.
Registering Plates
To register a plate:
In the Device View, select the plate station for the sample plate and the target plate location(s) along with the corresponding plate type. In the example below, Plate Station 1 and Plate Station 2 are the target and sample plates, respectively.
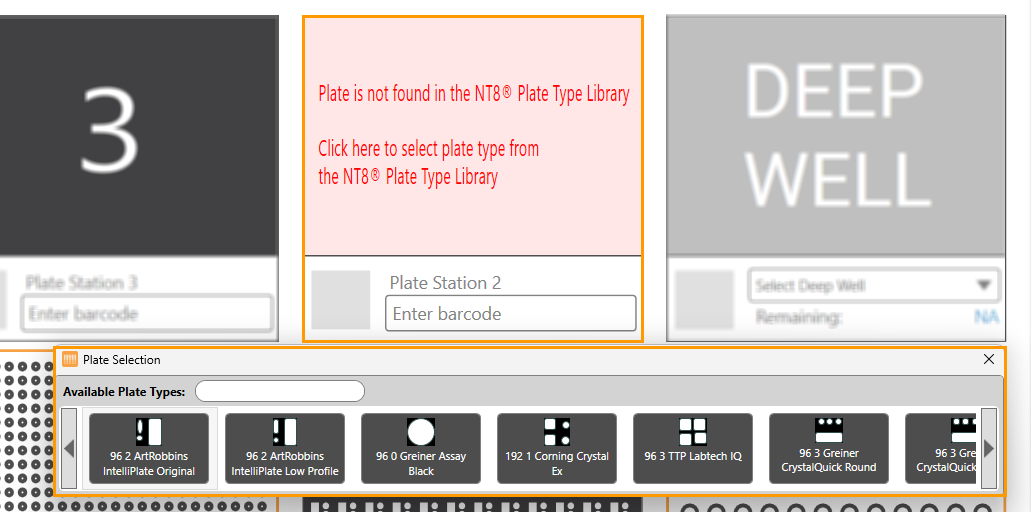
Selecting a Plate Type
Note
You can use the same Plate Station for both the sample and target location if you are planning to dilute the sample in the same plate.
In the Serial Dilution side panel, go to the Register Plate section. Then,
select a plate station from the Sample Plate Location field, and
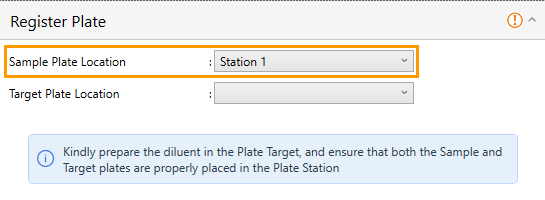
Sample Plate Location Field
select a plate target location from the Target Plate Location field.
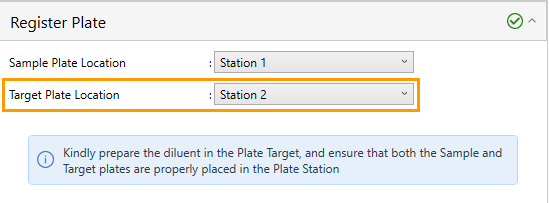
Target Plate Location Field
Place the target and sample plate(s) properly in the corresponding plate station(s).
Note
To change the plate, right-click on the corresponding Plate Station and click Detach Microplate.
Configuring Parameters
To configure serial dilution parameters:
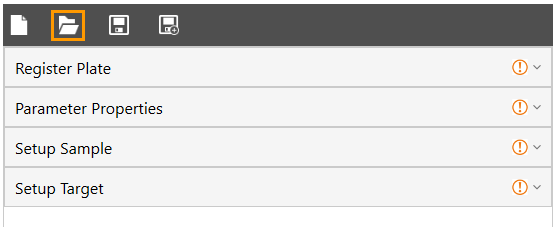
Click the Parameter Properties section below the Register Plate section.
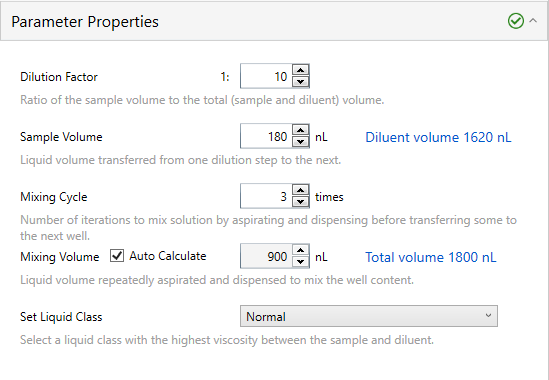
Parameter Properties Section
Input the volumes for Dilution Factor, Sample Volume, and Mixing Volume in their respective fields and set the desired number of Mixing Cycle.
Important
The Dilution Factor value must be 1 at a minimum.
Tick the Auto-calculate checkbox to automatically generate the value.
Select a liquid class in the Set Liquid Class field.
Defining Sample Location
To define a sample location:
Click the Setup Sample section below the Parameter Properties section.
Click one of the group rows where you want to run serial dilution in the Accessible Rows field.
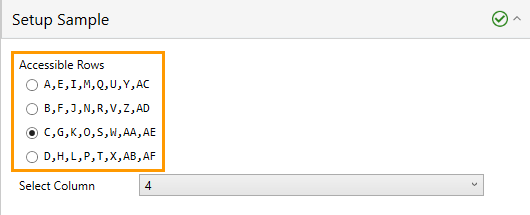
Accessible Rows Field in Setup Sample Section
Select a column containing a sample ingredient from the Select Column dropdown.

Select Column Dropdown
Defining Target Location
To define a target location:
Click the Setup Target section below the Setup Sample section.
Click the group row for the target location in the Accessible Rows field.
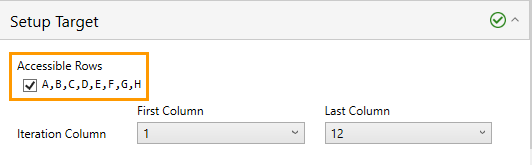
Accessible Rows Field in Setup Target Section
Select the first and last columns in the corresponding dropdowns in the Iteration Column field.

Iteration Column Field
Running the Protocol
If everything is set, click Run Protocol.
Note
The Run Protocol button will be active if all fields are complete with valid inputs. Warning errors
 in each section inform about any invalid inputs or incomplete fields if hovered over.
To reset all entered information, click the Reset button.
Changing the plate after completing any sections in the Serial Dilution side panel will clear all information.
Save the Serial Dilution Protocol (Optional)
To save a serial dilution protocol, click Save
 on the top bar.
To save a serial dilution protocol as a specific format, click Save As
 .
.
The serial dilution protocol XML files are saved to your local drive.
Creating a Serial Dilution by Importing a Serial Dilution XML File
Loading a Serial Dilution XML File
To load a serial dilution:
Click the Serial Dilution button
.In the Serial Dilution side panel, click the Open Task List button
 .
.
Open Task List Button in Serial Dilution Side Panel
In the Open Project dialog box, select an XML serial dilution file and click Open. The information from the XML is loaded into the sections in the Serial Dilution side panel.
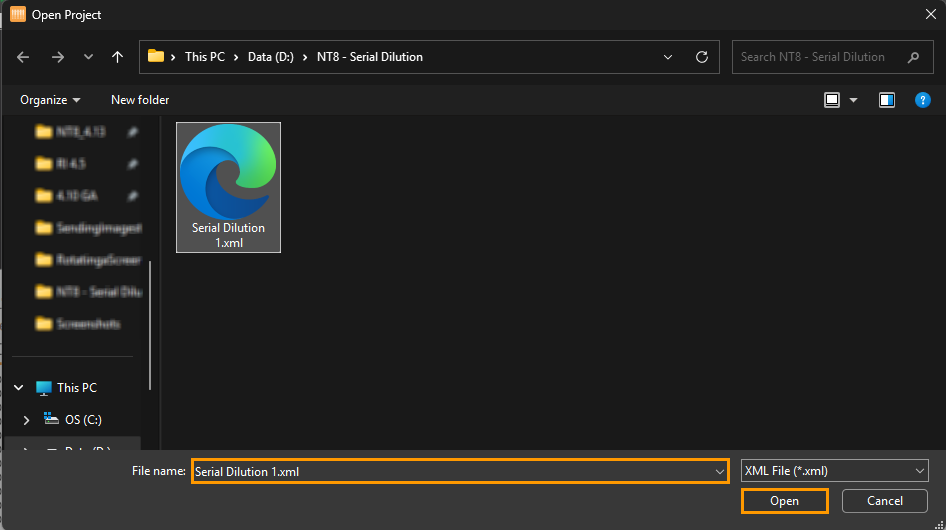
Open Project Dialog Box
Prepare Diluent and Sample
Prepare the diluent and sample in the corresponding plate.
Note
You can use the same plate for both the sample and target location.
Registering Plates
To register a plate:
In the Device View, select the plate station for the sample plate and the target plate location(s) along with the corresponding plate type. In the example below, Plate Station 1 and Plate Station 2 are the target and sample plates, respectively.
Selecting a Plate Type
Note
You can use the same Plate Station for both the sample and target location.
In the Serial Dilution side panel, go to the Register Plate section. Then,
select a plate station from the Sample Plate Location field, and
Sample Plate Location Field
select the location of the target plate from the Target Plate Location field.
Target Plate Location Field
Place the target and sample plate(s) properly in the corresponding plate station(s).
Note
To change the plate, right-click on the corresponding Plate Station and click Detach Microplate.
Configuring Parameters
To configure serial dilution parameters:
Click the Parameter Properties section below the Register Plate section.
Parameter Properties Section
Input the volumes for Dilution Factor, Sample Volume, and Mixing Volume in their respective fields and set the desired number of Mixing Cycle.
Important
The Dilution Factor value must be 1 at a minimum (it represents the ratio of the final volume to the sample volume, and the final volume can not be less than the original sample volume).
Tick the Auto-calculate checkbox to automatically generate the value.
Select a liquid class in the Set Liquid Class field.
Defining Sample Location
To define a sample location:
Click the Setup Sample section below the Parameter Properties section.
Click one of the group rows where you want to run serial dilution in the Accessible Rows field.
Accessible Rows Field in Setup Sample Section
Select a column containing a sample ingredient from the Select Column dropdown.
Select Column Dropdown
Defining Target Location
To define a target location:
Click the Setup Target section below the Setup Sample section.
Click the group row for the target location in the Accessible Rows field.
Accessible Rows Field in Setup Target Section
Select the first and last columns in the corresponding dropdowns in the Iteration Column field.
Iteration Column Field
Running the Protocol
If everything is set, click Run Protocol.
Note
The Run Protocol button will be active if all fields are complete with valid inputs. Warning errors
in each section inform about any invalid inputs or incomplete fields if hovered over.To reset all entered information, click the Reset button.
Changing the plate after completing any sections in the Serial Dilution side panel will clear all information.
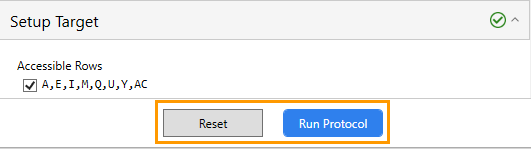
Reset and Run Protocol Buttons
Save the Serial Dilution (Optional)
To save a serial dilution, click Save
on the top bar.To save a serial dilution as a specific format, click Save As
.
Serial dilution files are saved to your local drive.