Protein Source Station
The Protein Source Station is an area in the NT8 software where you interact with your protein solutions, such as adding an aspirate and dispense task to the Protein Tray Station. As a very low dead volume machine, the NT8 requires proper setup of reagents to ensure optimal performance.
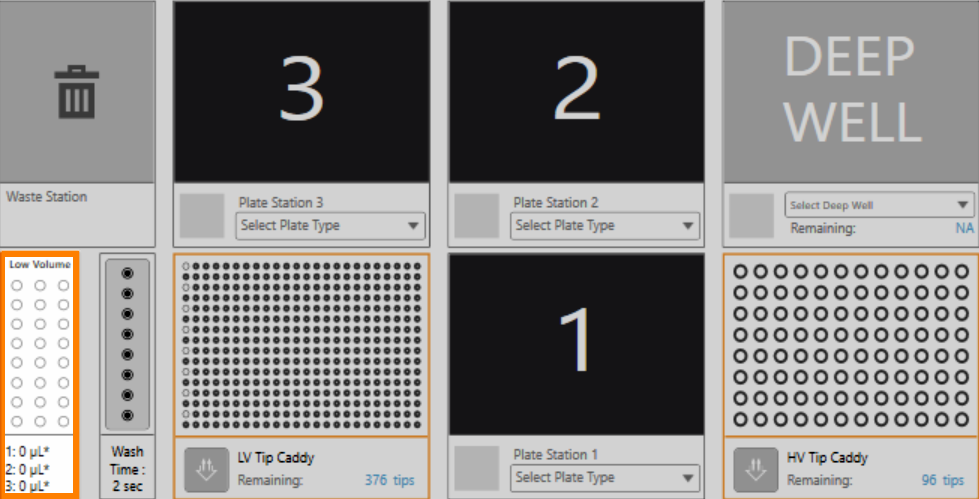
Protein Source Station
An inactive protein source is indicated by a grey Protein Source Station in the Device View. You must set up your protein source in NT8 before performing any experiments involving either the high volume (HV) or low volume (LV) protein block. Read below to better understand the difference between HV and LV protein blocks.
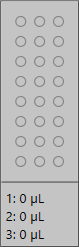
Inactive Protein Source
Low Volume (LV) Protein Block |
High Volume (HV) Protein Block |
|---|---|
Can hold up to 3 μL of protein Can hold up to 13 μL of protein sample, 300 nL of which is dead sample, 500 nL of which is dead volume. |
Can hold up to 13 μL of protein sample, 500 nL of which is dead volume. |
Can be filled using an LCP head (if present). |
The volume can be calculated by NT8 either manually or automatically. |
Always calculates protein volume automatically. |
Provides continuous update of the remaining protein volume in the protein tray during an aspiration task (if you set the volume manually) |
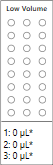
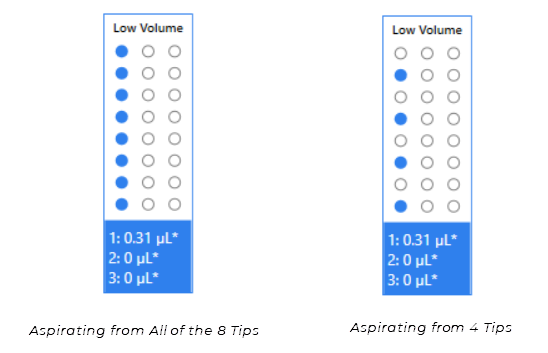
An active low volume protein block is indicated by the words Low Volume appearing at the top of the Protein Source Station icon, as shown below
|
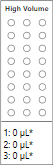
An active high volume protein block is indicated by the words High Volume appearing at the top of the Protein Source Station icon, as shown below.
|
See the sections below for more information on automatic and manual protein volume calculation.
Enabling Automatic Protein Volume Calculation
NT8 always enables the Automatic Protein Volume Calculation when you use an LV protein block because the LV protein block is typically used for one-time task runs before it needs to be filled again. With Automatic Protein Volume Calculation enabled, the software will automatically calculate the required volume of sample to be aspirated from the protein tray, compensating for any dead volume. Meanwhile, the HV protein block allows you to choose whether the volume calculation is manual or automatic. The latter function is enabled by default. If it is disabled in your software, follow the tutorial below to enable this function.
Note
It is recommended to use the automatic volume calculation feature, and pipette the specified volume into the protein block for use in your experiment.
To enable the protein volume calculation for high volume protein block:
Right-click the protein source image and select Set Protein Volume. The Protein Volume Setup panel appears:
Note
If you are using a High Volume protein block, right click the protein source image and select Set High Volume Protein Tray. Your hardware may be equipped with automatic sensors to distinguish between protein blocks.
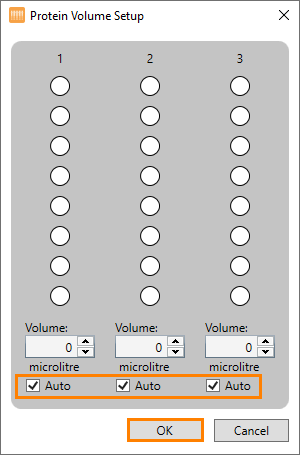
The Protein Volume Setup Panel
Check the Auto check boxes, then click OK. Please note that the maximum volume of the low and high volume protein trays are 3 µL per well and 13 µL per well, respectively.
Warning
Use a 2, 10 or 20 µL pipette to dispense the calculated volume of solution into each well of the specified column. This should be done as the last step before initiating a dispense, to minimize the risk of evaporation while preparing the experiment. It is important to practice proper reverse pipetting technique to eliminate bubbles when loading the protein tray. See Reverse the Pipetting Technique topic below for more information. Alternatively, you could use the aliquoting feature of a suitable electronic pipette.
Note
Due to larger dead volume, a warning message will appear if you assign a High Volume protein block to an aspiration task with a volume lower than 3 μL (3000 nL). Hover over the Warning sign displayed next to the Aspirate action column in the task list to view the notification and its recommendation.
(HV Protein Block) Setting the Protein Volume Manually
If you manually set the volume of protein in your HV protein block, NT8 will provide a continuous update of your remaining protein volume in the Protein Source Station icon as the protein is aspirated from the protein tray. At the end of the task run, the NT8 software will also show the remaining volume that hasn’t been aspirated yet. You can use the remaining volume for another experiment.
Note
It is strongly recommended to use the automatic volume calculation feature in NT8, and fill the specified volume into the protein block for use in your experiment.
To set the protein volume manually:
Right-click the protein source image and select Set Protein Volume. The Protein Volume Setup dialog appears:
Note
If you are using a High Volume protein block, right click the protein source image and select Set High Volume Protein Tray. Your hardware may be equipped with automatic sensors to distinguish between protein blocks.
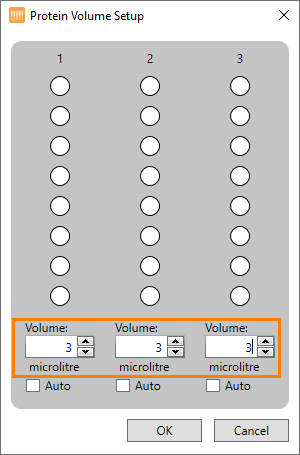
Defining the Protein Volume Manually
Uncheck the Auto check boxes and type the desired protein volume in Volume fields for each column. Please note that if the Auto check boxes are left checked, the NT8 will automatically calculate the protein volume required for any aspiration tasks assigned to the protein tray instead of your specified volume.
Note
Due to larger dead volume, a warning message will appear if you assign a High Volume protein block to an aspiration task with a volume lower than 3 μL (3000 nL). Hover over the Warning sign displayed next to the Aspirate action column in the task list to view the notification and its recommendation.
Fill in the volume available in each reservoir of a particular column using reverse pipetting.
Warning
Ensure that the volume set on the NT8 Control Software matches the actual volume in each reservoir of the protein source. Reservoir volume must be the same for each reservoir in a column.
Click OK.
Reverse Pipetting Technique
Reverse pipetting technique is used to dispense a measured quantity of liquid by means of an air displacement pipette. In traditional pipetting, one would aspirate the required amount of sample by pushing the pipette’s plunger to the first stop and then releasing it. The dispense then would require pushing out the entire sample and a small amount of air by pushing the plunger past the first stop and to the second one. In contrast, reverse pipetting involves pushing the plunger to the second stop, thus overaspirating, and dispensing the required amount by pushing the plunger to the first stop. This technique is particularly useful to eliminate bubbles when loading the protein tray.
Prerequisite:
You are using an air-displacement pipette.
To fill the protein tray in reverse pipetting technique:
OPTIONAL: Take the Protein Source out of the Protein Source Station.
Attach the Tip to the Pipette, and set the volume as needed.
Press down the plunger to the second stop (purging position).
Immerse the tip to the protein solution liquid and slowly release the plunger to draw up the liquid to the tip.
Dispense the liquid into the Protein Source wells by pressing down the plunger to the first stop. Please note that this approach will leave a small volume of the liquid inside the tip, which is normal.
Repeat the steps 3-6 until all protein wells are filled with the required volume.
Note
After you have filled all the protein wells, if desired, you can recover the overaspirated volume from the pipette tip by pressing down the plunger to the second stop.
Creating a Dispense Task for the Protein Tray
When you use low volume protein block, you can tell the NT8 to fill the protein tray using LCP heads (if present), which always provide a highly precise dispense. Follow this tutorial to add a dispense task for your protein tray.
Right-click the Protein Source Station icon and select Aspirate/Dispense.
OR
Double-click the Protein Source Station icon.
Under Select Operation, select Dispense, as shown in the image below. The LCP Syringe option in the Select Head option is selected automatically.
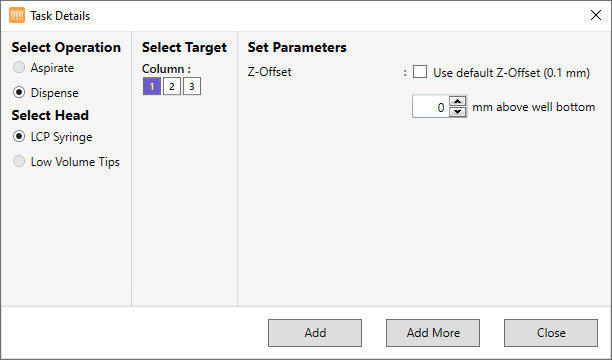
Creating a Dispense Task for the Protein Tray
Under Column, select which columns in the protein tray you want to dispense the protein sample into.
Next to Z-Offset, choose the distance from the tray you want the tip of the syringe to dispense from. The default value is 0.1 mm.
Click Add to save the changes.
OR
Select Add More if you want to add more Dispense commands and set up additional dispense volumes.
Protein Source Station Right-Click Menu Option
Option |
Description |
|---|---|
Aspirate/Dispense |
Launches the Task Details window. The Aspirate/Dispense option is enabled only if you have already added the Pick Tip command to the Task List, (see The Tip Caddy Stations).
|
Set Protein Volume |
For HV tips only. See Setting HV Protein Volume Manually. |
Set High Volume Protein tray/Set Low Volume Protein Tray |
Lets you to select the specific protein tray type to be used in your experiment. The NT8 supports the use of both a low volume protein tray and high volume protein tray. |
Related Topics