Installation Guide
Prerequisite:
Microsoft SQL Server is installed on the computer where ROCK MAKER version 4 will be installed. Otherwise, see the installation guide.
To install ROCK MAKER version 4:
Download the ROCK MAKER version 4 installer here.
Open the installer.
Note
The dialog box below may appear. In that case, click More Info and select Run anyway.
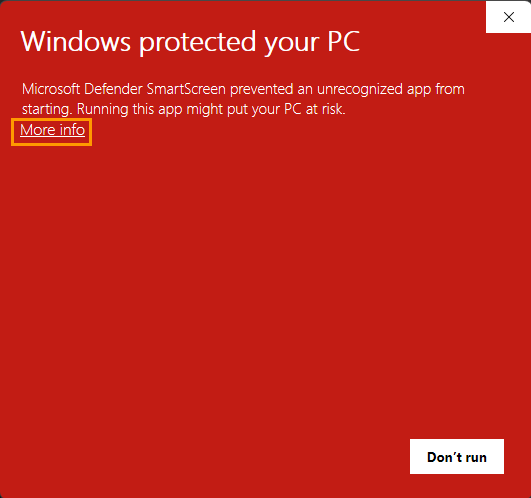
More Info
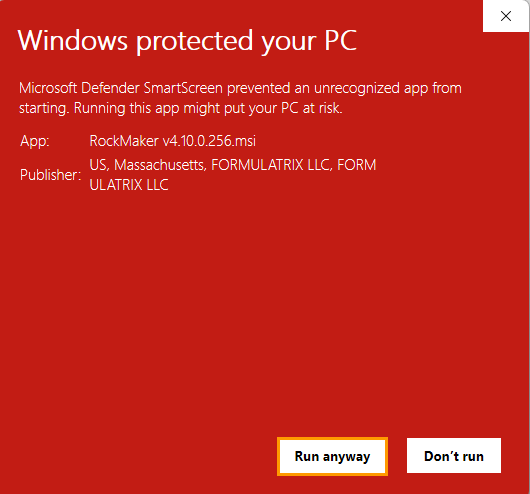
Run anyway
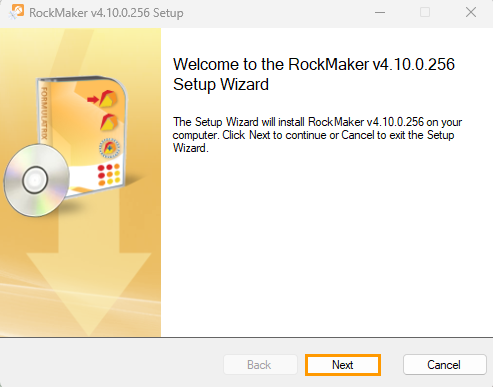
In the setup wizard, click Next.
Next Button
Select Install Rock Maker for the first time and click Next.

Selecting Install Rock Maker for the first time
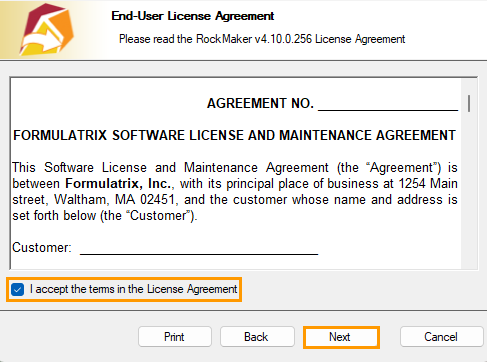
Click the I accept the terms in the License Agreement checkbox. Then, click Next.
Accepting the Terms in License Agreement
In the Application Settings wizard, go to the Windows Credentials of this PC section and enter your PC’s password in the Password field.
Note
The following fields are automatically generated.
HTTP Port: 5000.
HTTPS Port: 5001.
User Name: Your PC’s login account (editable).
Domain: Your PC name (editable).
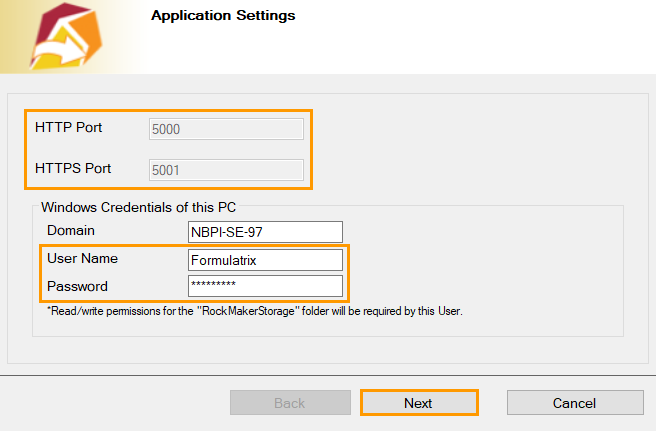
Application Settings Wizard
If everything is set, click Next.
The default destination folder is displayed in the Destination Folder wizard. To edit the destination folder, click Change. Then, click Next.
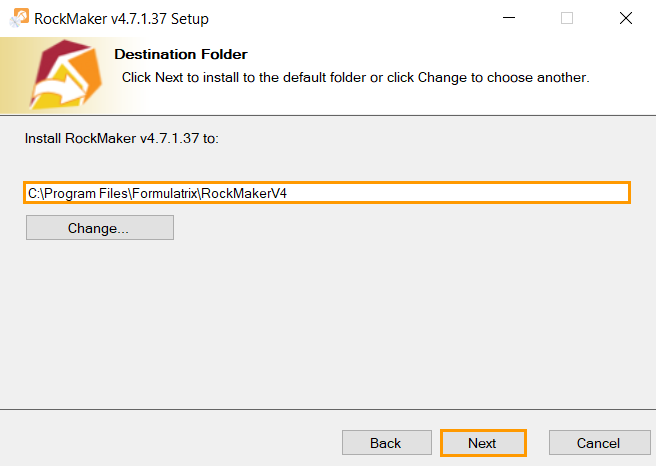
Destination Folder Wizard
Enter a unique database name in the Database Name field and click Next.
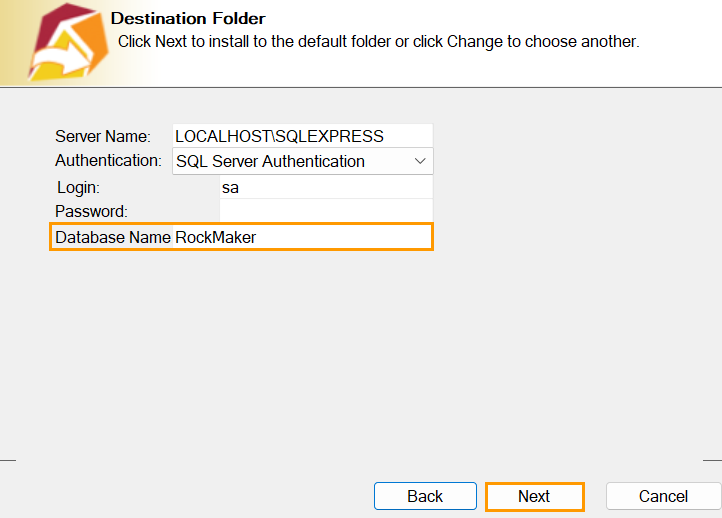
Database Name Field
Note
The Server Name, Authentication, and Login fields are automatically generated, but you can modify them if needed.
The Password field applies only to the database that requires a password. If you do not want to set a password, leave this field blank.
While the installation is in progress, the following dialog boxes might appear.
User Account Control: select Yes to continue.

User Account Control Dialog Box
Database upgrade warning: click the I am the administrator and understand the risks of upgrading checkbox and type your name in the Your Name field. Then, click Continue to proceed with the installation.
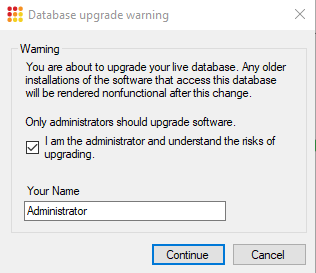
Database Upgrade Warning Dialog Box
Once the installation is complete, click Finish.
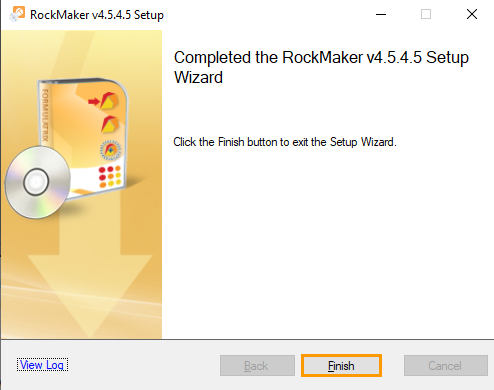
Finish Button
Accessing ROCK MAKER Version 4
To access from a computer installed with ROCK MAKER version 4, enter the URL below in your browser:
Note
The example below uses 5000 as the HTTP port.
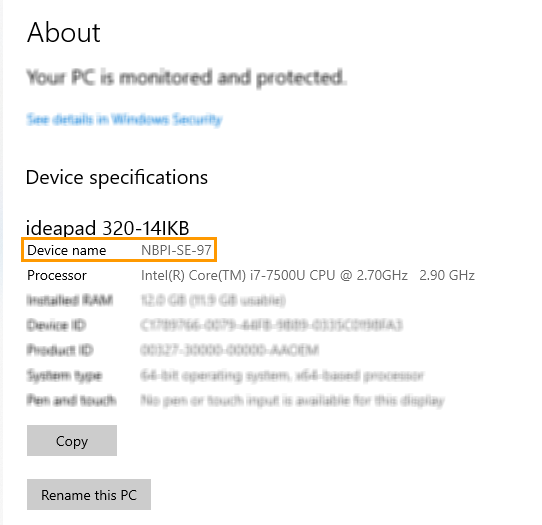
To access ROCK MAKER version 4 from a computer on the same network, replace the localhost in the above URL with the name of the computer on which ROCK MAKER version 4 is installed. Enter the URL below in your browser:
Note
The example below uses 5000 as the HTTP port.
Computer Name
Licensing
Starting from version 4.10, all licenses work as Concurrent. Existing users do not need to convert their licenses.
Go to Licensing Submenu for more information.
HTTPS Certificate
An HTTPS certificate is only required if you access ROCK MAKER version 4 from outside your network. The HTTPS certificate is a development certificate. You should obtain a certificate for your own domain from any online certificate authority to make ROCK MAKER version 4 accessible from the internet.
Note
The HTTPS certificate should be in a PFX format.
To use the HTTPS certificate to run ROCK MAKER version 4:
Place the HTTPS certificate in the installation folder.
See the example of an installation folder below:
C:\Program Files\Formulatrix\RockMakerv4\
In the installation folder, open the appsettings.json file and locate:
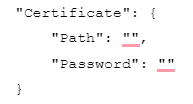
Type the HTTPS certificate name in the Path row, for example, “Path”: “dev-certificate.pfx”,.
Type the HTTPS certificate password in the Password row, for example, “Password”: “mario64”.

appsettings.json File
Click Save or press Ctrl + S on your keyboard.
Open Services and locate RockMaker Service.
Right-click RockMaker Service and select Restart.
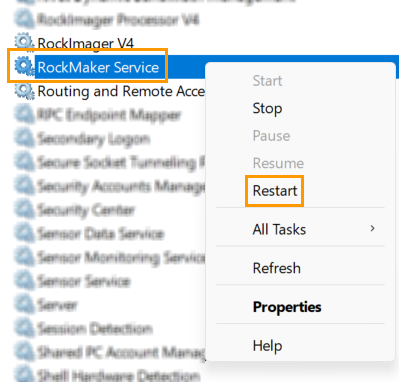
Restart Option
Troubleshooting
Question: How do I skip the database backup when installing ROCK MAKER version 4?
Answer:
Important
Make sure that the manual database backup has been done before you skip the database backup.
Open Command Prompt on your computer and go to the folder where the ROCK MAKER installer is.
Run the command below:
c:\>msiexec /i “RockMaker v4.5.2.3.msi” SKIPBACKUP=”TRUE”
Note
Replace the RockMaker v4.5.2.3.msi in the above command with your ROCK MAKER version (example: 4.10.x.x.msi). Make sure you enter an accurate version number.
Press Enter.
Question: Why does nothing appear when accessing http://localhost:5000?
Answer:
The service might have stopped running on the ROCK MAKER version 4 server. To solve this problem, go to the server machine and select one of the following:
Restart your computer.
OR
Open Services.
Locate RockMaker Service.

RockMaker Service
Right-click and select Restart.
Clear the browser cache.
Open Task Manager and make sure MaintenanceModeServer is not running. If it is running, end that process.
Question: Why do no images appear in the Canvas menu? This also happens in the Drop and Compare menus.
Answer: Since ROCK MAKER version 4 requires some pre-processing to display the images, it takes a few moments. A green progress chart appears on the bottom right bar of the experiment page to show the progress.

Green Progress Chart
If nothing works after waiting for a few moments, this issue might relate to your image store’s access right. To solve this issue:
Open Services on the ROCK MAKER version 4 server machine.
Locate RockMaker Service and double-click on it.
RockMaker Service
In the RockMaker Service Properties (Local Computer), open the Log On tab.
Select This account in the Log on as section and do the following.
Type your computer username in the This account field or click Browse for an advanced user search.
Type your computer password in the Password field.
Retype your computer password in the Confirm password field.
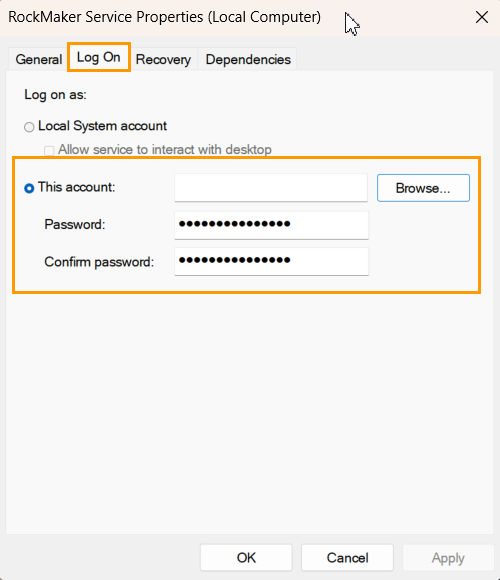
RockMaker Service Properties (Local Computer) Dialog Box
Once everything is set, click OK.
Question: How can I change the port when or after installing ROCK MAKER version 4?
Answer: You can keep the default port and change it once you complete the installation.
To change the port:
Go to your ROCK MAKER version 4 directory and open appsettings.json.
Locate the following configuration keys in the orange boxes in the image below and input your new port. See the examples below:
“Url”: “http://*:7000/”
“Url”: “https://*:7001/”
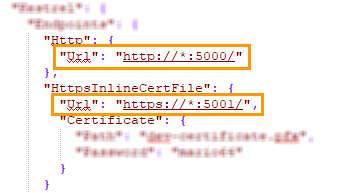
Configuration Keys
Click Save
 or press Ctrl + S on your keyboard to apply the changes.
Go to Services on your computer and restart RockMaker Service.

RockMaker Service