Managing Groups and Access Rights
In TIGA, user access is managed through groups and permissions. Users are assigned to one or more groups, and each group is granted access to specific applications and tables using the Access Control List (ACL). This setup ensures users only see or modify the data relevant to their roles.
Creating a Group
Groups are created to define sets of users that share similar roles or access needs.
Prerequisite:
You must be part of the TIGA team and have administrator access.
To create a group:
Expand the Systems dropdown and select the Security application.
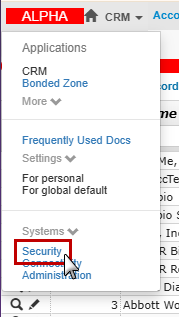
Security System in TIGA
Open the Group table and create a new group by completing the following fields:
Group Name: Enter an appropriate name for the group that identifies the related user.
Is Active: Check to indicate an active group.
Description: Enter a brief description of the group that explains its purpose.
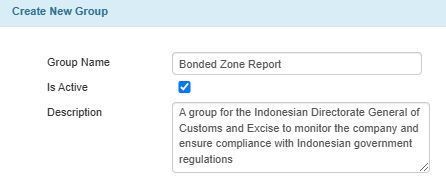
Creating a New Group
Click Create to finish the process.
Post Condition:
The group is now created in the Group table and can be configured with access permissions.
Setting Access and Permissions
Table access rights are a key component of TIGA’s security model. The Access Control List (ACL) manages these rights to determine user permissions and scope on each table. This ensures users only see or update data relevant to their roles and keeps the data secure and consistent.
The ACL works using four permission types:
Permission Type |
Description |
|---|---|
User Read |
Controls which records a user can view. |
User Write |
Controls which records a user can create, modify, or delete. |
Leader Read |
Allows a group leader to view other group members’ records. |
Leader Write |
Allows a group leader to create, modify, or delete other group members’ records. |
Each permission is assigned one of the following numerical scope values:
Value |
Scope Description |
|---|---|
0 |
No access to any records in the table. |
1 |
Access based on the user’s own records. |
4 |
Access to the records of someone in the same group. |
8 |
Access to all records. |
Note
If the Write permission has a higher value than Read, the Write value takes precedence. For example, if Read value is 0 and Write is 8, the user can both read and write all records.
The ACL values can be applied to applications, tables, and groups. This means that in order to gain permissions to a table, you must be a member of a group that has access to that table.
In the following examples, permission columns are configured as 4 consecutive digits, representing: User Read, User Write, Leader Read, Leader Write.
Group |
Permissions |
Description |
|---|---|---|
Employee table in the CRM application. |
||
FORMULATRIX |
8184 |
8: All group members can view all employee records. 1: All group members can update only their own records. 8: Group leaders can view all employee records. 4: Group leaders can update the records owned by people in their groups. |
Qiagen |
0044 |
0: No access for individuals to view the records. 0: No access for individuals to update the records. 4: Group leaders can view records owned by people in the Qiagen group. 4: Group leaders can update the records owned by people in the Qiagen group. |
Currencies table in the Bonded Zone application. |
||
Bonded Zone Report |
8088 |
8: All group members can view all currency records. 0: All group members cannot update any currency records. 8: Group leaders can view all currency records. 8: Group leaders can update all currency records. |
Note
If a user belongs to multiple groups with access to the same application and table, TIGA will automatically apply the highest access level from those groups specifically for that application and table. In the example above, if group members are in the Formulatrix and the Qiagen group, they will inherit the higher value from either group, allowing them to view all and update their own records.
Prerequisite:
You must be part of the TIGA team and have administrator access.
To set access and permission:
In the Security application, open the ACL table.
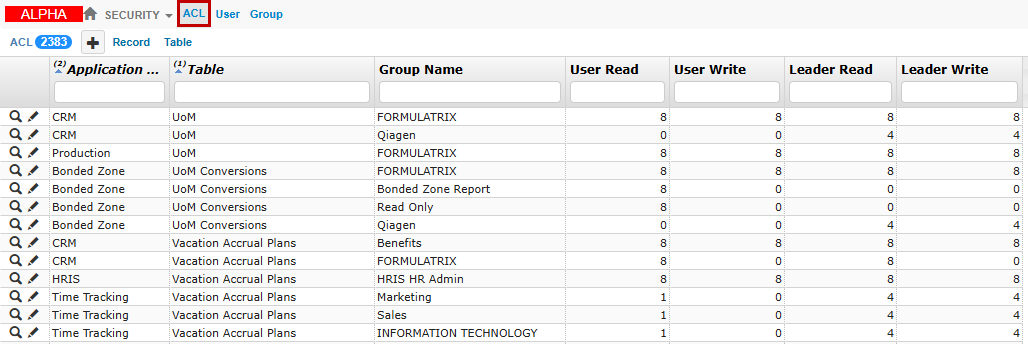
ACL Table
Add a new record for each table the group should have access to, including any related tables.
Complete the fields as follows:
Application Name: Select the application name the settings will apply to.
Table: Select the table name to which the group will have access.
Group Name: Select the group name to assign the permissions.
User Read: Enter a number to define the read access level for users in this group to view records.
User Write: Enter a number to define the write access level for users in this group to create, edit, or delete records
Leader Read: Enter a number to define the read access level for leaders in this group to view records.
Leader Write: Enter a number to define the write access level for leaders in this group to create, edit, or delete records.
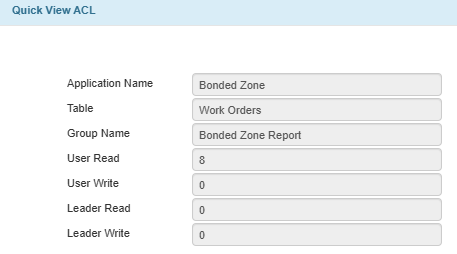
ACL for Bonded Zone Report Group
Click Create to apply the settings.
Post Condition:
Users in the group will now have access to the tables and applications based on the assigned permission levels.
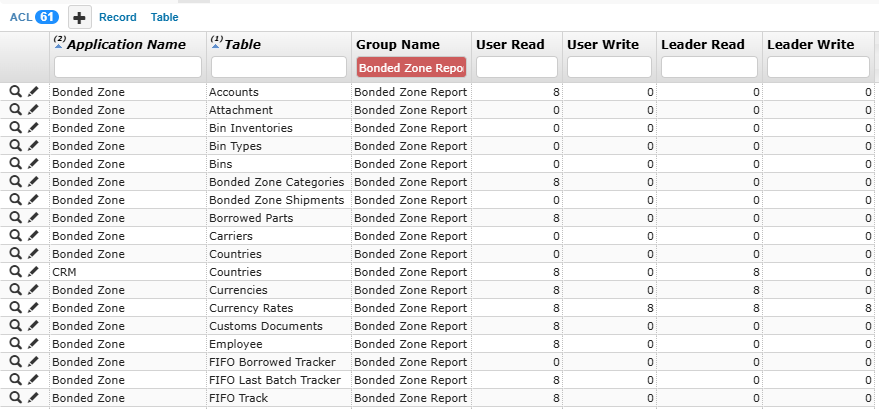
All ACL for Bonded Zone Report Group
Assigning Users to Groups
Once a group is created and its permissions are set, users can be added to it so they inherit its access rights, allowing them to access specific applications or tables.
To assign a user to certain groups:
In the Security application, click Group table. Then, find and select the group name.
Tip
Type the group’s name in the Group Name column to filter.
Click Link
 button in the Group Membership/Related Table. Then, connect the related user account.
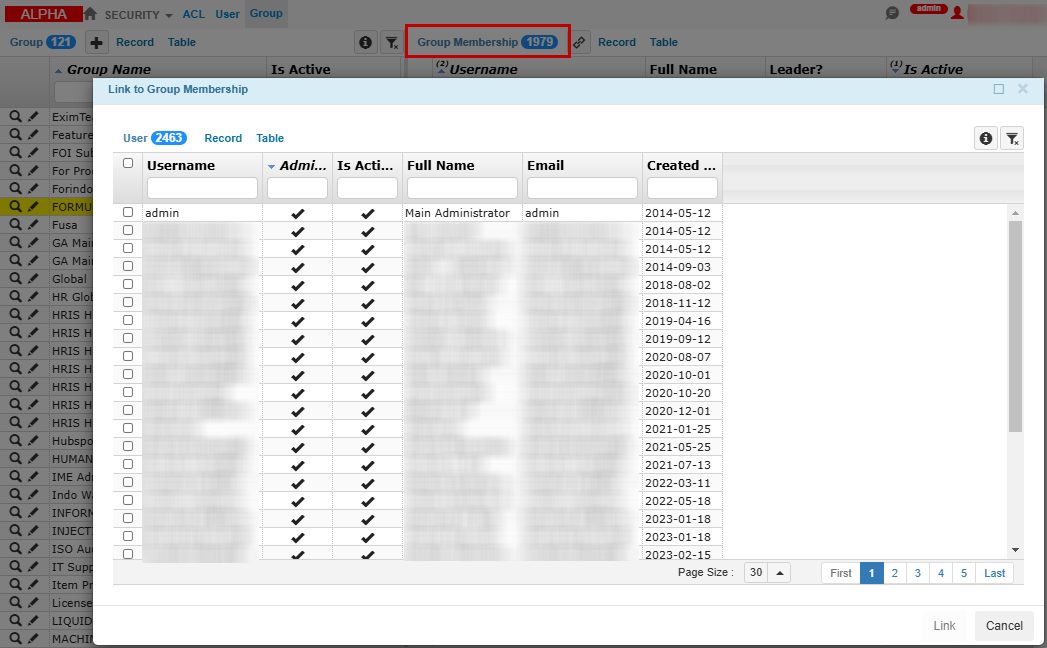
Link a User to a Group
Click Link to finish the process.
Post Condition:
The user is now a member of certain groups.