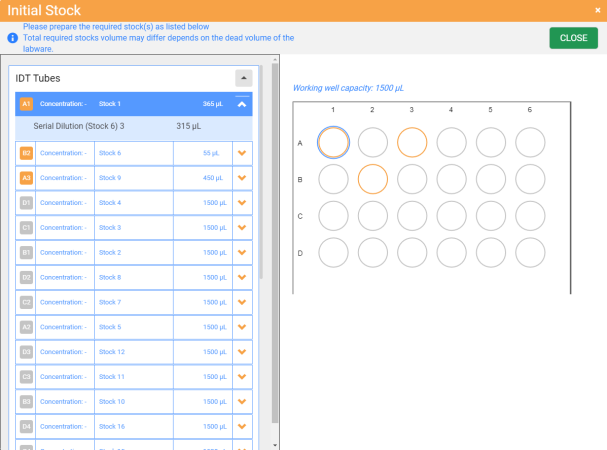
Locate the protocol you want to execute in the Protocol Explorer page, and open the selected protocol.
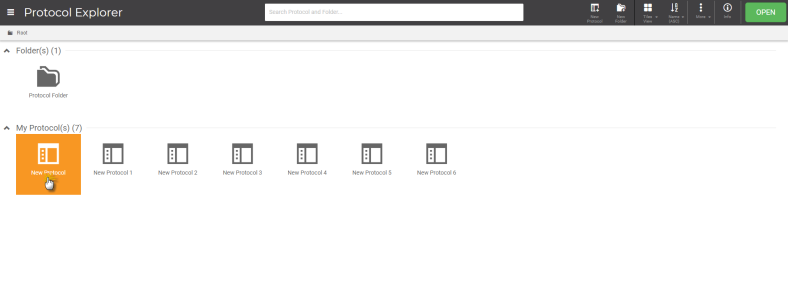
Open the Selected Protocol in the Protocol Explorer Page
OPTIONAL: Before proceeding to the next step, you can perform either of the following tasks in the Protocol Editor page.
Modify the pipetting steps in your selected protocol before executing it. To edit the protocol, use the Edit Step button and modify the step settings according to your preference. To remove a step, use the Delete Step button
 of the selected step.
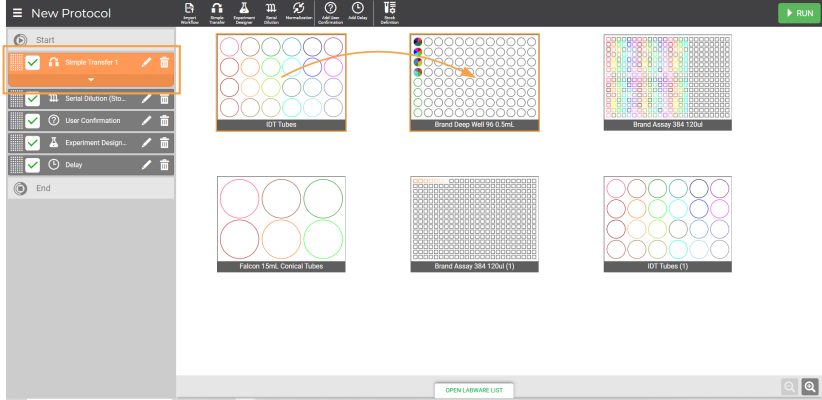
Edit Step and Remove Step Buttons of the Selected Step
By default, the FLO i8 software selects all steps in the current protocol, indicated by the green check box icon . If you wish to run only several of the pipetting steps in the protocol, uncheck the pipetting step(s) that you want to exclude from the pipetting steps list. The FLO i8 will only execute the pipetting steps with a green check in the checkbox.
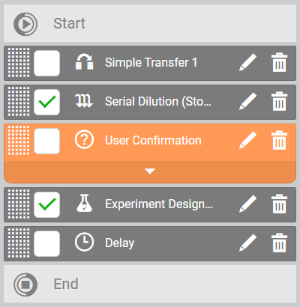
Selecting the Pipetting Steps to be Executed
The FLO i8 software executes the pipetting steps from the earliest to the latest made step. But, you can change the order of the pipetting steps before hitting the RUN button. This way, you can set the steps priority based on your preference. To do so, click and drag the grid button of a selected step that you wish to re-order to the desired position. In the Order Editor panel, you can revert, undo, or redo the modified order. When you are satisfied with the order, click Apply to confirm the changes.
Changing the Step Order
Click the RUN button in the upper-right corner.
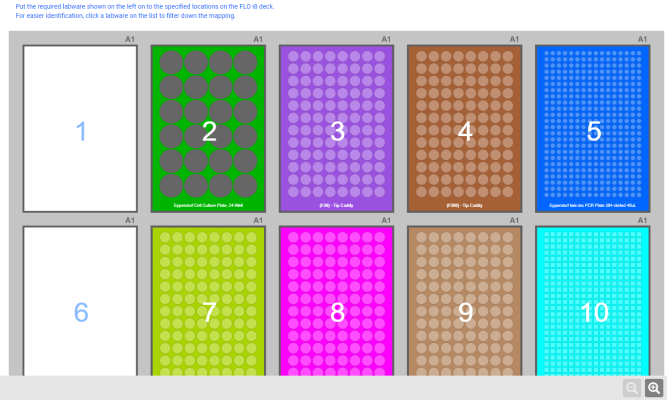
Put the labware that you have prepared on the actual deck by referring to the labware position in the Preparing Required Labware page.
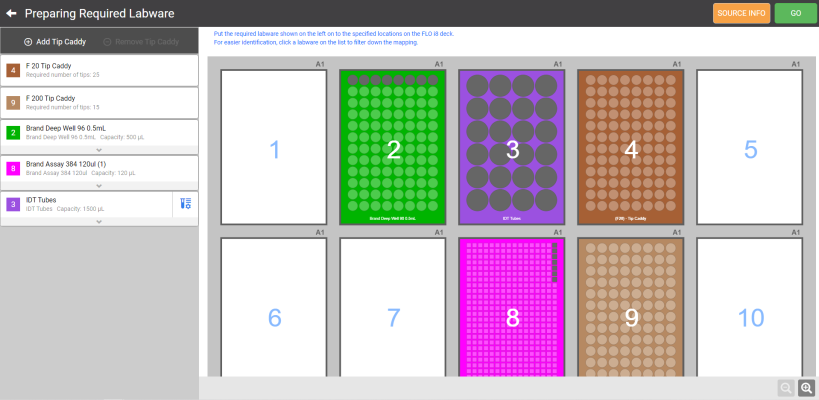
Preparing the Required Labware Page
Important: The actual labware position in the FLO i8 deck must match with the required position as recommended by the FLO i8 system in the virtual deck. The FLO i8 software will automatically detect any invalid labware or position during the execution by highlighting the labware in the Preparing Required Labware page. To continue, make sure you use the correct labware and put them in the position in the FLO i8 deck as recommended by the FLO i8 software. If the problem persists, contact FORMULATRIX support.
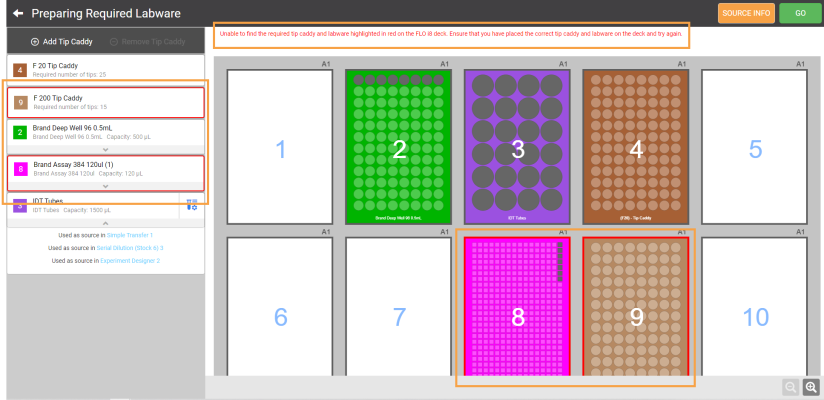
Cannot Execute the Protocol Because of the Invalid Labware
Tip: Click the Zoom In button  at the top side of the plate preview for a bigger labware display. Use the Up
  , Down
  , Right
  , or Left arrow button
  to shift the plate display to the right, left, top, or bottom side. Click the Zoom Out button
  to zoom out or Fit to deck button
  to reset the labware display.
OPTIONAL: You can view the required labware information and mapping, add or remove tip box, and/or view the initial stocks before executing the protocol. For more information, see Virtual Deck Layout Overview.
Click GO to execute the protocol. The running protocol status will be displayed on the Executing page. At this stage, you can pause the protocol execution by clicking the PAUSE button at the top right side of the page and click RESUME to continue. Click ABORT to forcefully stop the running protocol.

A Running Protocol on the FLO i8 Executing Page
Important: Do not open the FLO i8 door during the protocol execution in order to prevent the instrument from damage or other issues.
Congratulations! Your protocol has been successfully executed.
Click REPORT to check and/or download the dispense report, or click CLOSE to go back to the Protocol Editor page.
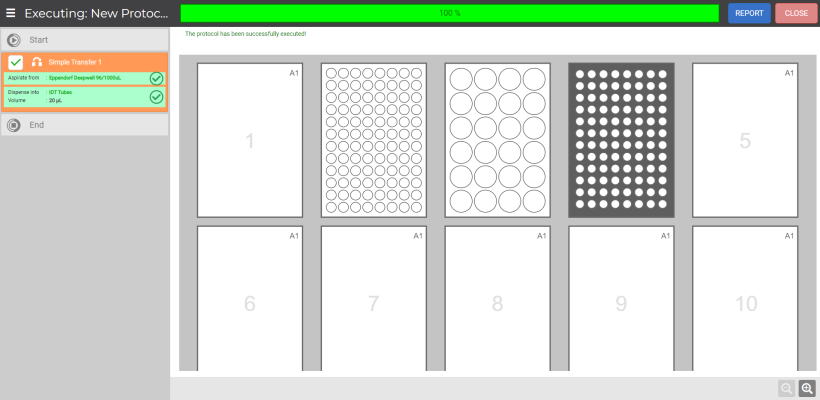
The Protocol is Successfully Executed
 of the selected labware to display the information)
 of the labware to access the stock information). For more information, see
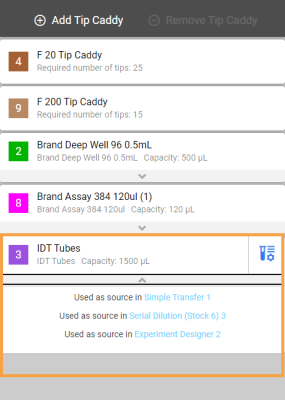
 of the selected labware or select from the labware preview.
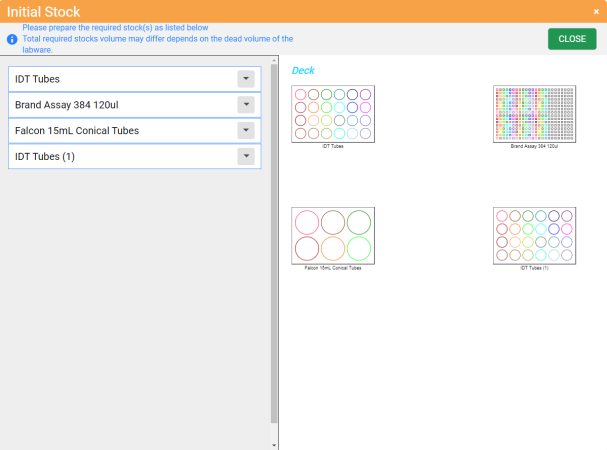
 of the selected stock to display the assigned step and dispensed volume. Click the CLOSE button to go back to the Preparing Required Labware page.