The Experiment Designer mode allows you to create a dispense map in the desired labware using all available stocks that you have. In this section, you will learn how to create a pipetting step using Experiment Designer and identify the List of Stock panel.
Creating an Experiment Designer Pipetting Step
On the navigator bar, click the Experiment Designer button .
.
Select the labware on the virtual deck, and click NEXT.
In the Experiment Designer page, add stock to the Experiment Designer labware by choosing from the following options:
Select a stock or group of stocks in the Stock list, located at the left side of your screen. Then, continue to step 4.
Create a new stock or group of stocks from the available well source by following the steps below:
Click the CREATE STOCK button. This step will lead you to the Stock Setup window.
In the Stock Setup window, define stocks to be used in the Experiment Designer step. For more information, see Setting Up a Stock Definition.
Click FINISH when you’re done. At this stage, your stock will be automatically listed in the Stock list.
Select the stock or group of stocks you have defined.
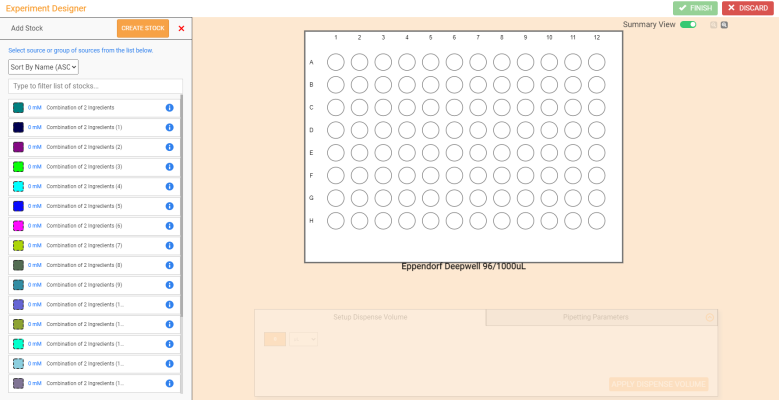
Selecting Stocks in the Experiment Designer Page
Map the stock or group of stocks to the labware by choosing from the following options:
To map a single stock:
Select the destination location in the labware by clicking or dragging over the wells.
Define the volume in mL or μL in the provided field under the Setup Dispense Volume tab.
Click APPLY DISPENSE VOLUME when you’re done.
To map a group of stocks:
Select the destination location in the labware by clicking or dragging over the wells in rows or columns.
Select a dispense pattern using the Stamp or Sample tab at the right side of the labware. The FLO i8 system will automatically provide the mapping patterns based on the number of stocks in the group and available wells in the labware. The mapping patterns will appear if you use a larger number of well labware. See Mapping Pattern Selections for more information.
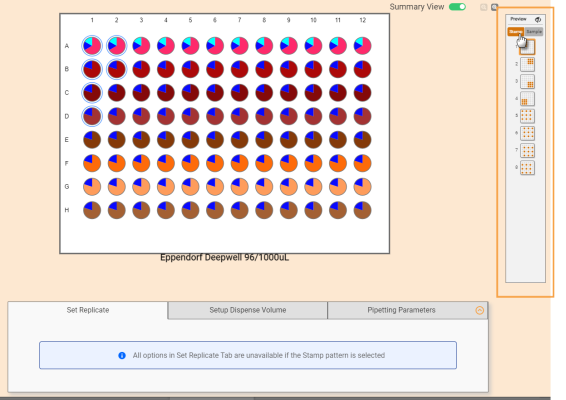
Selecting Dispense Pattern in the Stamp or Sample Tab
Note: The dispense pattern options in the Stamp or Sample tab will appear when transferring liquids to labware with more wells than the source labware.
OPTIONAL: In the Set Replicate tab, define the number of copied mapping patterns by Row or Column and the replicate direction in the provided fields. Set the starting well point by selecting the position under the Starting Well panel.

The Options in the Set Replicate Tab
Note: You can only set the replicate mapping patterns if you select the Sample patterns. The options under the Set Replicate tab will be automatically disabled if a Stamp pattern is selected.
Define the dispense volume in mL or μL under the Setup Dispense Volume tab.
Click APPLY DISPENSE VOLUME when you’re done.
Note: You can modify or remove one or multiple source stock by selecting the checkbox next to each stock, or by selecting the List of Stock option, which will select all the listed source stocks.
If you want to add more stocks later to dispense, click the ADD STOCK button and repeat steps 3-4 accordingly.
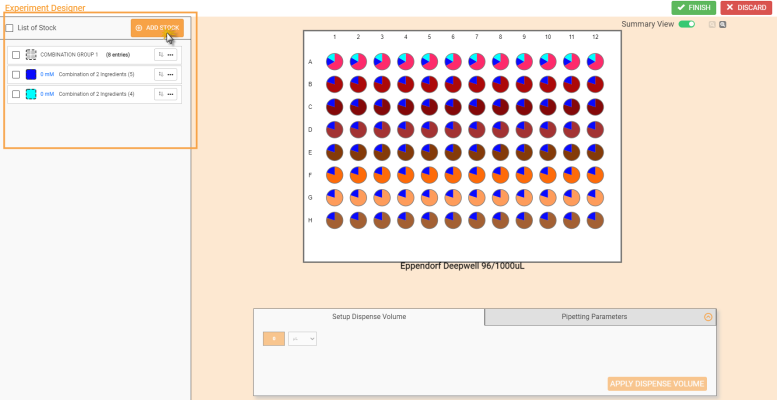
Adding More Stocks to Experiment Designer
Note: If you add a single stock and have mapped a group of stocks in the labware, you can combine the single stock with the mapped group by selecting the available group of stocks to be combined. Set the dispense volume in mL or μL under the Setup Dispense Volume tab afterwards.
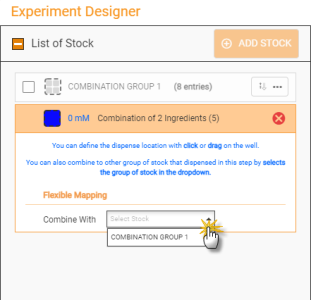
Select a Group of Stocks to be Combined
OPTIONAL: To modify the pipetting parameters as needed, select one or multiple mapped stocks from the Stock list, and then choose from the following options:
Important: Please make sure that you check the pipetting profile before modifying, as it might affect the corresponding steps that are using the current profile in other protocols.
Change the current pipetting parameters with an available pipetting profile listed under the Pipetting Parameters tab. Click APPLY when you’re done.
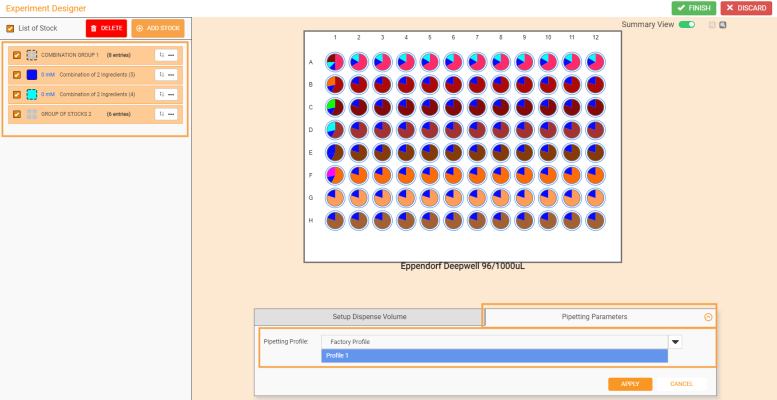
Change the Pipetting Parameters for Multiple Stocks
Modify the current pipetting parameters as you design the step. To do so, click on the Expand button on the Pipetting Parameters tab or click the Settings button
 in the assigned stock if the pipetting parameters profile is invalid or has been removed previously. Then, edit the settings based on your preference.
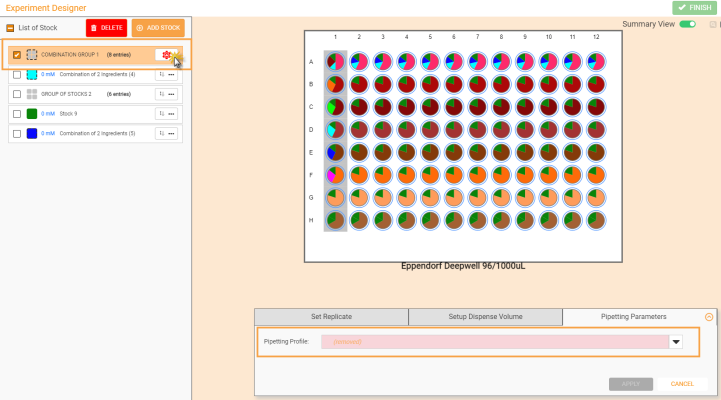
Click the Settings Button to Modify the Pipetting Parameters
Note: You cannot modify the default pipetting parameters. Make sure you have selected the predefined parameters that are available in the Pipetting Profiles Explorer page.
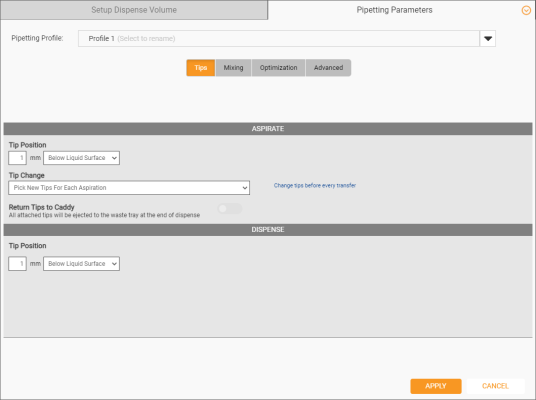
Modifying the Pipetting Parameters
Create a new pipetting profile from the Pipetting Parameters tab by selecting the Creating New Pipetting Profile option on the Pipetting Profile field. Type a new name, and then set the pipetting parameters based on your preference. Click APPLY when you’re done. The new pipetting profile will be automatically saved in the Pipetting Profiles Explorer page. For more information, see Using the Pipetting Parameters.
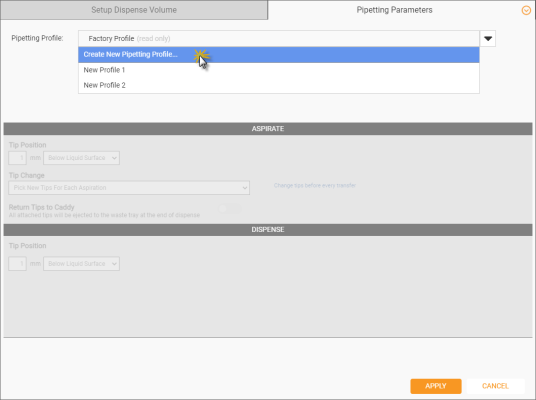
Creating a New Pipetting Profile
OPTIONAL: If you want to remove the mapped stock locations in the current destination labware, select a stock or group of stocks in the Stock list or select the List of Stock option to select all source stocks. Then, click the DELETE button.
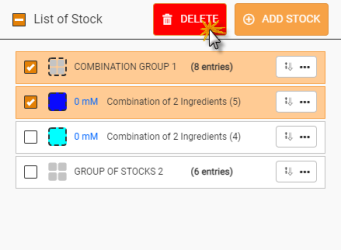
Deleting the Selected Stocks
Tip: Click the Undo button to undo deleting the stocks.
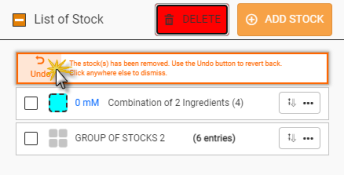
Click the Undo Button
Click FINISH to save the pipetting task and return to the Protocol Editor page.
Note: The FLO i8 system will automatically detect any new stock combination in the current pipetting task. You can see the stock list from the List tab and preview the stock mapping from the Preview tab. Click CREATE STOCKS in the Create New Stock Combinations window to proceed.
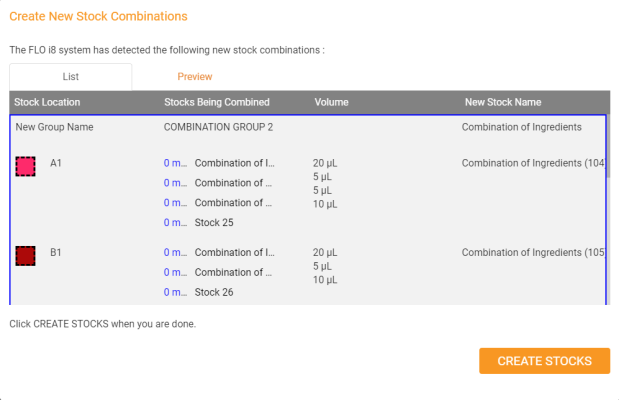
Create New Stock Combinations Window
If you want to create more Experiment Designer pipetting steps, repeat steps 1-8. If you want to edit the pipetting step, follow the steps below:
Click the Edit Card button on the desired pipetting step in the Protocol Editor page.
Important: Make sure you check the steps before modifying. Modifying a saved pipetting step cannot be undone and it might affect all associated steps in that protocol, especially if you reset the pipetting steps order. Click CONTINUE in the Pipetting Task Dependency dialog box to continue.
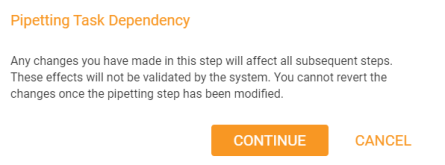
Pipetting Task Dependency Dialog Box
Modify the current step as needed.
Click FINISH when you’re done, or DISCARD and YES, DISCARD to cancel the changes.
Important: If the edited step affects the associated steps within the protocol, a warning icon![]() will automatically appear in the corresponding step, and the protocol will not be executed. Check and edit the affected steps to continue.
will automatically appear in the corresponding step, and the protocol will not be executed. Check and edit the affected steps to continue.
Click RUN to directly execute the Experiment Designer step. If you want to add more pipetting step(s), see the Simple Transfer and Serial Dilution section. For more information, see Executing a Protocol
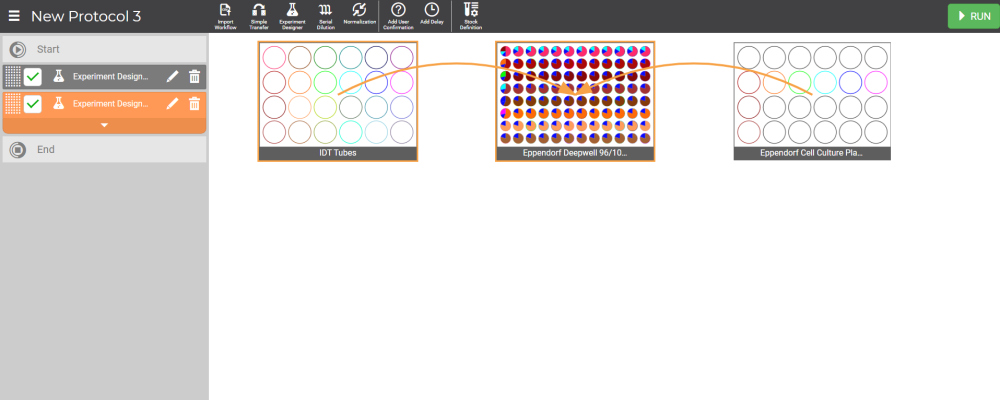
Experiment Designer Pipetting Step in the Protocol Editor Page
The List of Stock panel—that is located at the left side of the Experiment Designer window—consists of a list of stocks in the Experiment Designer pipetting step. This panel will automatically appear after you have mapped the stocks to the labware. In the List of Stock panel, you can easily:
See the image and descriptions below for the detailed options in the List of Stock panel.

List of Stock Panel
| Name | Description |
|---|---|
| DELETE Button |
Use the DELETE button to remove the selected stocks in the List of Stock panel. See step 7 above to remove the selected stocks. Important: Deleting a stock or group of stocks from the List of Stock panel could remove all associated transfers from the specific source. |
| ADD STOCK Button | Click this button to add more stocks to the stocks list. Besides selecting the stocks from the predefined stocks, you can also create a new stock to be added in the stocks list. See step 5 to use this button. |
| Mapped Stock |
Shows you the list of stocks that have been mapped in the destination labware. It can be a single, multiple, or a group of stocks. You can see the mapped stocks in the labware, identified by the colors assigned in the stocks.
Mapped Stocks in the List of Stock |
| Flexible Mapping Panel |
If you have a group of stocks within your stock list, you can combine it with a single stock or combined stocks, as well as modify and/or remove the combinations from the Flexible Mapping panel. To do so, follow the steps below:
|
| Pipetting Parameters Indicator |
In the List of Stock panel, you can see the active pipetting parameters settings that are assigned to the stock. Click on the indicator button
Pipetting Parameters Indicator Active settings are indicated by the green icons, while the white icons indicate inactive settings. Hover your mouse over each icon to see the pipetting parameters item. Click CLOSE to close the pipetting parameters preview. For more information, see Pipetting Parameters. |
| FLOi8Q-V13R021
|