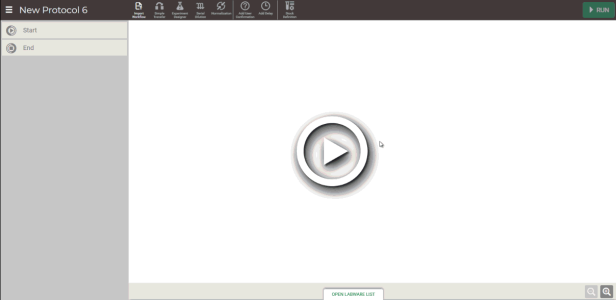
Before using the Experiment Designer and Serial Dilution modes in FLO i8, you must identify any stocks you wish to dispense or dilute. FLO i8 allows you to add single stocks as well as multiple stocks or groups of stocks in your desired source labware.
Creating a group of stocks for a labware in FLO i8 helps you map the dispense location for multiple stocks and dispense them simultaneously with the same volume. This is particularly useful when you are using high-density plates. The Group of Stocks consists of various stocks, indicated by different well colors. You can create a single group or multiple groups in the available well locations within the labware.
Note: Stock setups in FLO i8 can only be used for the active protocol. You must set up new stock definitions or import stock definitions when creating a new protocol.
The Stock Definition Feature in the FLO i8 Software
This topic covers the following sections:
In this section, you will learn how to define stocks in the selected labware.
In the Protocol Editor page, choose from the following options:
Click the Stock Definition button on the Navigator Bar.
Click on Experiment Designer or Serial Dilution, and then click NEXT.
Note: If you are using the Serial Dilution mode, you will need to select the WITH STOCK type before proceeding to the stocks setup.

Click NEXT to Proceed to Set Up the Stocks When Using Serial Dilution
OPTIONAL: Before setting up the stocks in each labware, you can set the stock’s default name, concentration, and volume. To do so, follow the steps below:
In the Stock Setup window, click the SETTINGS button.
In the Settings panel under the Default Value tab:
Type a name you wish to use in the Stock Name field.
In the Concentration field, specify the concentration volume in M, mM, μM, copies/μL, or au to be used for each stock.
In the Volume field, define the default volume in mL or μL to be used for each stock.
Note: The FLO i8 software might automatically adjust the predefined stock volume later on, depending on the selected labware capacity.
Click anywhere in the blank space of the Settings panel or click the Close button  . The FLO i8 software will automatically save the default stock settings.
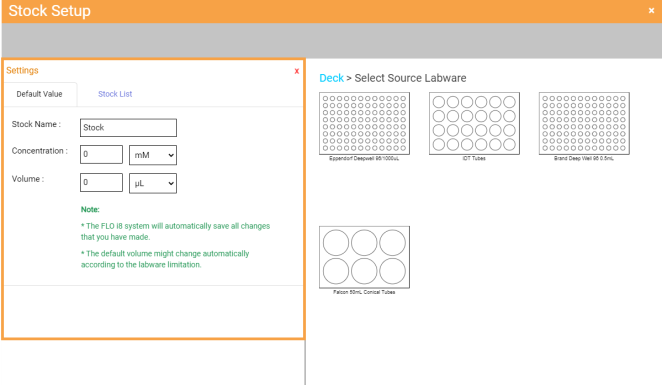
Settings Panel of the Stock Setup Window
In the Stock Setup window, select the source labware for your stocks by clicking the Expand button next to each labware name at the left side of the window, OR by directly choosing a labware image on the labware list at the right side of your screen.
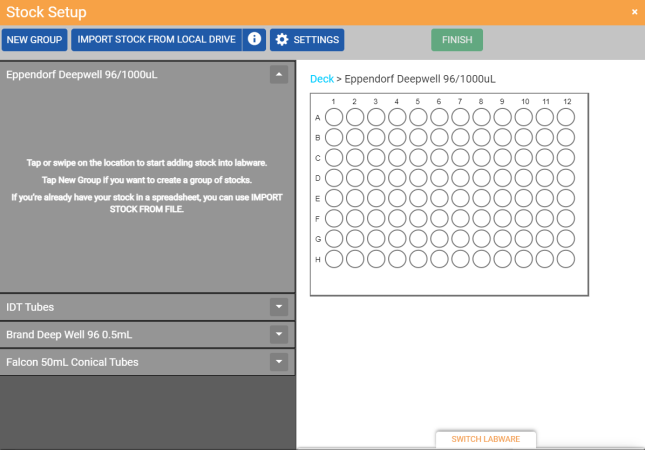
Selecting a Source Labware in the Stock Setup Window
Add the stocks to the selected labware by choosing from the following options:
To select a single source location for the stock, click the desired stock location on the labware.
To select multiple source locations at once, click and drag over the desired well locations on the labware. Select ADD SINGLE STOCK to add a common stock for these locations, or click ADD MULTIPLE STOCKS to add multiple stocks.
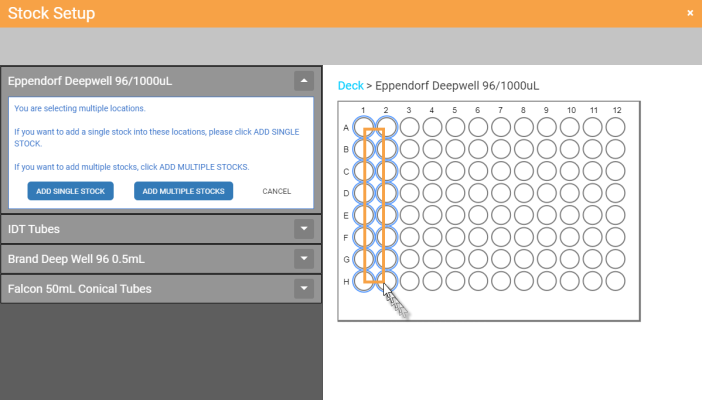
Selecting Multiple Source Locations
To create a group of stocks:
Click the NEW GROUP button at the top left of the Stock Setup window. Then, select from the following location to map the locations:
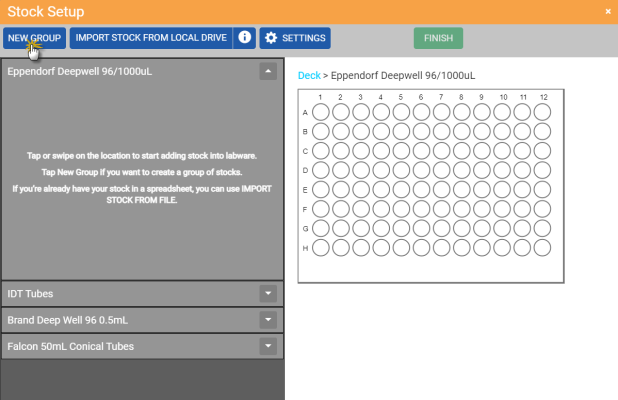
Click the NEW GROUP Button
Important: A well location can only belong to one group at a time.
Click or drag over the desired well locations to add stocks to the group.
Select the Auto Layout option, and then specify the group members as follows:
Select the starting well under the Starting Well panel by clicking the arrow buttons. The default well location to start is A1.
Define the group members along the rows and/or columns by selecting the Column and Row options.
Specify the number of the group members in the provided fields.
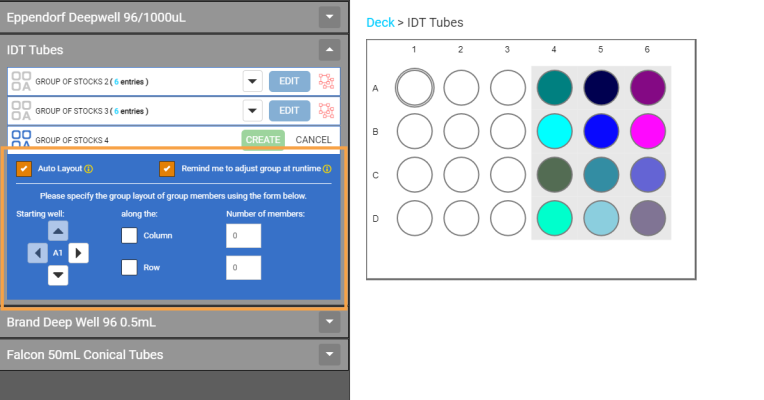
Select the Auto Layout Option
Note: If the Auto Layout option is active, the Remind me to adjust group at runtime option will be automatically selected. By activating this option, a dialog box will appear after you click the RUN button, from where you can adjust the group of stocks before executing the current protocol. You can also deselect this option to directly execute the protocol. For more information, see the Adjust Group of Stocks at Runtime section.
Click the CREATE button when you’re done.
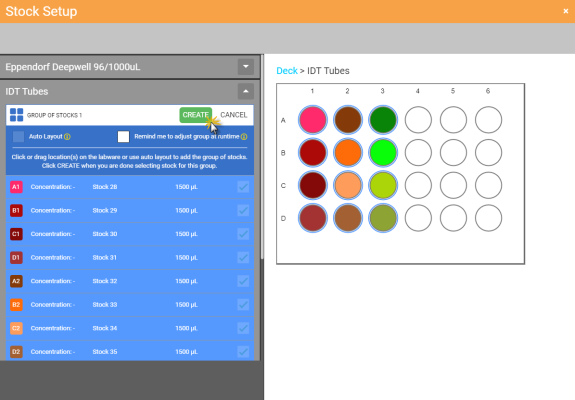
Creating a Group of Stocks
Repeat steps a-b to add more groups to the available well locations.
OPTIONAL: Change the default stock settings by specifying each item as follows:
Edit the Concentration item of the selected stock, and then click APPLY to save the changes.
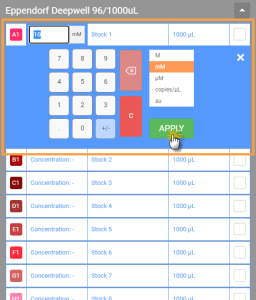
Change the Concentration
Rename the selected stock and press Enter on your keyboard to save the new name.
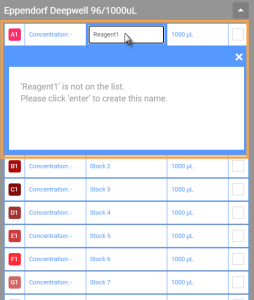
Type a New Stock Name
Edit the Volume item of the selected stock, and then click APPLY to save the changes.
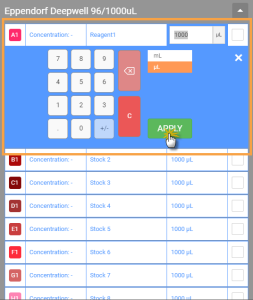
Change the Stock Volume
Note: If you do not define the source stock volume, the system will automatically set the volume to the maximum well capacity of the selected labware.
OPTIONAL: To switch labware, click the SWITCH LABWARE button under the labware preview. Then, double click the available labware in the labware list. The FLO i8 will automatically list the selected labware in the labware list.
Note: If you already set the stocks, you can only switch labwares with the same number of wells. Otherwise, you can switch the labware with the available labware from different types based on your preference.
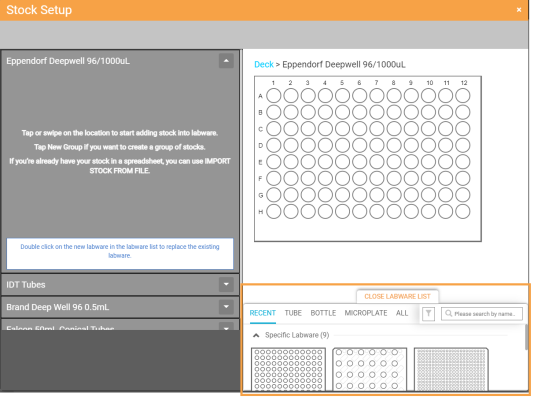
The Labware List of the Switch Labware Button
Repeat steps 2-6 If you wish to add more stocks for the remaining wells of the selected labwares.
Click FINISH to save the stock definition and go back to the Protocol Editor page. You can now use the stock definition in your protocol.
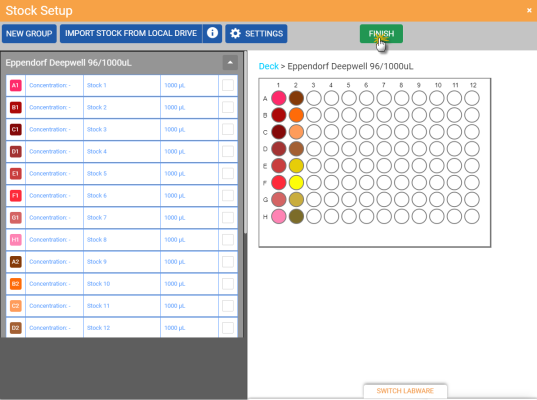
Click the FINISH Button
To easily define your stocks — especially if you are using 96 or 384 well plates — you can import a stock definition file from your local drive or USB flash drive to the FLO i8 software. You can import one or multiple stock definition files into a labware, depending on well availability. To use the multiple stock definition files in one labware, you will need to import the files individually.
In an imported stock file, you can only define either a single/multiple stocks or group of stocks file, you cannot define both at the same time. Follow the steps below to import a stock definition file.
You have a predefined stock definition saved in the .CSV format. If you do not have the stock file template, you can download the .CSV file from the Stock Setup window. To do so, follow the steps below:
Click the Import Stock Information button  on the top of the labware list.
In the INFO panel, click the GET THE TEMPLATE button to download the .CSV file and save it into your local drive.
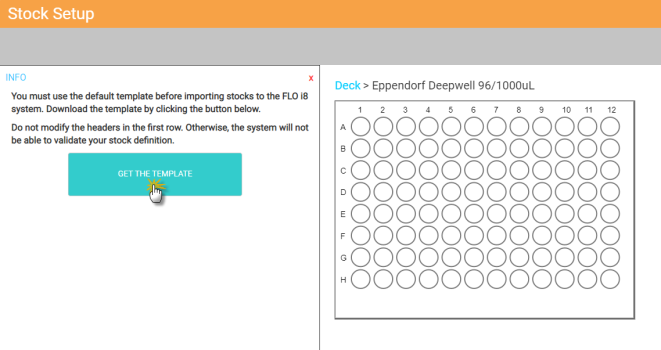
Click the GET THE TEMPLATE Button
Click the Close button  to close the INFO panel.
You have selected the required labware in the Protocol Editor. The labware selection must be able to accommodate all stock locations defined in the .CSV file.
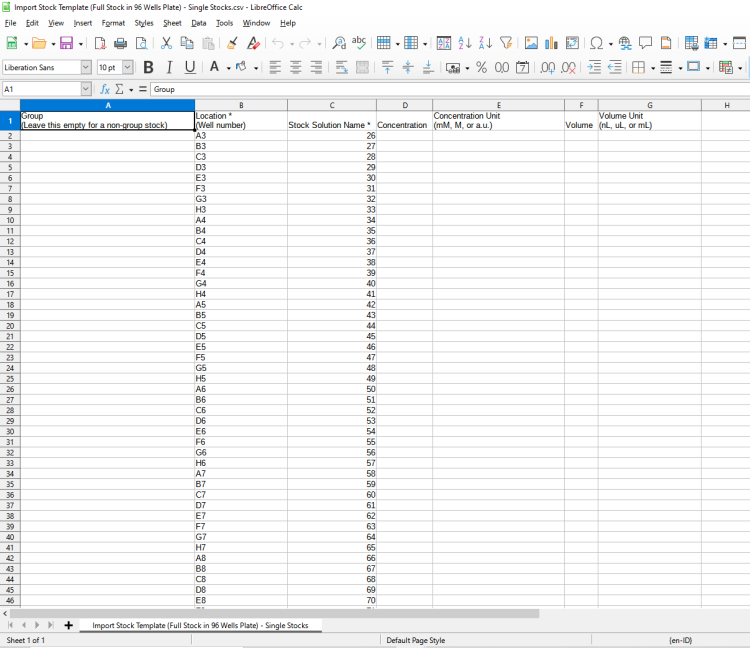
Stock Definition Sample File of Multiple Stocks
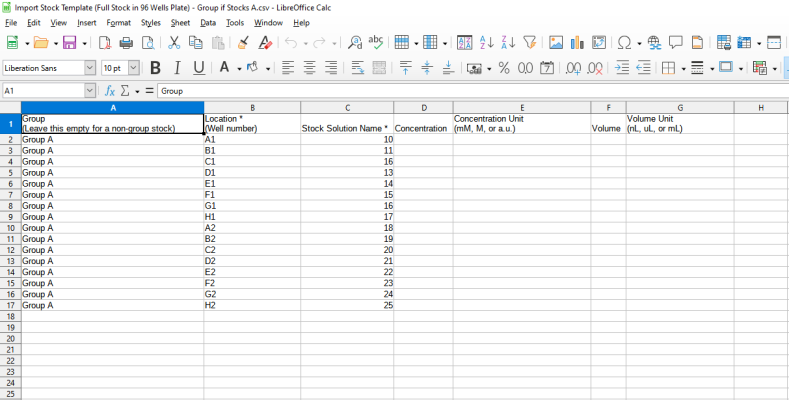
Stock Definition Sample File of a Group of Stocks
In the Stock Setup window, select a labware from the labware list.
Click the IMPORT STOCK FROM LOCAL DRIVE button on the top of the labware list.
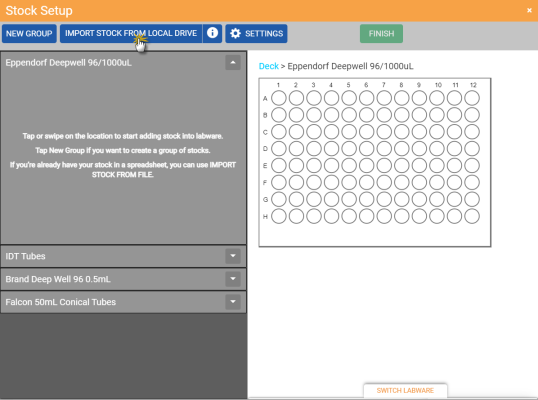
Click the IMPORT STOCK FROM LOCAL DRIVE Button
Then, locate and open the .CSV file in the file browser window to import the stock file.
Modify the stock settings or click FINISH to save the stock definition and create a pipetting step.
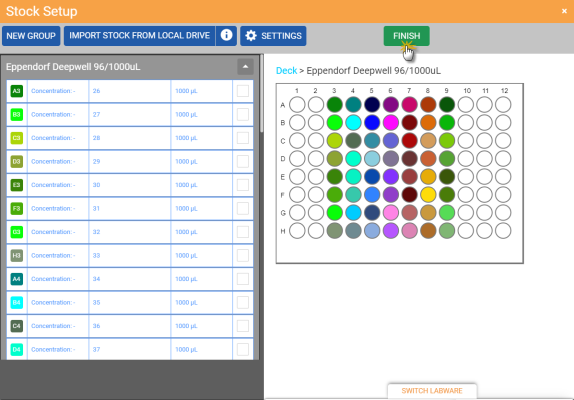
Finish Importing the Stock Definition File
You can modify the initial stocks that you have defined in the source labware. However, the defined source stock cannot be modified if it has been combined with other stocks, as it might affect all previously associated destinations. If there are any stock combinations within the selected labwares, the FLO i8 software will automatically update the defined stocks list of the corresponding labwares in the Stock Setup window by adding or changing the stocks based on the combination in the assigned steps. Follow the steps below to modify the initial source stocks.
Important: Modifying any values of the defined stocks will override the previous stock setup and update the stock definition in all applicable pipetting steps. Before proceeding, ensure that you have saved all important setup for future use.
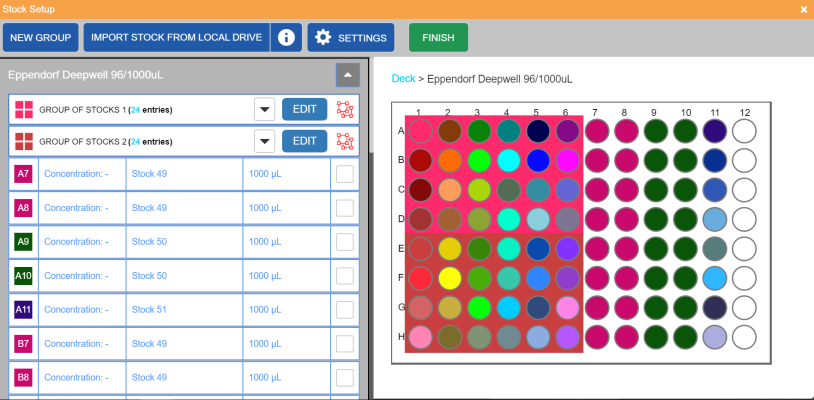
Initial Source Stocks in the Stock Setup Window
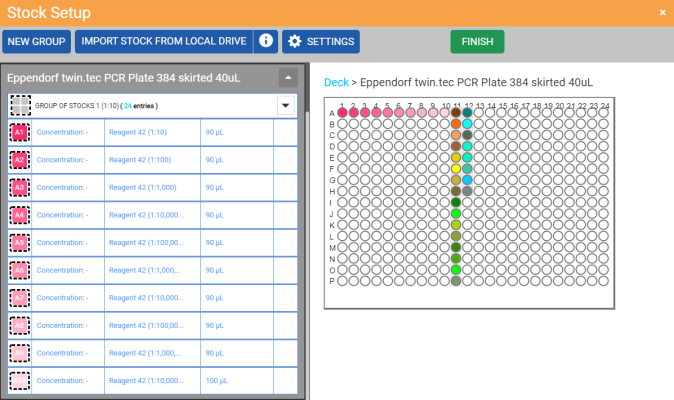
Source Stocks Combination in the Stock Setup Window
In the Protocol Editor page, click the Stock Definition button  on the navigator bar.
Select the desired labware, and modify the stock value as needed. You can choose from the following options:
To add more stocks to the available locations in the selected labware, follow step 4.
To modify the concentration, click the Concentration tab of the selected stock. Define a new value for your concentration, and click APPLY to save the new value.
To rename the initial stocks, choose from the following options:
To rename a stock, click the Stock Name tab, type a new name in the Name box, press Enter on your keyboard or click anywhere on the blank space of the labware list to save the changes.
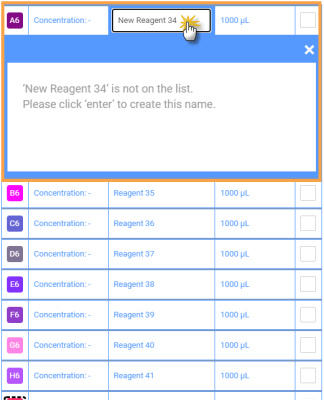
Rename a Single Stock in the Source Labware
Note: If you rename a stock with the existing name, click RENAME after typing the stock name to confirm the changes.
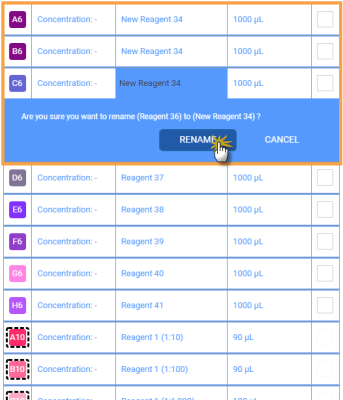
Rename a Stock with an Existing Name
To rename a stock that has been used or defined in multiple locations:
Type a new name in the Stock Name tab of the selected stock.
Click RENAME to rename the selected stock in the current location, or RENAME ALL to update the stock in any other applicable locations.
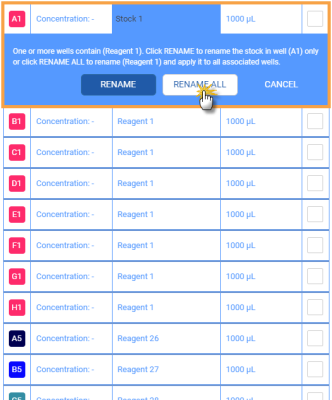
Rename a Single Stock That Has Been Assigned to Other Locations
To modify the volume, click the Volume tab of the selected stock. Define a new volume and click APPLY to save the new value.
To remove a stock, you can do one of the following actions:
To remove all stocks:
Select a stock, then click the SELECT ALL button.
Click REMOVE SELECTED and choose YES, REMOVE to confirm.
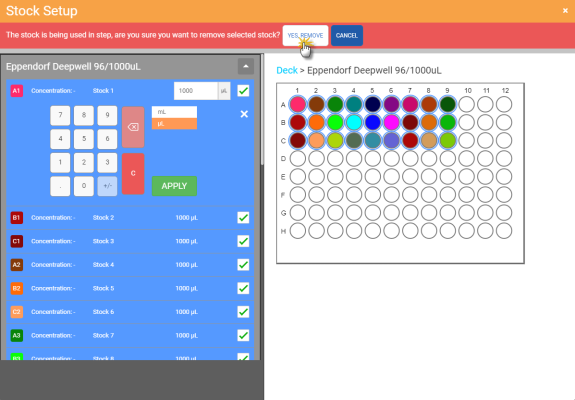
Click the YES, REMOVE Button
To add more stocks to a group, click EDIT, then click or drag the desired available wells. Click APPLY to save your selection.
Note: You can also use the Auto Layout option if you have previously selected it when creating the group of stocks. Otherwise, this option will be automatically disabled. To add more stocks from the available location, see step 4 in creating a group of stocks.
To rename the GROUP OF STOCKS, click the Name box of the desired group, and type a new name. Press Enter on your keyboard or click anywhere on the blank space to save the changes. The stock name can only be edited in 20 characters maximum.
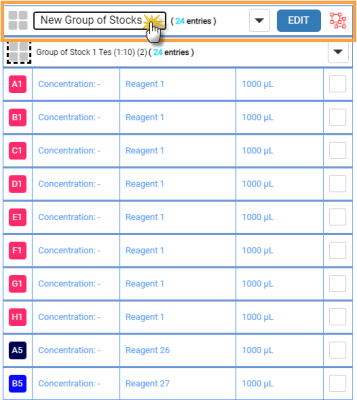
Rename a Group of Stocks
To edit the volume of the member stock of the group, click on the Volume tab of the selected stock. Then, define the volume and then click APPLY to confirm.
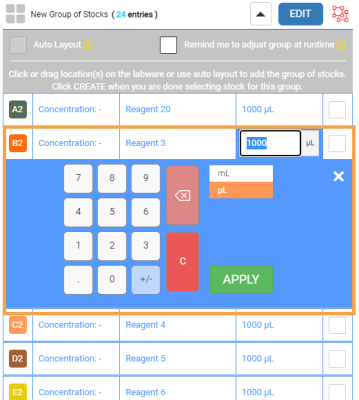
Edit the Volume of Group Member
Choose from the following options to remove stocks from the group:
Select the checkbox located at the right side of the desired stock and click the REMOVE SELECTED button. Choose YES, REMOVE to confirm.
Double click the selected stock in the labware preview, and then click YES to confirm.
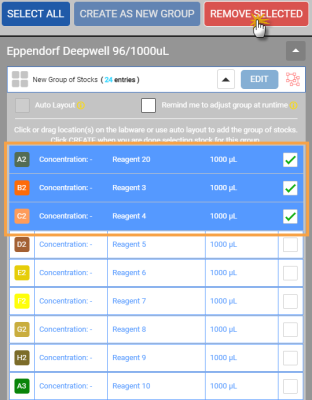
Select Multiple Stocks to be Removed from the Group
Click the selection box of the selected stock(s).
Then, click the SELECT ALL button to include the remaining stocks in a group.
Click REMOVE SELECTED, and then click YES, REMOVE to confirm.
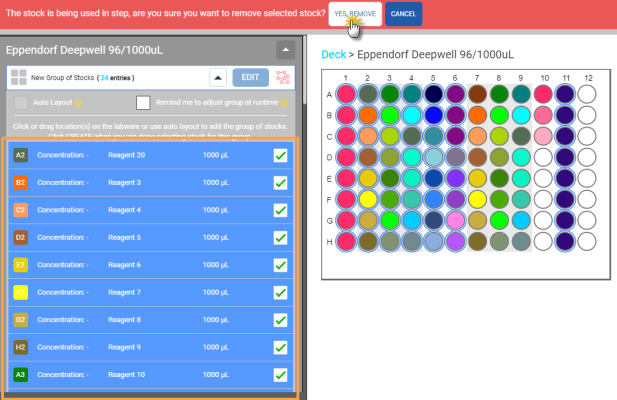
Remove All Stocks From the Group
To ungroup the stocks, click the Ungroup button of the selected Group of Stocks. Click YES, UNGROUP ALL to confirm.
Note: If you wish to keep several stocks in the same group, select the stocks you want to keep by clicking on the checkbox of each stock, click CREATE AS NEW GROUP, and regroup them as in step f.
If you have multiple stocks in different locations within a labware, you can merge them into a group of stocks. To do so, select the stocks you wish to merge, and then click CREATE AS NEW GROUP. Click CREATE to save the group.
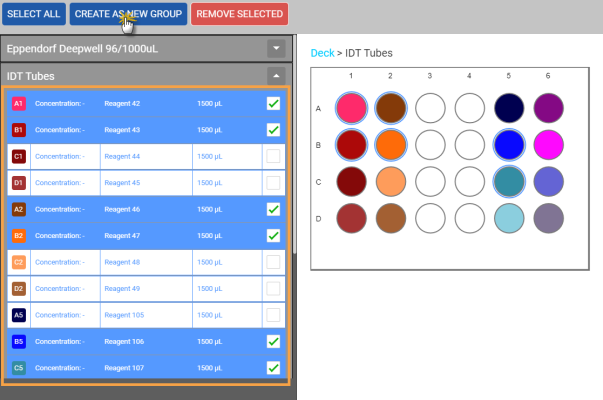
Create a New Group of Stocks
Click FINISH to save the changes and go back to the Protocol Editor page.
If you select the Remind me to adjust group at runtime option when creating a group of stocks, FLO i8 will prompt you to adjust the stocks before executing the protocol. A Reminder Adjust Group dialog box will automatically appear after you click the RUN button in the Protocol Editor page, allowing you to adjust the stock. This option is useful especially if you edit the group of stocks that you are using regularly.
In the Reminder Adjust Group dialog box, you can only edit the number of stocks being used. Follow the steps below to adjust the group of stocks.
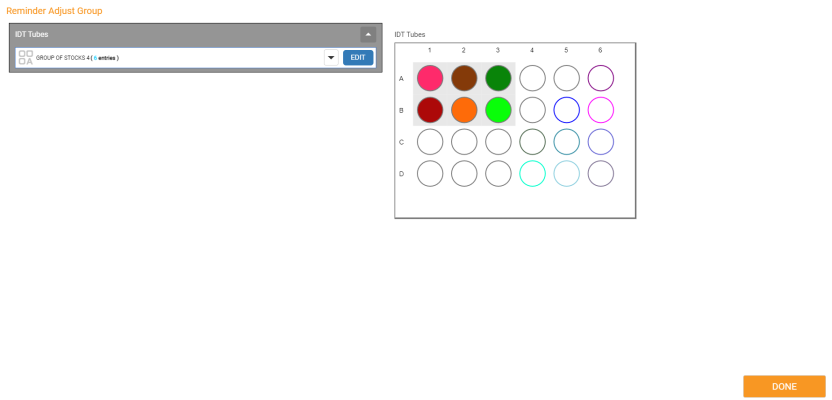
Reminder Adjust Group Dialog Box
To view the list of stocks, click the Expand button  of the group of stocks in the selected labware.
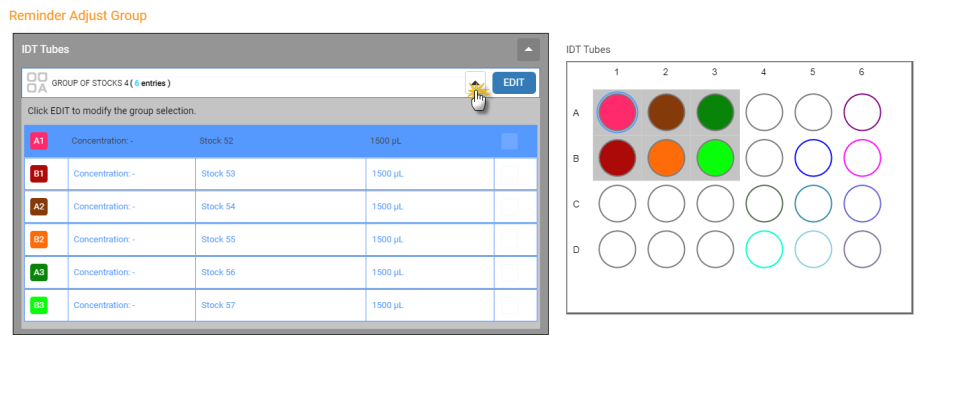
View the Stock List
To edit the number of a group of stocks, click the EDIT button of the selected group in the labware and modify the stocks:
To edit the stocks locations, move the well position to the empty location by specifying the starting well from the Starting Well panel.
Choose the following options to remove or add the number of stocks.
If you select the Auto Layout option, you can type the number you wish to use along the columns or rows in the provided field. Click APPLY when you’re done.
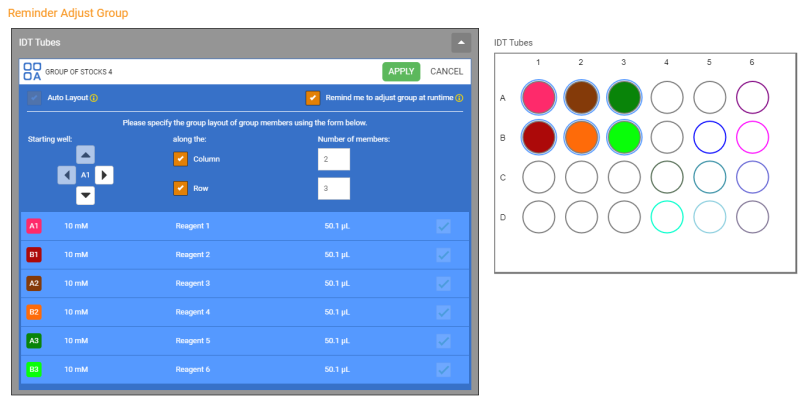
Edit the Group of Stocks Member
Double click on the desired stock in the labware preview, and then click YES to confirm.
Note: You can only add more stocks if there are empty wells in the current labware.
Click DONE to save the changes and continue to the Preparing Required Labware page.
| FLOi8Q-V13R021
|