Preparing LCP Samples
NT8 with the LCP option includes an LCP mixer that allows you to prepare samples for running LCP experiments. There are three main steps in performing an LCP experiment:
Preparing an LCP sample, covered in this section
NT8 can help you quickly mix the protein sample and lipids required for LCP sample preparation by moving the mixer plunger from side to side. This process will continue until the mixture is homogeneous. To do so, you must first prepare the NT8 hardware and set up the software by following the tutorial below:
Important
The maximum total volume of the two syringes to be mixed should be 70 μL. If the volume exceeds the allowed limit, the liquids might not end up thoroughly homogenous.
Setting Up the NT8 V4 Hardware
Prerequisites:
Two available syringes
A coupler
To set up the NT8 V4 hardware:
Prepare two LCP glass syringes that have been filled with solution and protein.
Mount the coupler on the LCP syringe, and join the two LCP syringes using the coupler. Make sure both syringes are conjoined.
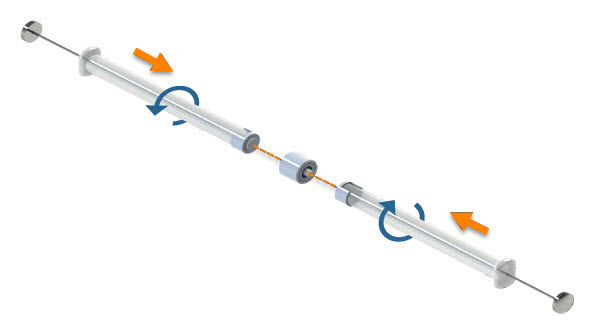
Join the Two LCP Syringes
Install the syringes on the mixing station by gently pressing the barrels into the mixing bracket until they snap into place. The coupler must be placed in the white bracket.

Install the Syringes
Setting Up the NT8 V3 Hardware
Prerequisites:
Two available syringes
A coupler
To set up the NT8 V3 hardware:
Connect the mixer plunger (marked as number 1 in the image below) to the stage.
The mixer plunger should be positioned on top of the reference hole (marked as number 2 in the image below) located on the stage.
Slide down the mixer plunger to the hole with your thumb and forefinger.
Press down the locking knob with your other thumb until it gets into the hole. The knob will then be locked automatically. Ensure that it firmly locks the mixer plunger.
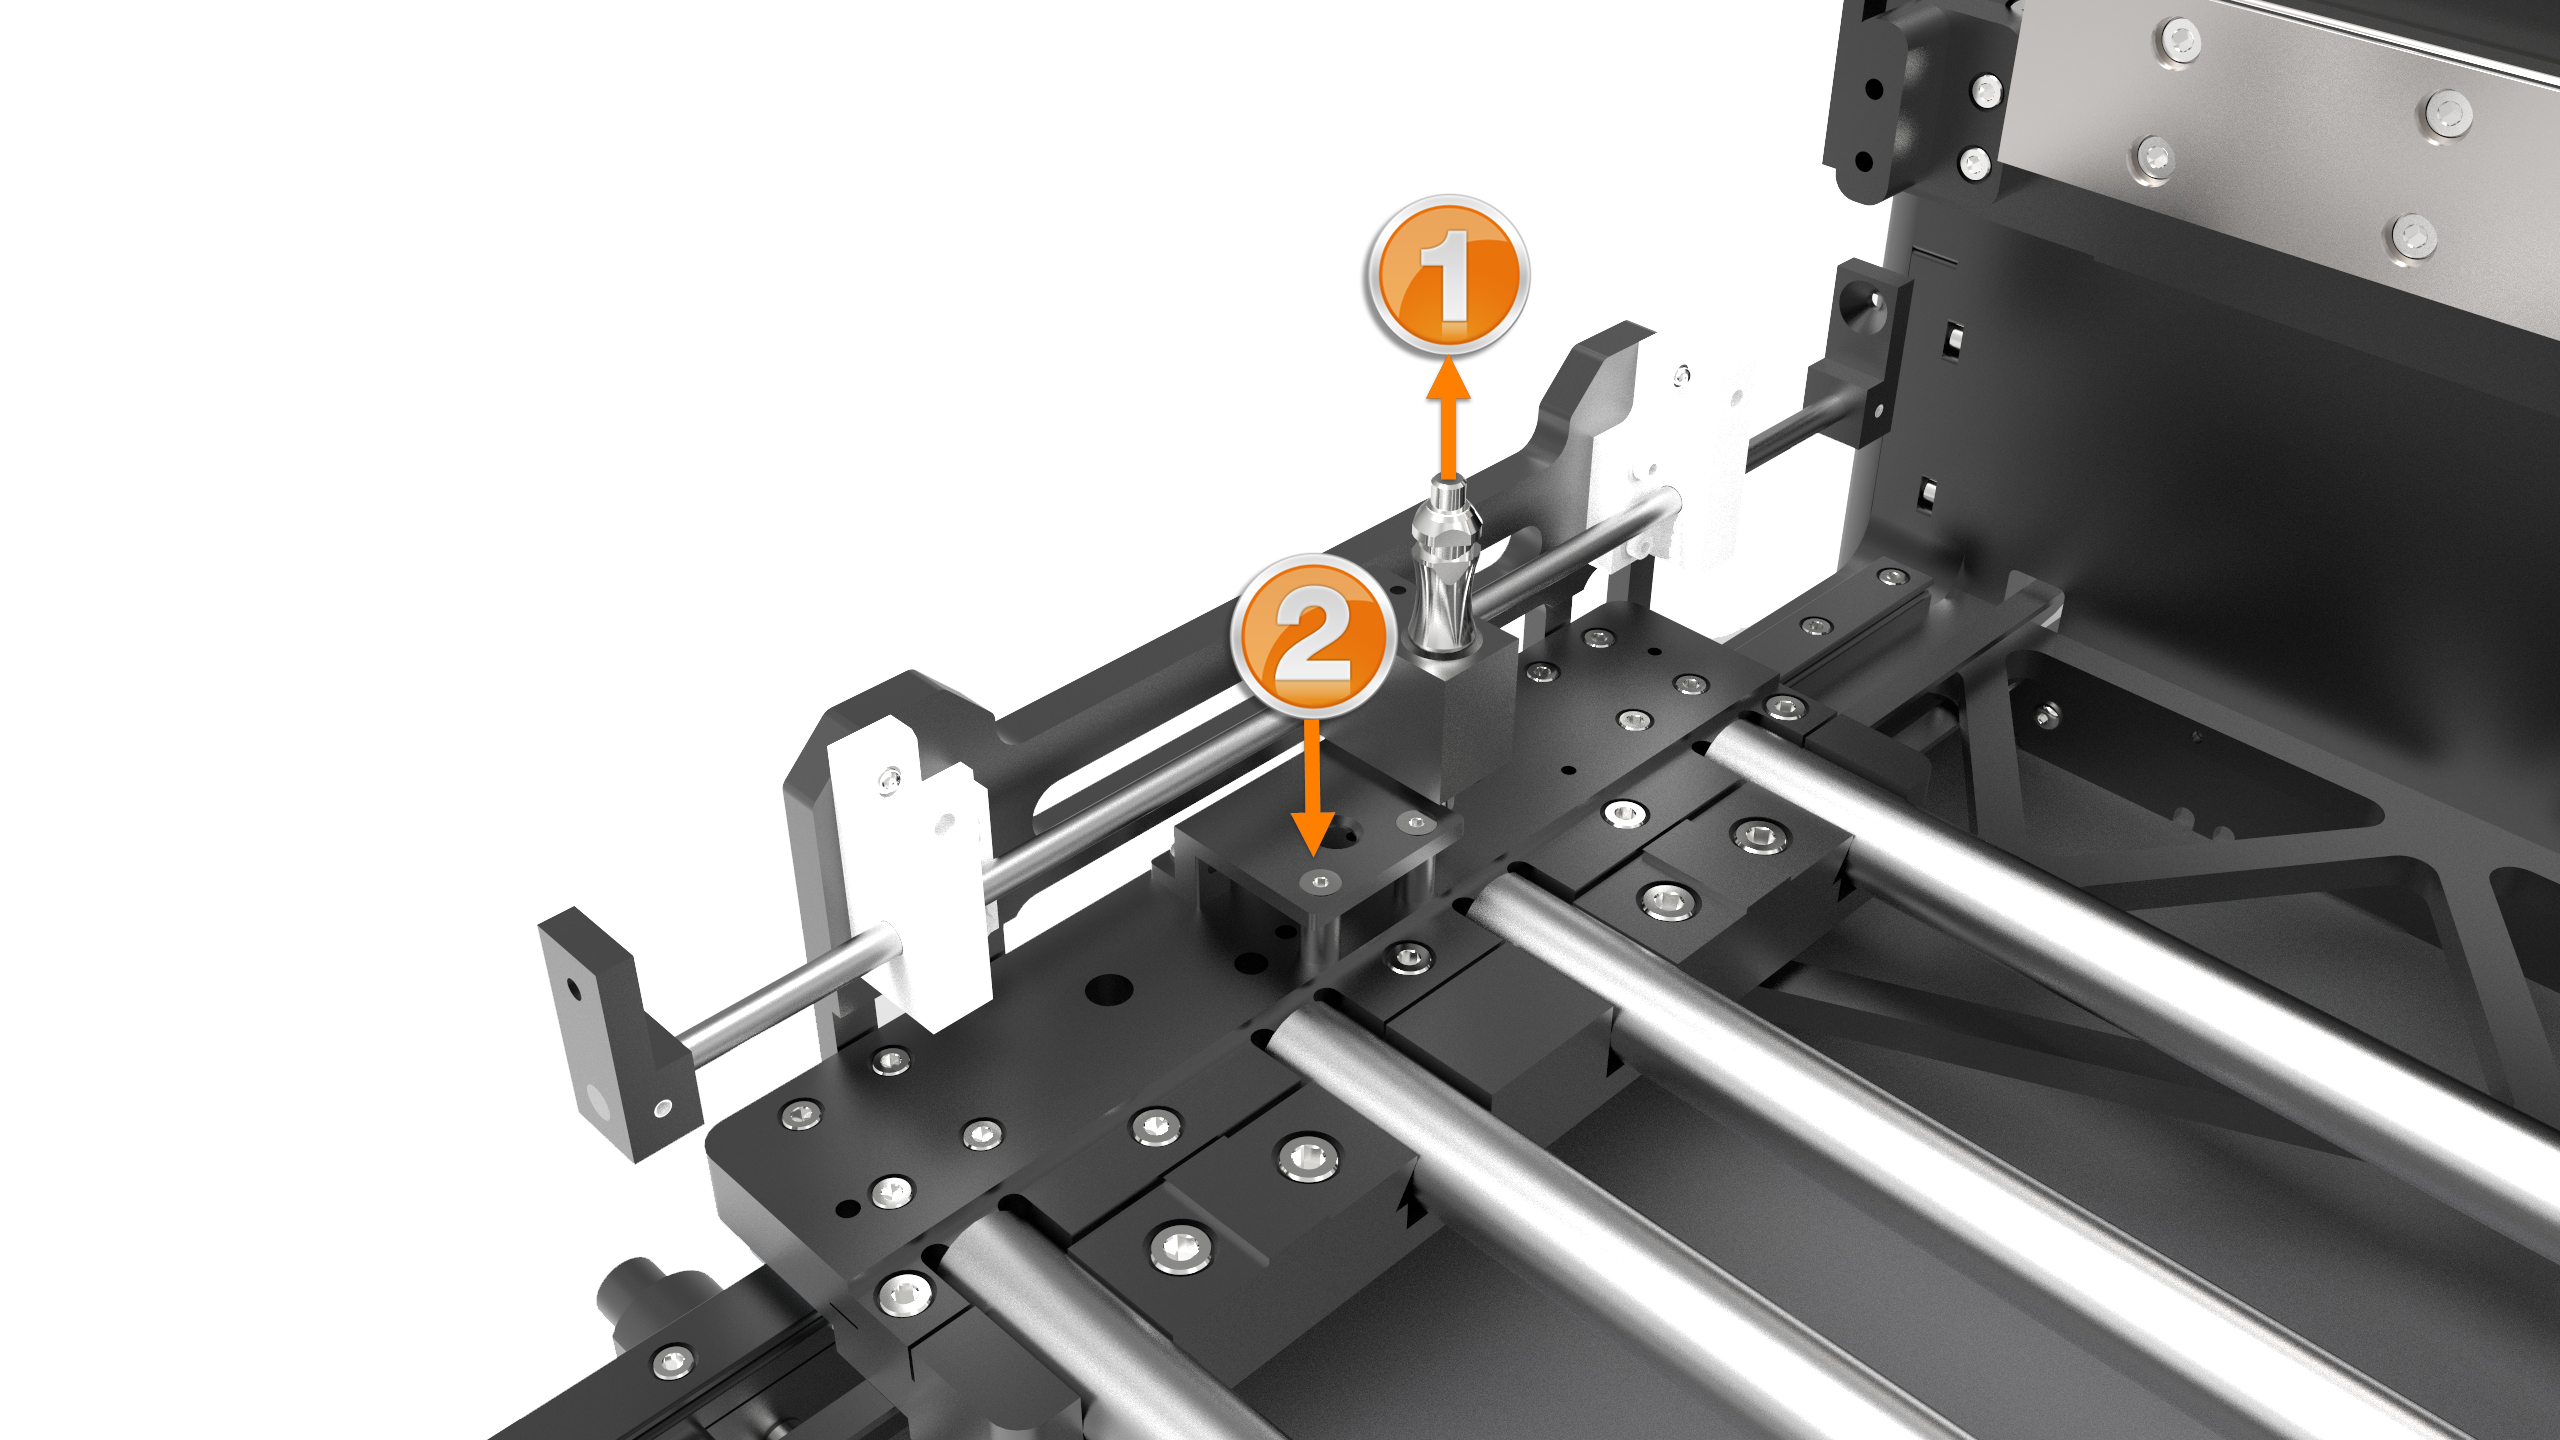
Connect the Mixer Plunger to the Stage
Prepare two LCP glass syringes that have been filled with solution and protein.
Mount the coupler on the LCP syringe, and join the two LCP syringes using the coupler. Make sure both syringes are conjoined.
Join the Two LCP Syringes
Install the syringes on the mixer by inserting them to the mixer slots. When you insert the syringes, make sure both ends of the plungers reach the stoppers.
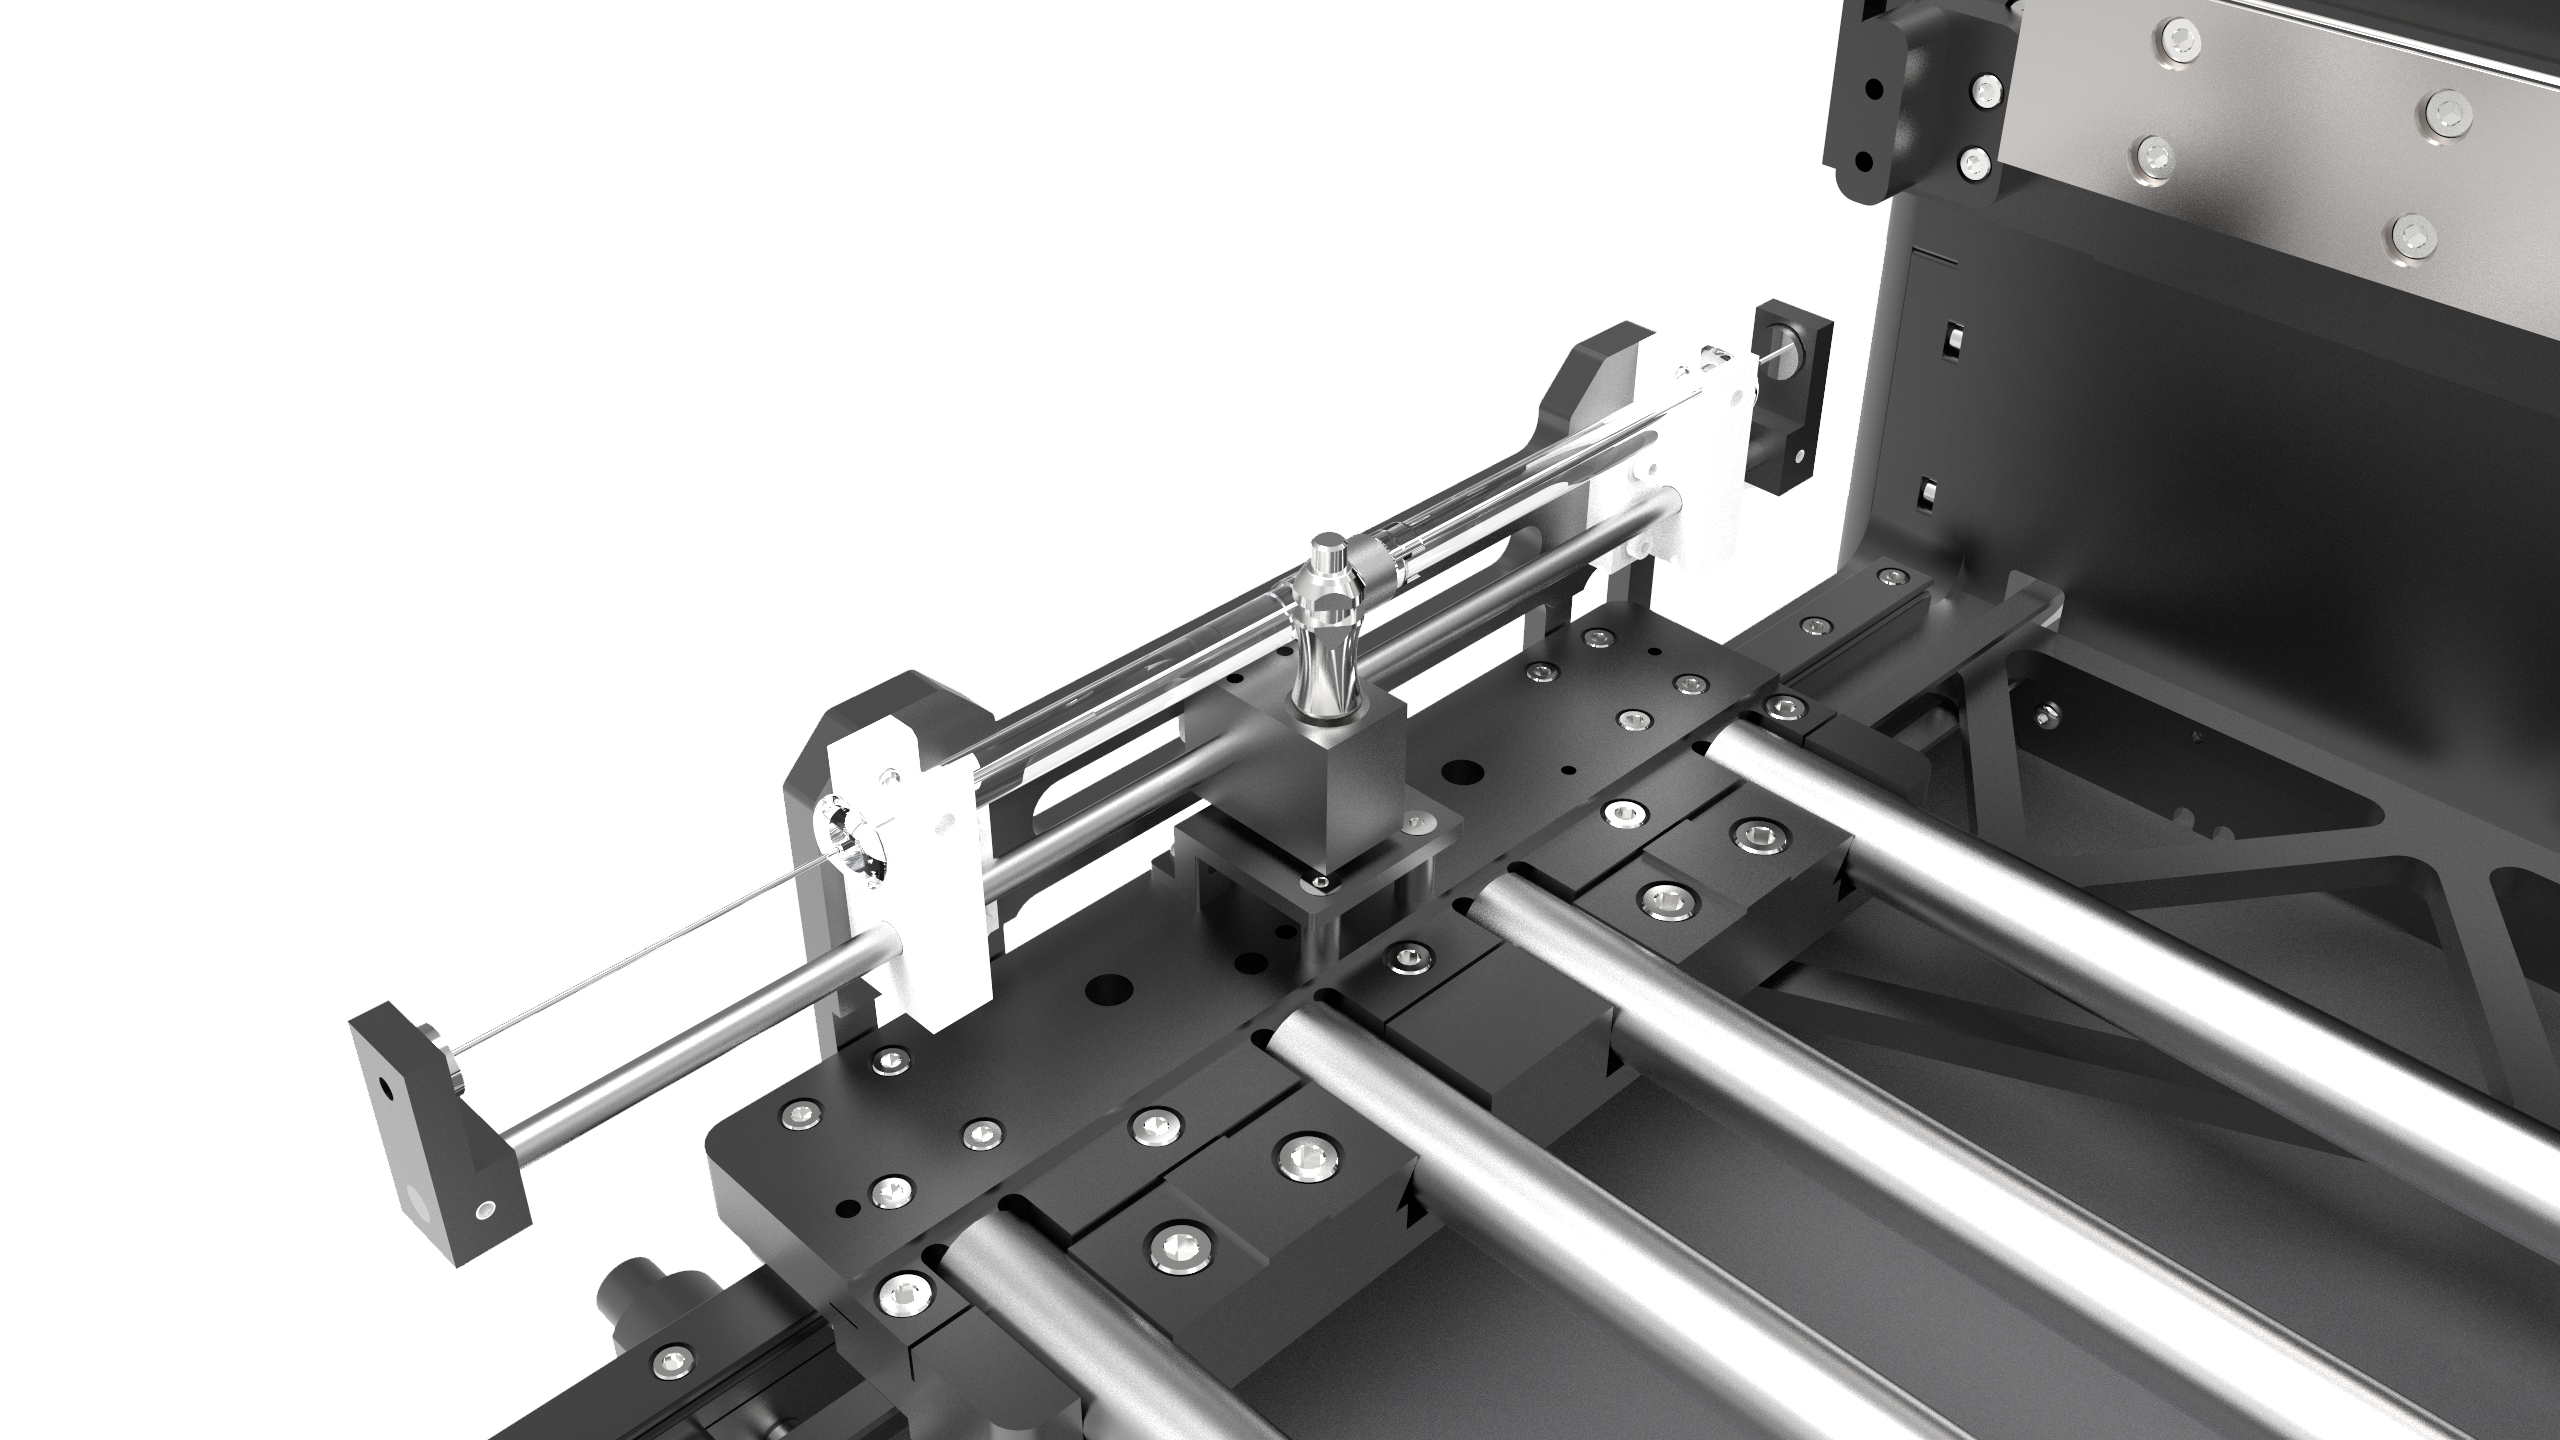
Install the Syringes
Setting Up the NT8 Control Software
Prerequisite
You have to set up the NT8 hardware
To set up the NT8 Control Software:
Click the Mix LCP button on the LCP Syringe Control panel.
On the Mixing LCP Wizard, click Next to continue.
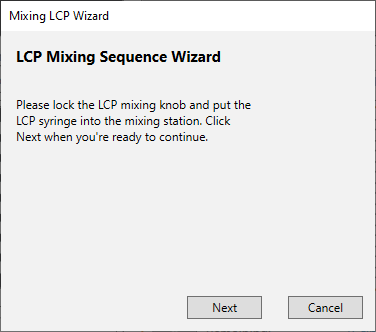
Mixing LCP Wizard
Note
If the below message appears, ensure that you have properly locked the LCP mixing knob and put the syringe in the mixing station before continuing.
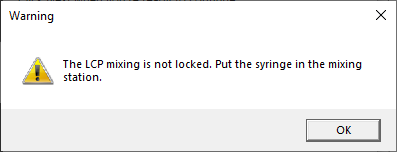
Warning Message to Lock the LCP Mixing Knob in the Mixing LCP Wizard
Then, set how many mixing cycles that you want the NT8 to perform in the Number of mixing cycles field.
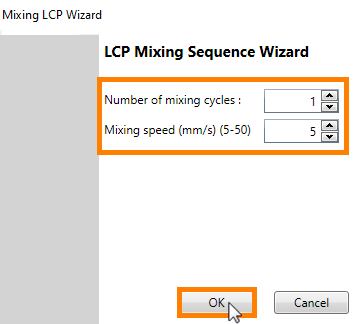
Mixing LCP Wizard
Set the mixing speed in mm/s in the Mixing speed field.
When you are done, click OK. NT8 will start mixing the syringes.
After the mixing is finished, a dialog displays and notifies you to remove the LCP syringes from the mixer slots.
Push the plunger to the other syringe position and detach the conjoined syringes. Then, attach the needle to the syringe that will be used in your experiment.
Disconnect the mixer plunger from the stage by pushing the button on top of the plunger and allowing the spring to return the plunger to its neutral position. The LCP Mixer icon in the Status Bar should say Unlocked now.
Click Finish.
Warning
You must unlock the LCP syringe before continuing.
After you have prepared the LCP sample, you can proceed to attach the LCP syringe to the NT8 head.
Related Topics