[ROCK MAKER Integration] Dispense Protocol
NT8 now supports more flexible dispensing protocols through the Customize button in the Experiment Info tab in RM Integration mode, allowing you to modify the protocols designed in ROCK MAKER. This feature lets you define how and which components NT8 should dispense in a structured manner.
It is especially useful when the loaded experiment is invalid or has unassigned sequences. In such cases, NT8 will warn you in both the Checklist tab and Dispense Protocol section and ask you to customize the dispensing protocol using the Customize Dispense Protocol window. In this window, you can rearrange the dispensing sequence set in ROCK MAKER by dragging and dropping components. Inline messages in the window guide you through the modification process of dispensing sequence.
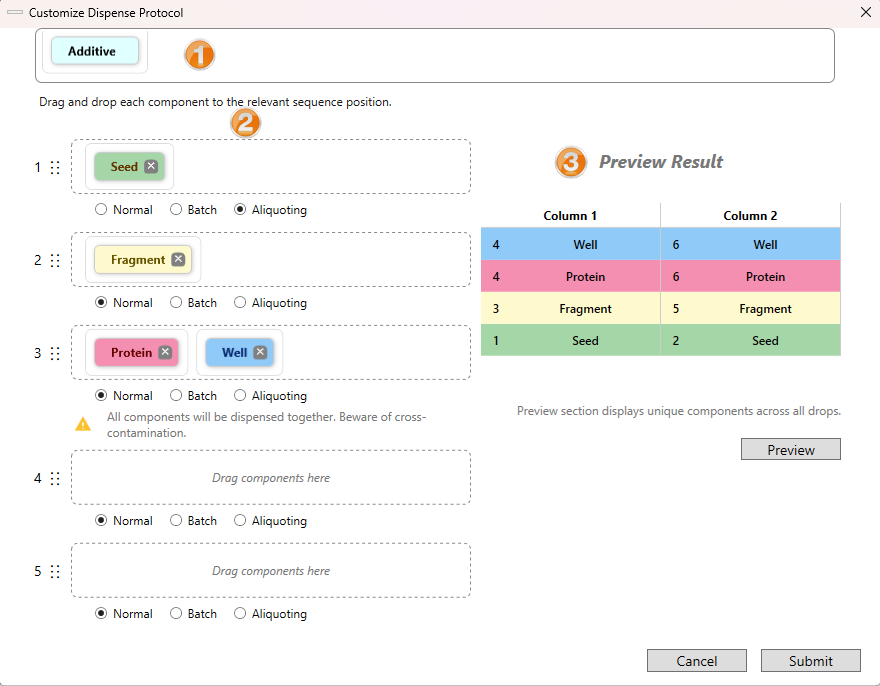
Customize Dispense Protocol Window
The Customize Dispense Protocol window comprises the following parts:
 Component Box — Displays unassigned components of the loaded experiment.
 Component Sequence Section — Displays the dispensing sequence and component types.
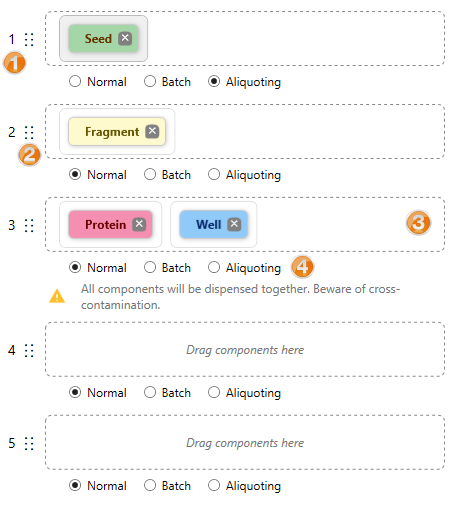
Component Sequence Section
The Component Sequence Section consists of:
Component Sequence Box — Displays the components’ (Protein, Seed, Fragment, Additive, Well, etc.) order.
Dispense Type — Offers the choice of dispensing methods.
Normal: Aspirate from and dispense to a column.
Batch: Aspirate from and dispense to all selected columns.
Aliquoting: Single aspirate from and multi-dispense to all columns.
Preview Section — Displays an animated simulation of the dispensing sequence when the Preview button is clicked.
Prerequisites:
You have created an experiment in ROCK MAKER.
To dispense additive and fragment screens using RM Integration, you must run ROCK MAKER version 4.11 or newer.
To customize Dispense Protocol:
Go to the RM Integration mode.
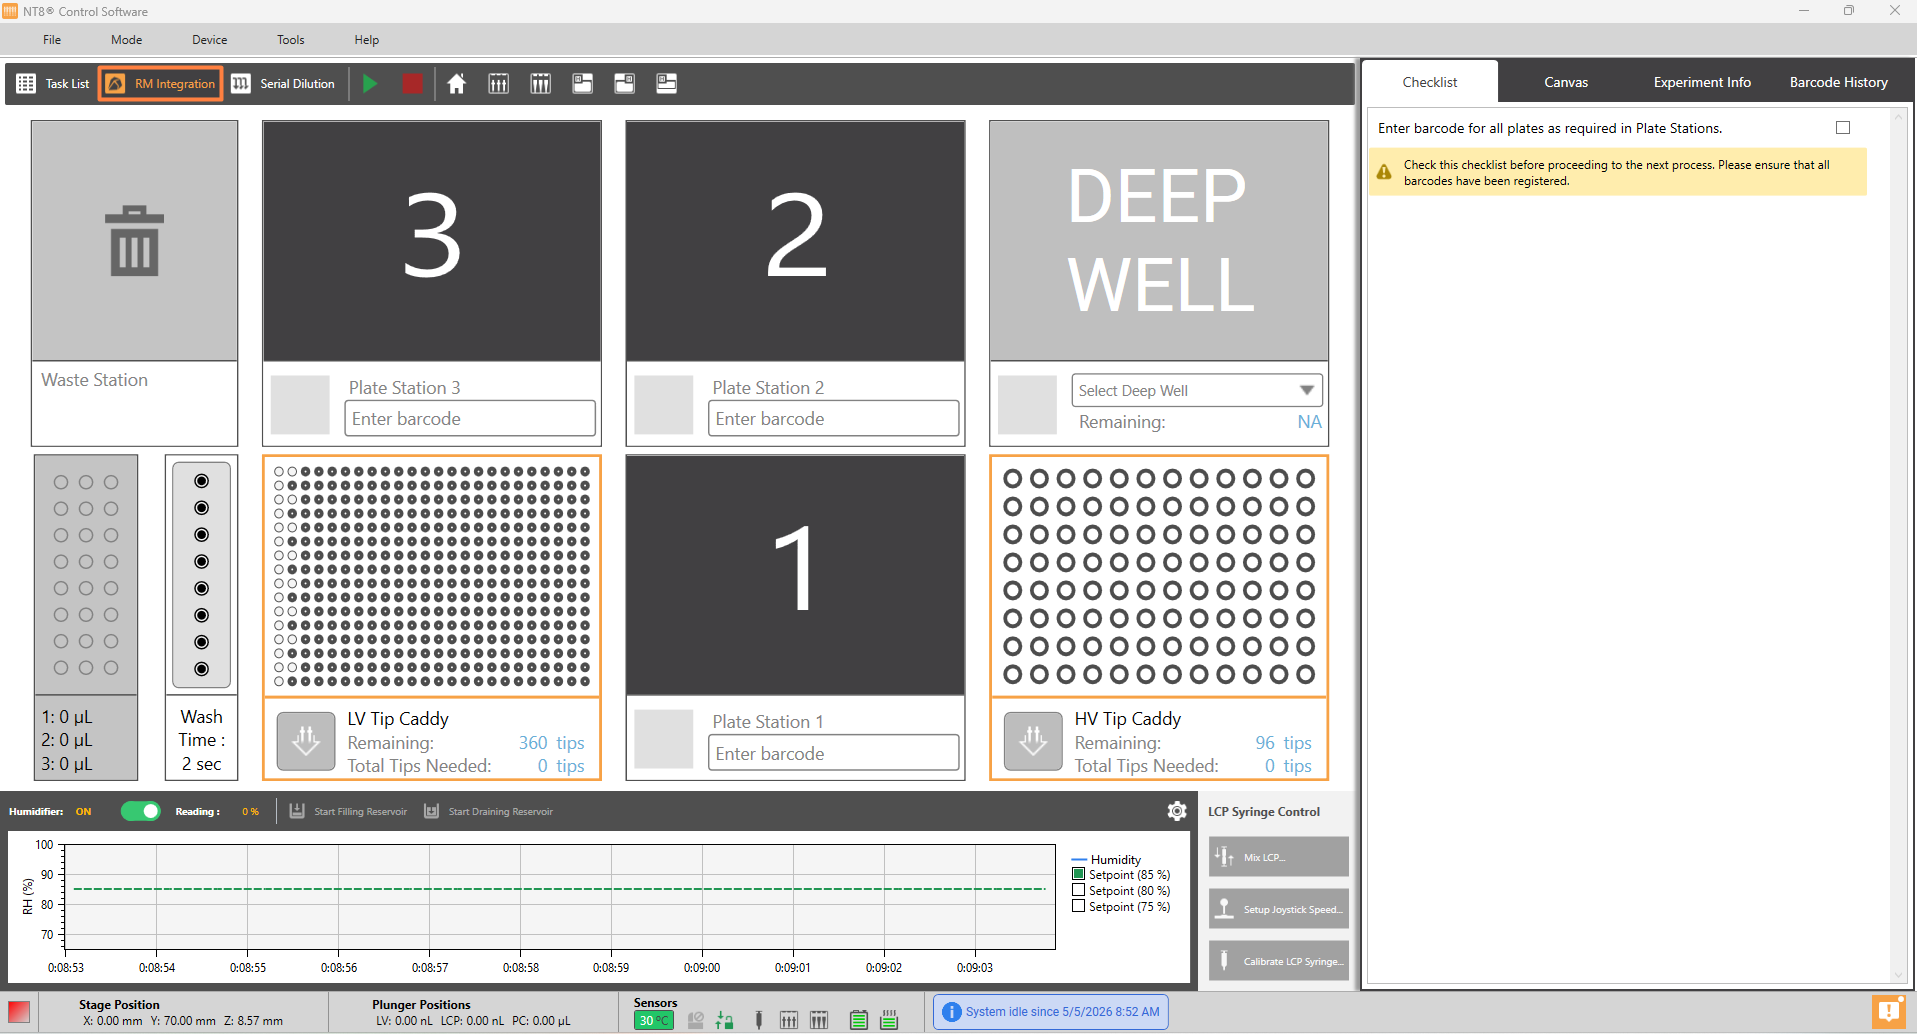
RM Integration Mode
Choose a plate station and enter the experiment barcode number or scan it with a barcode scanner (if it is available).
Go to the Experiment Info tab and click the Edit button in the Dispensing Properties section. Then, click Customize in the Dispense Protocol section.
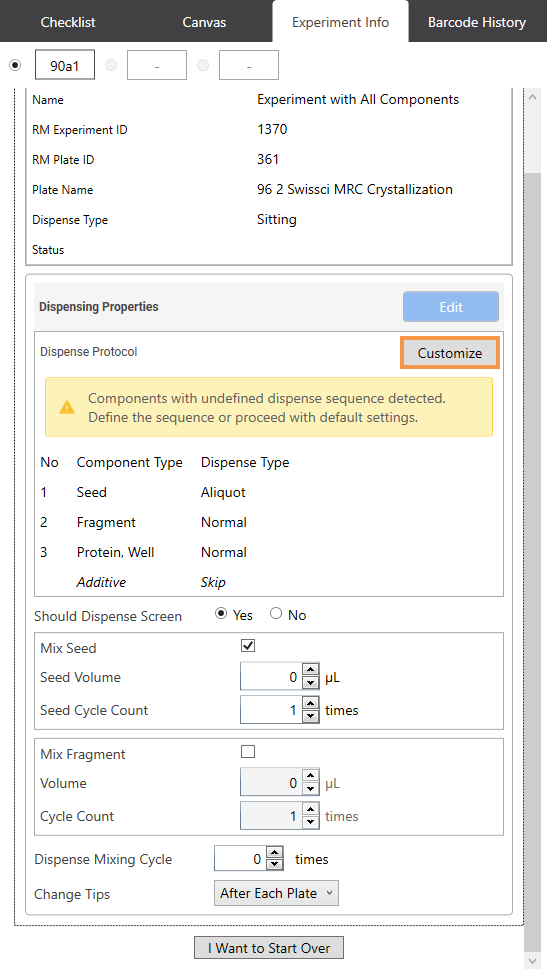
Customize Button
In the Customize Dispense Protocol window, modify the components and the sequence. Here, you can:
Reorder the components in the same Component Sequence Box or move them to a different Component Sequence Box by dragging and dropping them into the desired box. You can also change the Dispense Type as needed.
Remove the components you don’t want to dispense from any Component Sequence Box by clicking [x] on the intended component. The removed component is moved to the Component Box and detected as Skip in the Dispense Protocol section.
Reorder the Component Sequence Box using its Drag Handle.
Important
NT8 only dispenses components listed in the Component Sequence Section.
Note
The Customize Dispense Protocol window only displays components included in the loaded experiment. You cannot add new components to the experiment.
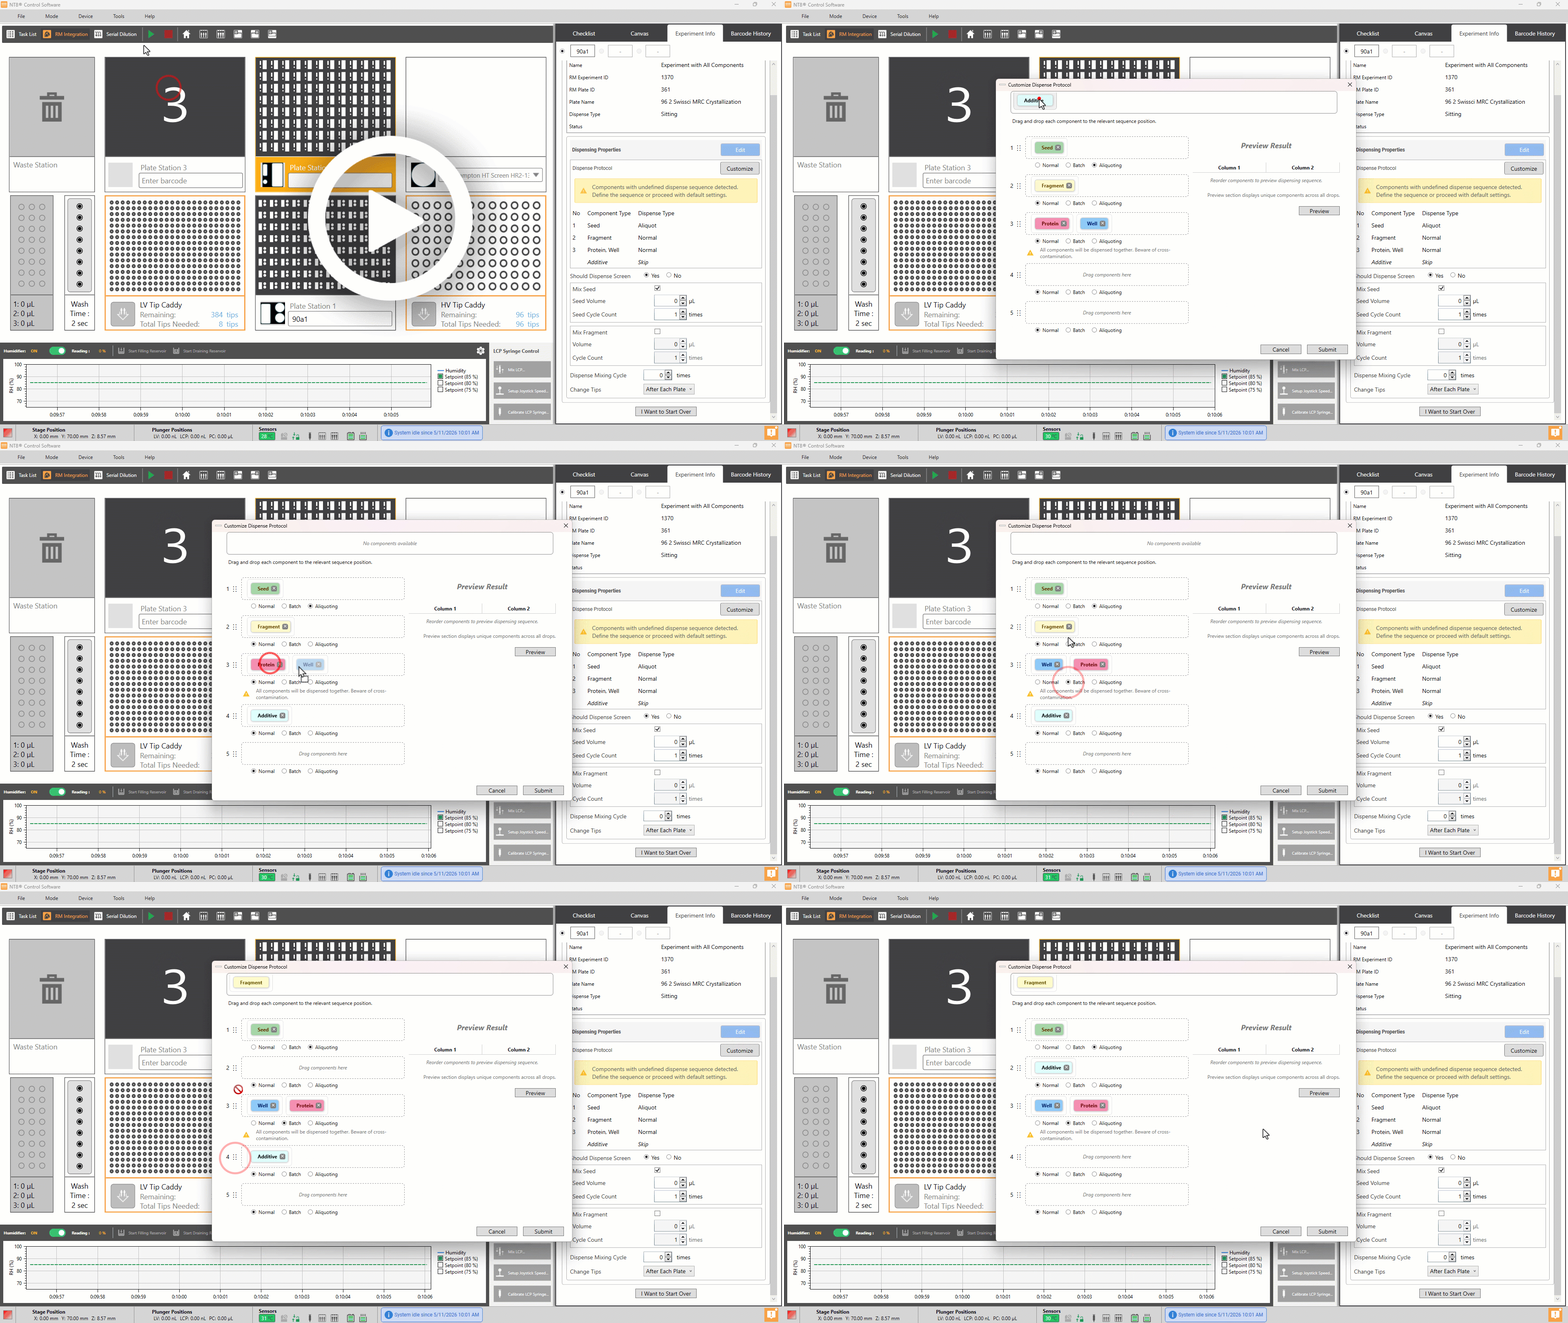
Customizing Dispense Protocol
Click the Preview button below the Preview section to see the animated simulation of your updated Dispense Protocol.
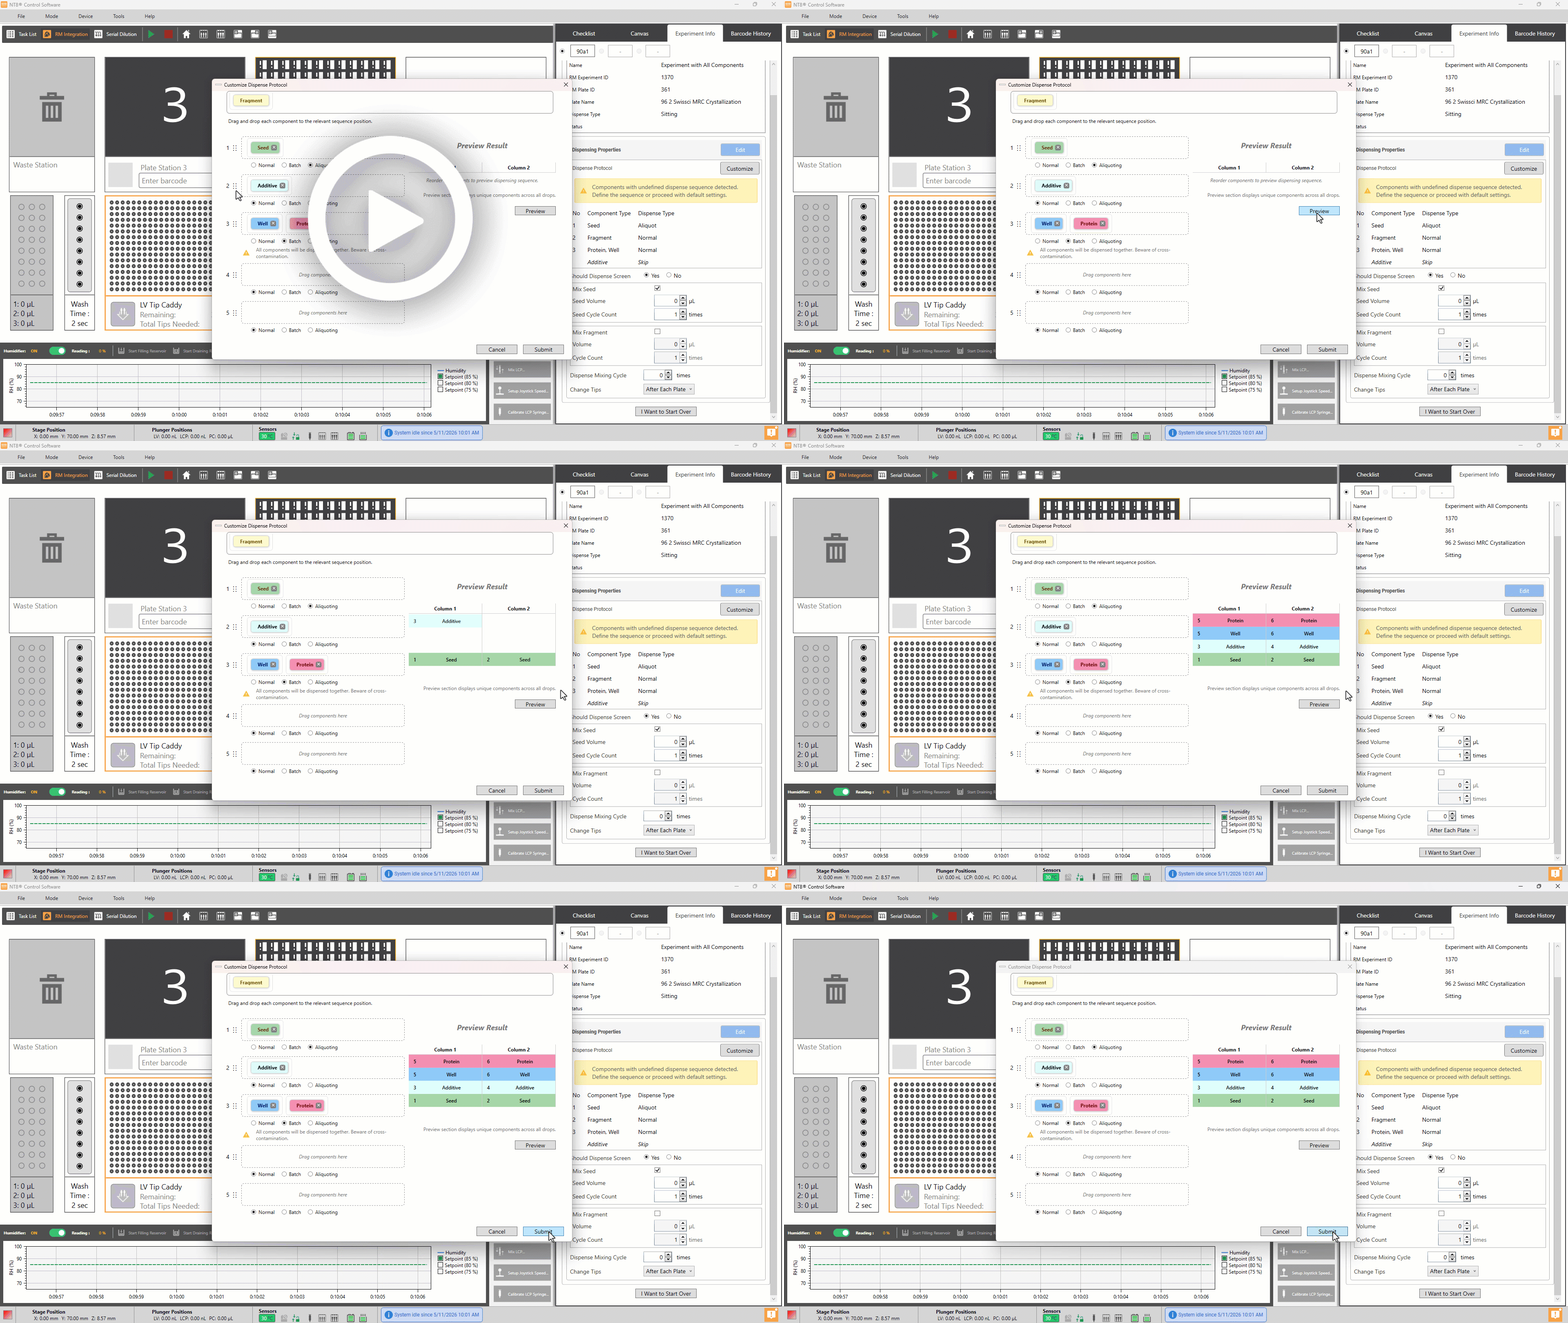
Animated Simulation
Note
NT8 only dispenses experiments with sequences it supports.
When the system detects potential sequence inconsistencies between what is shown in the Component Sequence section (as defined in ROCK MAKER) and what will be executed by NT8, NT8 suggests a sequence recommendation by clicking the Preview button
Important
Always click Preview and check that the sequence in the Component Sequence Section matches the one in the Preview section. A different sequence in the Preview section indicates the actual dispensing sequence recommended by NT8.
If everything is set, click the Submit button.
Once the Dispense Protocol is submitted successfully, go to the Checklist tab. Otherwise, adjust the component sequence and resubmit it.
Click the Run Protocol button, then select Yes, run the protocol in the Run Protocol dialog box.
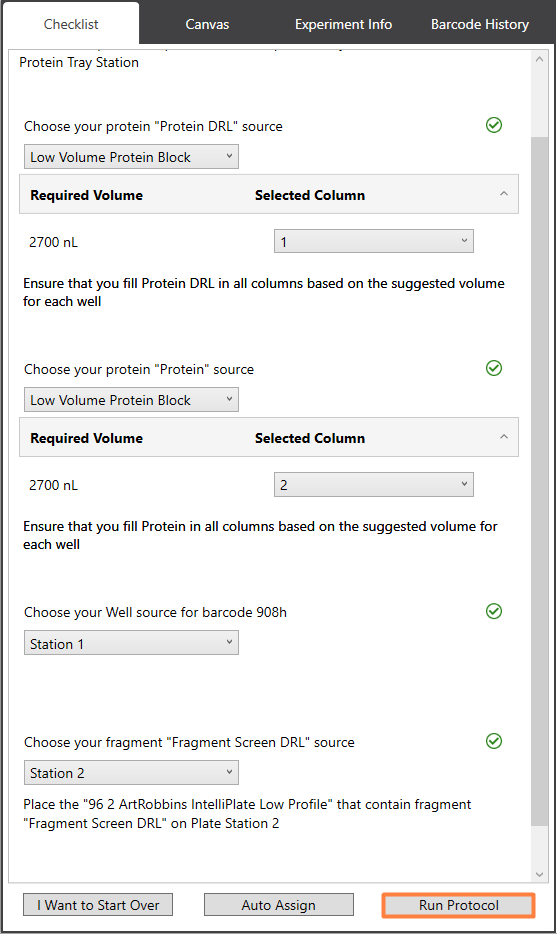
Run Protocol Button
Related Topics: