ROCK MAKER® Crystallization Software Integration Mode
Next to the Task List mode is the ROCK MAKER (RM) Integration mode that allows you to import and run an experiment as defined in ROCK MAKER. This mode is only enabled if you use ROCK MAKER as your Laboratory Information Management Software (LIMS). Please contact support@formulatrix.com to enable NT8 integration with ROCK MAKER.
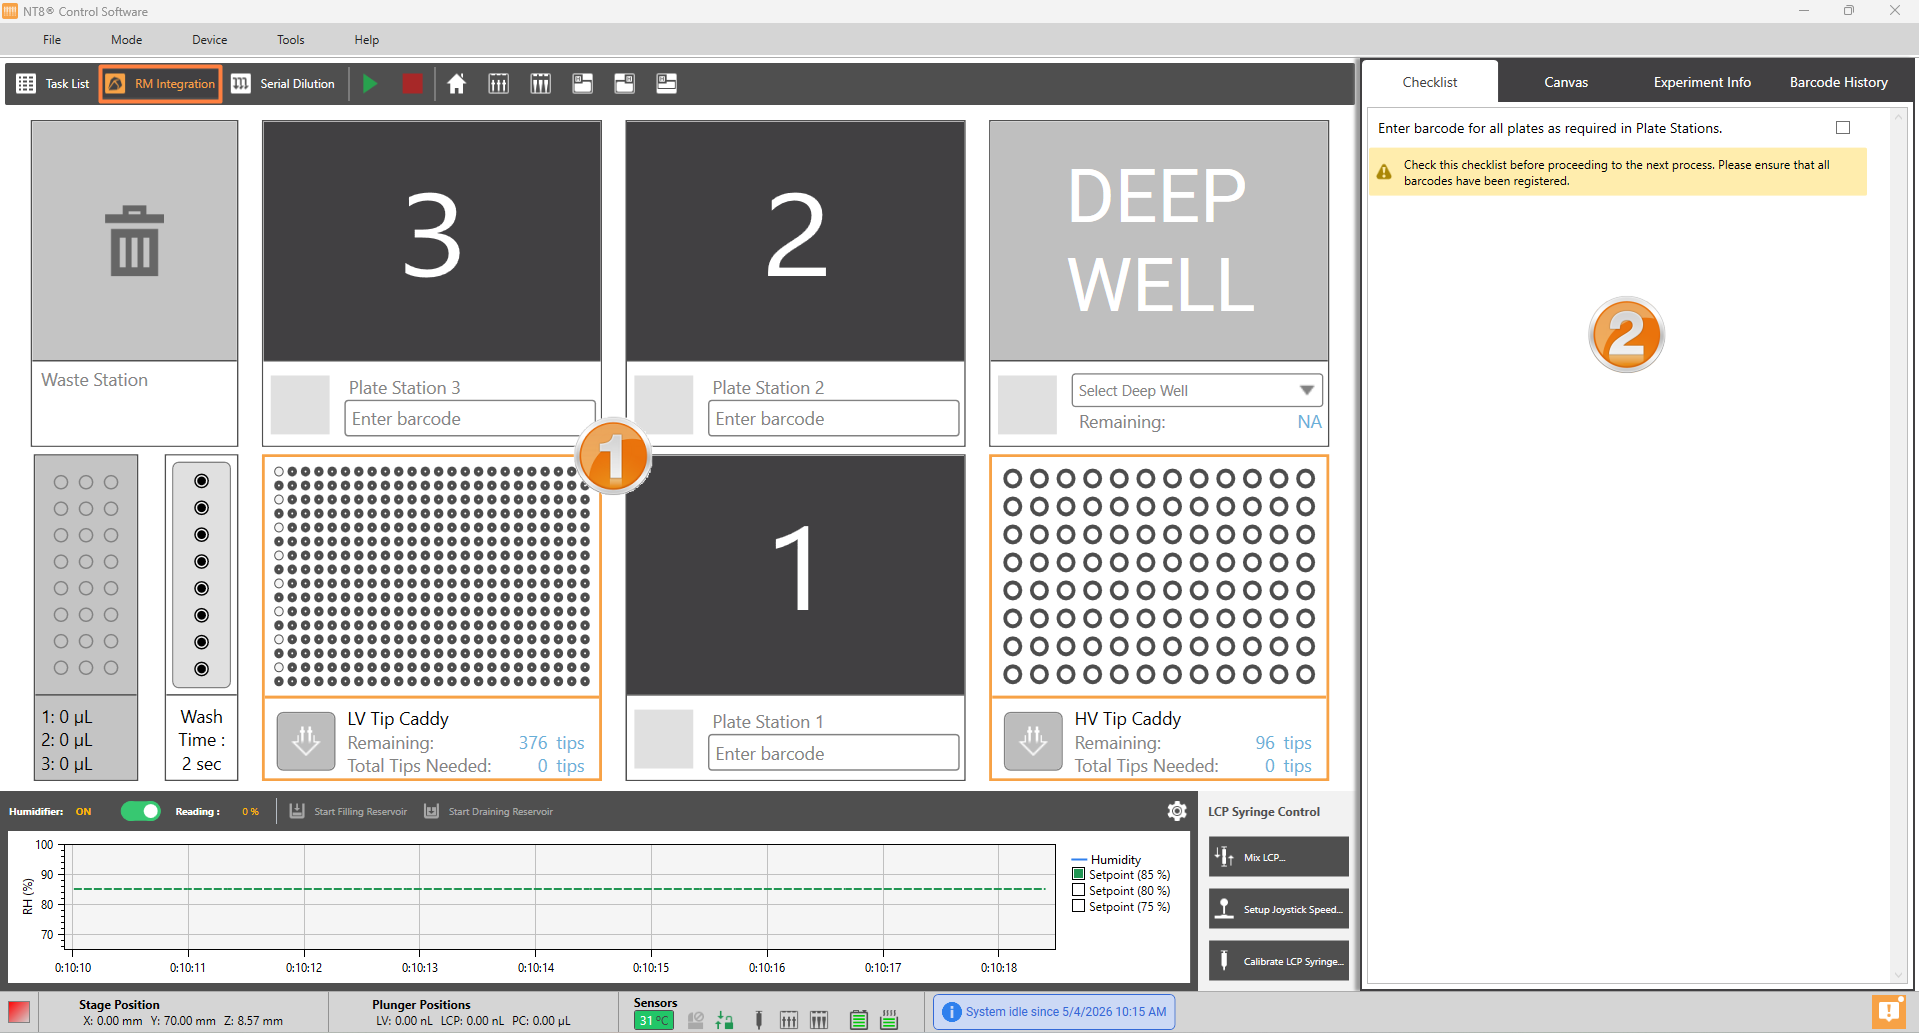
ROCK MAKER Integration Mode
The ROCK MAKER Integration mode consists of two areas: Plate Stations and the ROCK MAKER Experiment Property panel.
Note
Enabling the ROCK MAKER Integration settings through Options in the Tools menu will only allow access to the ROCK MAKER Integration mode in the NT8 interface. For your ROCK MAKER and NT8 programs to be integrated, FORMULATRIX support will need to modify some of the SQL settings on your computer. Please contact support@formulatrix.com for more information.
For further information on how to create an experiment in ROCK MAKER, please see the Experiment Design section of the ROCK MAKER help file.
 Plate Stations
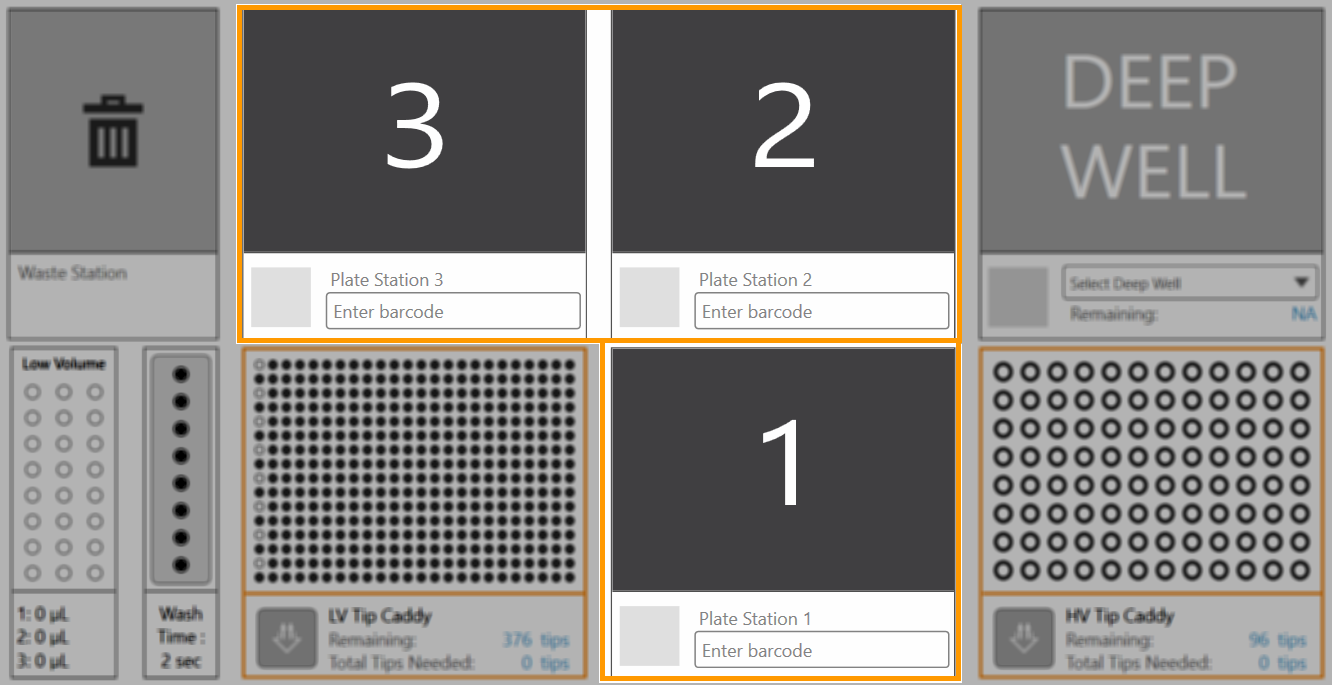
The Plate Stations in the ROCK MAKER Integration Mode
Each Plate Station has an Enter barcode field in which you can type in your experiment barcode number as defined in ROCK MAKER. You can make use of the three available Plate Stations on the NT8 deck to load up to three different barcodes from ROCK MAKER at the same time, provided each experiment requires the use of the same plate type.
Note
If you make any changes to the dispense design after this step in the NT8 software, ROCK MAKER will not mark the experiment as dispensed. The original design is preserved in ROCK MAKER unless you edit the experiment in ROCK MAKER.
 ROCK MAKER Experiment Properties Panel
ROCK MAKER experiment information appears in the ROCK MAKER Experiment Properties panel after your experiment barcode is validated. It comprises four tabs:
Checklist Tab
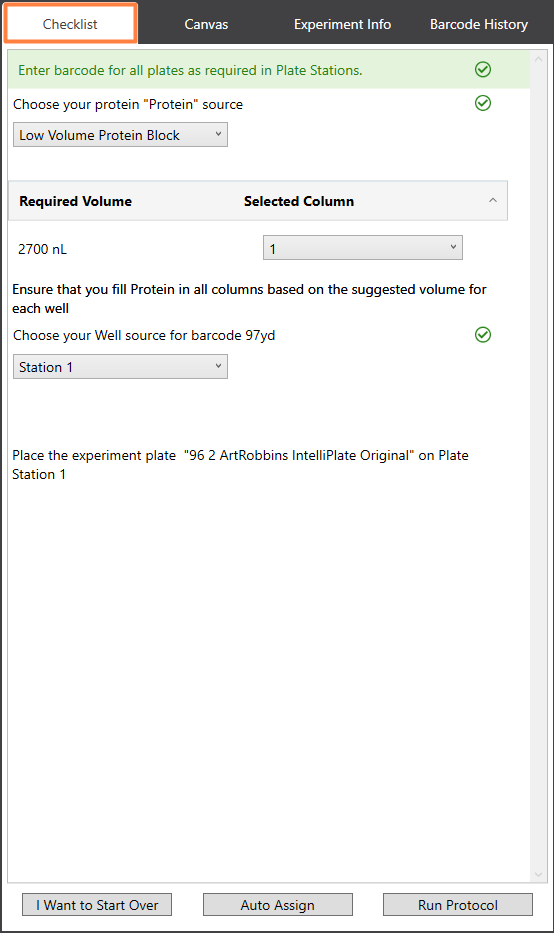
Checklist Tab in the ROCK MAKER Integration Mode
Once the experiment’s barcode is validated, you can view the list of experiment instructions from the Checklist tab by clicking the checkbox. If you have more than one experiment, make sure to load all of the experiments’ barcodes before clicking the checkbox. Loading multiple experiments will display the hardware setup instructions for all experiments in the Checklist tab. When necessary, you can modify the instructions before dispensing the experiments. After each instruction has been fulfilled, you can click the Run Protocol button to execute.
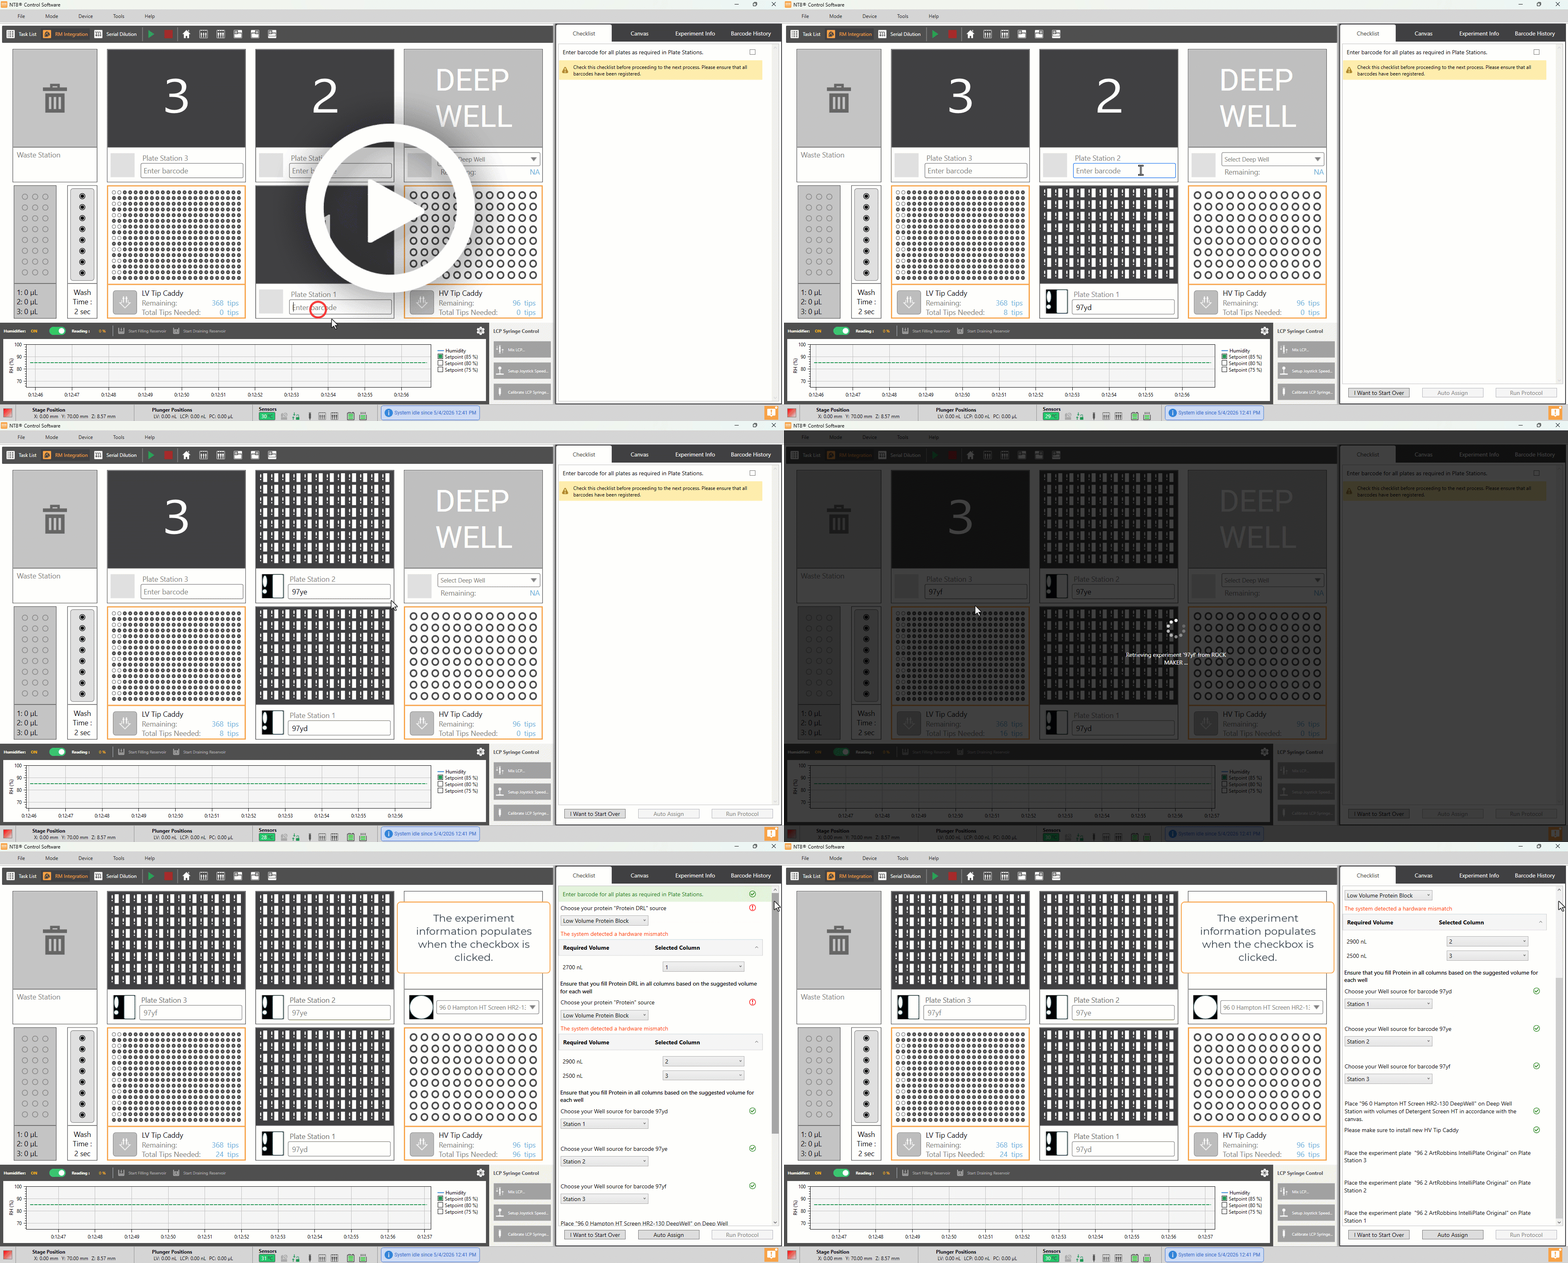
Loading Three Barcodes in ROCK MAKER Integration Mode
Note
You can unload the barcodes and clear all instructions from the Checklist tab by clicking the I Want to Start Over button.
You can reset any changes you made to the instructions in the Checklist tab to follow the system recommendations by clicking the Auto Assign button.
Canvas Tab
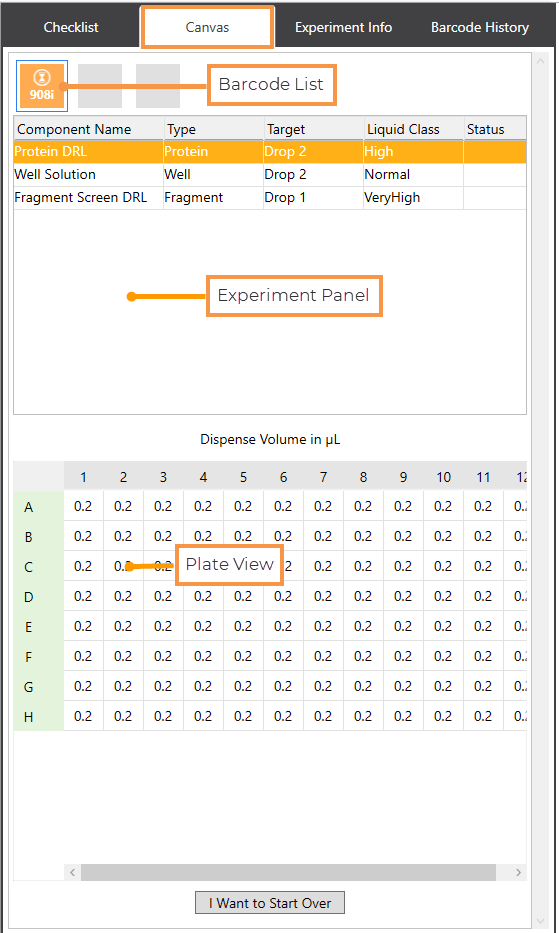
Next to the Checklist tab is the Canvas tab which provides information about the content of the experiment’s plate(s). The Canvas tab has three different sections: Barcode List, Experiment Panel, and Plate View, as shown below.
The Canvas Tab
Barcode List
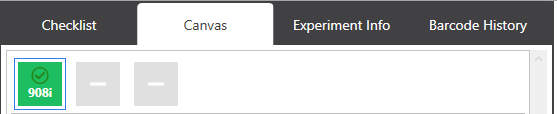
The Barcode List shows all the barcodes being loaded in the ROCK MAKER Integration mode. Click the desired barcode to see the content of the plate. Each barcode will change to green to indicate that the experiment has been dispensed, as seen below.
Green Barcode Indicates the Experiment Is Complete
Experiment Panel
Item |
Configurable? |
Description |
|---|---|---|
Component Name |
N/A |
The component name. |
Type |
N/A |
The experiment layer type as defined in ROCK MAKER. |
Target |
N/A |
The dispense target as defined in ROCK MAKER. |
Liquid Class |
|
Determines the liquid class of proteins, well solutions, seeds, additive screens, and fragment screens. |
Status |
N/A |
Tells you the current component’s status as the experiment is being executed. |

Plate View
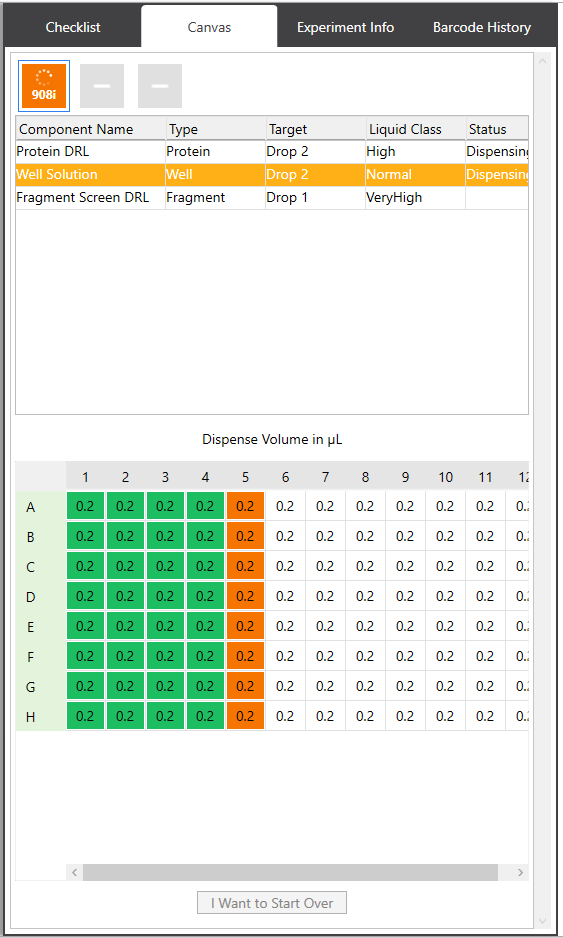
The plate graphic below represents the plate in use, providing the selected component/protein volume information as defined in ROCK MAKER. While an experiment is running, each column will turn orange which indicates the aspirate/dispense process is taking place, then it turns green when it’s complete.
The Plate Graphic Shows the Aspirate and Dispense Progress
Experiment Info Tab
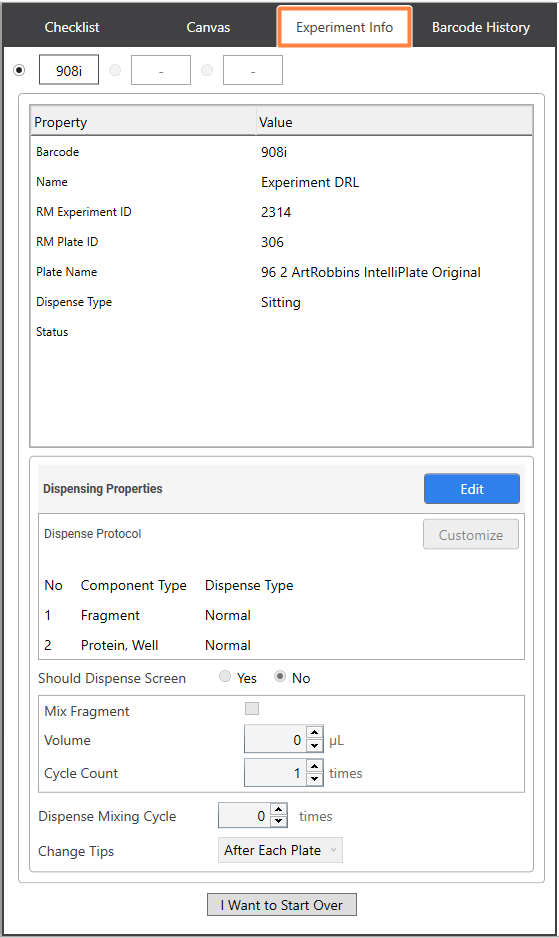
The Experiment Info tab shows properties of your experiment that you defined in ROCK MAKER. Click the Edit button to modify the settings in the Dispensing Properties section as needed before running the experiment. However, the modified settings will only be valid as you open your experiment in the ROCK MAKER Integration mode. The changes will not be saved and will be removed after you exit the NT8 software.
Note
The ROCK MAKER Integration mode only allows you to edit dispense-related information. The modified information will not affect the experiment you made in ROCK MAKER.
Experiment Info Tab
Item |
Configurable in RM? |
Description |
|---|---|---|
Barcode |
N/A |
Shows the experiment barcode number. |
Name |
N/A |
Shows the experiment name as defined in ROCK MAKER |
RM Experiment ID |
N/A |
Tells the ROCK MAKER experiment ID number. |
RM Plate ID |
N/A |
Informs the ROCK MAKER plate ID number. |
Plate Name |
N/A |
Shows the plate name as defined in ROCK MAKER. |
Dispense Type |
N/A |
Displays the dispense type. The dispense type will change accordingly, depending on the Plate Name that you choose. |
Status |
N/A |
Tells you the current experiment status. If you have run the dispensing process, the status will be marked as Dispensed. Otherwise, it will be blank. |
Dispensing Properties |
N/A |
Allows you to modify the dispense protocol by clicking the Edit button. This action overrides your protocol setup in ROCK MAKER, ensuring that any changes made do not affect the original protocol in ROCK MAKER. |
Dispense Protocol |
|
Offers flexible dispensing protocols through the Customize button, where you can define how and which components NT8 should dispense in a structured manner. This section displays messages regarding dispensing protocols and components, indicating when customizing the dispense protocol is necessary. It also lists the Component Type and Dispense Type. Besides Batch, Normal, and Aliquoting, the Dispense Type also includes Skip for unassigned components. To run the protocol, you need to assign the Skip component to a Component Sequence Box. |
Should Dispense Screen |
N/A |
This property is only available for systems with the Plate Copy feature. You can select whether you want to dispense to a screen by using the Plate Copy or not in ROCK MAKER. |
Mix Fragment |
N/A |
Allows you to configure fragment screen dispensing through the following fields when ticked.
|
Mix Seed |
N/A |
Allows you to configure seed dispensing through the following fields when ticked.
|
LCP predispense Volume (nL) |
N/A |
Displays the LCP pre-dispense volume (only available for LCP dispense). You can change the volume accordingly from the ROCK MAKER software. |
LCP predispense Cycle |
N/A |
Provides the information about how many pre-dispense cycles will be done (only available for LCP dispense). You can change the number of pre-dispense cycles as needed through the ROCK MAKER software. |
Dispense Mixing Cycle |
|
This option determines for how many cycle(s) the NT8 will mix all of the components together, after they have been dispensed. Enter the desired number of cycle(s) in the option box. |
Change Tips |
|
This is where you instruct the NT8 when to wash the LV tips. Options include:
|
The seeding option is available only for ROCK MAKER 3.10 or newer.
Barcode History
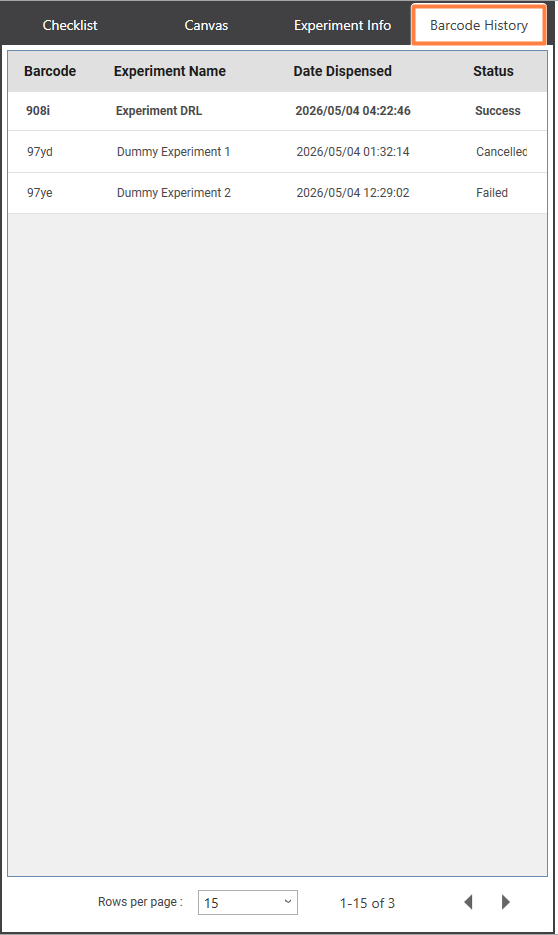
Barcode History Tab in the ROCK MAKER Integration Mode
The Barcode History tab helps you track the experiment that you have conducted. It displays the barcodes, experiment names, dates dispensed, and the statuses of your experiments: Success, Failed, or Canceled.
By default, the Barcode History tab displays 15 of the most recent experiments. However, you have the option to show up to 25 experiments. If you want to explore the older experiments, use the navigation arrows.
Related Topics