Important
This web help is an outdated version. Visit the latest version (NT8 v4.8) here.
Adding New Deep Well Plates
NT8 comes preloaded with the most common Deep Well plate types in the Plate Type Library, but you can add new definitions of the plate that you want to use. This tutorial will teach you how to add new Deep Well plates in two simple ways.
Adding a Deep Well Plate with the Datasheet
Preparation:
Prepare the Deep Well plate datasheet that you want to add.
To create a Deep Well plate with the datasheet:
Click Tools in the Menu Bar and select Plate Type Library.
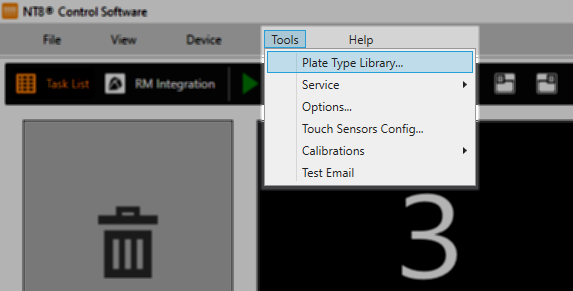
Selecting the Plate Type Library Option
Click the Add New Plate button.
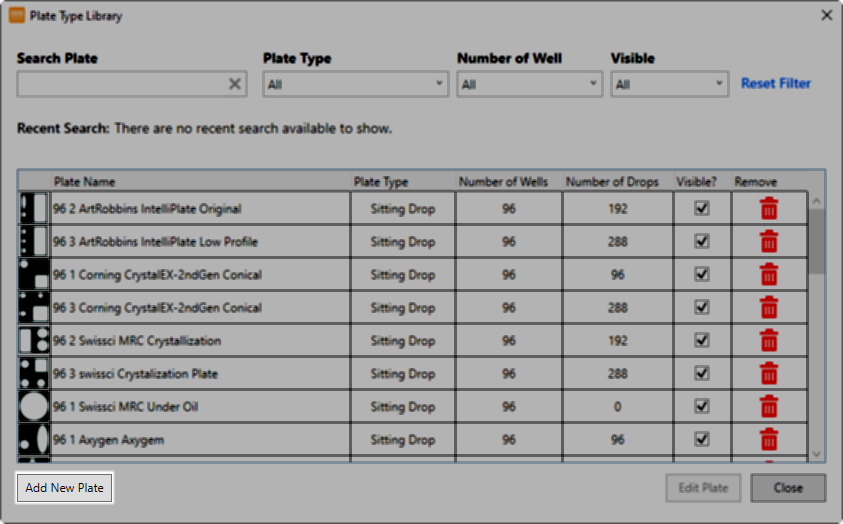
Selecting the Add New Plate Button in the Plate Type Library
On the New Plate Type window, fill in the information as needed. For more information, read Adding and Editing Plate Types.
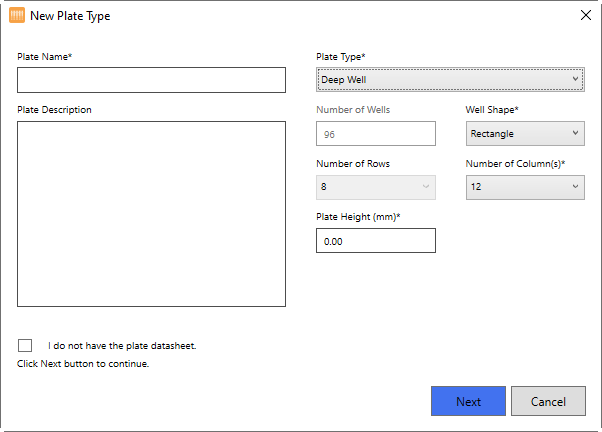
New Plate Type Window
Click Next to continue to the next step.
Insert your plate datasheet in the provided fields of the Reservoir Well information. For reference, see the picture below:
Note
Most fields are automatically filled with default values if you have defined the Plate Height (mm)* field in step 3. Refer to your plate datasheet to fill in the fields with accurate information that matches the actual dimensions of the plate. Fields marked in (*) are mandatory.
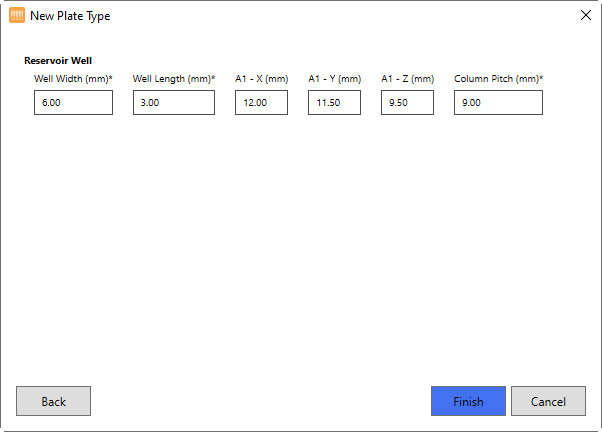
Defining the Well Dimensions
Well Width (mm) - The width of the well and drop in mm. The example value is 8.00 mm.
Well Length (mm) - The length of the well and drop in mm. The example value is 8.00 mm.
A1 - X (mm) - The X offset position values of the A1 well of your plate. The example value is 14.50 mm.
A1 - Y (mm) - The Y offset position values of the A1 well of your plate. The example value is 11.24 mm.
A1 - Z (mm) - The Z offset position values of the A1 well of your plate. The example value is 37.50 mm.
Column Pitch (mm) - The distance between two vertically adjacent wells. The example value is 9.00 mm.
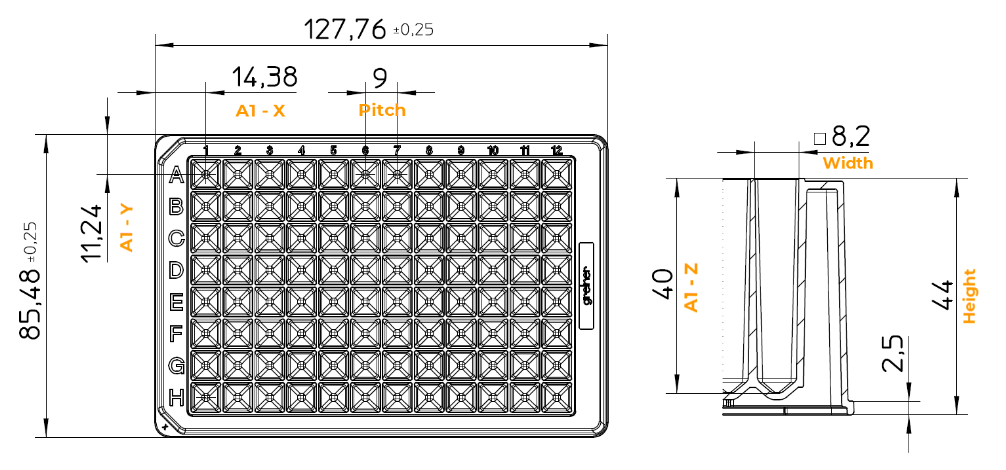
The Dimension of A Deep Well Plate
When you have entered all the required information, click Finish.
Type a descriptive name for your new plate in the Save Plate Definition dialog box to save it as a .PD file. For easier identification, the file name should be the same as the defined name in the Plate Name field.
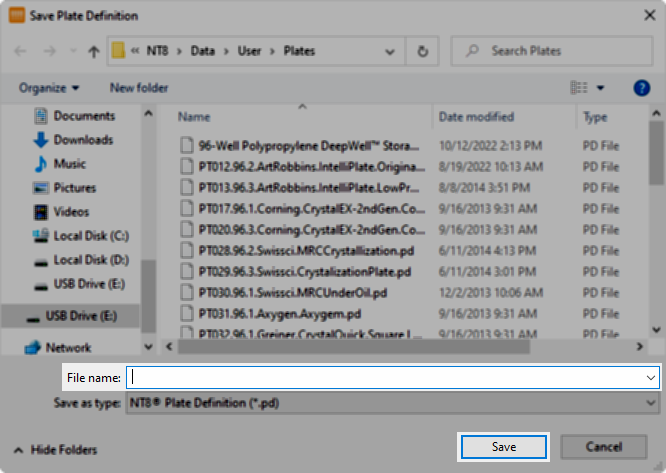
Saving the New Plate Definition
Click Save to save the settings. Your new plate should appear in the Plate Type Library now.
Adding a Deep Well Plate without the Datasheet
Preparations:
Calibrate the Deep Well station.
Prepare a new Deep Well plate.
Attach a Low Volume (LV) tip to Low Volume (LV) Tip Attachments channel number 8.
Prepare a High Volume (HV) tip.
To create a Deep Well plate without the datasheet:
Click Tools in the Menu Bar and select Plate Type Library.
Selecting the Plate Type Library Option
Click the Add New Plate button.
Selecting the Add New Plate Button in the Plate Type Library
On the New Plate Type window, fill in the information as needed. For more information, read Adding and Editing Plate Types.
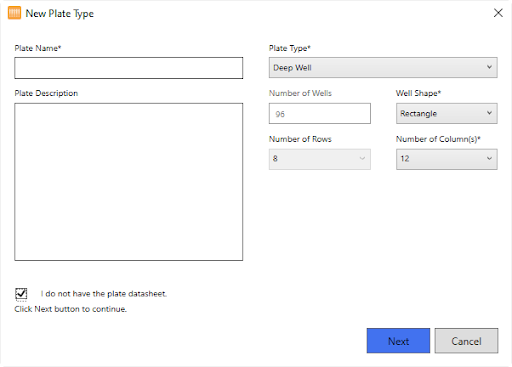
New Plate Type Window
Tick ‘I do not have the plate datasheet’ under the Plate Description box if you don’t know the plate height.
Click Next to continue to the next step.
Place the new Deep Well plate on the Deep Well Station.
To find the plate height, use the manual control buttons to move the LV tip to any area on the top of the plate. Click Next when you are done.
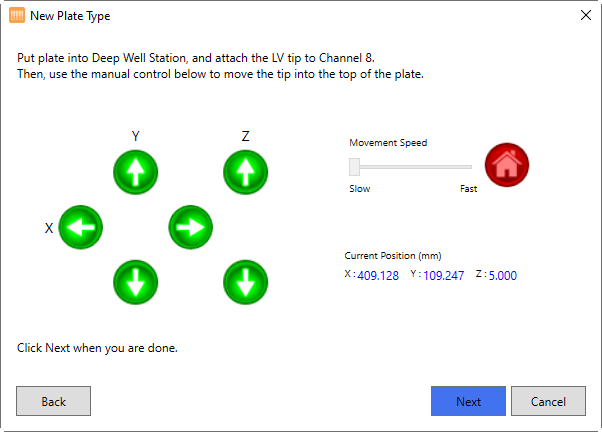
Using the Manual Control Buttons to Find the Plate Height
To find the plate depth of the front row, use the manual control buttons to move the HV Tip to the H1 of the well. Please make sure it is centered and reaches the bottom of the well. Click Next when you are done.
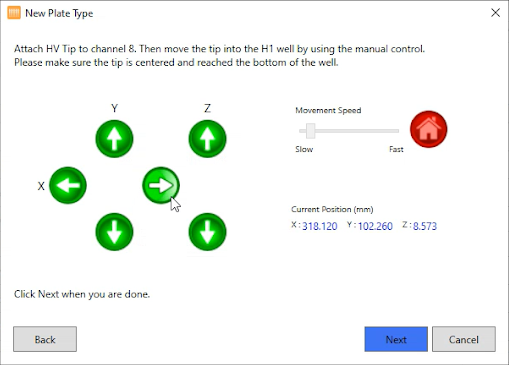
Using the Manual Control Buttons to Find the Plate Depth
Repeat step 8 and move the HV Tip to the H12 of the well to find the plate depth of the back row. Please make sure it is centered and reaches the bottom of the well. Click Next when you are done.
Using the Manual Control Buttons to Find the Plate Depth
The measurement results will appear in the following window. Click Finish to proceed.
Defining the Well Dimensions
Type a descriptive name for your new plate in the Save Plate Definition dialog box to save it as a .PD file. For easier identification, the file name should be the same as the defined name in the Plate Name field.
Saving the New Plate Definition
Click Save to save the settings. Your new plate should appear in the Plate Type Library now.
For queries, contact support@formulatrix.com
Related Topics