Setting Up NT8
Before running a dispense, you need to prepare the hardware. If you’re not familiar with the components, please see Hardware Overview.
This topic will explain how to station every possible component of the NT8. You may not have to set up each component for a dispense, so make sure to read the quick start guide for the particular experiment you are going to perform before prepping your hardware to avoid unnecessary hardware setup.
Prerequisites
You are familiar with the NT8 hardware.
This tutorial covers the following topics:
Installing the LV and HV Protein Block
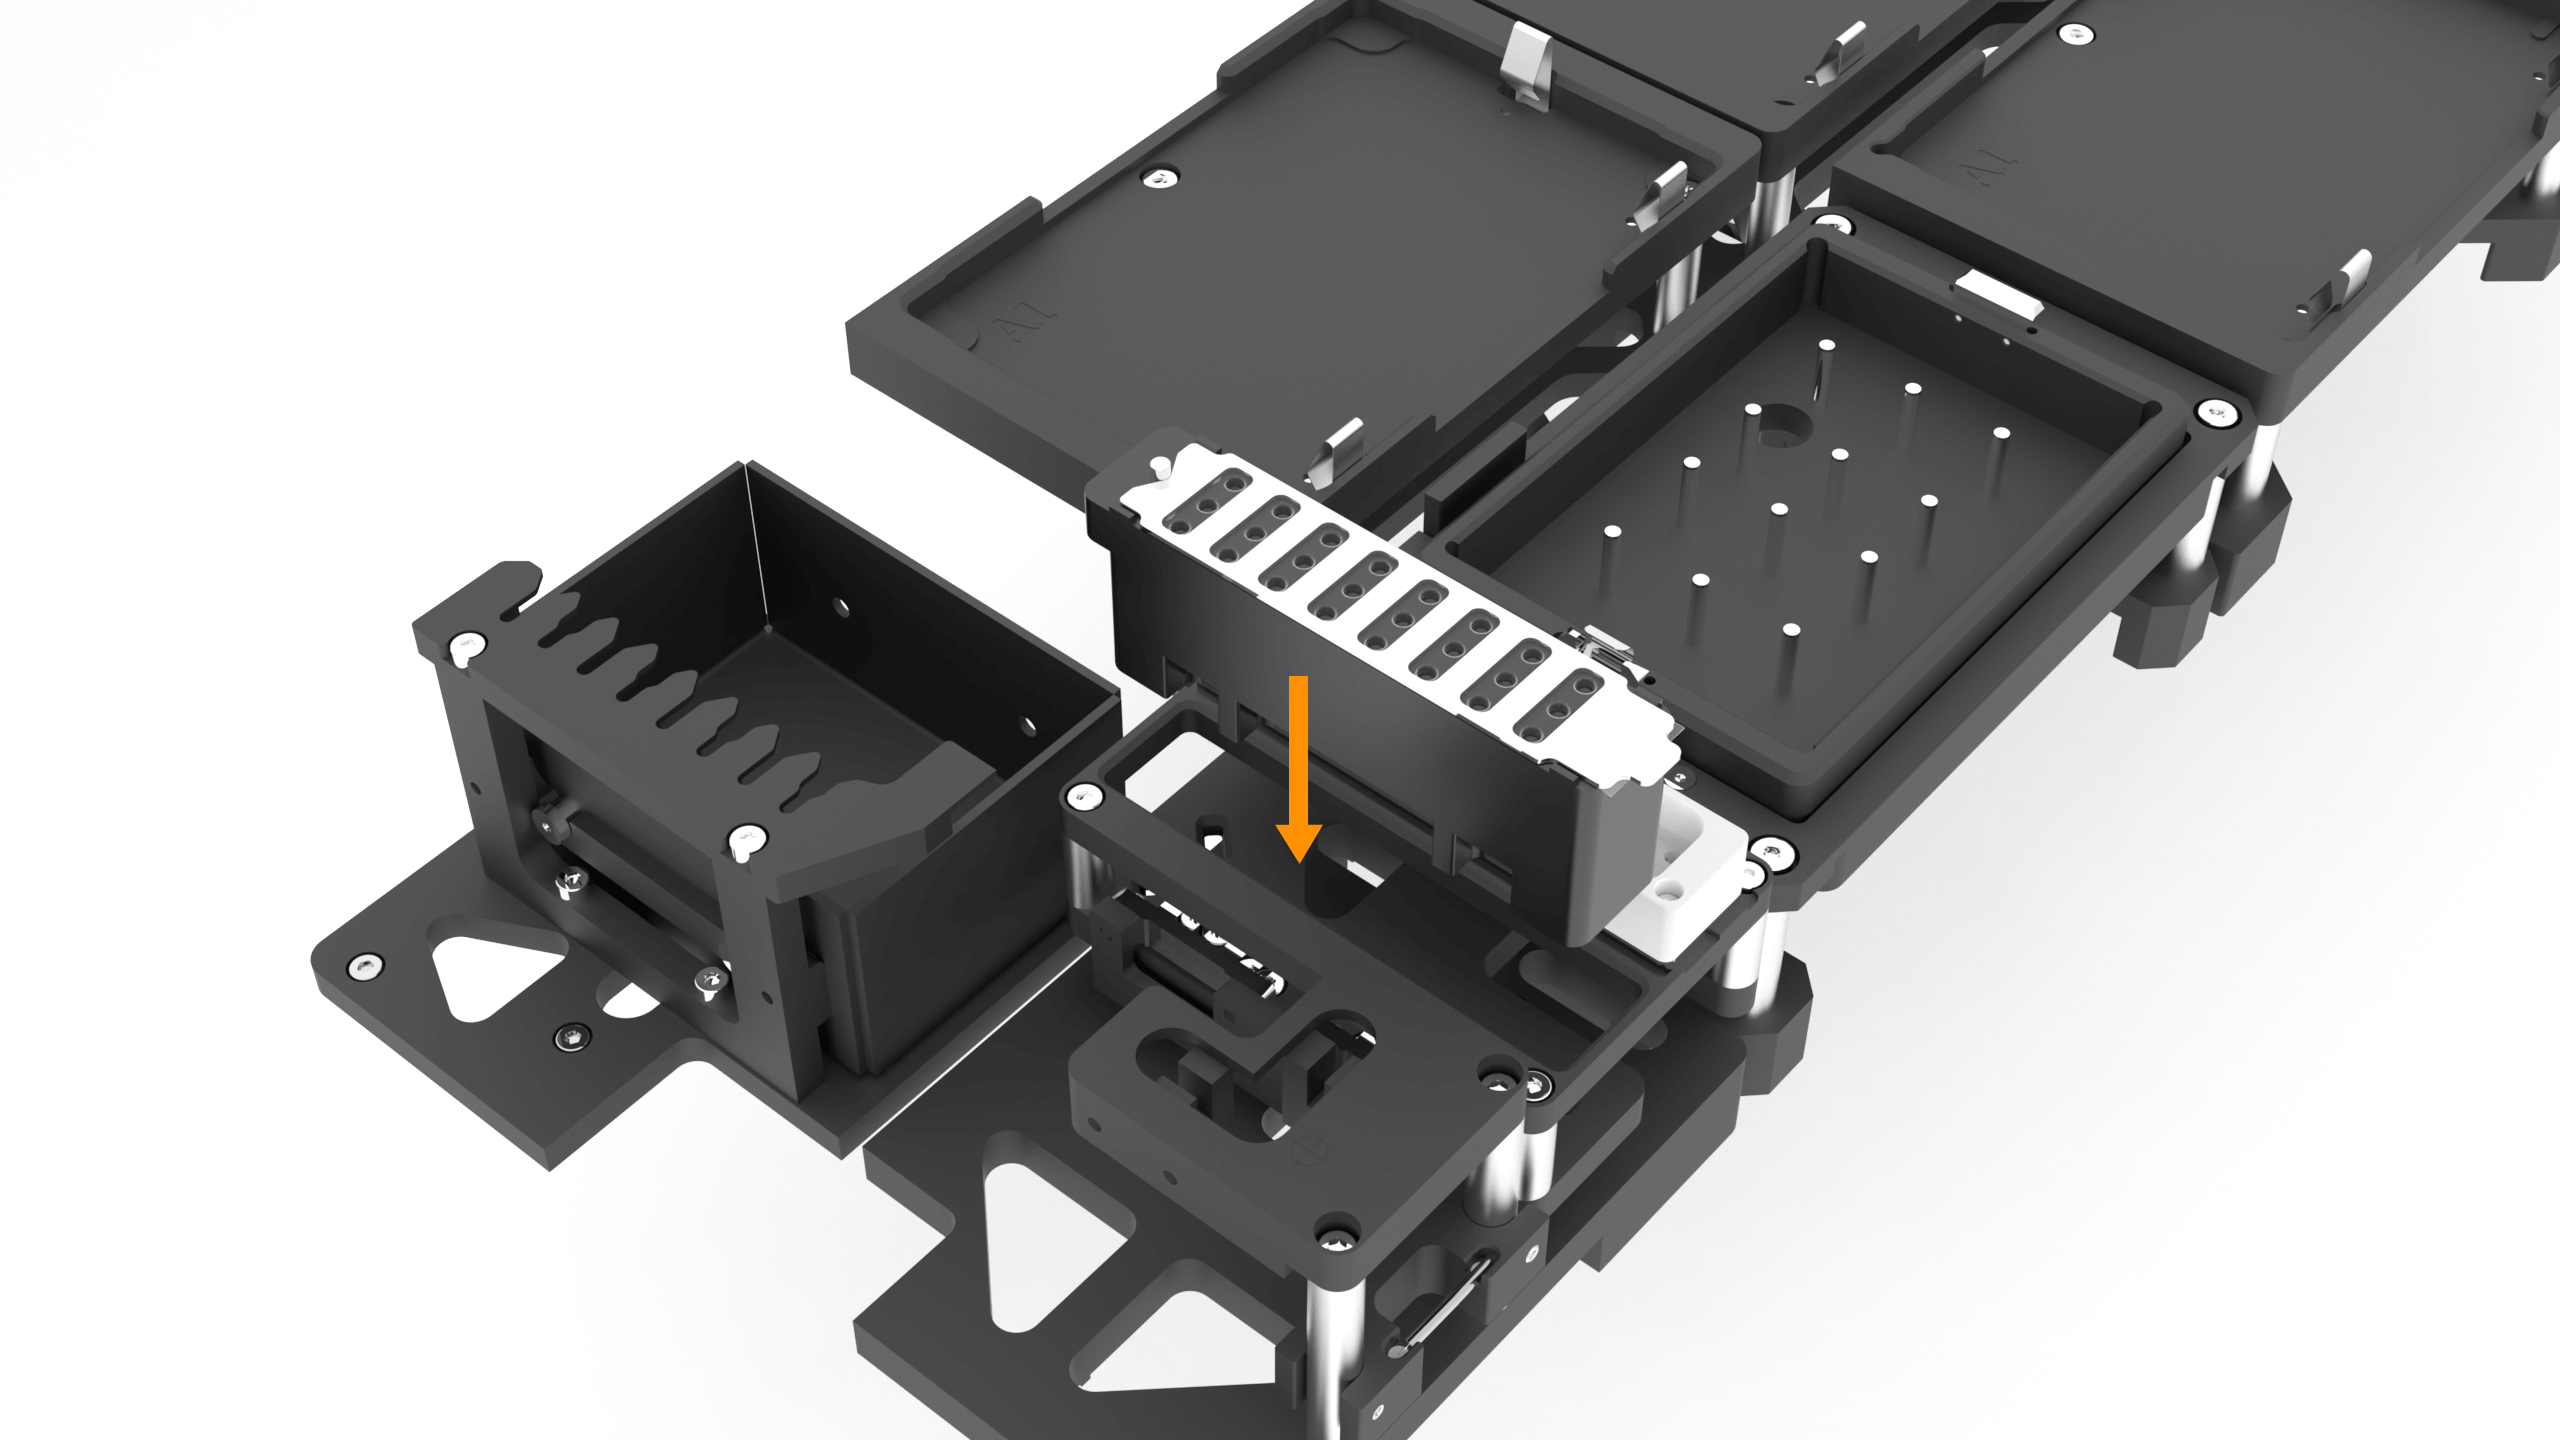
If you want to perform an experiment that involves the use of protein sample, then you need to set up LV or HV protein block, which is the container to store the protein sample.
Make sure you have attached the protein tray to the protein block and secured it with a clamp, all of which come pre-packaged when you purchased the NT8.
Place the protein block on the protein source station.

The LV Protein Block
The HV Protein Block
Installing the High Volume (HV) Multi-source Protein Block
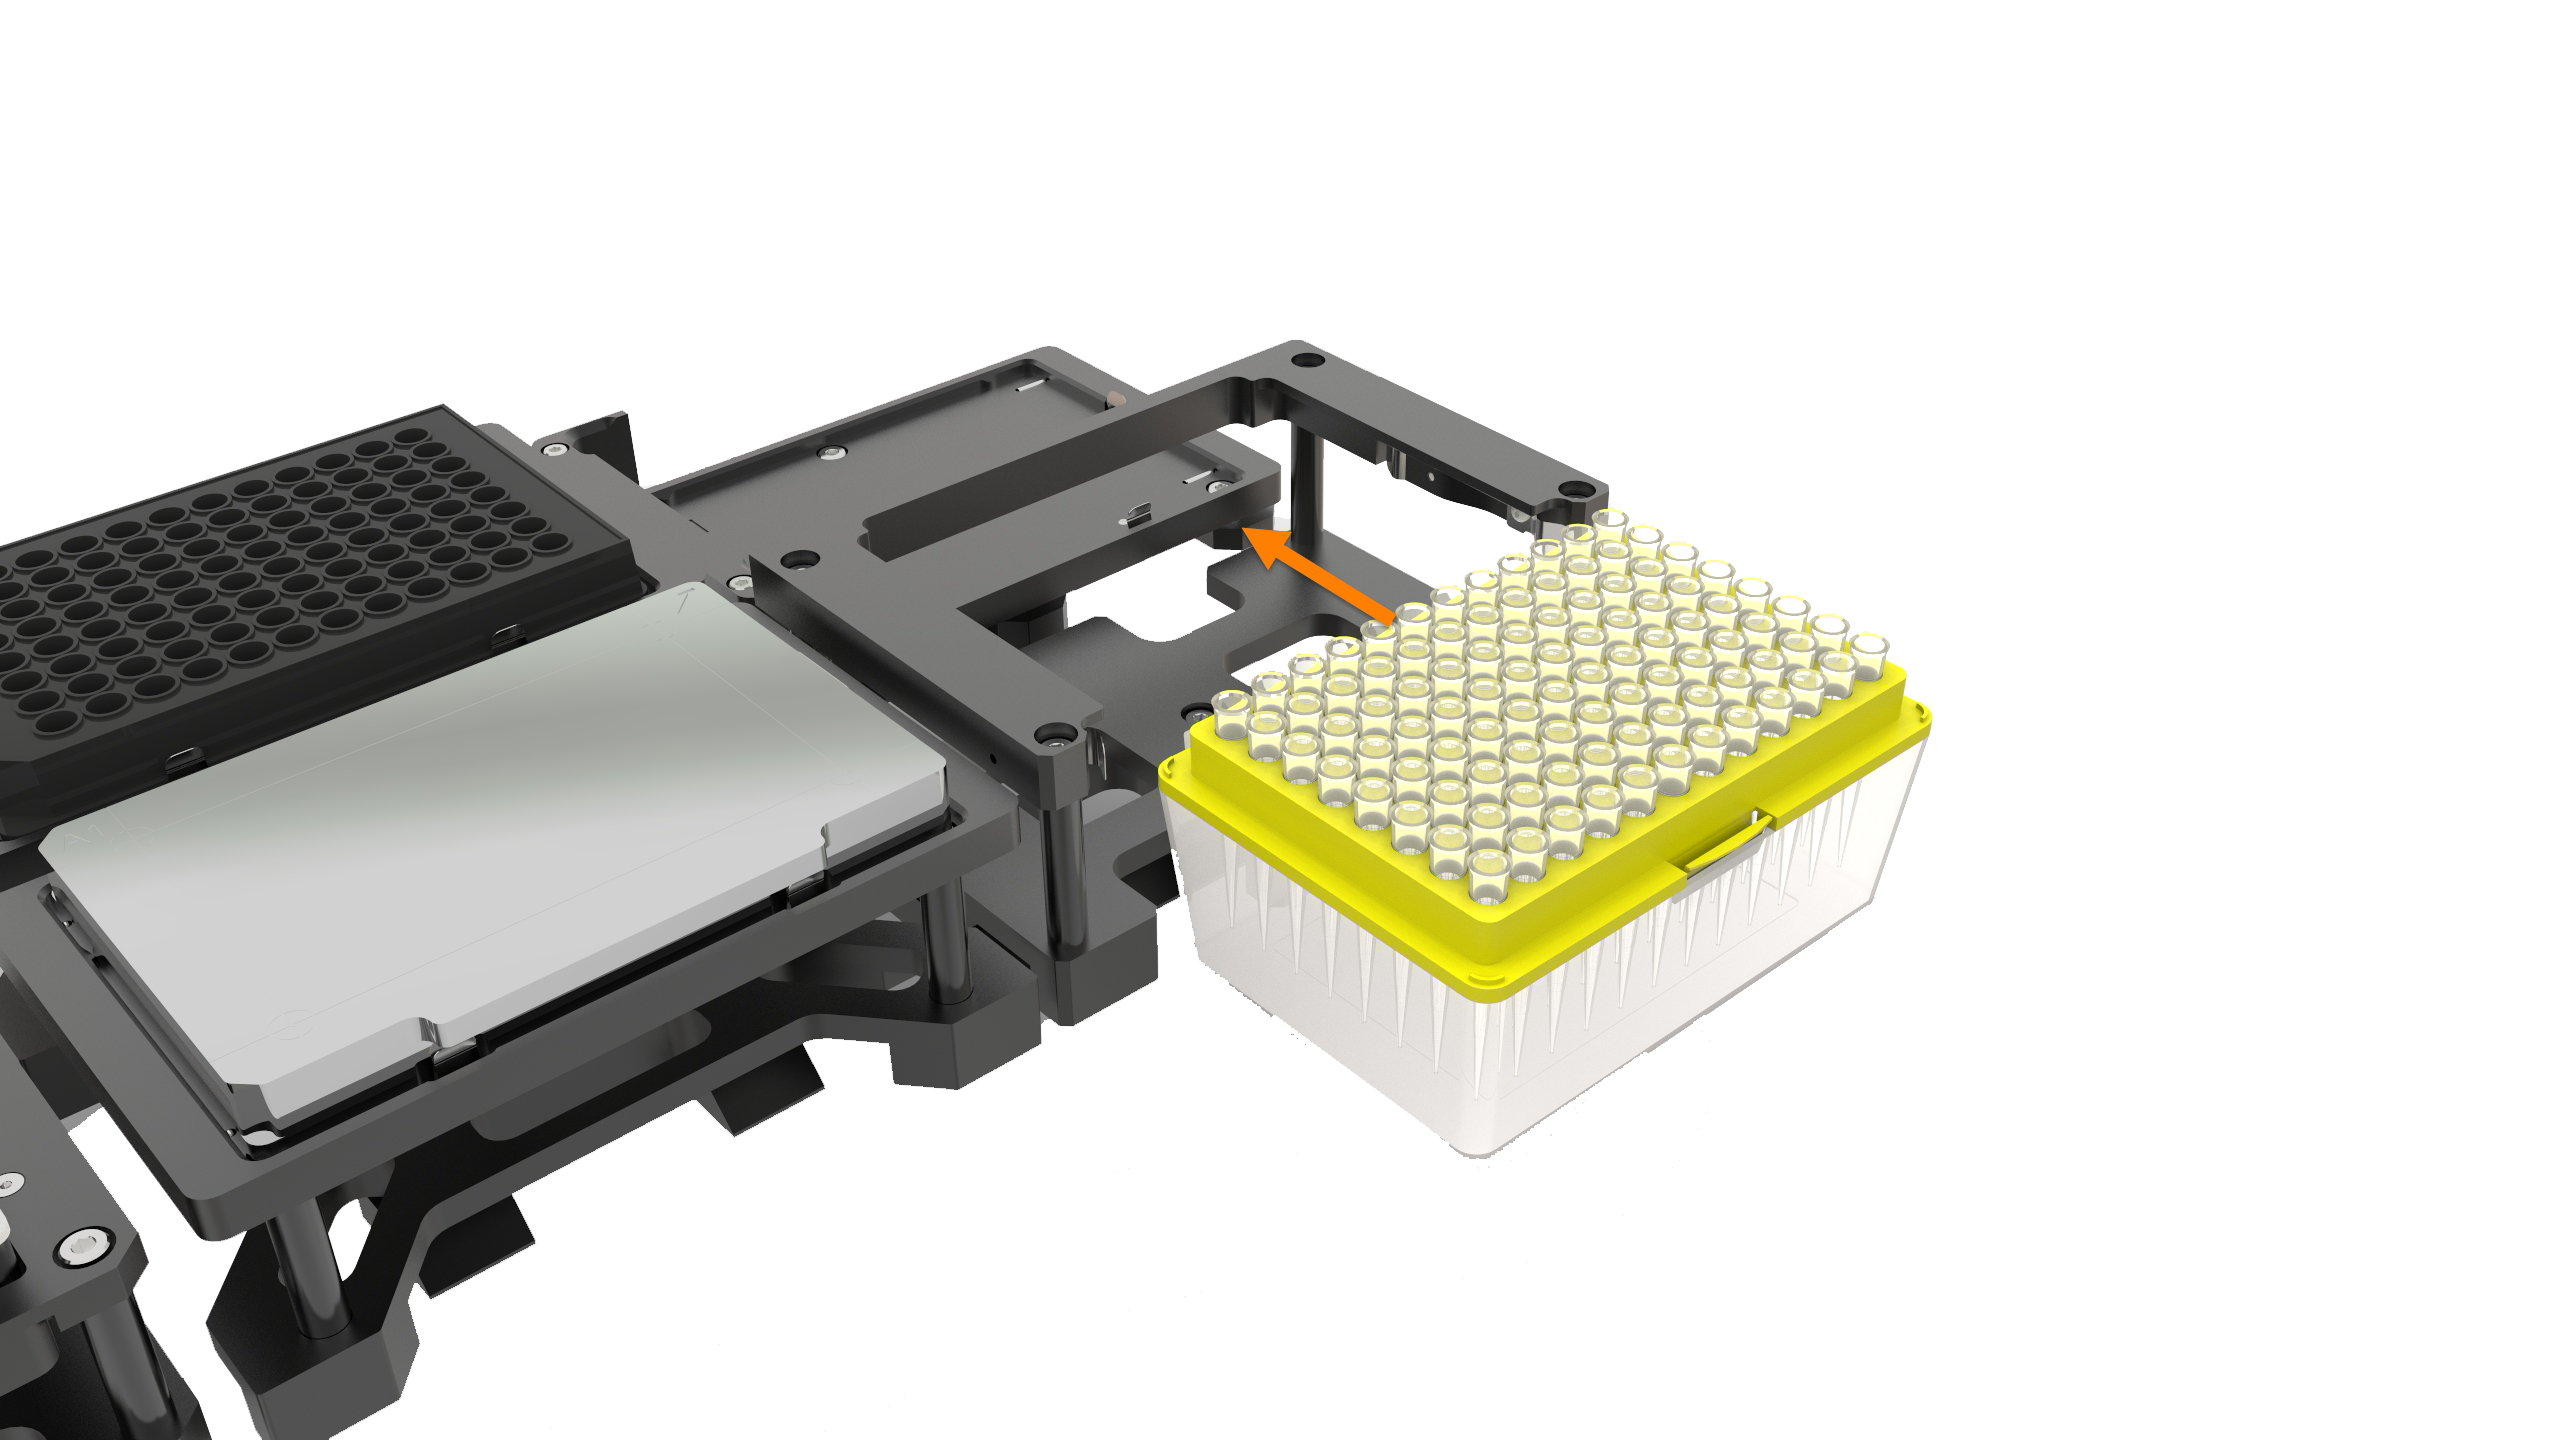
If your experiment requires more protein sample than a single HV protein block can handle, you can make use of the HV Multi-source protein block which can hold up 52 μL protein volume.
Place the Multi HV Protein Tray on Microplate Station 3.
Make sure it is secure.
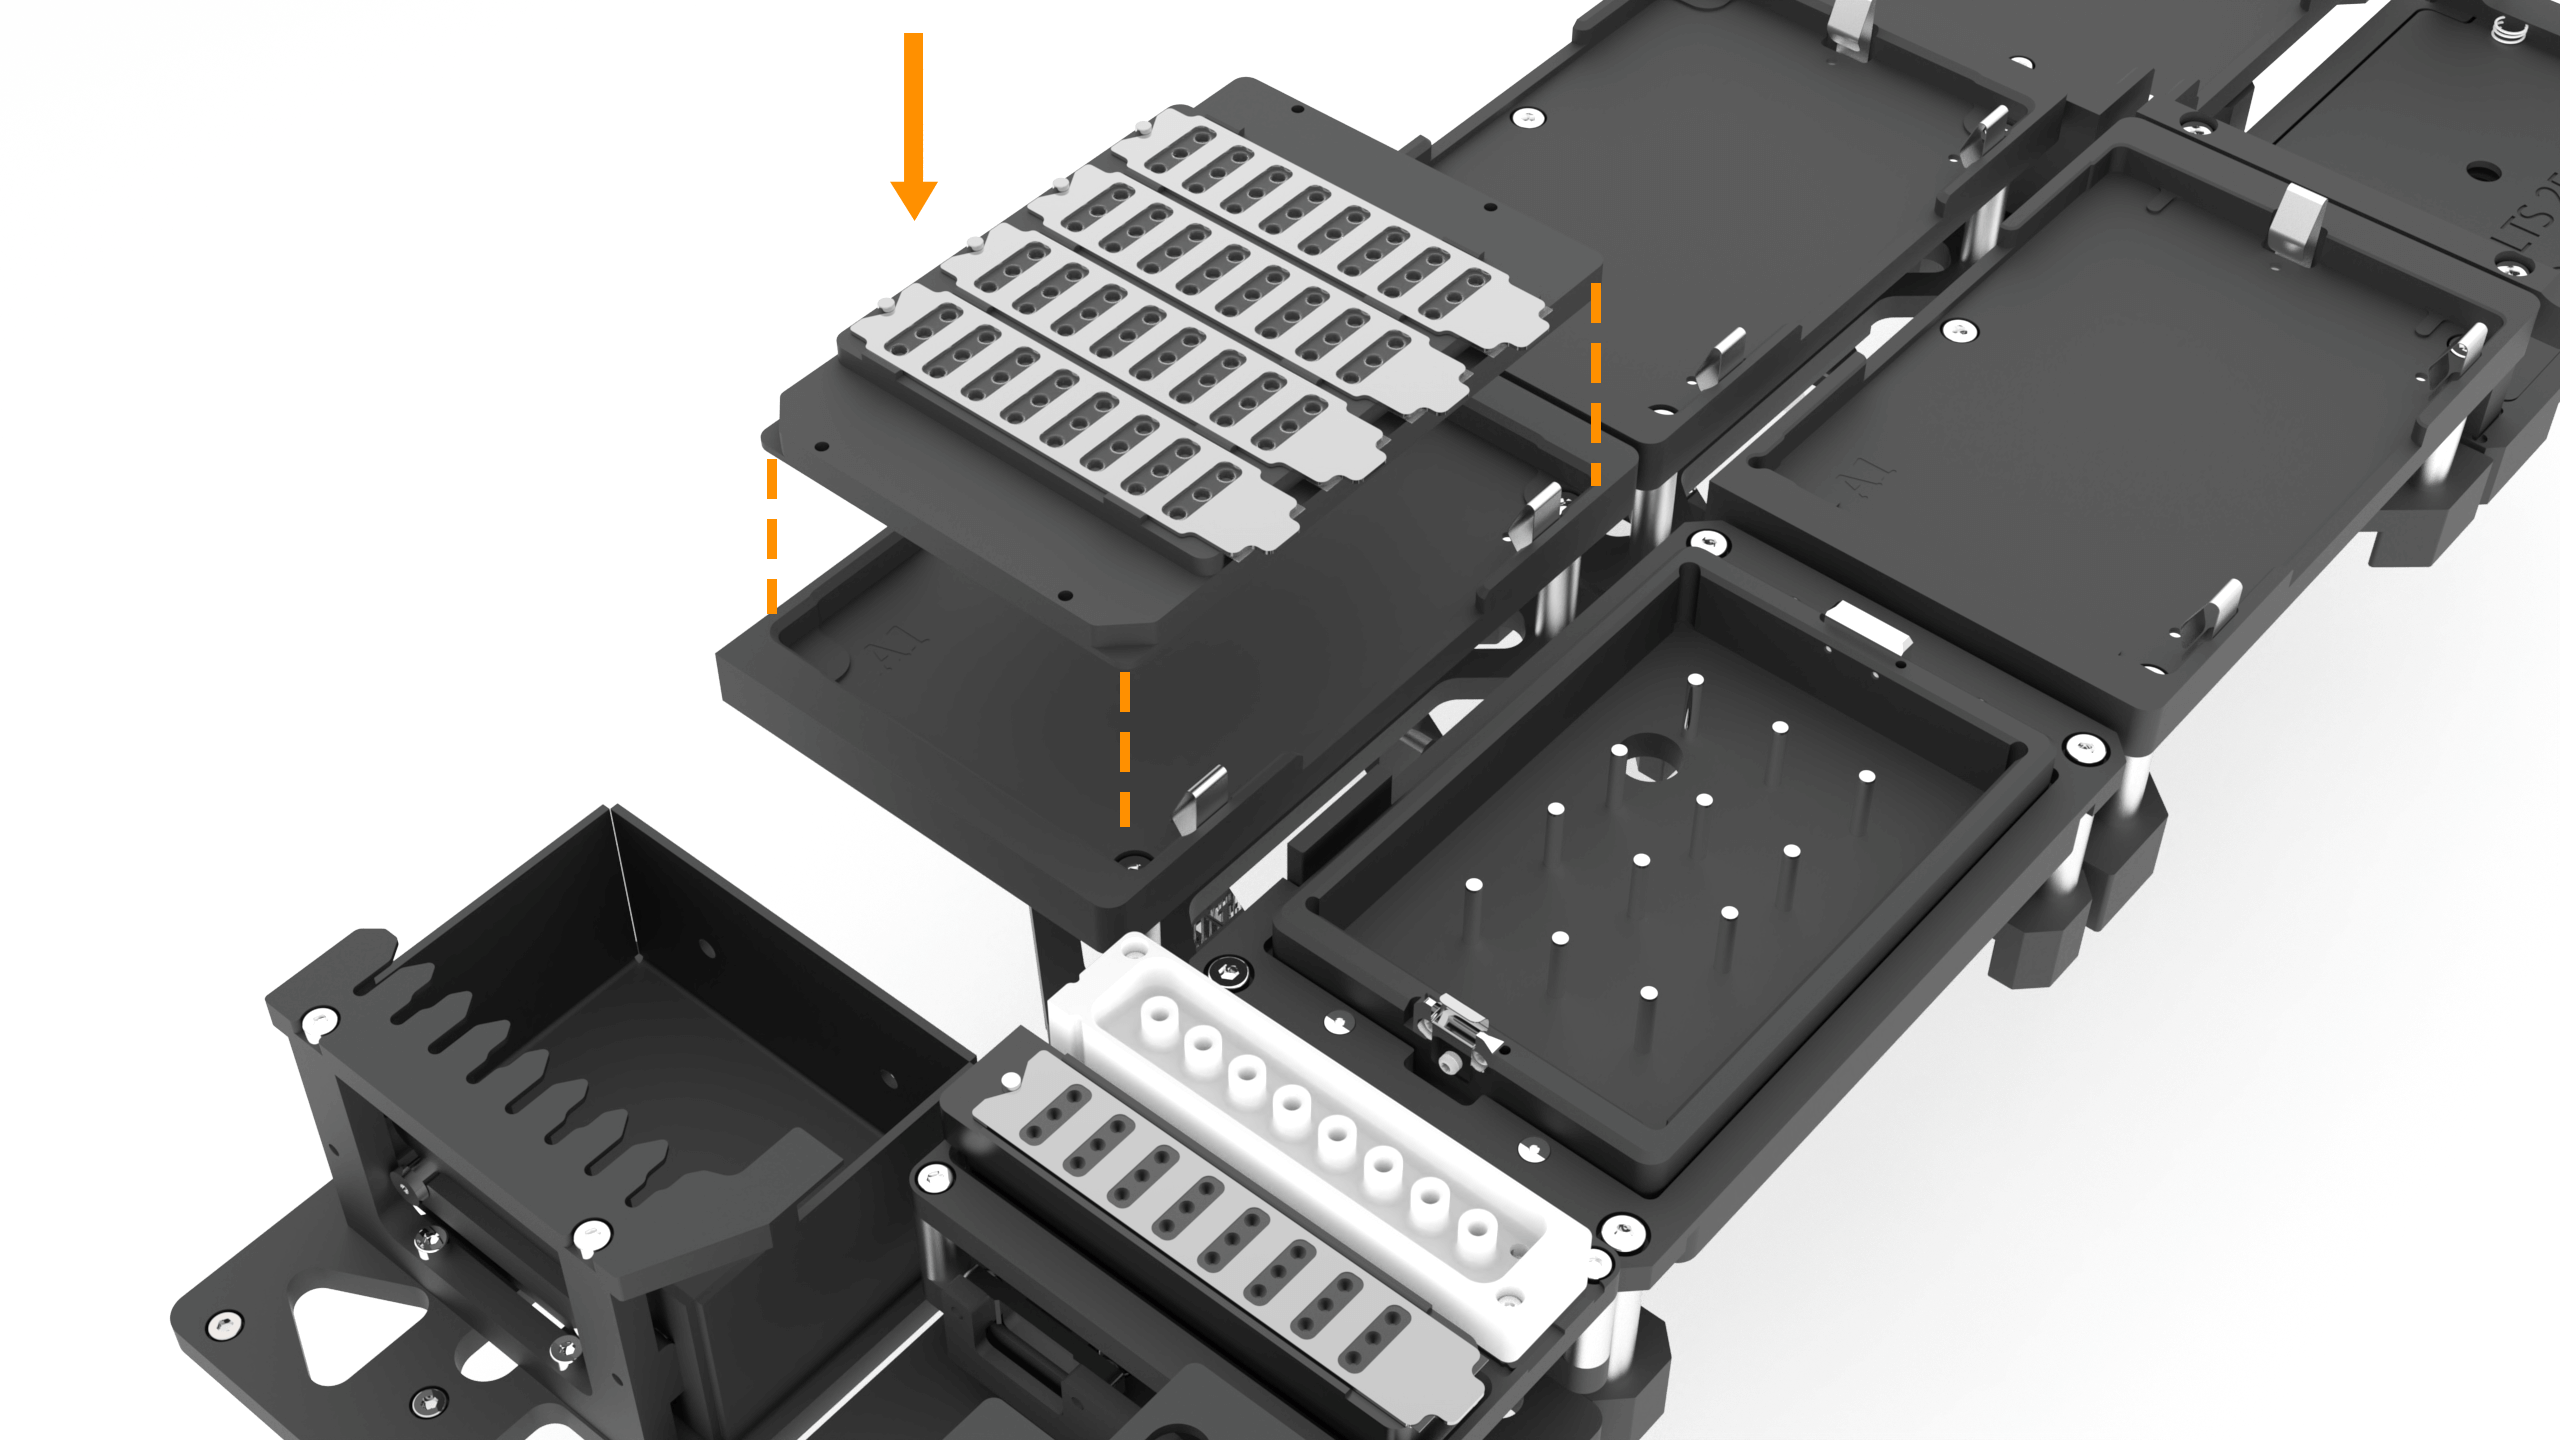
The HV Multi-source Protein Block
Installing the LV Tip Caddy
The LV Tip Caddy serves as the container for LV tips, which are utilized in sitting drop, hanging drop, LCP, seeding, and serial dilution experiments.
Place the LV tip caddy on the LV tip caddy station.
Make sure it is secure.
Slide the tip caddy into position carefully, so as not to dislodge any of the tips.
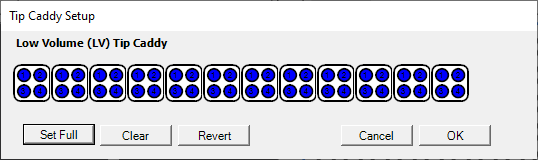
The LV Tip Caddy
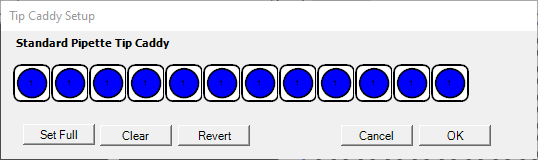
Installing the HV Tip Caddy
High Volume Tip Caddy serves as the container for plate copy tips, which are utilized in a plate copy experiment. If your NT8 instrument didn’t come with this option upon purchasing, you don’t need to follow this instruction.
Click the Device menu and select Move to Park Location 1 to move the NT8’s head to the waste station. This gives you space to interact with items on the right side of the stage, and thus allowing you to place the HV tip caddy into place easily.
The HV Tip Caddy for V4 Hardware
The HV Tip Caddy for V3 Hardware
Installing the Reference Plate
This tutorial goes to all of the three plate stations on the NT8 deck.
Put the reference plate on the desired microplate station.
Make sure the arrow mark position is on the top-right corner.
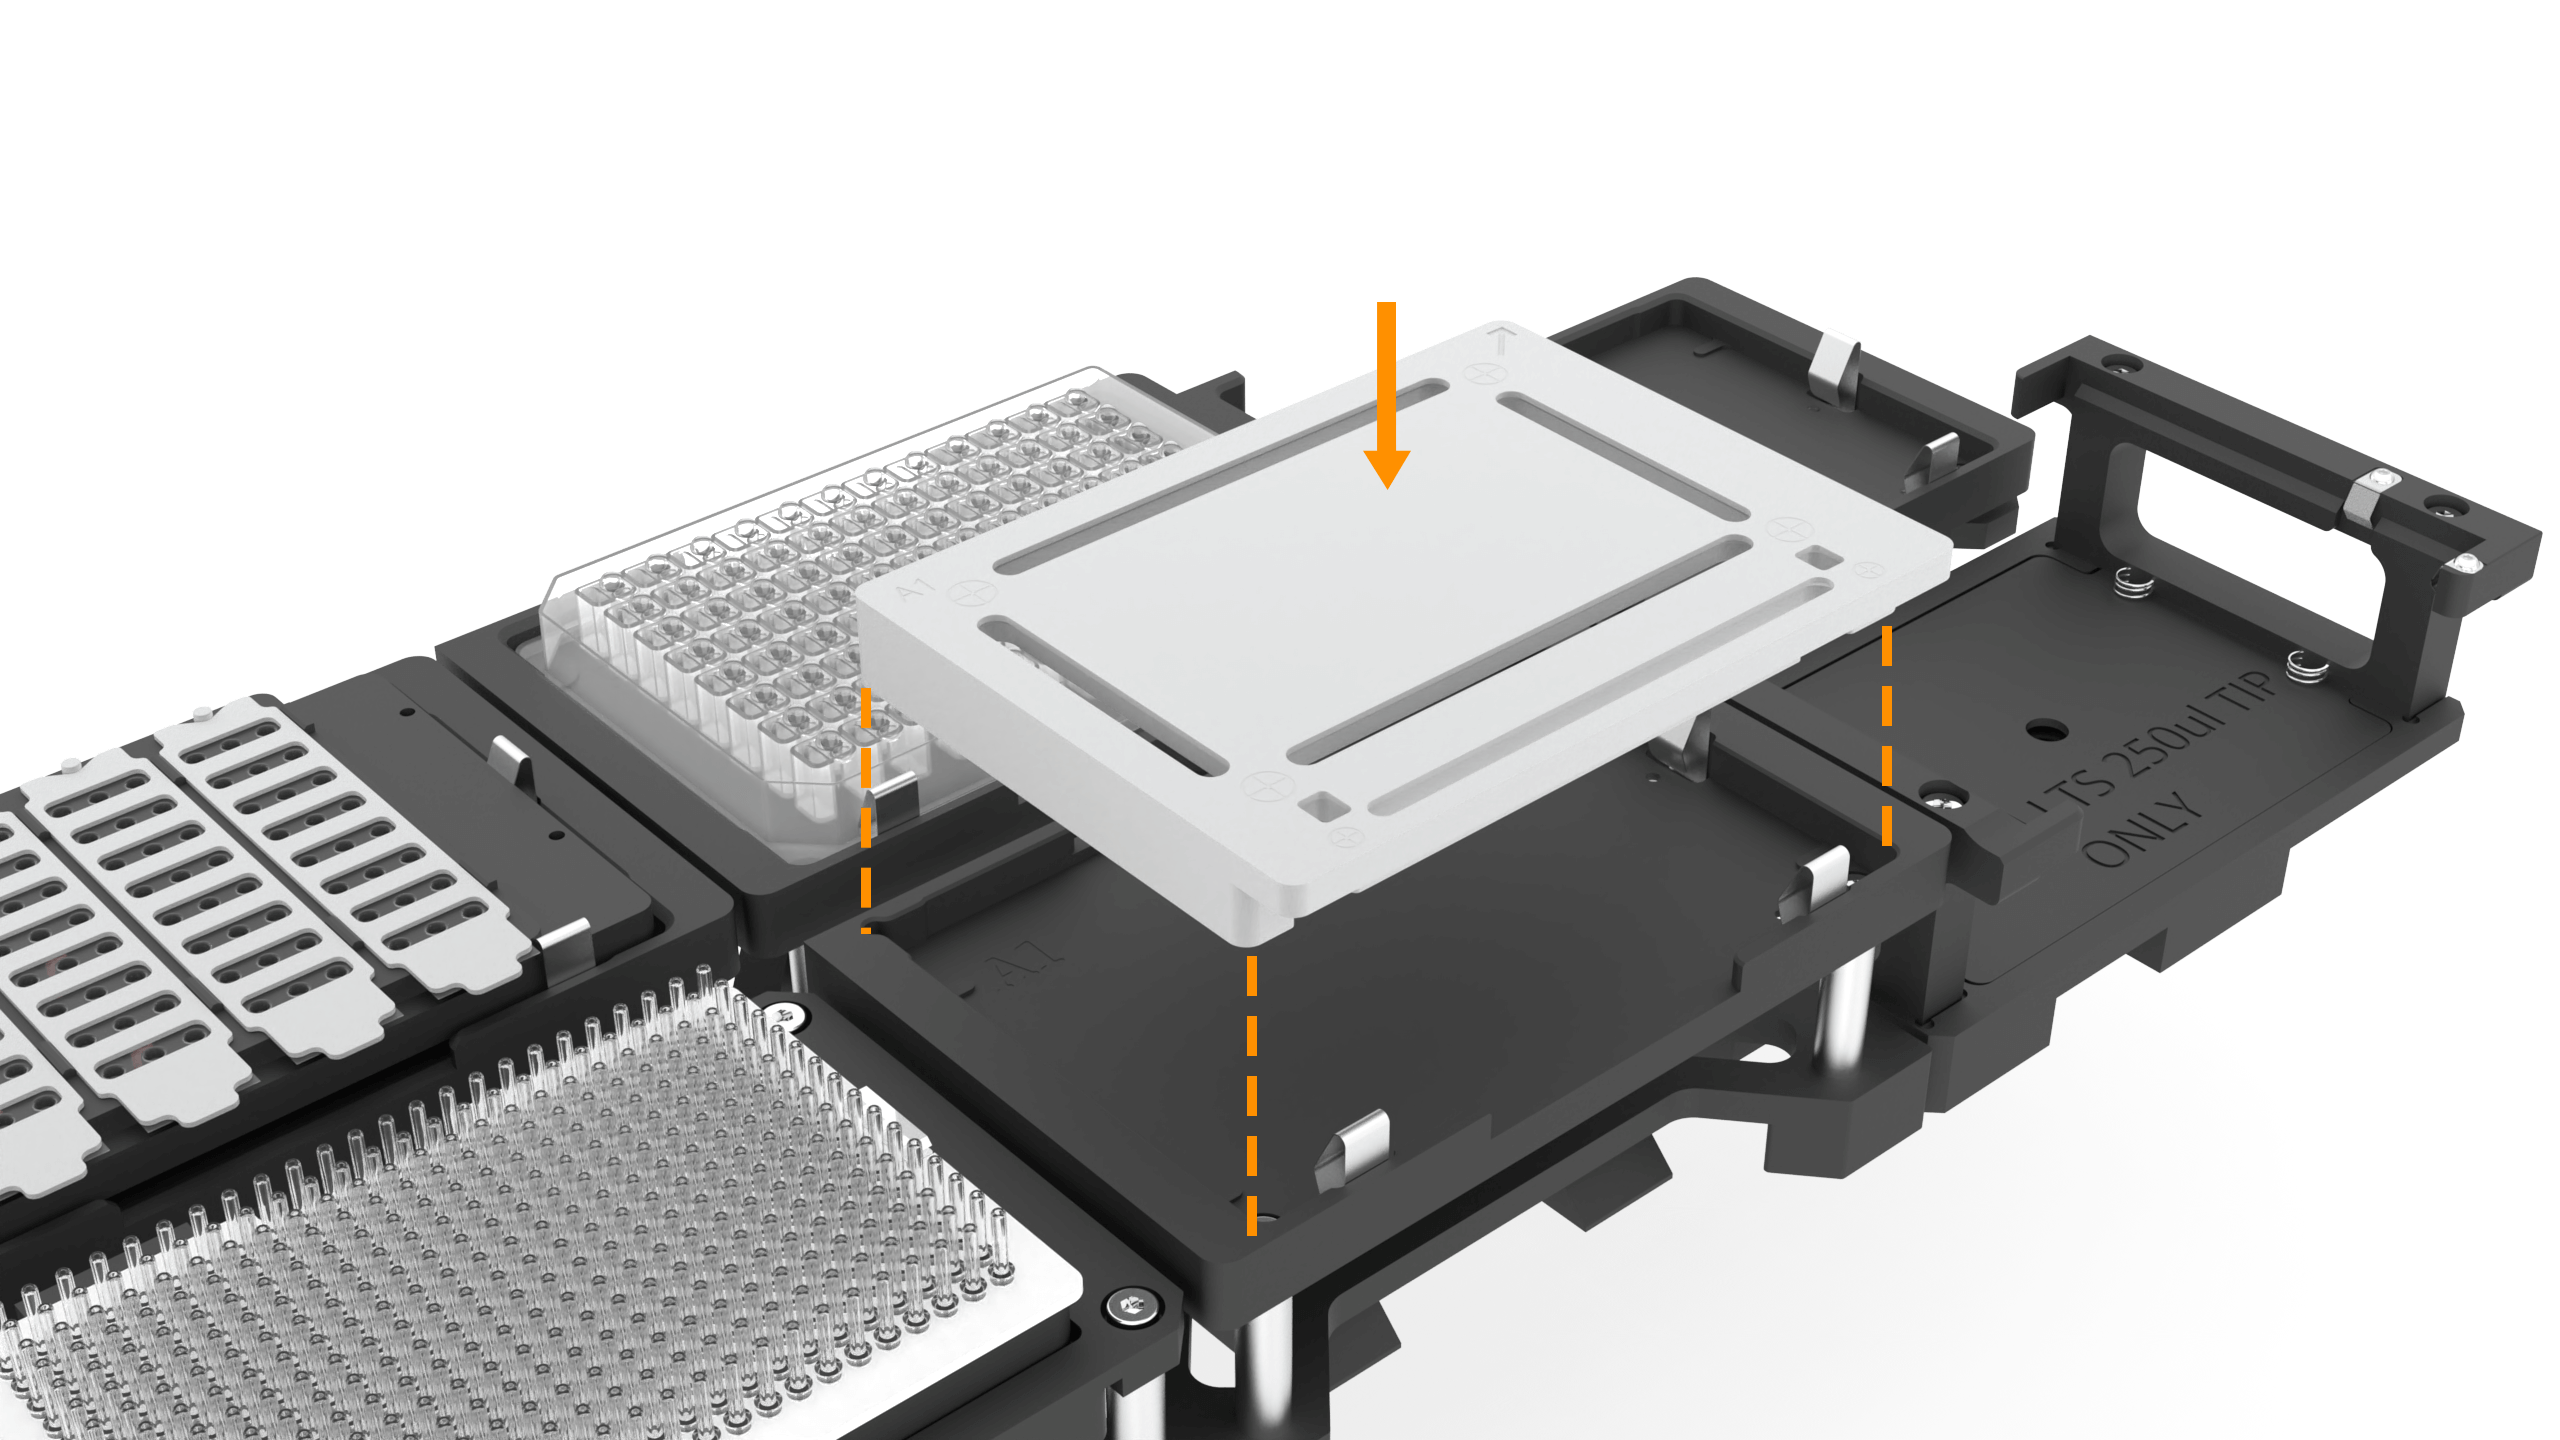
The Reference Plate
Related Topics