Requesting Parts for Issued Out Transaction
The Request Part feature is used to request items from a warehouse to be issued out for a Work Order (WO). It allows users to initiate part requests directly from the Work Orders table, specify the required items and quantities, and determine how issued quantities are allocated using Job ID.
Based on the request, the system automatically:
Validates available stock,
Assigns the appropriate warehouse,
Creates the Issued Out transaction,
Creates corresponding Transaction Line Items (TLIs) per Item ID and Job ID, and
Sends email notifications to the Warehouse team, including item details, quantities, warehouse and bin locations, job information, and scannable QR codes to help them confirm, pick, and deliver parts accurately.
Note
Job ID indicates which job or project the issued items are intended for.
In practice, a single Work Order (WO) may cover more than one job, project, or production stage. To represent this, a WO can be conceptually divided into smaller job scopes, commonly referred to as Work Order Child (WOC). Each WO or WOC is then assigned a unique Job ID called WO/WOC Job ID.
By assigning a Job ID during the Request Part process, users can control how quantities and costs are allocated, even when the same item is used for different jobs under the same WO.
Prerequisites:
The selected WO is in Open to Buy status.
At least one warehouse in the same company is marked as Warehouse for Issued Out.
The WO contains an eligible Work Order Line Item (WOLI).
Note
A WOLI is considered eligible to appear in the request only if all of the following conditions are met:
The Item Category for the item is not Process.
The Issued Discrepancy of the WOLI is greater than 0.
Warehouse stock for issuing the item is greater than 0.
The Committed Available Quantity (CAQ) must be greater than 0 if:
The warehouse storing the item is marked as Include in CAQ.
The item’s Main Category is OTS.
The item does not have Controlled Inventory data in the Item Inventory Summaries table for the company.
The WOLI has not reached its required quantity from previous unconfirmed requests, if any.
To request parts for issued out transaction:
Open the Work Orders table and select a WO with an Open to Buy status.
From the Actions menu, select Request Part to open the request wizard.
Request Part Action
In the Select Origin section, choose how the list of requested items will be defined.
Automate By System (Default)
The system automatically lists all eligible WOLIs for the selected WO on the next page. It is suitable if all the requested items belong to one project or Job ID.
Note
All requested items will use the same Job ID from the selected WO, and it cannot be edited.
Each Item ID appears only once in the request.
Import Using CSV
Allows the requester to define the list of requested items in a CSV file. This option is suitable if you need to issue the same item to multiple projects or Job IDs, or you want to pre-define requested quantities in bulk. Upload the file using Choose File. For details about preparing and importing the CSV file, refer to the Importing Items Using CSV section.

Select Origin Section
For example:
Use Automate By System when you need 10 units of Item A for one Job ID.
Use Import Using CSV when you need:
6 units of Item A for Project X (Job ID X).
4 units of Item A for Project Y (Job ID Y).
Item A will appear in two rows, each with a different Job ID.
Select Next to open the Edit Line Items section. The system displays eligible items based on the selected origin.

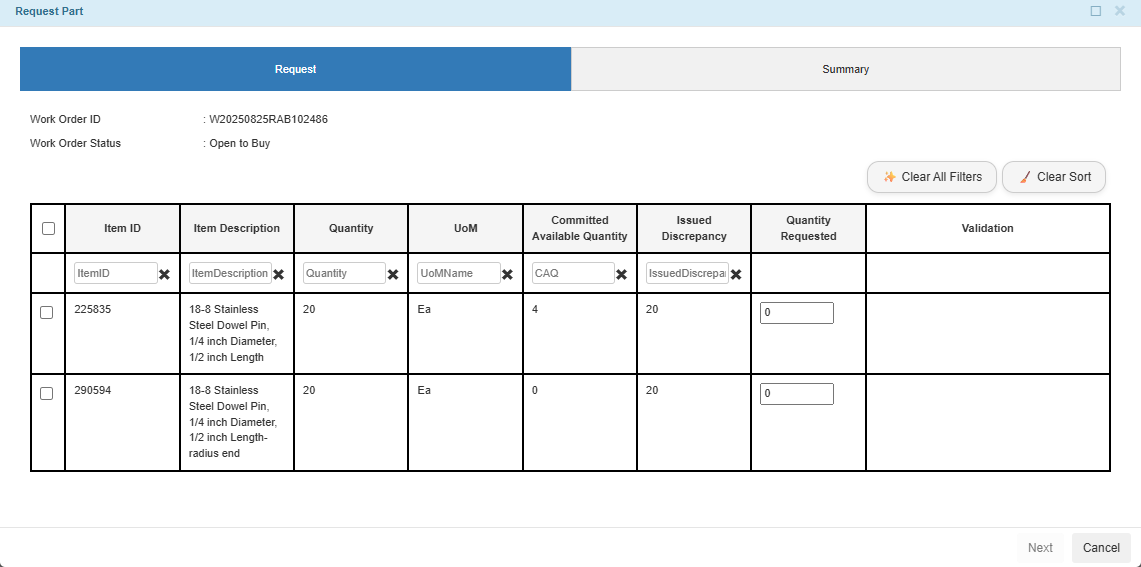
Edit Line Items Section
Note
When using Import Using CSV, the same Item ID may appear in multiple rows if assigned to a different WO/WOC Job ID.
Select View Full Rules to understand how items are included in this list.

View Full Rules Button
Select the checkbox for the desired items to include in the request and enter the Quantity Requested for each selected item.

Select Item and Enter Quantity Requested
Important
The request cannot be submitted if all the checkboxes are unchecked or Quantity Requested is 0, empty, or invalid.
The Quantity Requested must not exceed:
If there is any Unconfirmed Quantity for the item, meaning quantities that have been requested but not yet confirmed by the Warehouse, the total of Quantity Requested and Unconfirmed Quantity must not exceed the WOLI Quantity.
Enter the expected date to receive the items in the Pickup Date field. The date must be today or a future date.

Pickup Date
Important
If you navigate Back to Select Origin, any changes made on the Edit Line Items will not be saved.
Select Next to proceed to the Summary.
The Summary page displays Item ID, Quantity Requested, WO/WOC Job ID, and Pickup Date. Review the information carefully, then select Submit to complete the request.
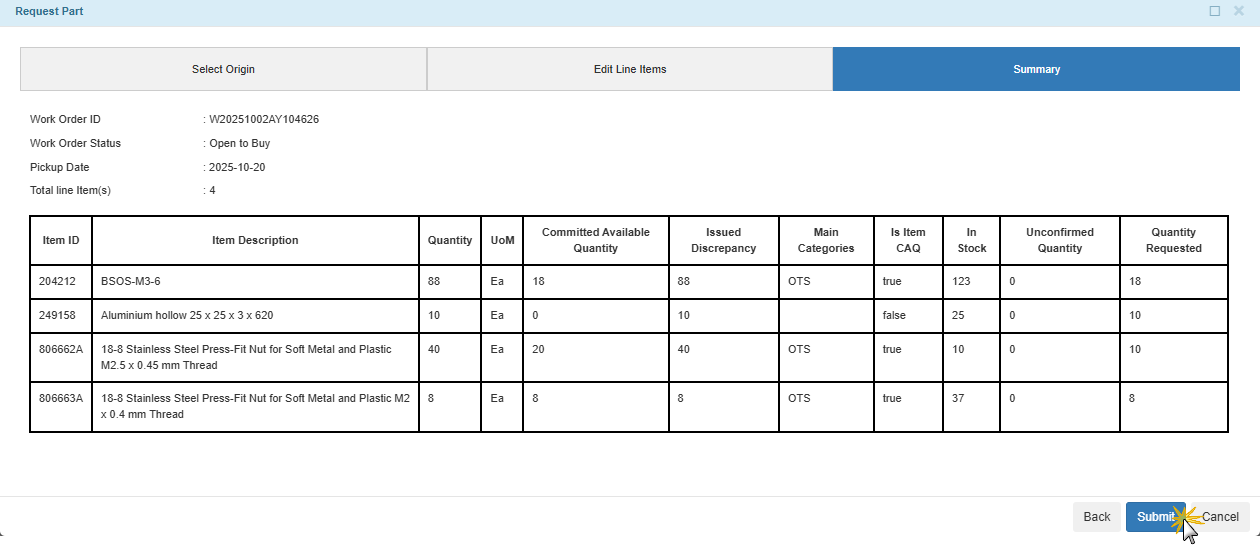
Summary Section
Post Conditions:
TIGA automatically:
Creates one or more Issued Out transactions based on warehouse availability.

Issued Out Transactions for the Work Order
Creates corresponding Transaction Line Items (TLIs). If the same Item ID is issued to different jobs, it will be recorded as multiple rows, one per WO/WOC Job ID.

Transaction Line Items
Sends an email notification to the Warehouse team, requester, and the WO’s Assignee and Requester. The email includes a PDF listing all requested line items, quantities, warehouse and bin locations, job information, and scannable QR codes.

Request Part Email Result
The Warehouse team can complete the process by confirming the TLI. Read more about confirming items using the scan barcode.
Importing Items Using CSV
Import Using CSV is recommended when:
A Work Order (WO) contains a large number of items, and only a subset of them is needed at a time, or
The same Item ID needs to be issued to different projects or Job IDs.
Instead of selecting items one by one, you can manage the request more efficiently.
To obtain, prepare, and upload the CSV file:
In the Select Origin step, select Send to Email to receive a CSV file via email.
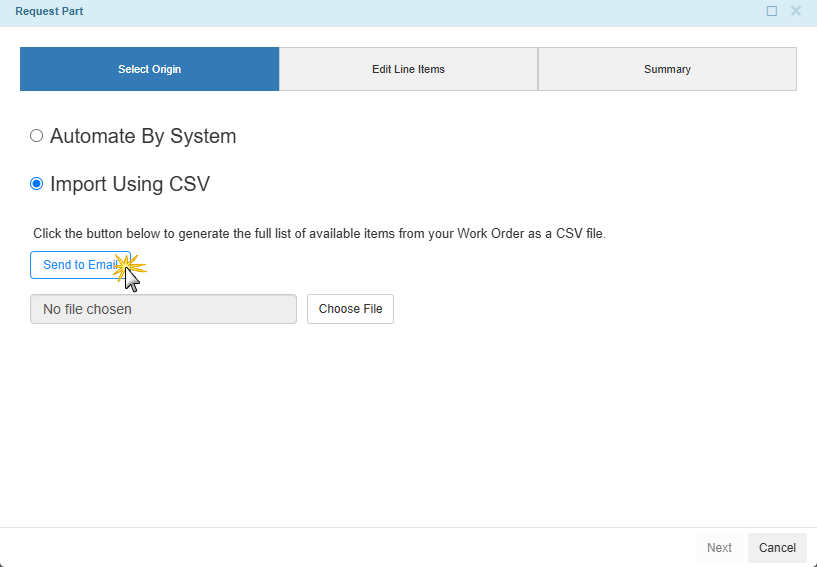
Send to Email Button
Note
The file includes all eligible line items along with their in-stock quantities, unissued quantities, prefilled requested quantities based on stock availability, and the Job ID from the selected WO.
Download the attached CSV file
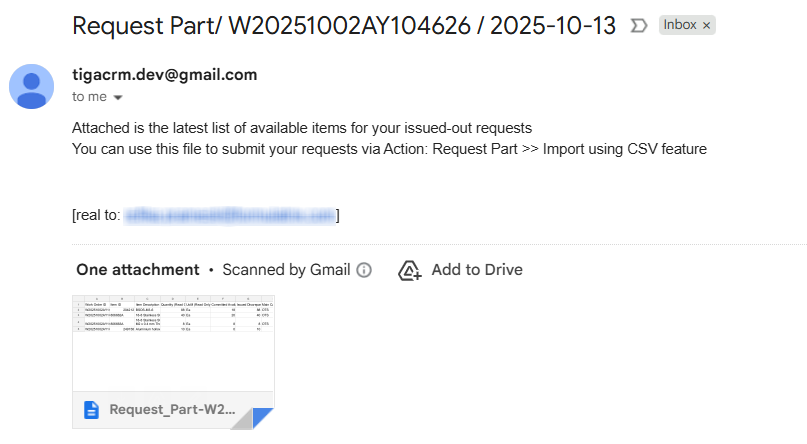
Email of CSV File for Request Part
Edit the CSV as needed.
Note
Make sure the following columns have valid entries, as the system depends on them for accurate data mapping and processing during import.
Work Order ID
Item ID
Quantity Requested
WO/WOC Job ID
To assign the same Item ID to multiple Job IDs, add separate rows for each WO/WOC Job ID.
If the WO/WOC Job ID is left empty, the system uses the Job ID from the selected WO. It will remain editable in the Edit Line Items section.
Upload the edited file using Choose File.

Choose File
Post Condition:
The system validates the uploaded file and lists the imported items automatically.

Populated Requested Items
Continue from the main flow to review the populated items, make any necessary edits, and submit the request.
Watch Requesting Parts for Issued Out video: