Calibrating the Scales
The scales in the aµtoPULSE are designed to measure tube and liquid weight using a load cell sensor. With high precision, the load cell ensures accurate volume control during protocol runs. The scales are available in each station with different configurations:
Concentration Station: Left Conical Tube Scale, Microtube Scale, and Right Conical Tube Scale
Cleaning Station(s): Left Conical Tube Scale and Right Conical Tube Scale
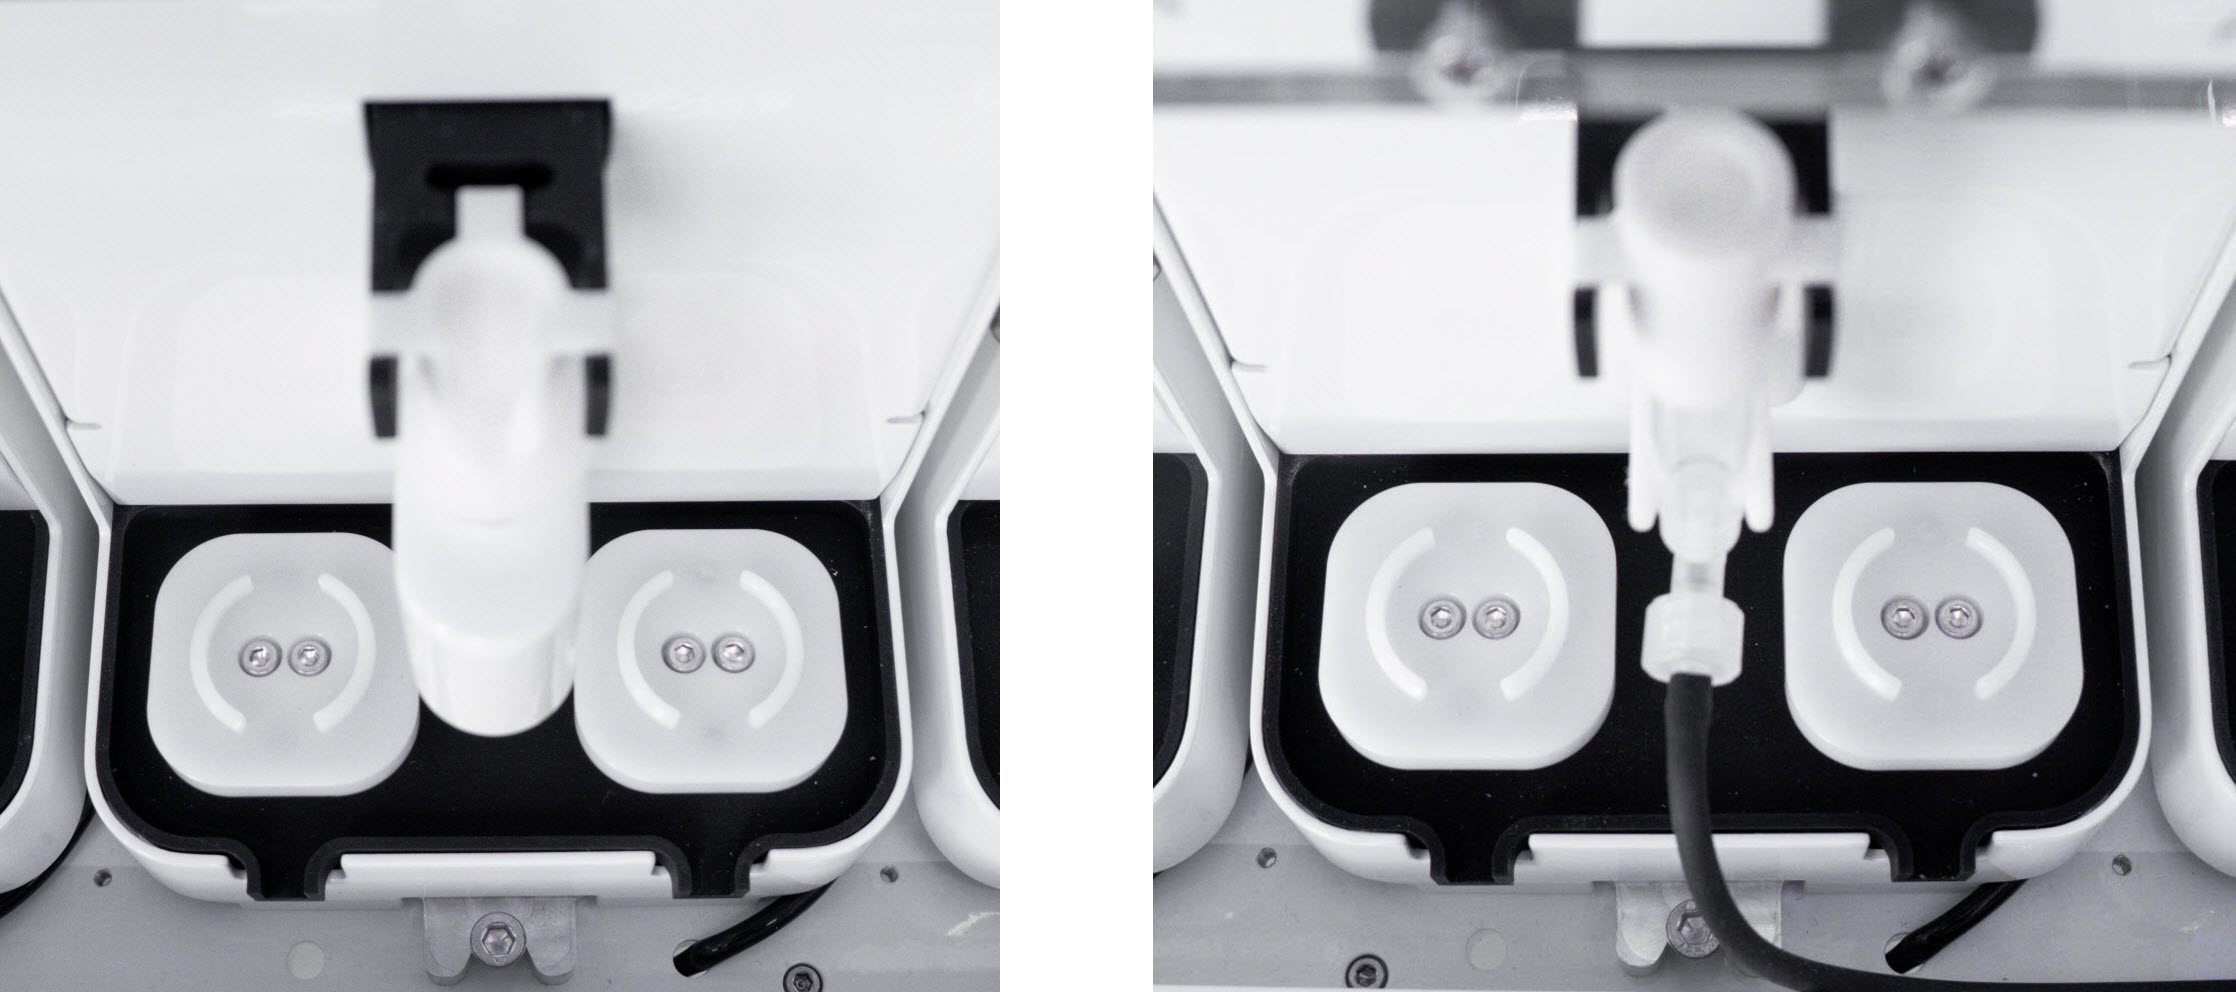
Scales in Concentration Station (Left); Scales in Cleaning Station (Right)
Over time, factors such as mechanical and electrical drift or environmental conditions can lead to inaccurate measurements. To maintain accuracy and prevent performance issues, periodic calibration is essential. Each scale must be calibrated individually. Follow the steps below.
Prerequisites:
Remove all tubes, 15 and 50 mL tube adapters, and chips from the stations.
Make sure that no weight is applied to the scales.
Required Tools:
100 g Calibration Weight (for Conical Scale calibration)
10 g Calibration Weight (for Microtube Scale calibration)
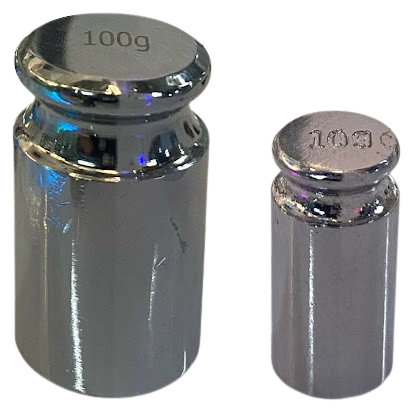
100 g Calibration Weight (Left); 10 g Calibration Weight (Right)
To calibrate the scales:
In the aµtoPULSE main menu, go to Tools and select Calibration. Then, navigate to the selected Station panel (for example, Station 1).
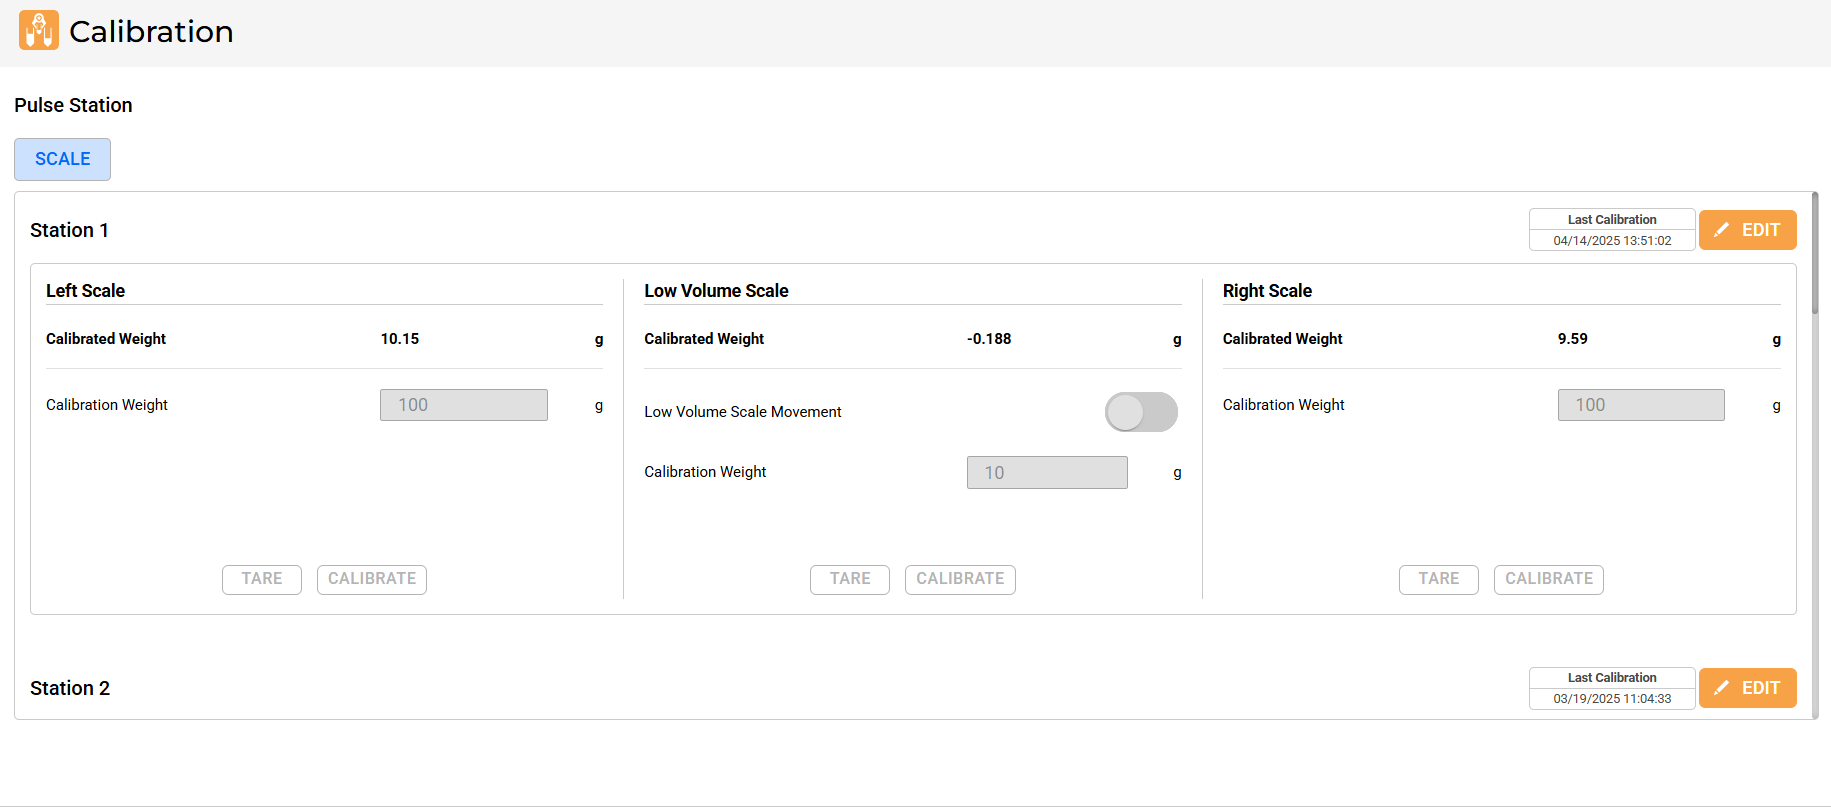
aµtoPULSE Calibration Page
See Last Calibration on the upper-right corner of the panel to check the calibration timestamp. Click EDIT to enable the button functions and configure the calibration settings.

Last Calibration Time
Do the following for each scale:
Left Scale and Right Scale (calibrate individually)
Click TARE to zero the scale.
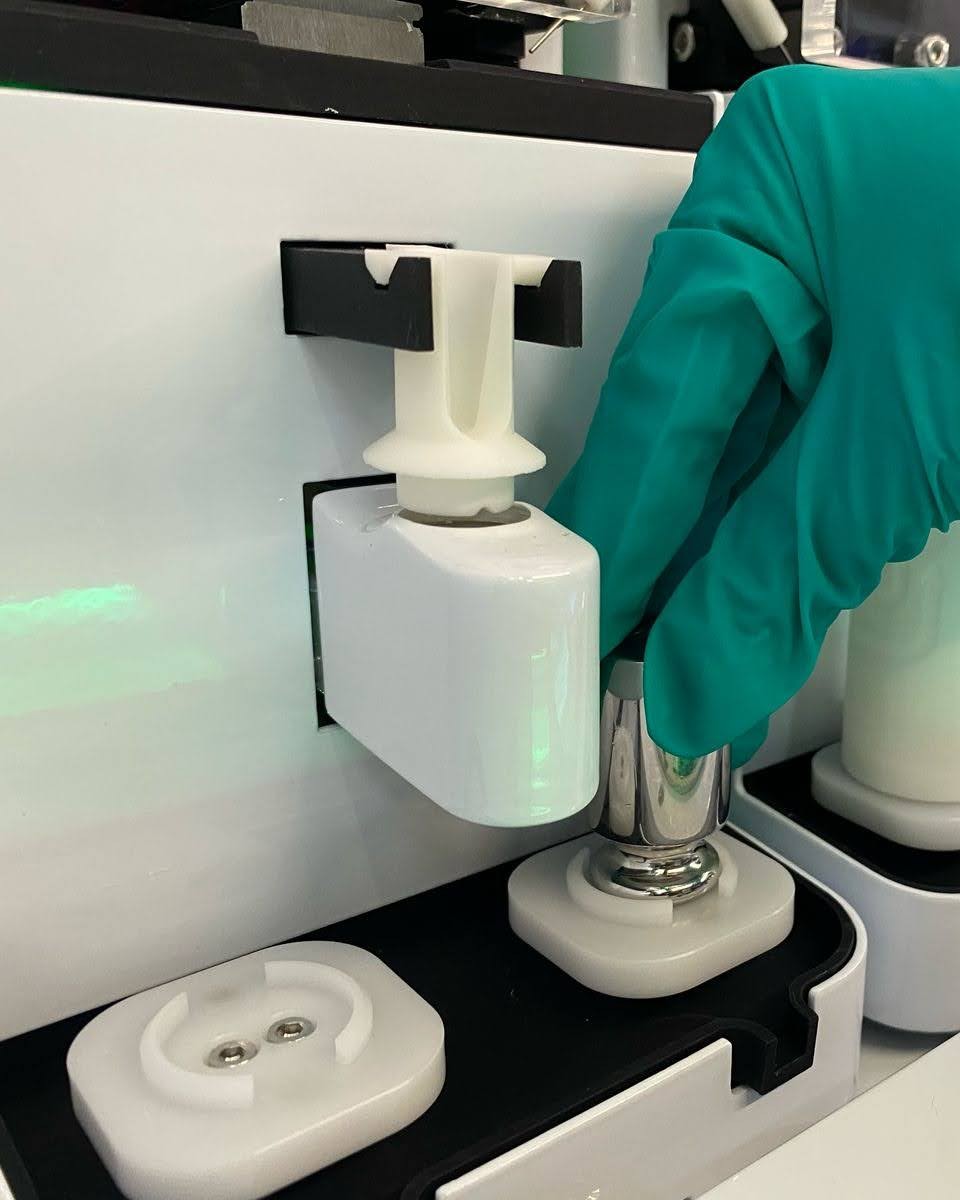
Carefully place the 100 g Calibration Weight in the center of the scale. Ensure proper placement, as seen in the image below.
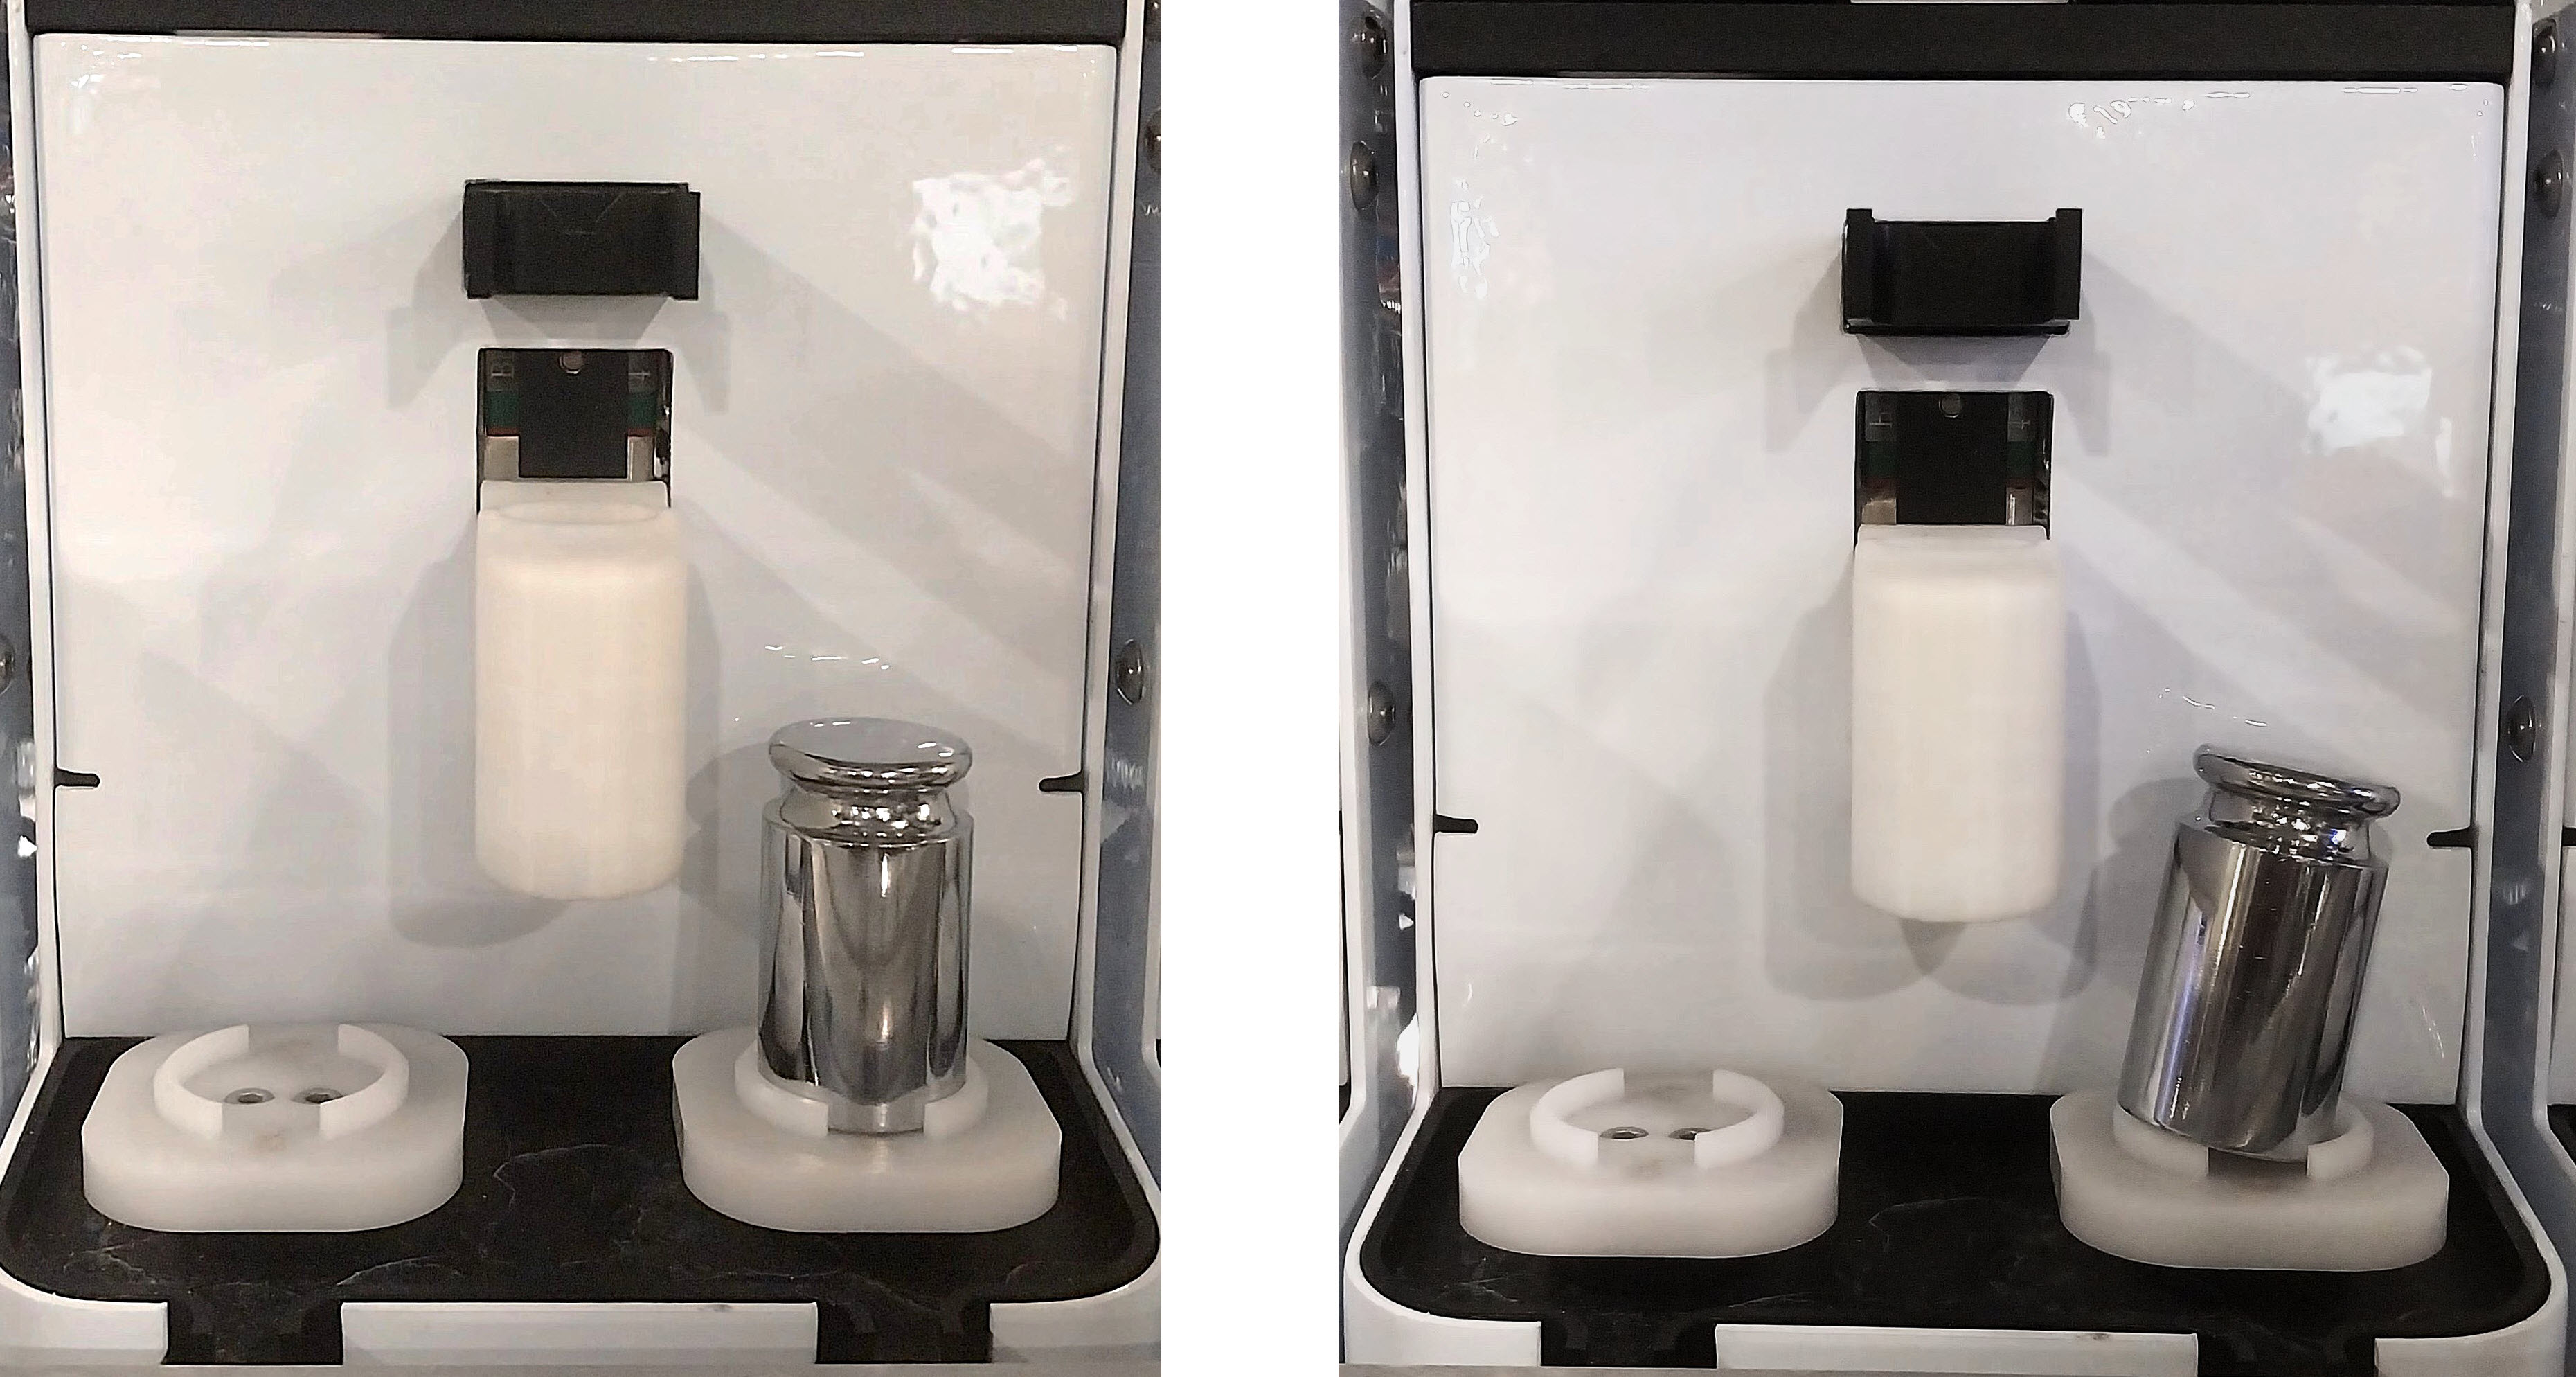
Proper Calibration Weight Placement (Left); Incorrect Calibration Weight Placement (Right)
Tip
If the calibration weight appears tilted or unstable, place it upside down for better stability.
Upside-Down Calibration Weight Placement
In the Calibration Weight field, enter 100 g.
Click CALIBRATE to initiate the calibration process. The system will fine-tune the scale and display the adjusted weight reading as the Calibrated Weight. The value should match the Calibration Weight.
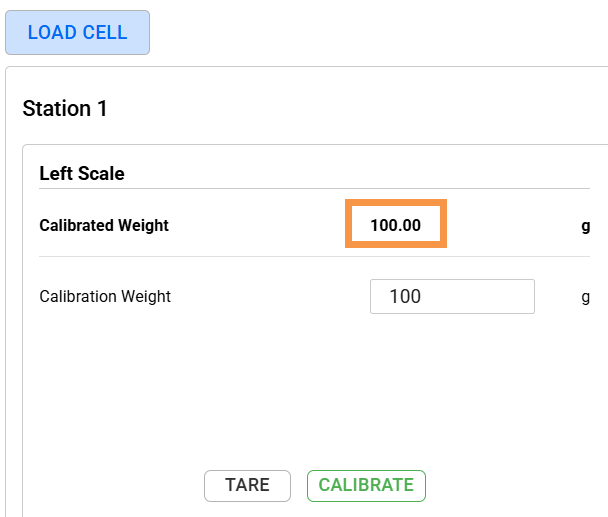
Calibrated Weight Value Matches the Calibration Weight
Note
The system allows a tolerance of ≤0.1 g on the Calibrated Weight. Recalibrate the scale if the value exceeds this range (e.g., 100.2). If the issue persists, contact support@formulatrix.com.
Repeat steps a-d to calibrate the other scale.
Microtube Scale
Important
The Microtube scale is fragile. Even light contact can exceed its load limit. Follow each step carefully and avoid direct contact with the scale to prevent damage.
Attach the microtube adapter. This prevents the calibration weight from direct contact with the load cell.
Activate the Low Volume Scale Movement toggle to lift the scale.
Click TARE to zero the scale.
Turn off the Low Volume Scale Movement toggle to lower the scale.
Carefully place the 10 g Calibration Weight in the center of the tube adapter.
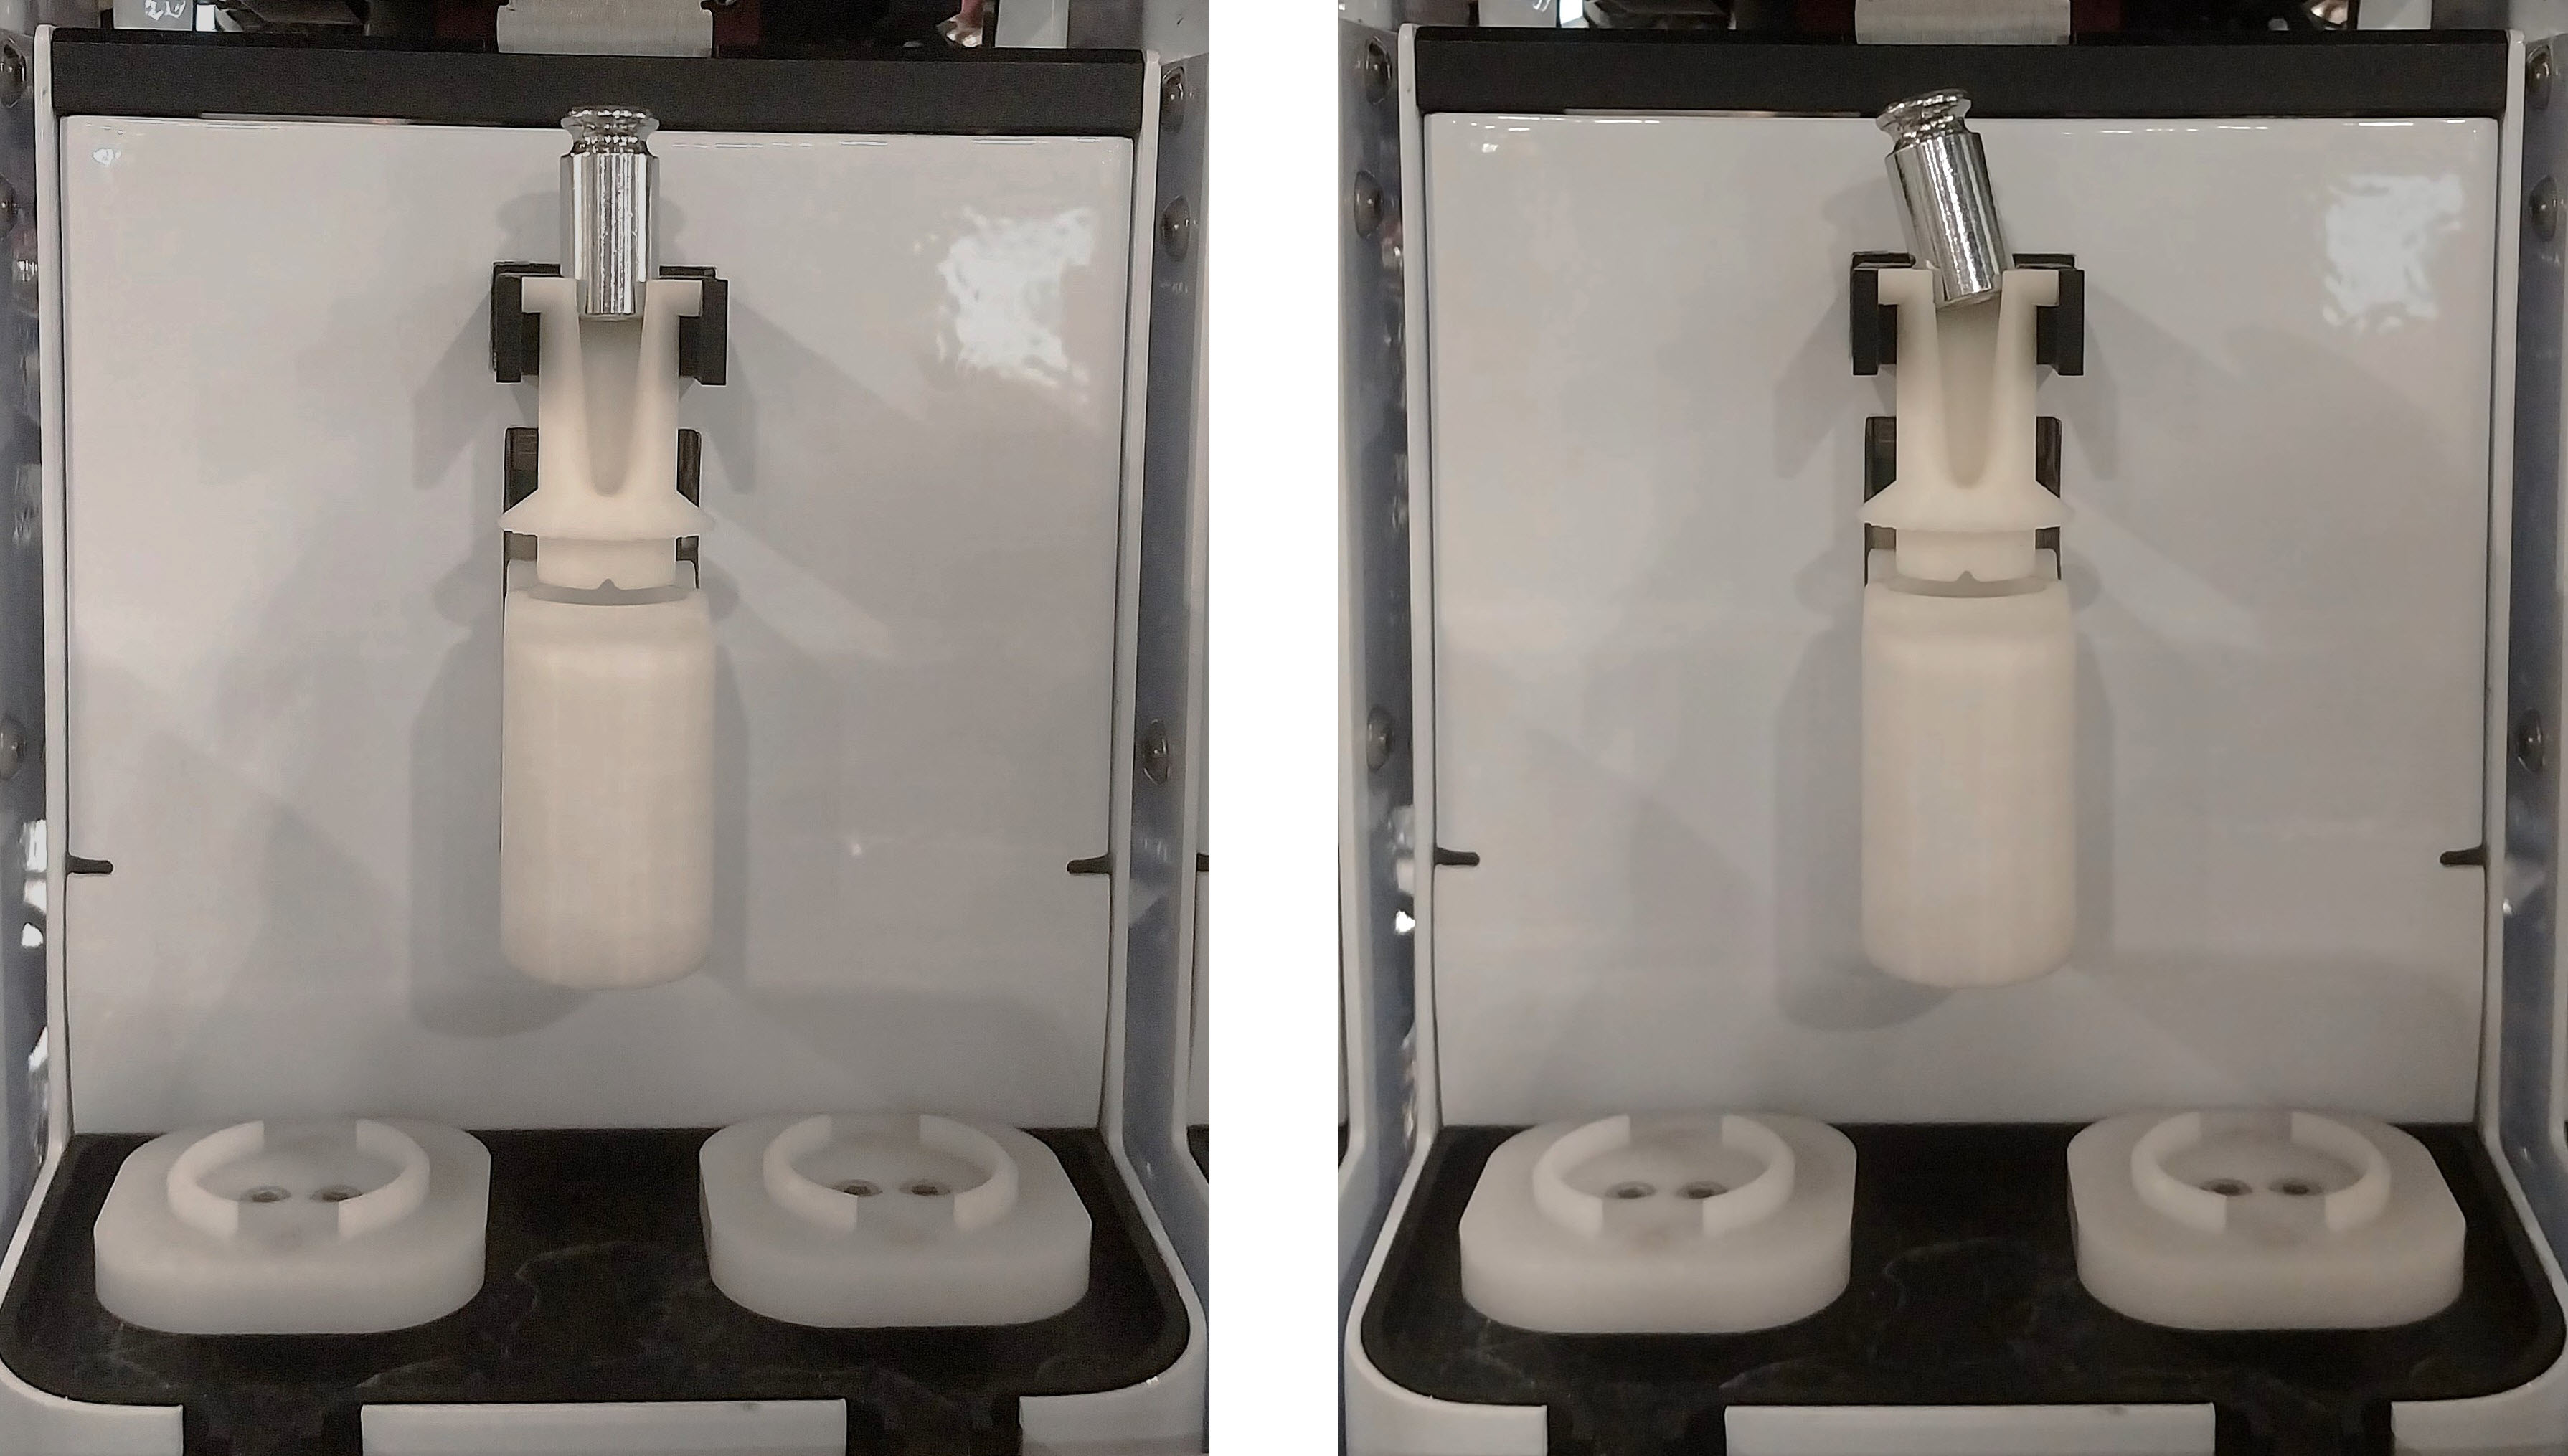
Proper Calibration Weight Placement (Left); Incorrect Calibration Weight Placement (Right)
Tip
If the calibration weight appears tilted or unstable, place it upside down for better stability.
Activate the Low Volume Scale Movement toggle to lift the scale.
In the Calibration Weight field, enter 10 g.
Click CALIBRATE to initiate the calibration process. The system will fine-tune the scale and display the adjusted weight reading as the Calibrated Weight. The value should match the Calibration Weight.
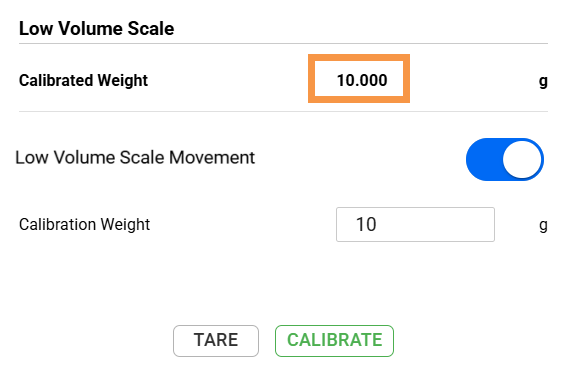
Calibrated Weight Value Matches the Calibration Weight
Note
The system allows a tolerance of ≤0.02 g on the Calibrated Weight. Recalibrate the scale if the value exceeds this range (e.g., 10.03). If the issue persists, contact support@formulatrix.com.
Turn off the Low Volume Scale Movement toggle to lower the scale.
Important
Do not skip this step. Damage can occur if the microtube scale is left in the upward position.
Click the SAVE button
 to keep the current calibration
settings.
to keep the current calibration
settings.Remove the calibration weight after calibration.
Repeat steps 2-5 for the remaining stations.