Peristaltic Pump Tubing Replacement Guide
This guide covers the replacement of pump tubing inside the peristaltic motor. A maintenance notification indicates when replacement is required. For instructions on replacing the full external tubing harness, refer to the Peristaltic Tubing Harness Replacement Guide.
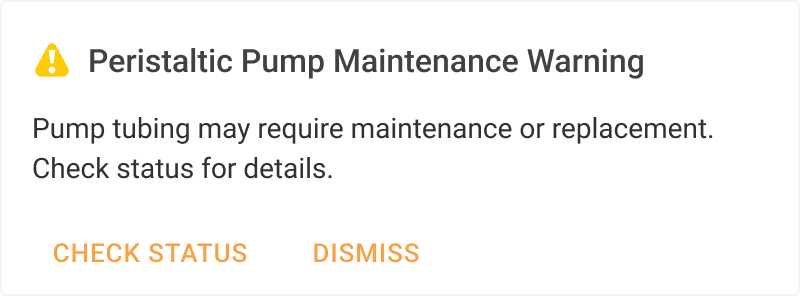
Peristaltic Pump Maintenance Notification
To help track tubing condition and lifespan, aµtoPULSE provides the Performance Metric page with the following indicators:
Good: Tubing is in good condition and ready for use.
Replace Soon: Tubing may need replacement soon, but can still be used.
Replace Now: Replace the tubing immediately to prevent leaking or clogging. Ensure no protocols are running before replacement.
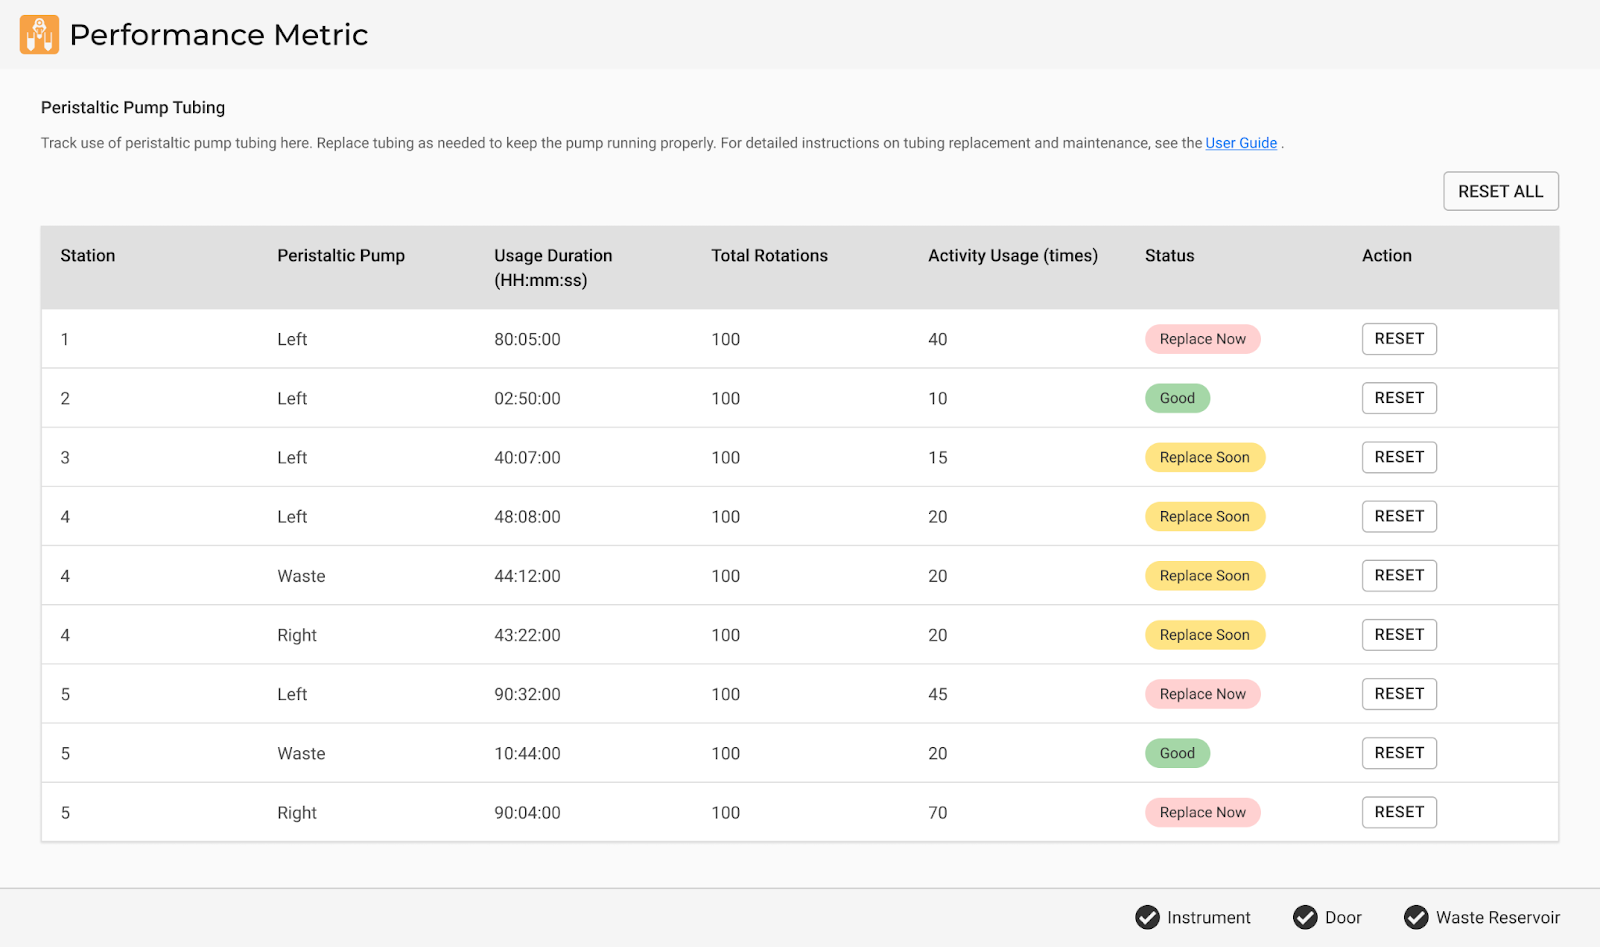
Performance Metric Page
Note
The Performance Metric details vary by Admin and Regular User role. See User Account Management for more information.
Follow the instructions below to replace the peristaltic pump tubing.
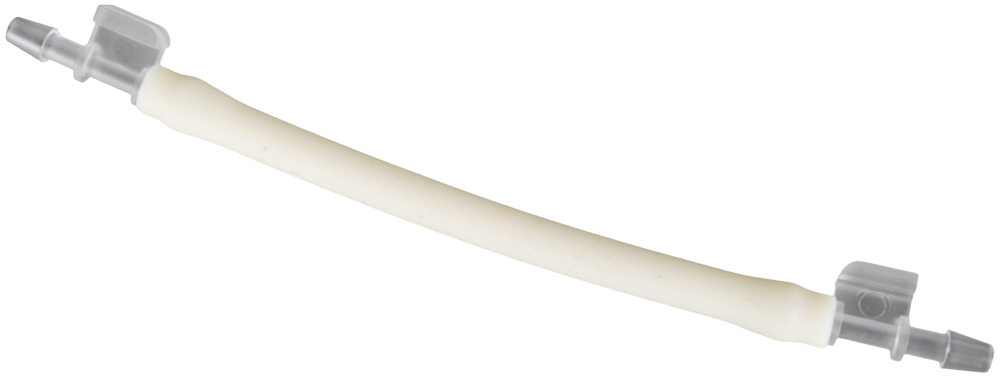
Required Part
Peristaltic Pump Tubing as required (PN: 817792A)
Important
Inspect the new pump tubing for any physical defects before installing.
Tools (Optional)
Nitrile gloves (for hygiene and safety)
Flashlight (for better visibility of tubing connections)
Section 1: Preparing the Instrument
Choose from the following options:
If the maintenance warning dialogue appears, click CHECK STATUS.
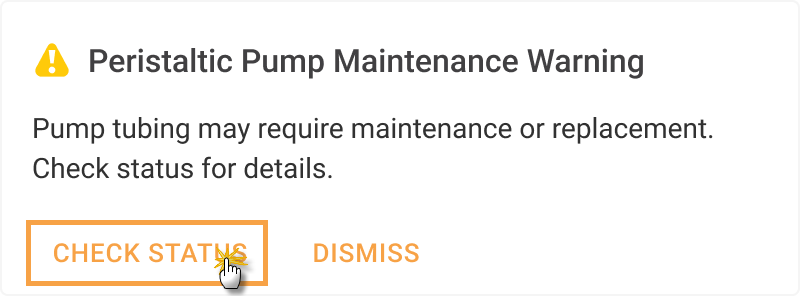
Click CHECK STATUS
For manual tracking, go to the Tools menu and select Performance Metric.

Select Performance Metric
Identify the peristaltic pump that needs tubing replacement in the Performance Metric page.
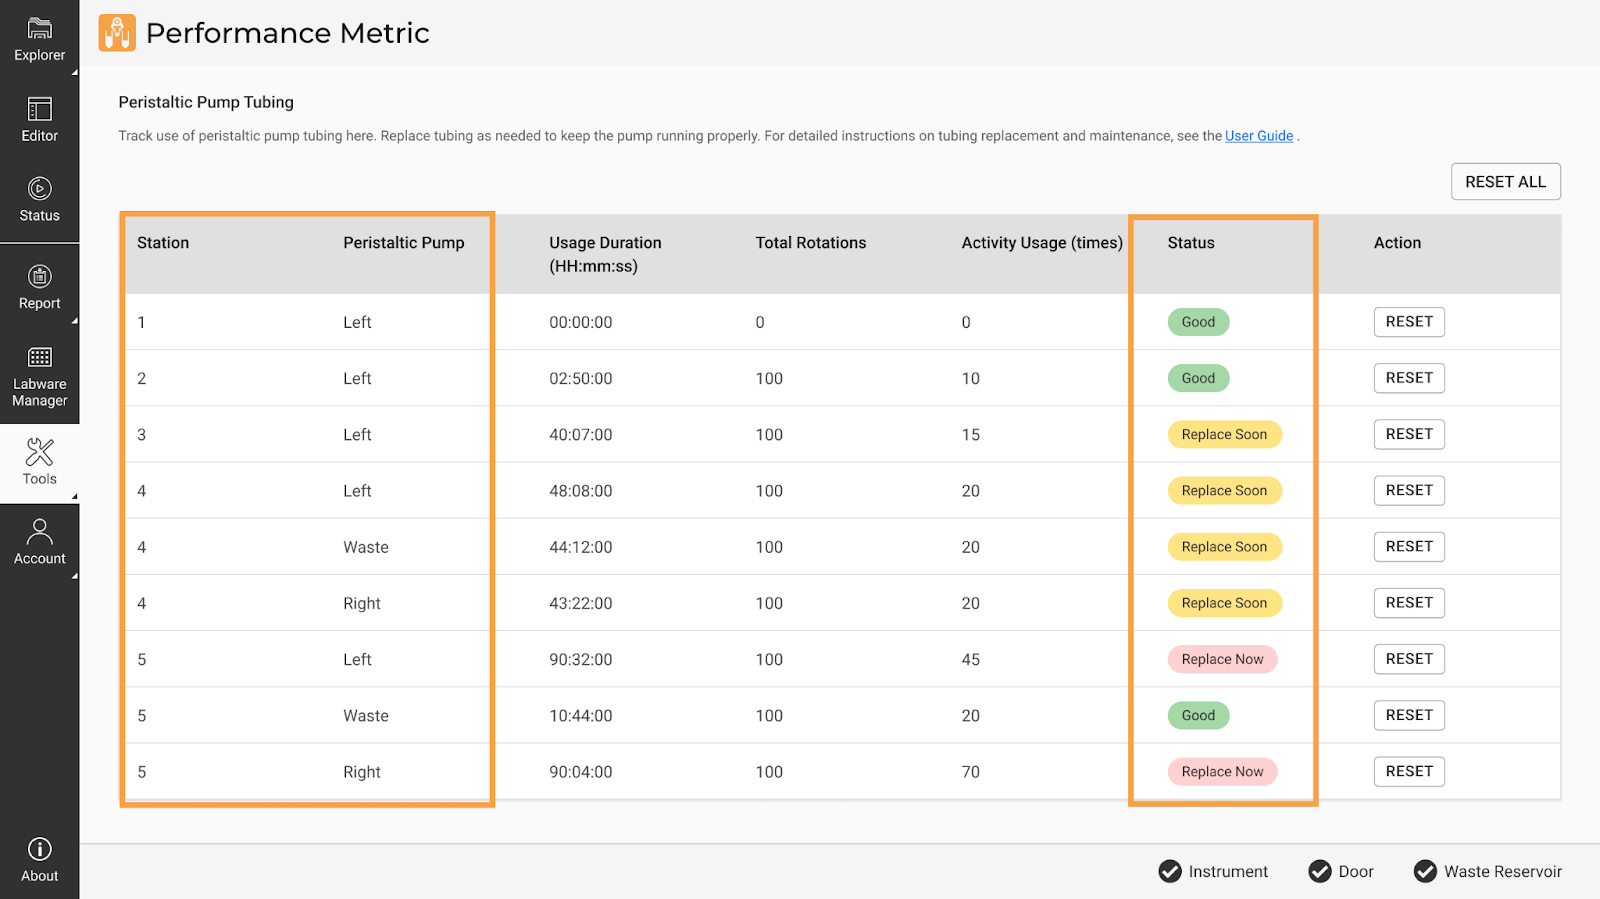
Identify Peristaltic Pump and Tubing Status
Purge and retract the remaining liquid in the tubing:
Open the Manual Control page from the Tools menu.
Select the affected STATION, then expand the Pulse Station Movement tab.
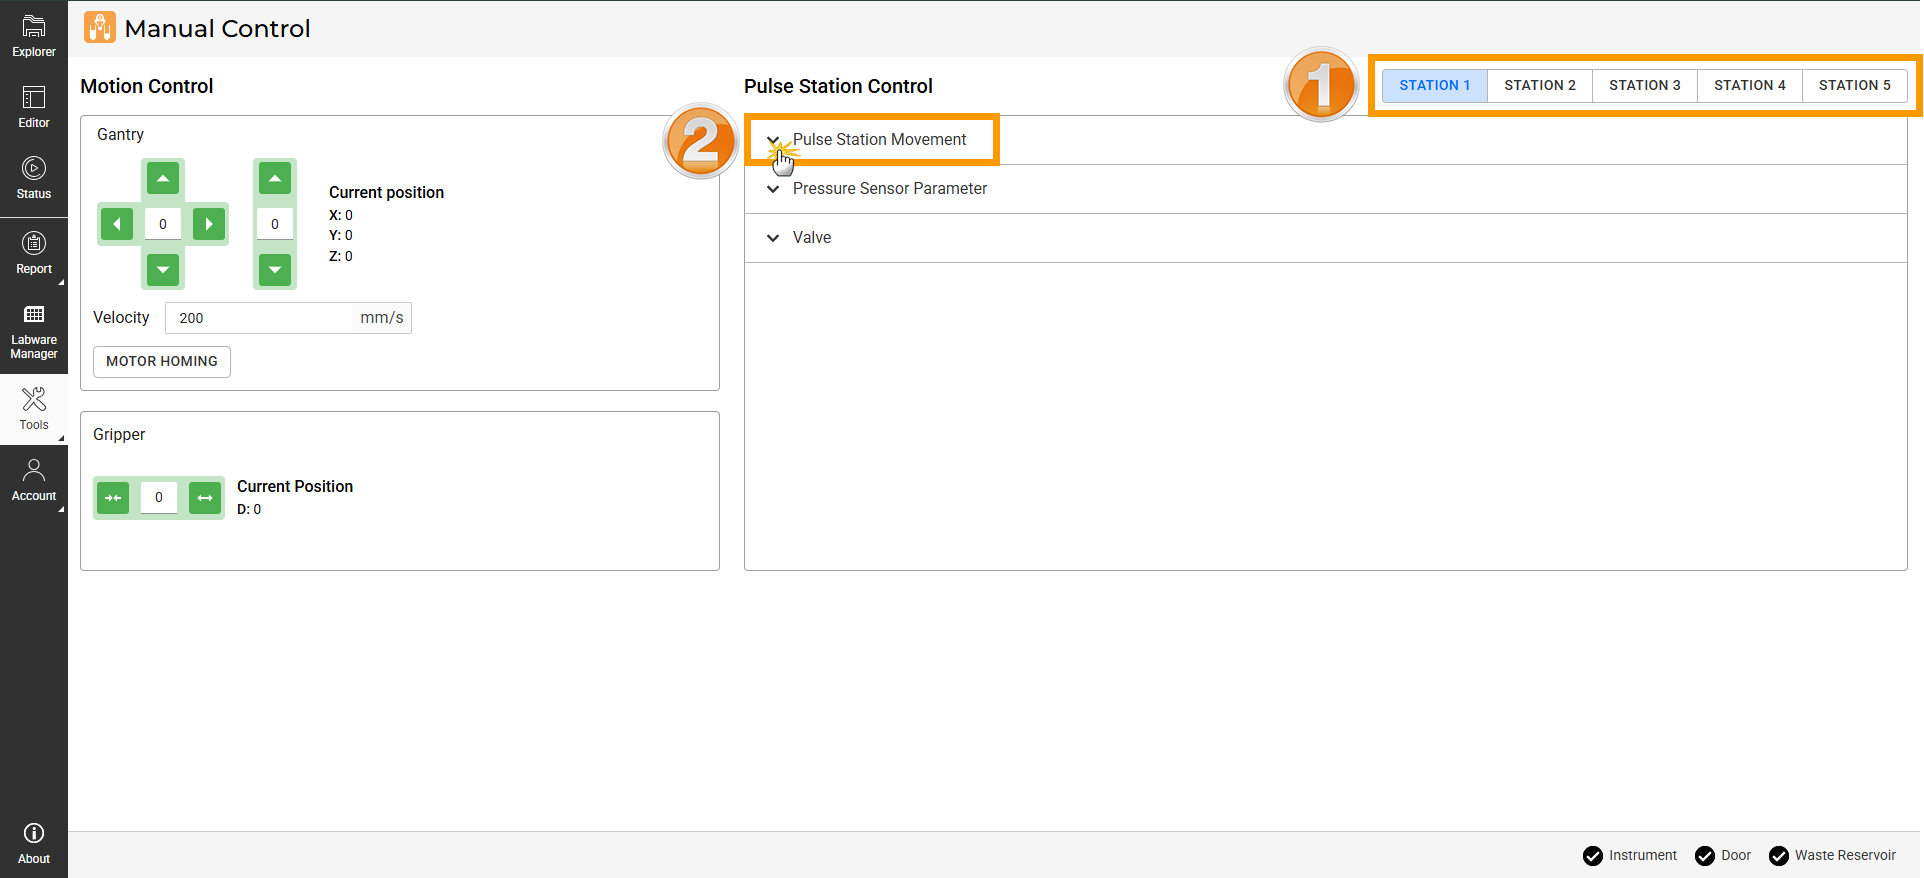
Expand the Pulse Station Movement Tab
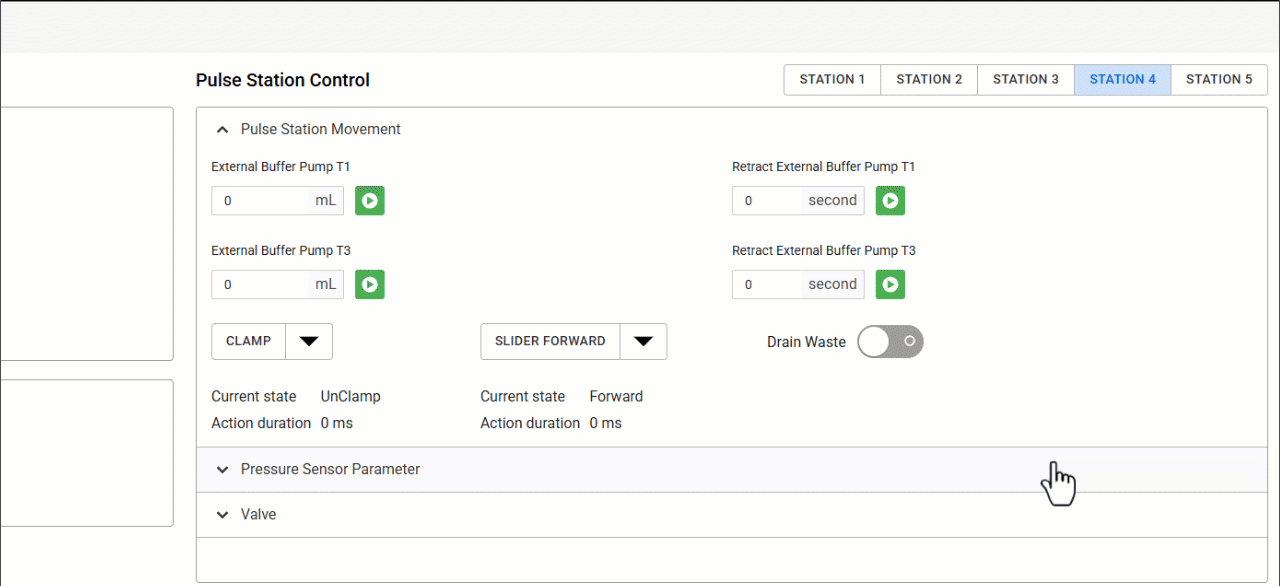
Under Retract External Buffer Pump, set the retraction time for 30 seconds to remove any remaining liquid from the station, then click Run
 .
.Tip
Ensure the tubing is dry by checking that only air bubbles are dispensed into the reservoir. If liquid remains, rerun the Retract External Buffer Pump or increase the retract duration.

Retract External Buffer Pump on Concentration Station
Note
Set the Drain Waste toggle to ON to empty the drain line before pump tubing replacement, then set it to OFF once it is fully drained to prevent discharge during or after maintenance.
Retract External Buffer Pump on Cleaning Station
Repeat steps b–c to retract the liquid on other stations.
Power off the instrument and unplug the power cable from the mains to prevent accidental activation.
Wait for any residual pressure to stabilize.
Section 2: Replacing the Pump Tubing
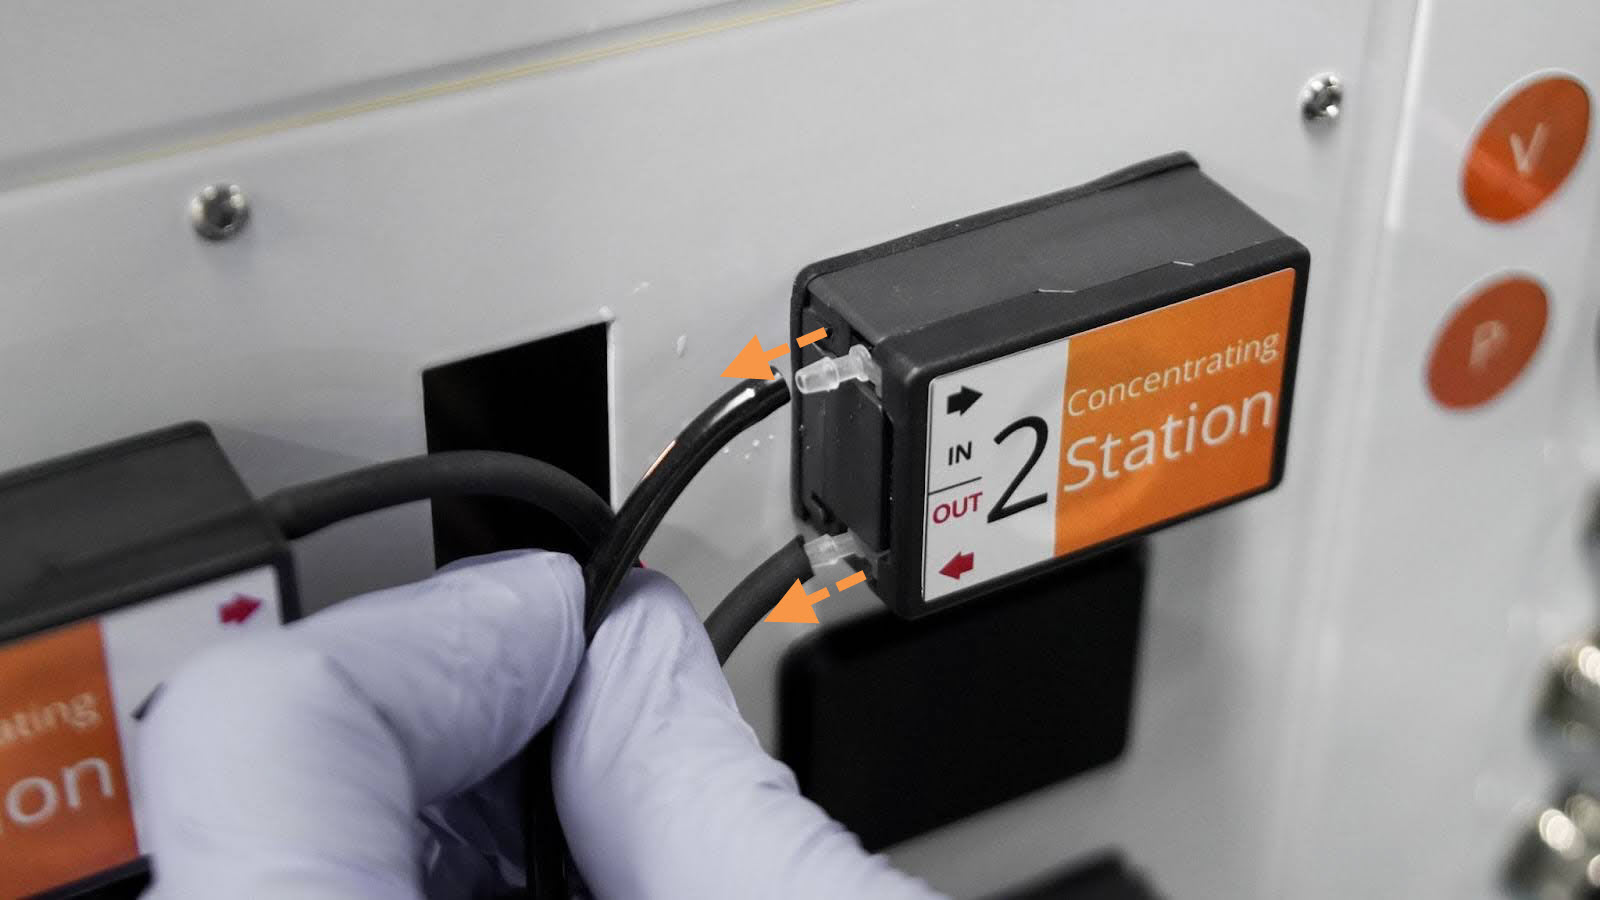
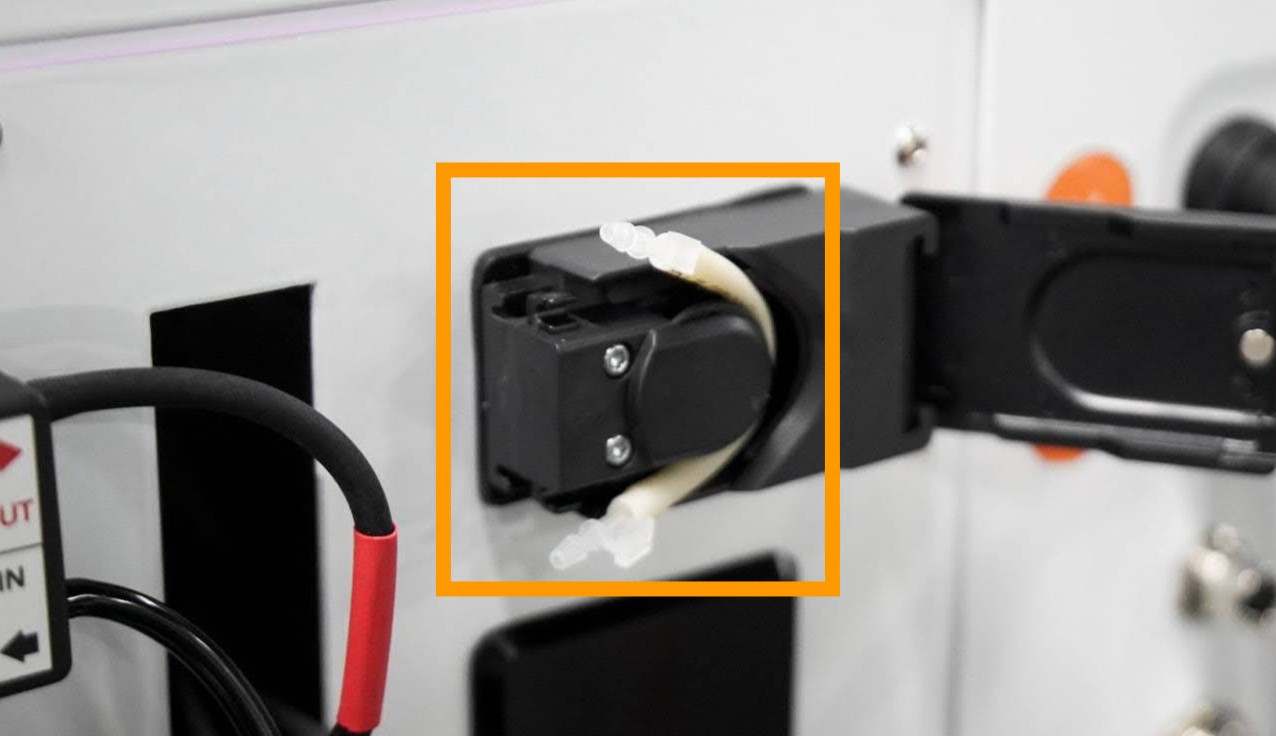
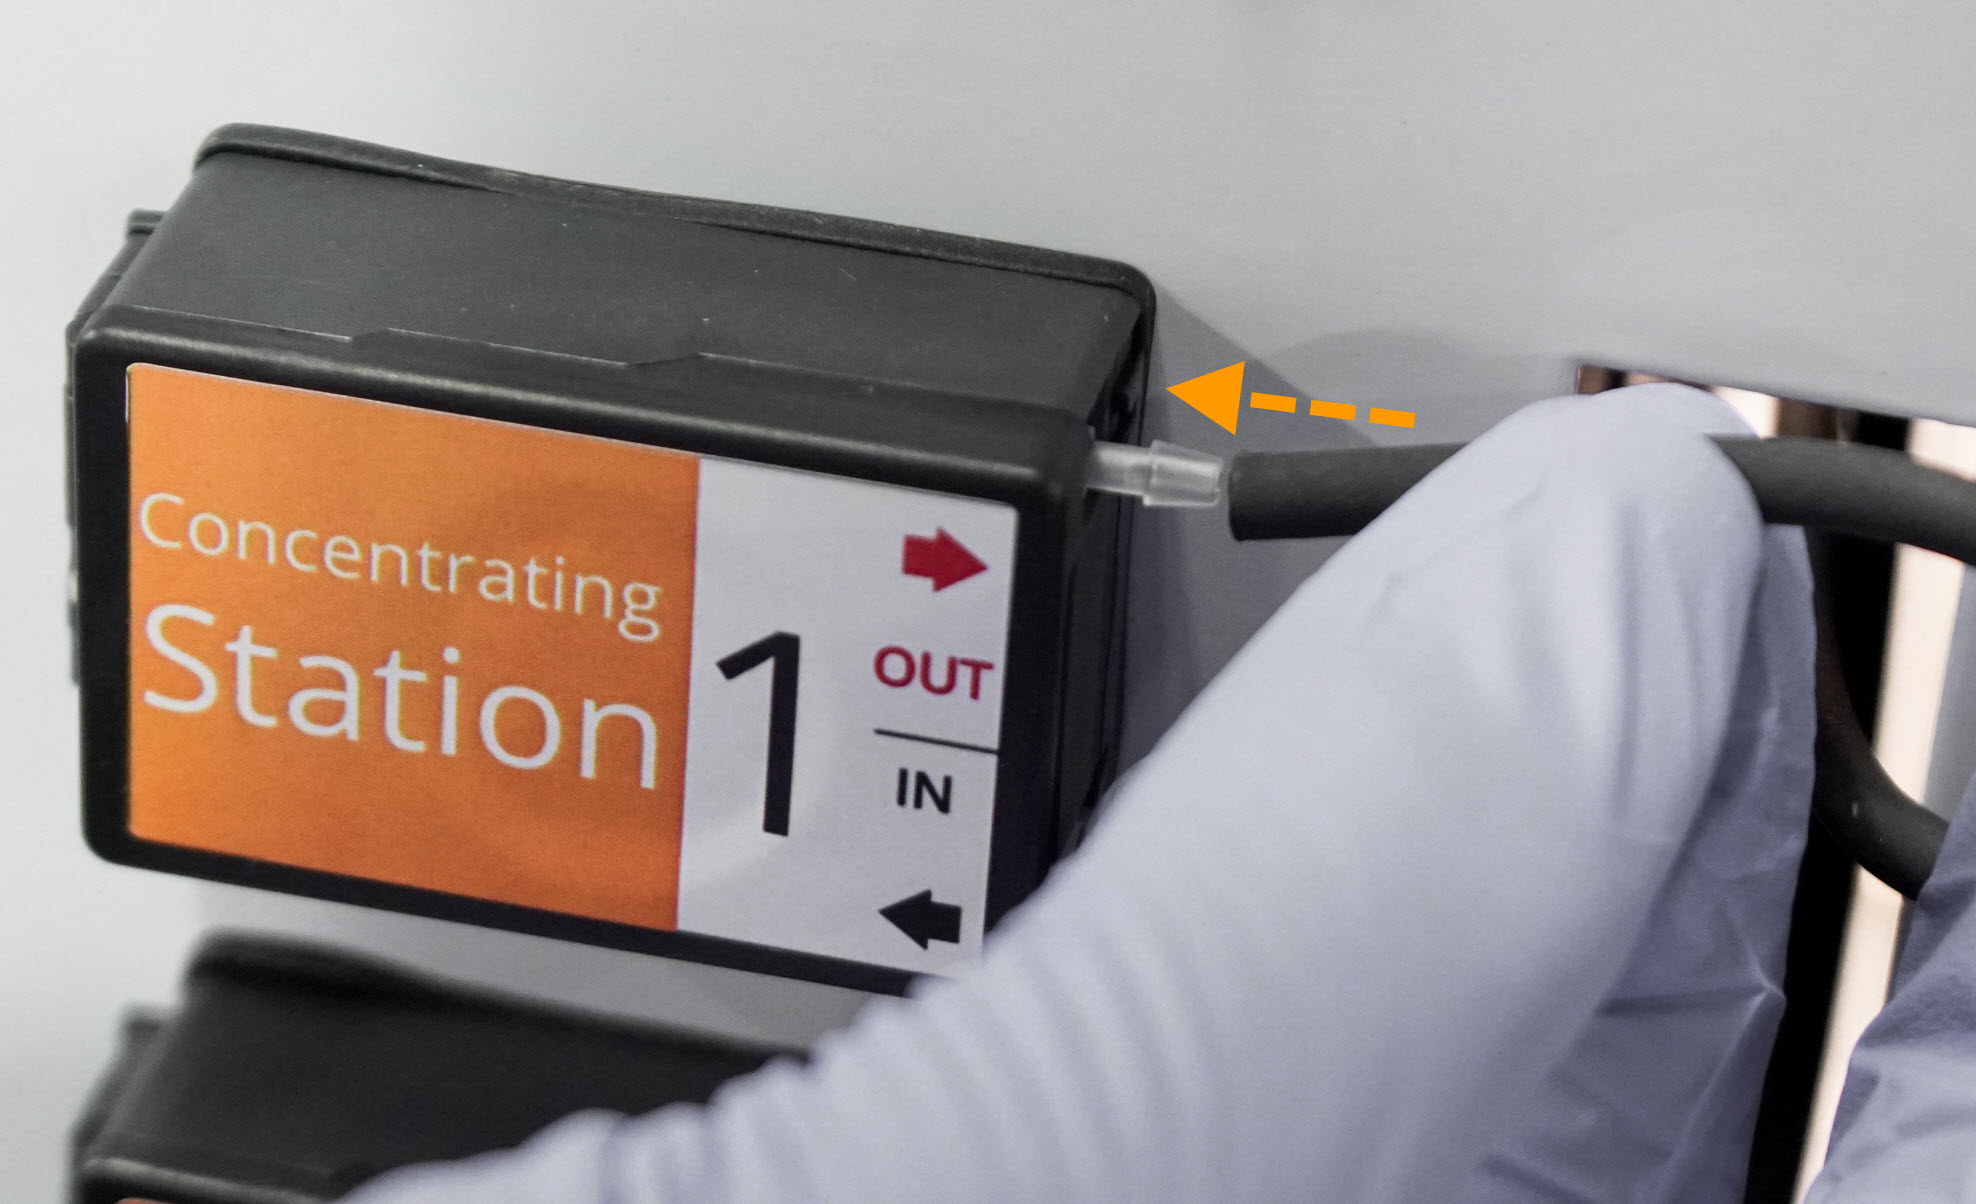
Carefully remove the tubing from the IN and OUT ports of the affected pump.
Removing The Tubing
Open the peristaltic pump access door completely.

Opening The Peristaltic Pump Access Door
Pull the tube connector out of the fitting.
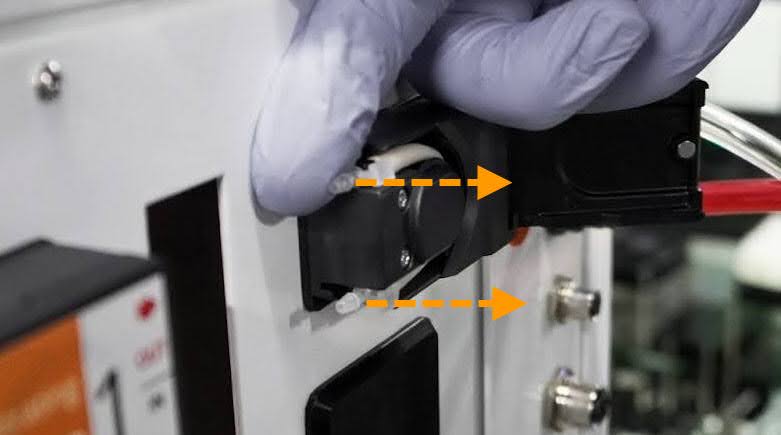
Pull Out The Tube Connector
Tube Connector out
Carefully remove the pump tubing from the housing.
Removing The Pump Tubing
Insert the new pump tubing into the housing until it is securely seated.
Verify that the pump tubing is fully inserted and the tube connectors are secured in the fittings, then close the pump door.
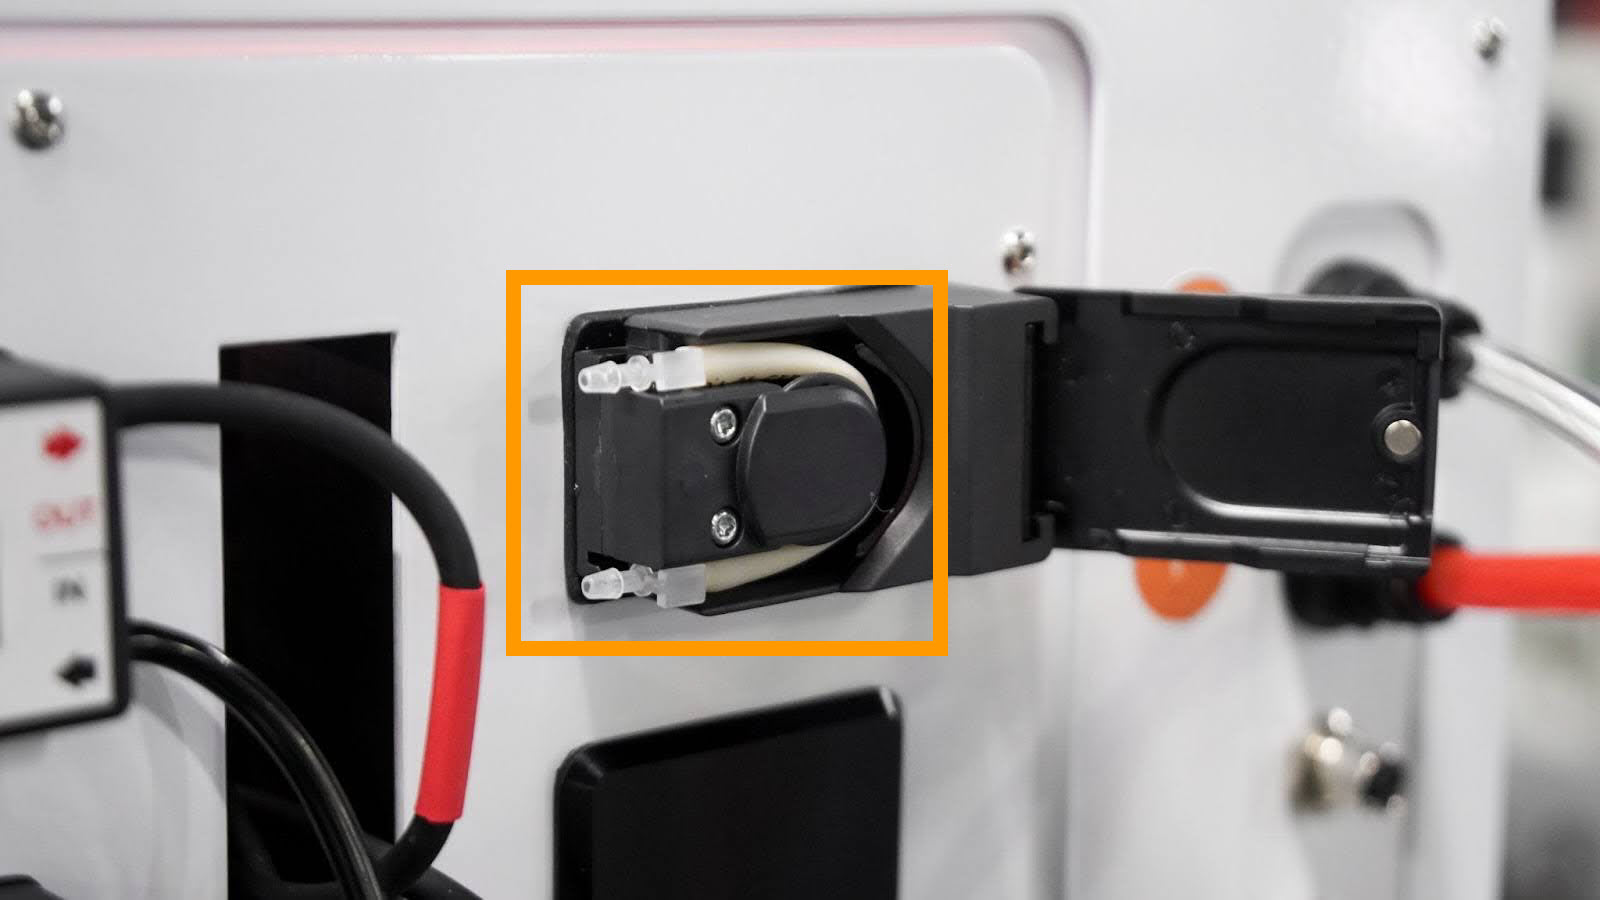
Properly Installed Pump Tubing
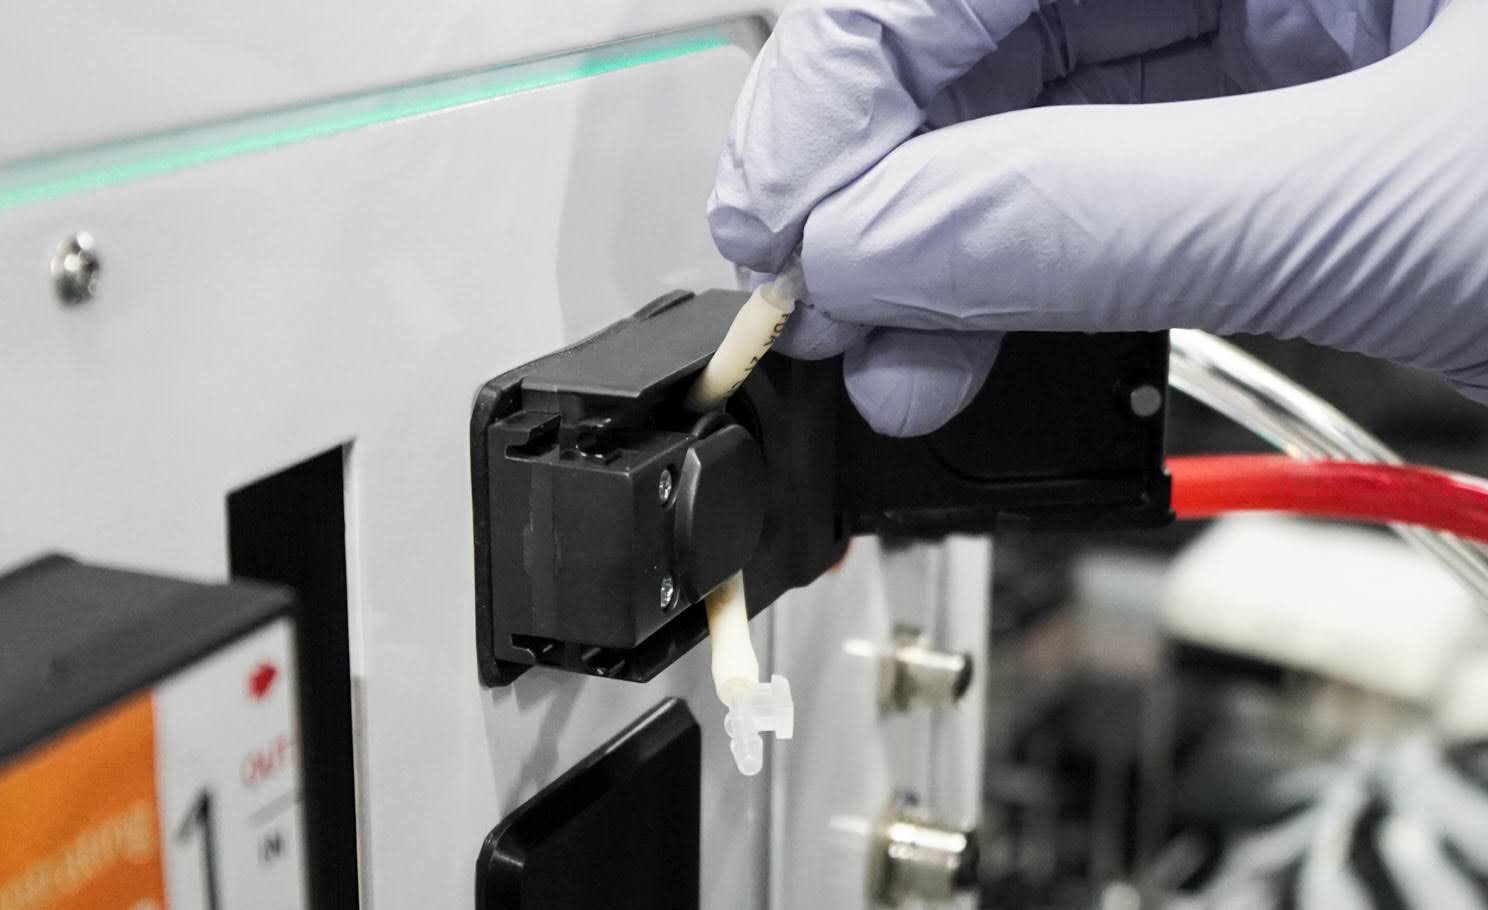
Reconnect the tubing to the IN and OUT ports until it contacts the peristaltic pump body.
Important
Before reconnecting, confirm the tubing and station numbers match.
Reconnect The Tubing
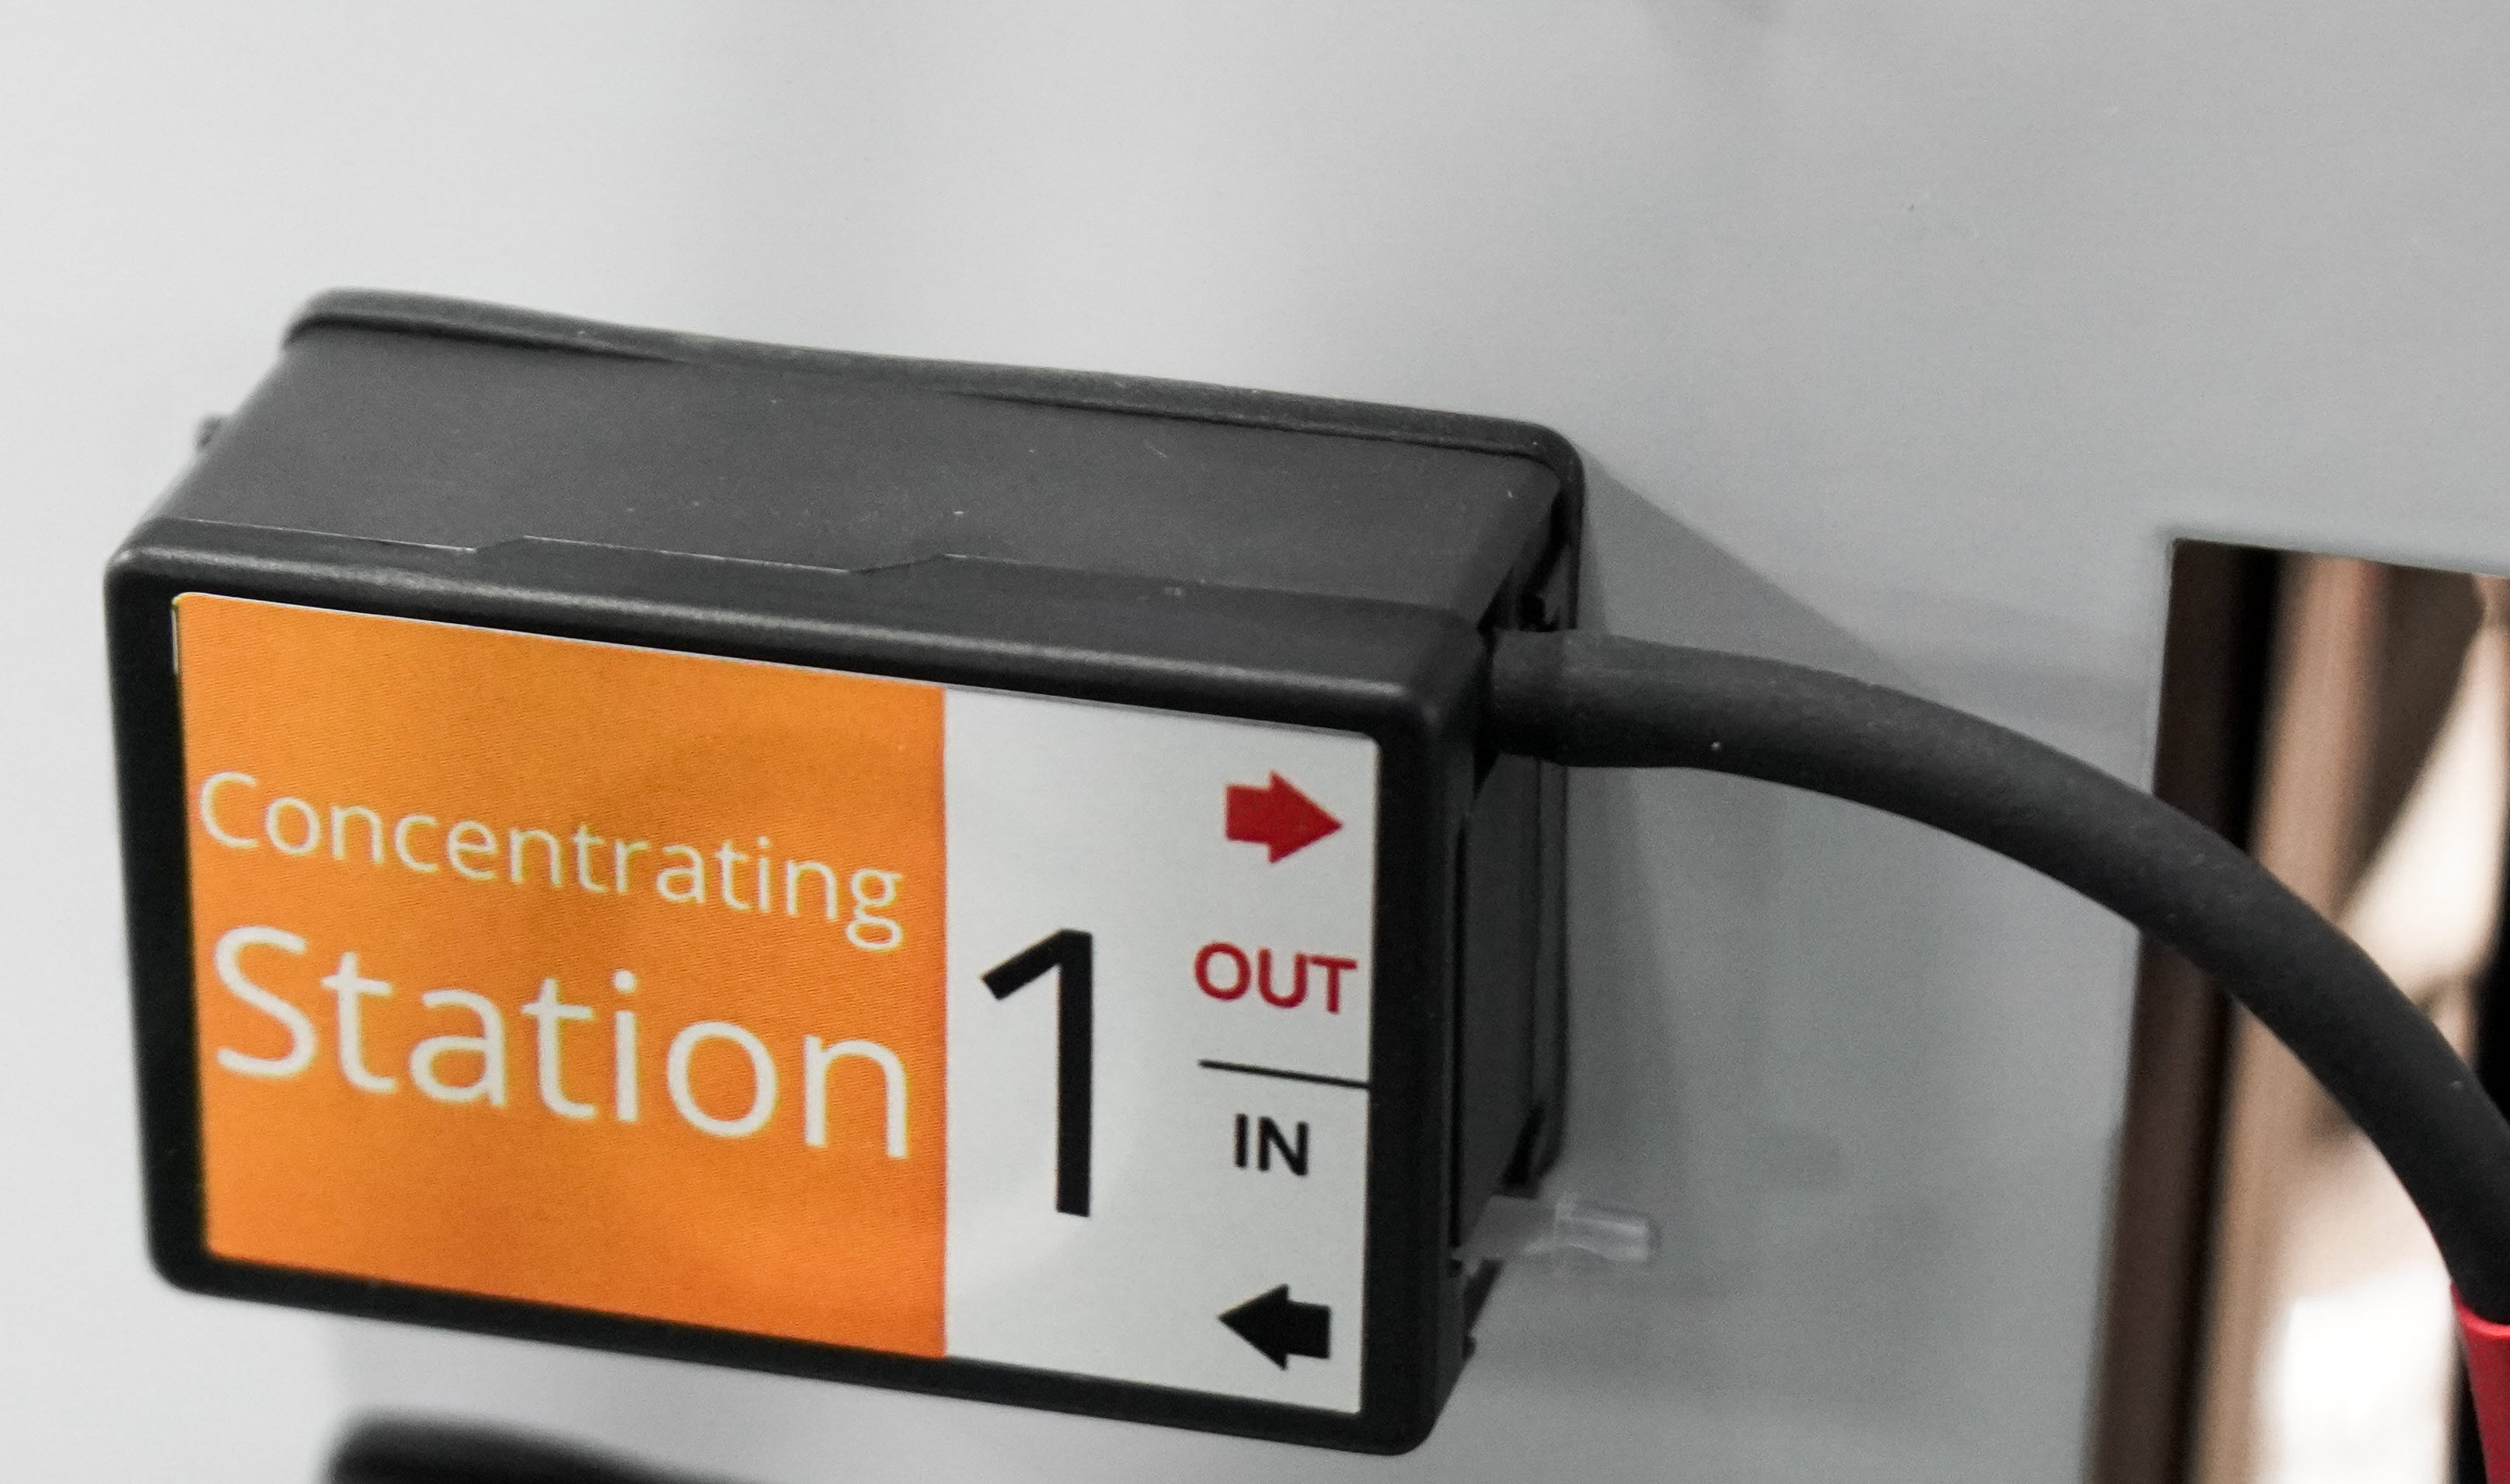
Properly Installed Tubing
Repeat steps 1–7 for the other affected peristaltic pumps.
Section 3: Testing the Installation
Reconnect the power cable, and power on the instrument. Wait for the instrument to complete the initialization.
Ensure there is an available tube at the station to receive the liquid.
Open the software and check the Status Bar.

Instrument Ready
Go to Manual Control and follow these steps:
Select the affected STATION and expand the Pulse Station Movement tab.
Under External Buffer Pump, enter a sufficient volume to test precision (for example, 5 mL). Then, click Run
.Tip
You can use either buffer or cleaning solution.

Pumping 5 mL of Liquid on Concentration Station
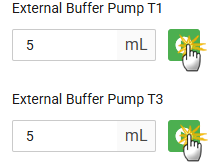
Pumping 5 mL of Liquid on Cleaning Station
A loud noise, gurgling, or reduced flow may occur if the tubing is not seated correctly. To fix this, open and close the pump door while the motor is still moving.
Tip
Alternatively, after inserting the tubing, keep the pump door open until the test is completed, then close it after the motor starts moving.
Inspect for leaks and verify flow; an initial delay is normal while the pump purges residual air. If the pump stops automatically at the defined volume, the test is successful.
Repeat this procedure to test the installation on other replaced pumps.
Section 4: Resetting the Replacement Status
Open the Performance Metric page from the Tools menu.
Click RESET on the corresponding pump or click RESET ALL if you replace the tubing in all pumps.
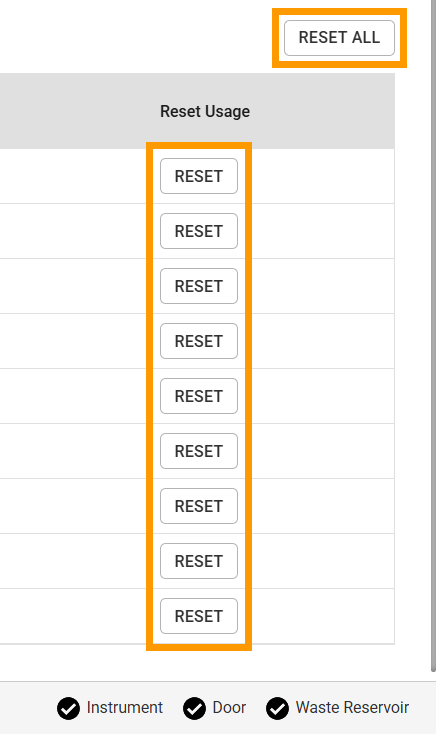
The Reset Buttons
Click RESET to proceed.
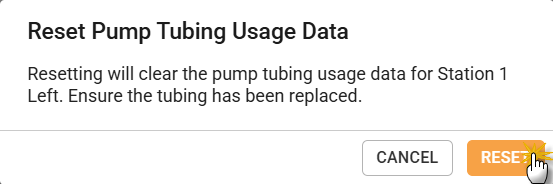
Click RESET on the Modal Dialogue
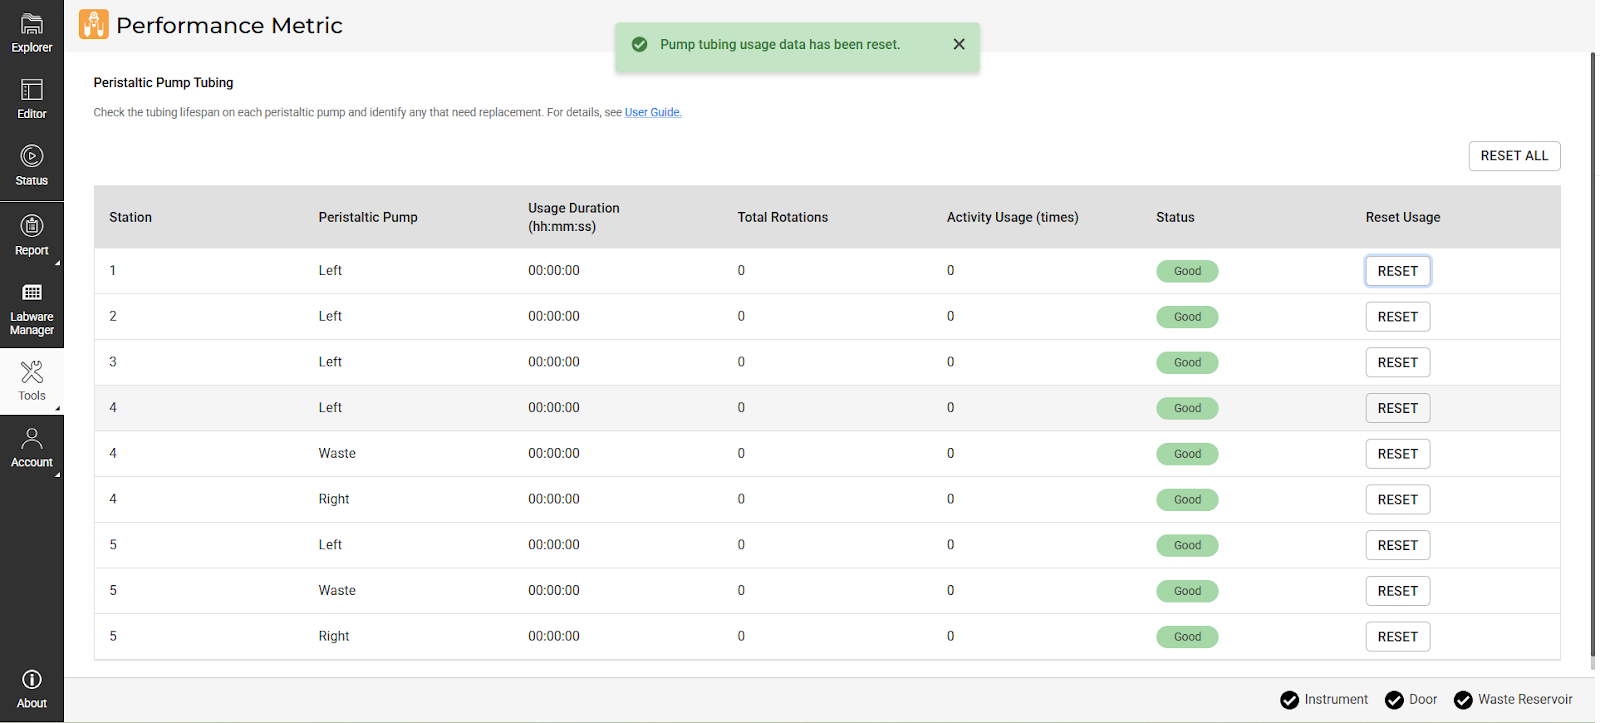
Replacement Status Displayed After Reset