Defining Labware on Stations and Deck
Start creating a protocol by setting up the tube adapters in the stations and labware on the deck.
Prerequisite:
You have prepared the required tube adapters, tubes, chips, and racks.
To define the labware:
Open the Editor page.
Defining Stations
Note
Station types are defined at the time of order and are factory-configured. Stations in gray represent Concentration Stations, while blue represents Cleaning Station(s). For replacement or adjustment, contact FORMULATRIX support.
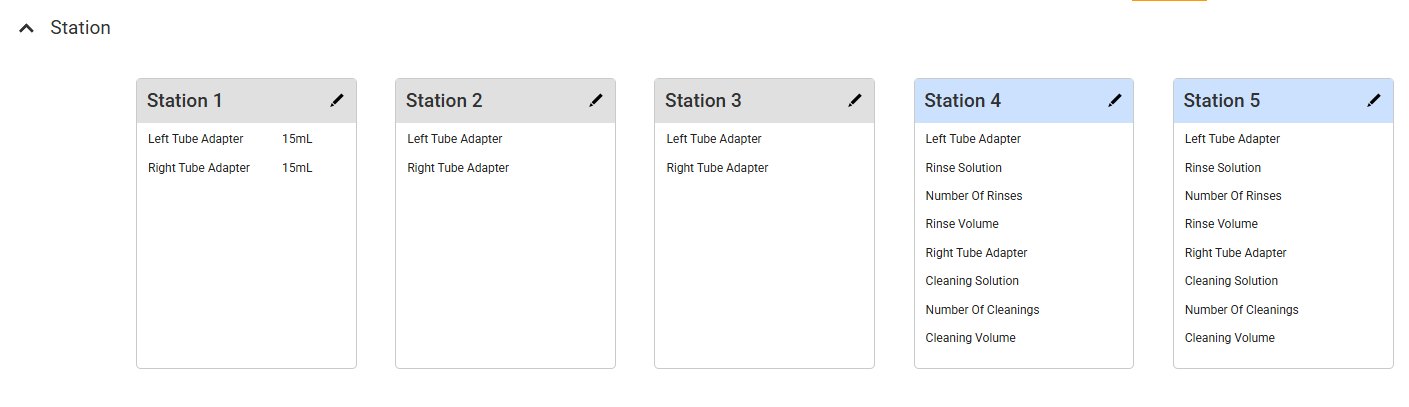
Station Panel
To define stations, choose from the following options:
If tube adapters are already installed, click Scan Adapters
 to detect all adapters in the Concentration Stations. Ensure each scale is tared properly on the Calibration page if scanning fails.
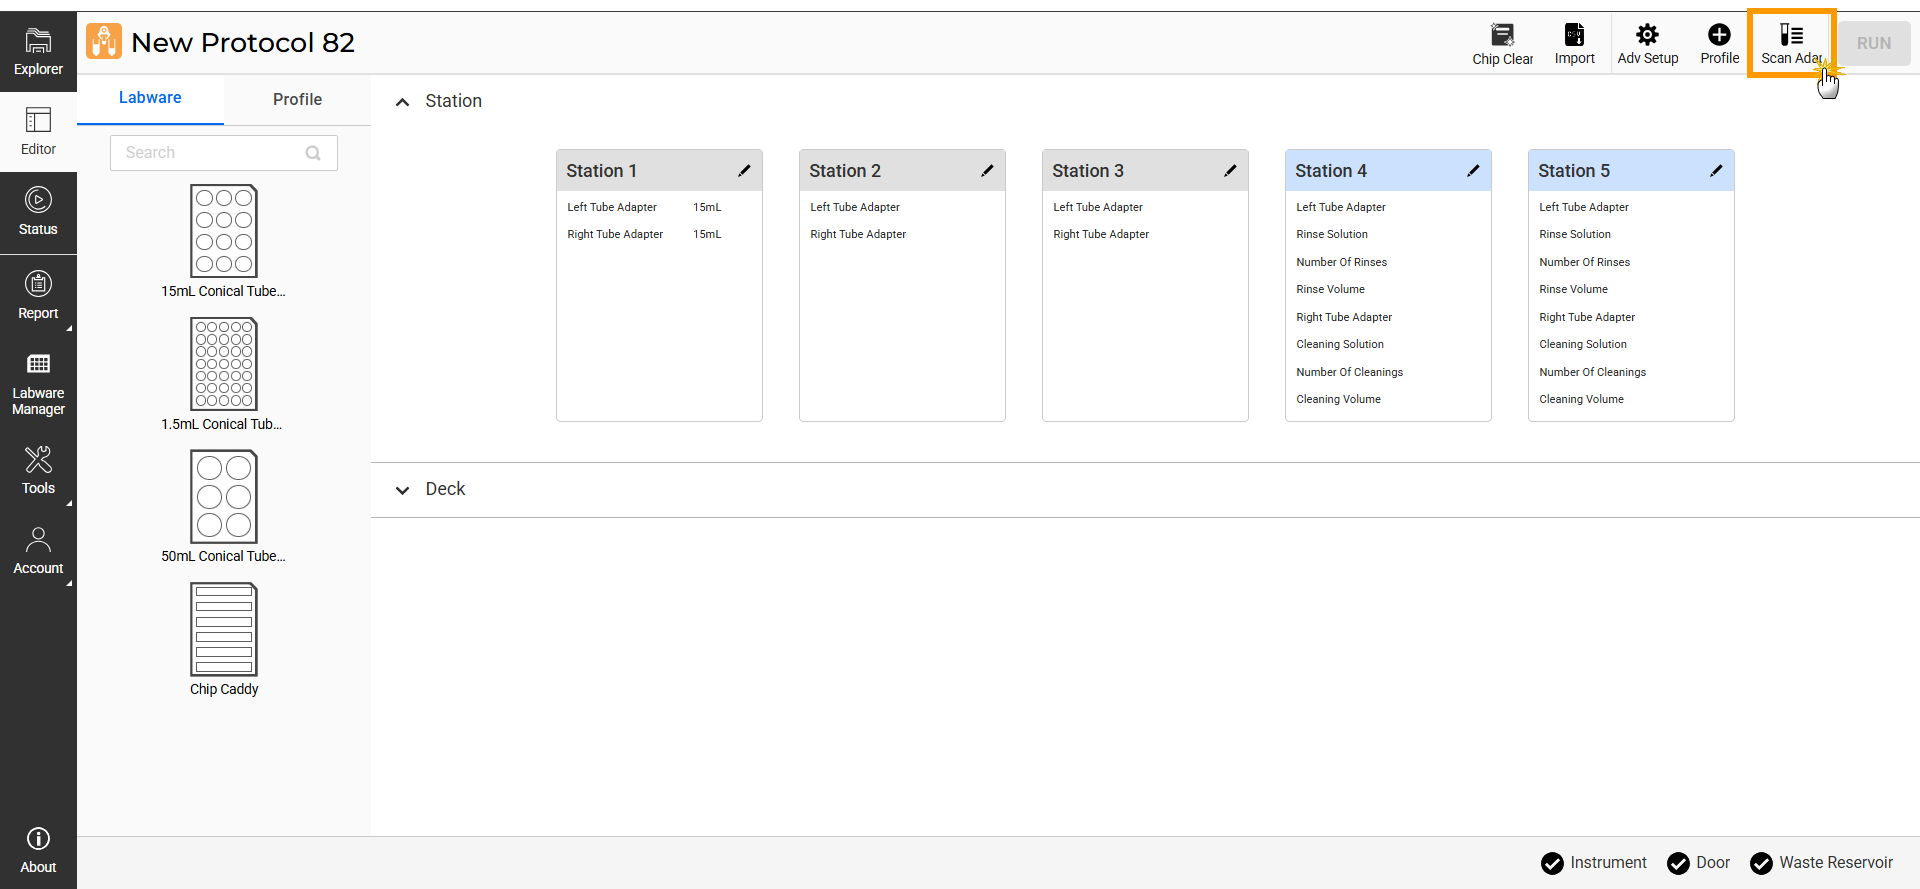
Click Scan Adapters Button
Under the Station panel, click Edit
 on a station card for manual configuration, then specify the following:
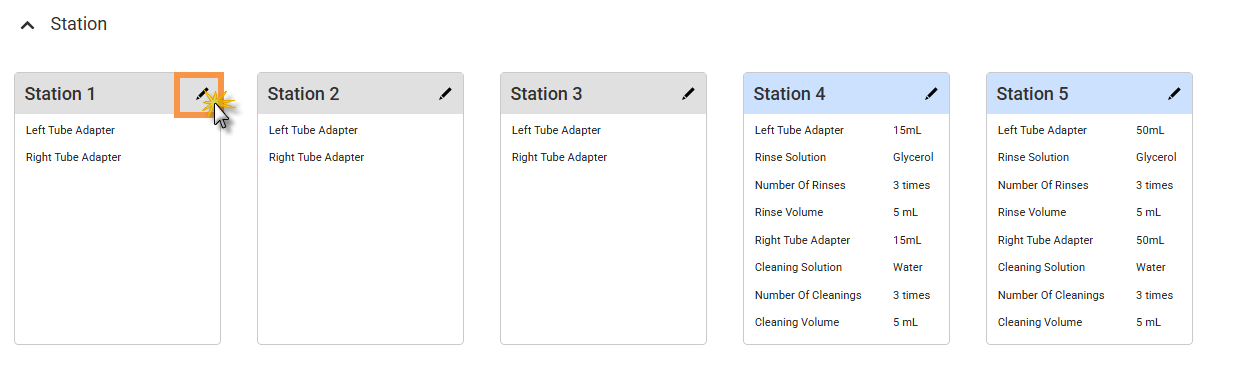
Click Edit on the Station Card
a. Concentration Station: Specify the left and right tube adapters. Click APPLY to save the settings.
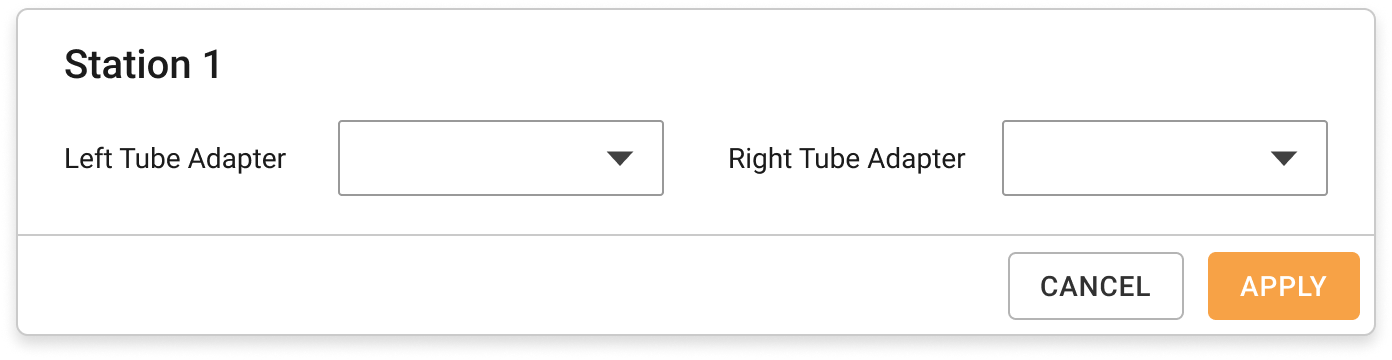
Concentration Station Settings
b. Cleaning Station: Specify each setting required for cleaning, then click APPLY.
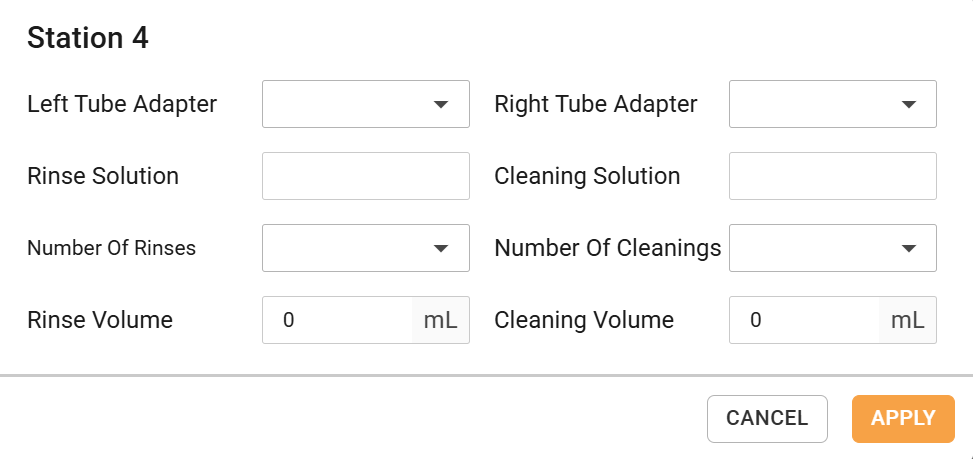
Cleaning Station Settings
Note
For multiple Cleaning Stations, adjust only the Left Tube Adapter and Right Tube Adapter parameters. Other parameters will follow the first Cleaning Station configuration.
Configuring the Deck
For easier identification, the mapped wells are indicated in different colors based on the Tube/Chip and Liquid Type selections. See the images below.
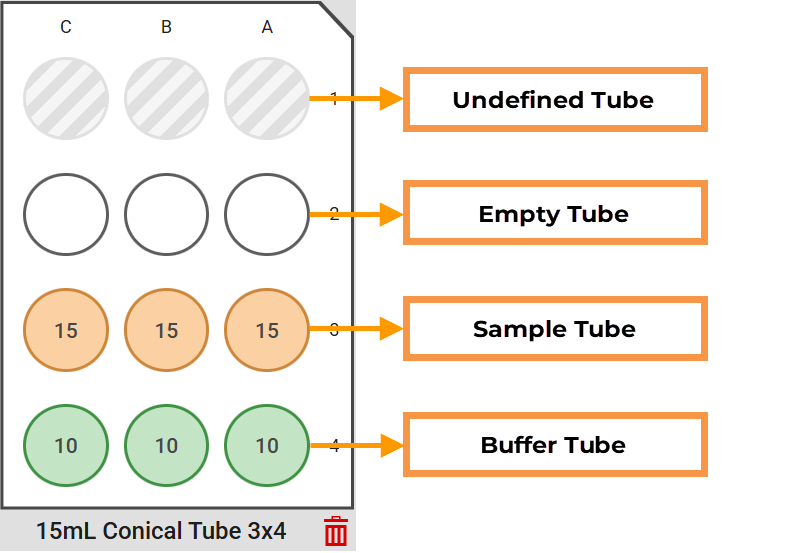
Tube Well Details

Chip Well Details
To configure the deck:
Expand the Deck panel.
Drag the desired labware from the Labware tab onto an available nest on the virtual deck. The labware-on-deck configuration must match your planned layout on the physical deck.
Dragging Labware to the Available Nests
Note
Click the Remove button
to remove labware from a nest.
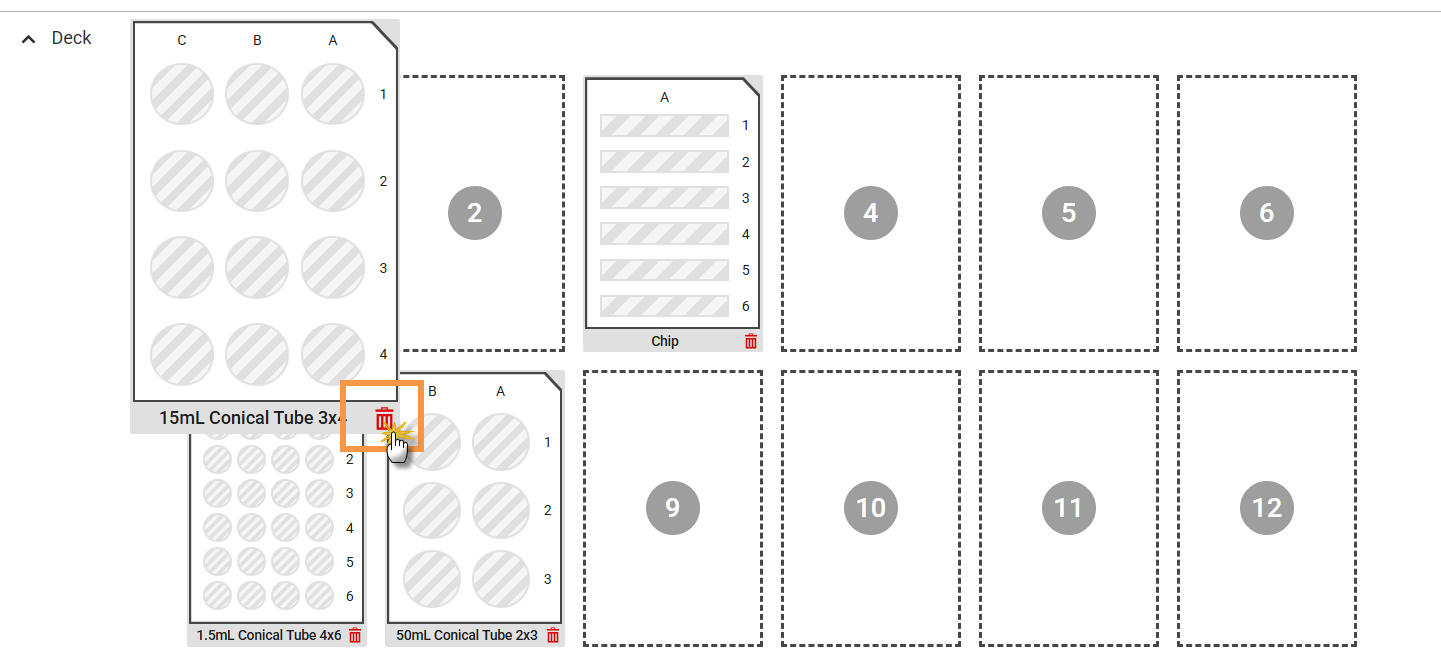
Remove Labware from the Nest
Click on each undefined well, and specify the parameters as follows:
Tube: If a tube is in place, activate this toggle, then fill in the following parameters:
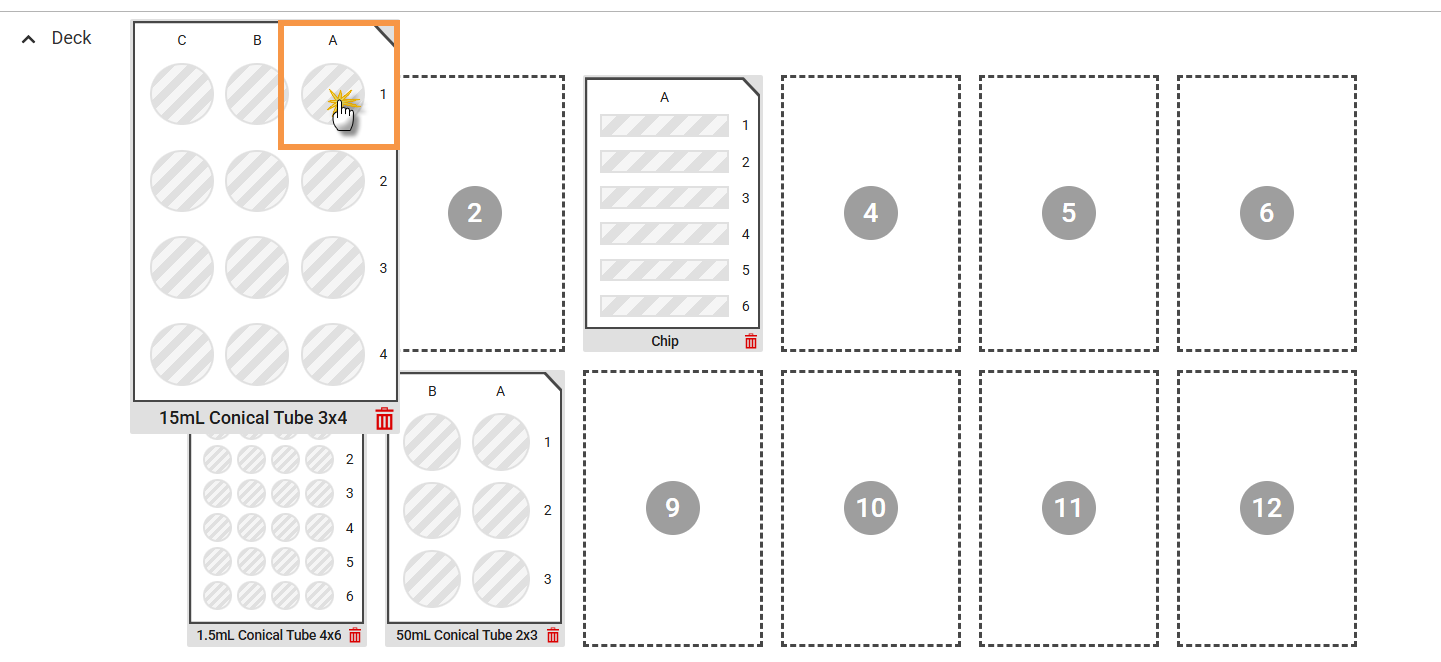
Click Undefined Well
i. Liquid Type:
- Empty (a tube that contains no liquid),
- Sample (a tube that holds a sample), or
- Buffer (a tube that holds a buffer solution).
ii. Starting Value: Specifies the sample or buffer volume in the tube (in mL or g).
iii. Starting Concentration: Applies only to Sample. It specifies the concentration of the sample in mg/mL.
iv. Density: The density of the sample or buffer (should be between 0.5 and 5 g/mL).
Note
Make sure the Density value is accurate to maintain stable processing and prevent inaccurate results.
v. Click APPLY to save the configuration.

Tube Detail Information
Chip
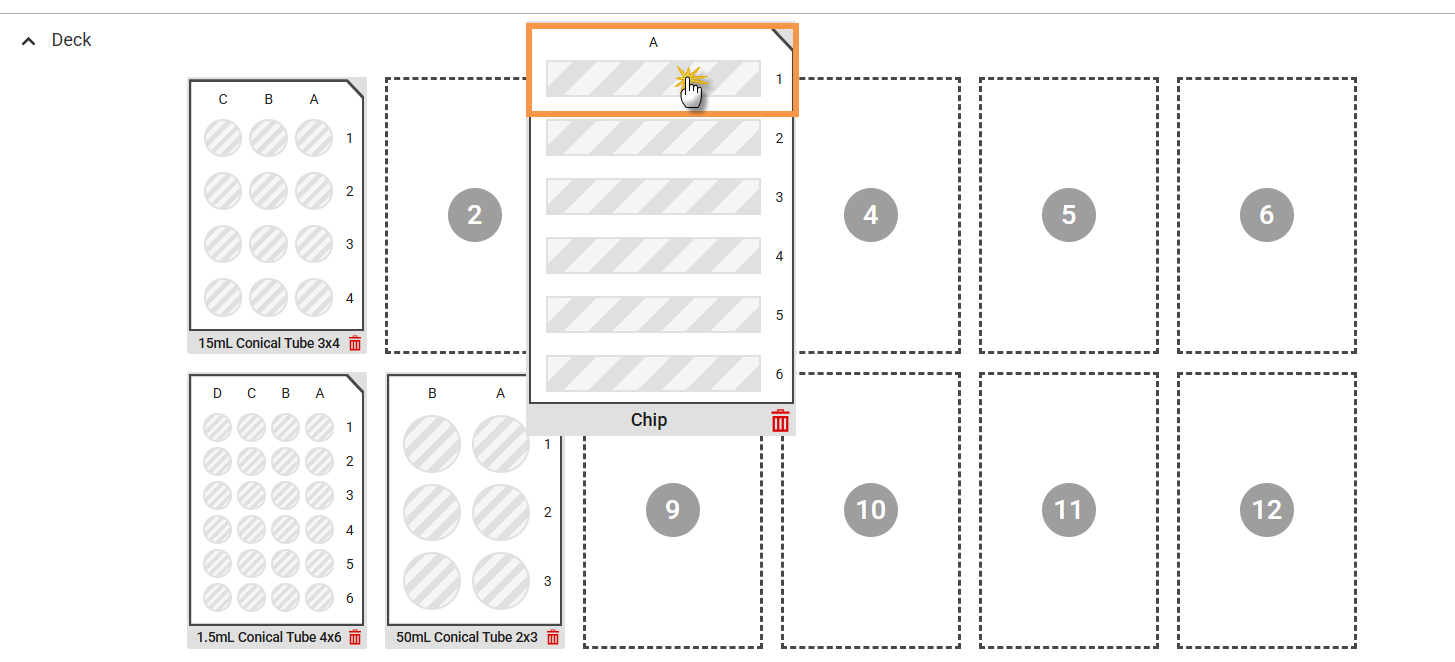
Click Undefined Chip
i. Membrane Type: Specify the placed chip membrane type.
ii. MWCO: Select the MWCO for the chip.
iii. Click APPLY to save the configuration.

Chip Selections
Continue to create profiles.