Administrator Submenu
Note
Only administrators can manage users. There is no maximum number of administrators.
ROCK MAKER implements administrator and user roles. In this tutorial, you can learn how to perform each role.
Administrator
Important
The tasks in this section can only be executed by administrators.
Creating a New User
Note
The ROCK MAKER Lite checkbox in the Administrator submenu is only available for users with the ROCK MAKER Lite license.
To create a new user:
In the navigation menu panel, click Settings
 and go to the Administrator submenu
  .
.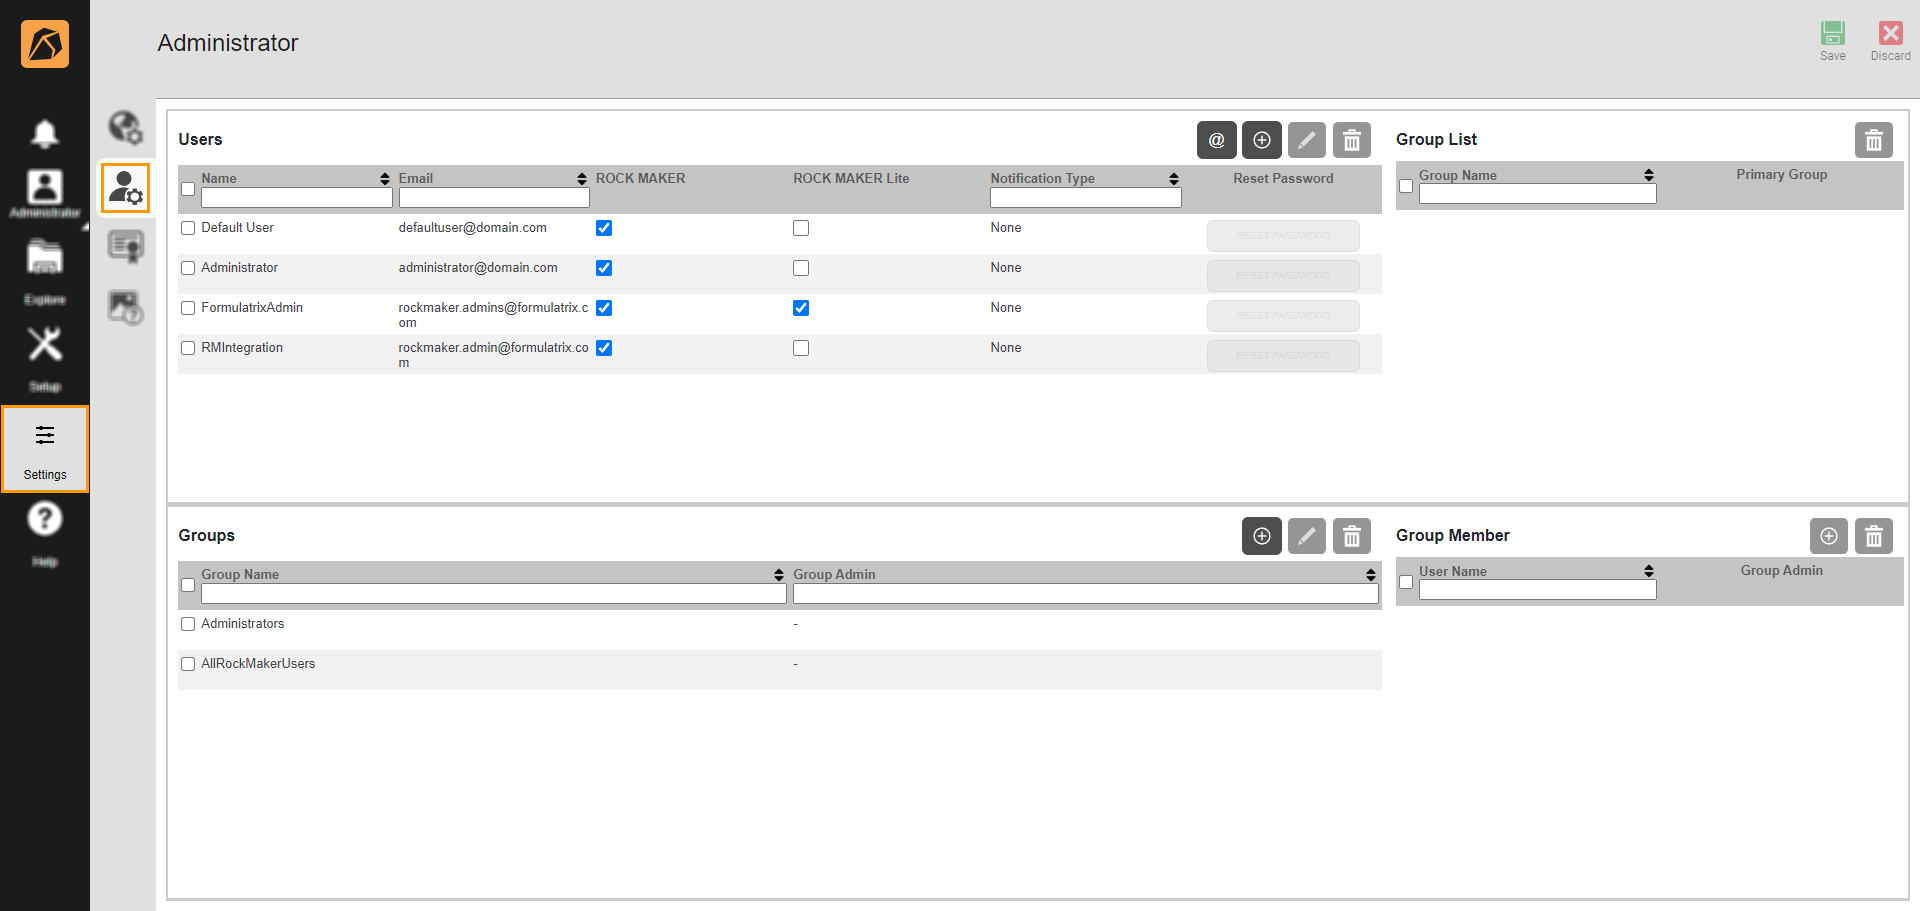
Administrator Submenu
Go to the Users section and click the Add button
 to open the Create User dialog box.
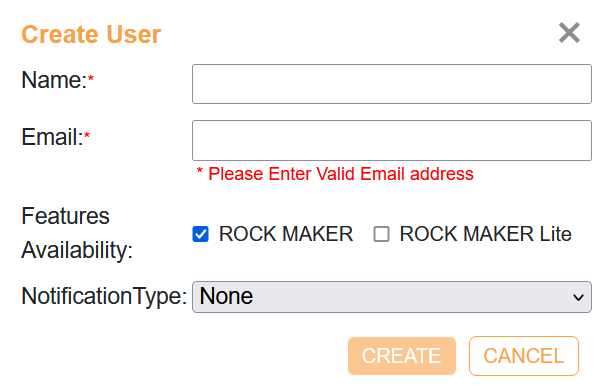
Create User Dialog Box
In the Create User dialog box, do the following.
Enter a user name in the Name field.
Enter the user’s email address in the Email Address field.
In the Features Availability field, tick:
ROCK MAKER and ROCK MAKER Lite checkboxes to grant access to both.
OR
ROCK MAKER Lite checkbox to grant access only to ROCK MAKER Lite.
Select a type of user notification in the Notification Type dropdown.
Note
The asterisk icons in the two fields indicate that those fields are required.
Once everything is set, click CREATE
 . The new user is then added to the user list.
Click the Save button
 on the top right bar of the Administrator submenu.
Editing a User
To edit a user:
In the navigation menu panel, click Settings
 and go to the Administrator submenu
  .
.
Administrator Submenu
Go to the Users section and click on a user name checkbox. Then, click the Edit button
 on the top right side to open the Edit User dialog box.
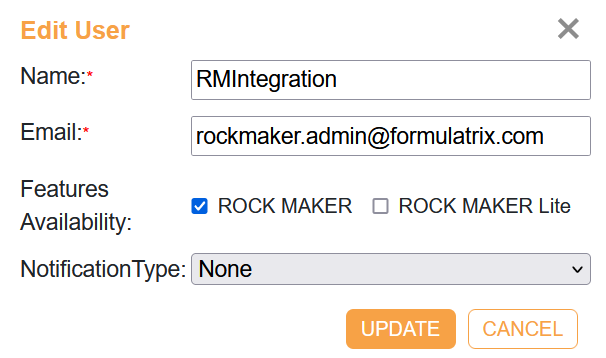
Edit User Dialog Box
In the Edit User dialog box, click and edit applicable fields. Once everything is set, click UPDATE
 .
.Note
The asterisk icons in the two fields indicate that those fields are required.
Click the Save button
 on the top right bar of the Administrator submenu.
Creating a New Group
ROCK MAKER comes with two default groups, Administrators and AllRockMakerUsers, which you can add if necessary. A group consists of multiple ROCK MAKER users with the same access to software features.
To create a new group:
In the navigation menu panel, click Settings
 and go to the Administrator submenu
  .
.
Administrator Submenu
Locate the Groups section and click the Add button
 to open the Create Group dialog box.
Groups Section
Fill in the Name field and click CREATE.

Create Group Dialog Box
The new group is added to the group list.

New Group
Click the Save button
 on the top right bar of the Administrator submenu.
Adding Users to a Group
To add users to a group:
In the navigation menu panel, click Settings
 and go to the Administrator submenu
  .
.
Administrator Submenu
Locate the Groups section and select a group by clicking the available checkbox(es)
 .
.
Groups Section
Go to Group Member and click the Add button
 .
.
Group Member
The User List dialog box will appear. Then, select the user(s) you want to add to the group by clicking the provided checkbox(es) and click ADD.
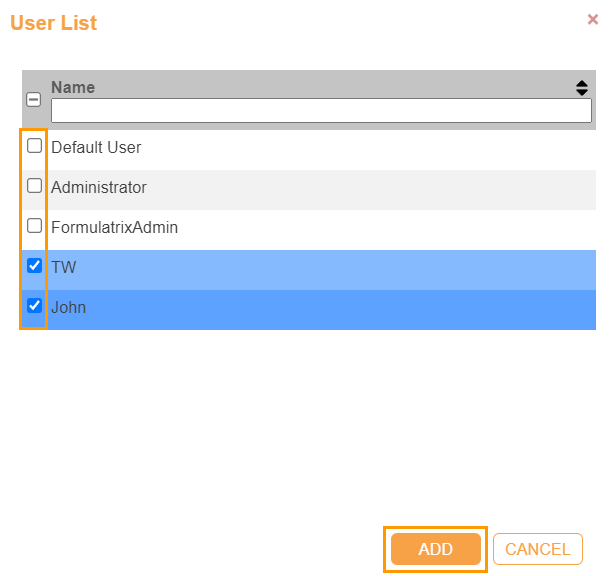
User List Dialog Box
You can find the added user(s) in Group Member and set one or more users as Group Admin.
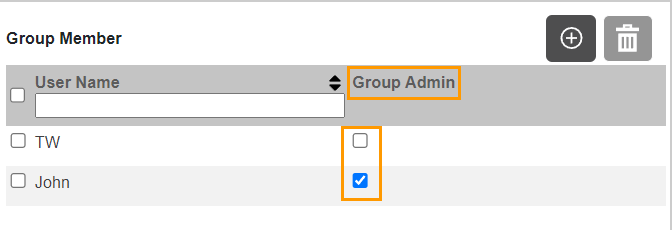
Selecting a Group Admin
If everything is set, click the Save button
 on the top right bar of the Administrator submenu.
Confirming a Password Reset Request
Note
When users request a password reset, the administrator needs to approve it before they can use the new password.
To confirm a password reset request:
In the navigation menu panel, click Settings
 and go to the Administrator submenu
  .
.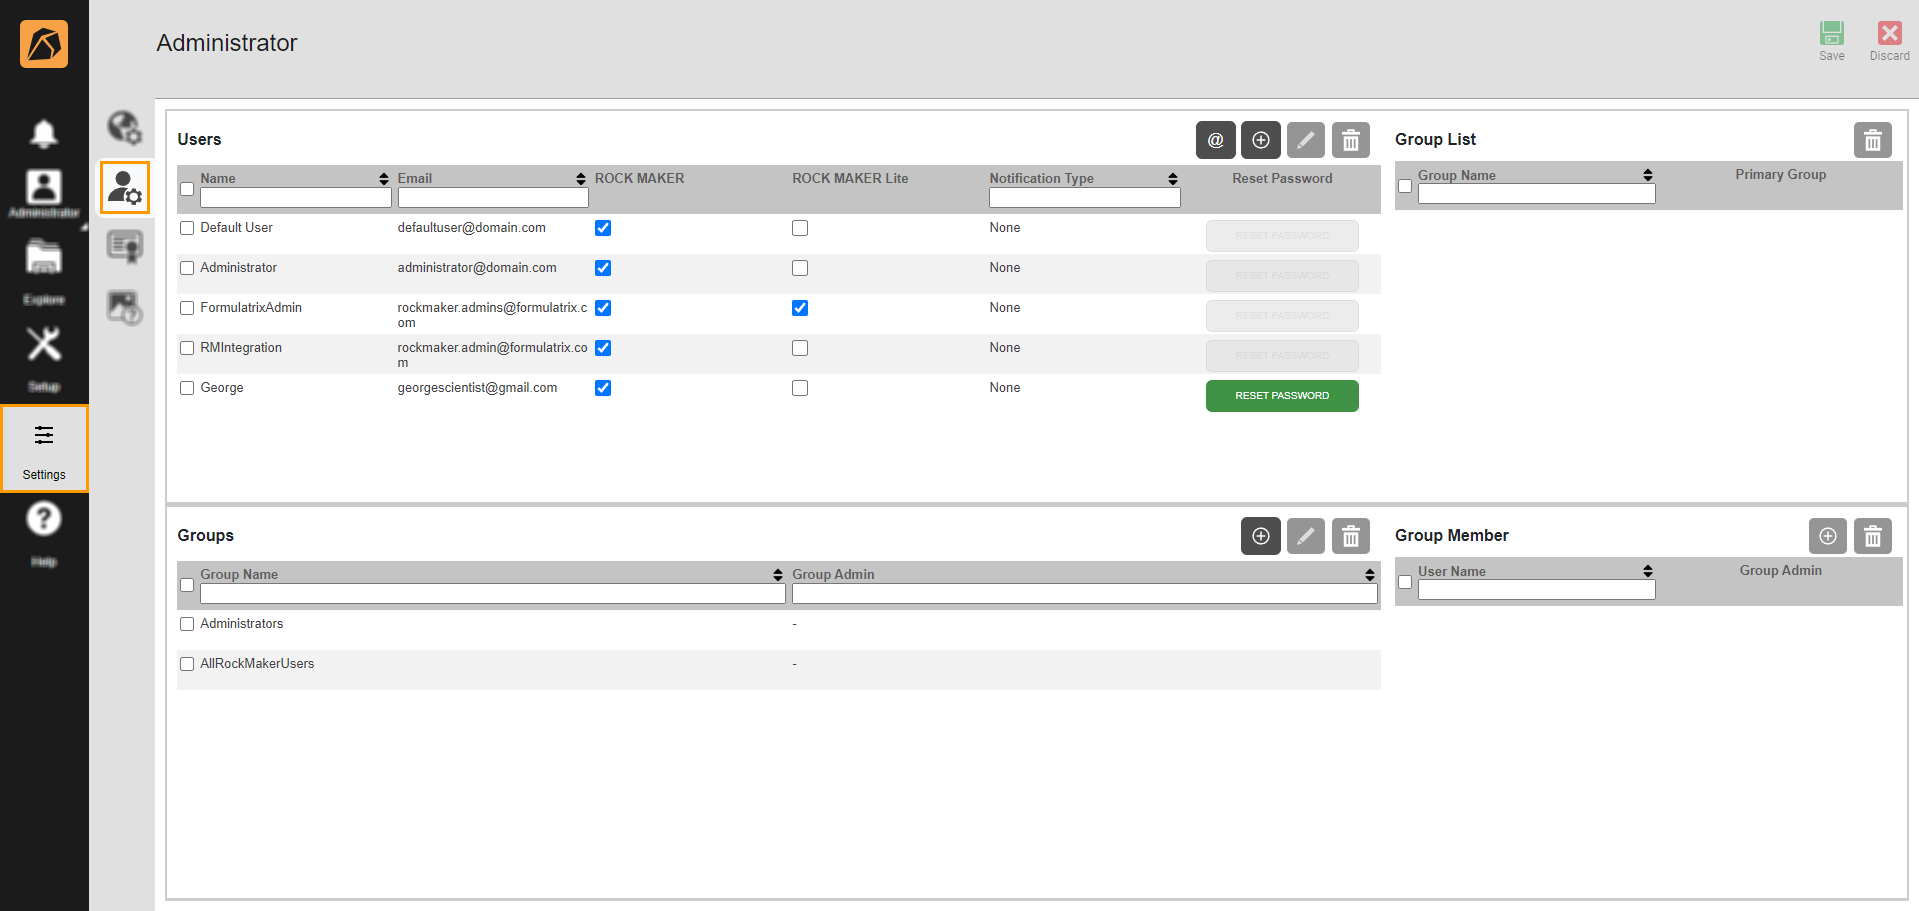
Administrator Submenu
In the Users section, locate the Reset Password column and click the RESET PASSWORD button in green.

RESET PASSWORD Button
Click the Save button
 on the top right bar of the Administrator submenu.
Note
The user whose password request has been confirmed is able to log in without entering a password.
Managing Access Right
As a part of authorization offered by ROCK MAKER, Access Right allows administrators to determine which users have access to a particular project, screen, or folder, and the type of access they have. This feature ensures the security of each experiment even though multiple users use the software.
Note
To enable authorization in ROCK MAKER, please contact FORMULATRIX Support.
The followings are steps to manage Access Right:
Note
A user’s access rights will affect search results. Whenever a user conducts a search, only the nodes to which the user has access will be included in the search.
Go to the Explore menu.
Click a screen, project, or folder. Then, click the More button
 in the Administrative Tools section on the right side of your ROCK MAKER window.
More Button
Select Access Right. The Manage Access Rights dialog box will appear.
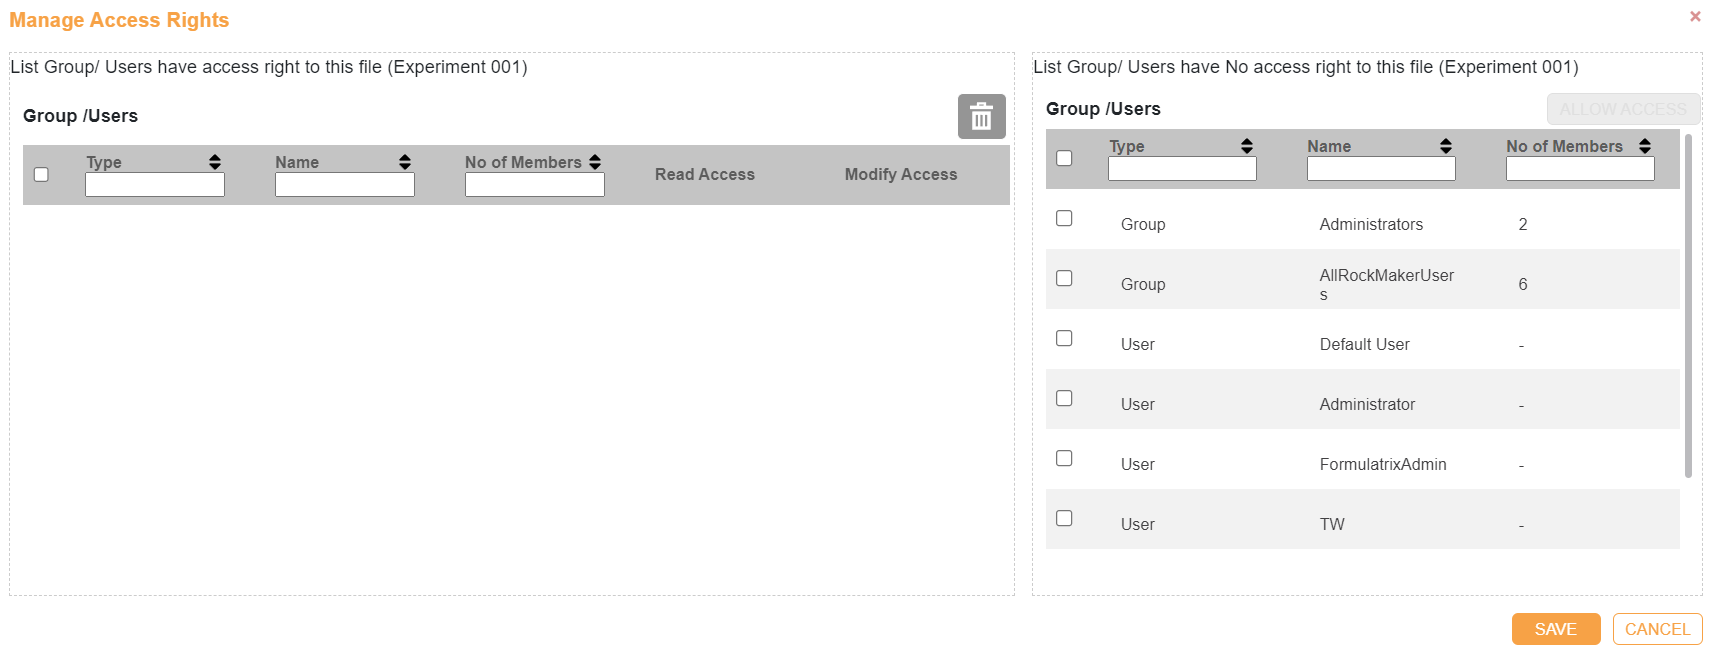
Manage Access Rights Dialog Box
From the Group/User having no access right to this file section, select the user(s) you want to share the access with by clicking the checkbox(es)
 . Then, click Allow Access.
Sharing Access with User(s)
The user you share access with will be added to the Group/User having access to this file list. Then, choose the access option(s) you want to grant. Read Access enables users to read a folder or an experiment, while Modify Access allows users to modify a folder or an experiment.

Selecting Access for User(s)
Sharing ROCK MAKER and ROCK MAKER Lite Accessibility
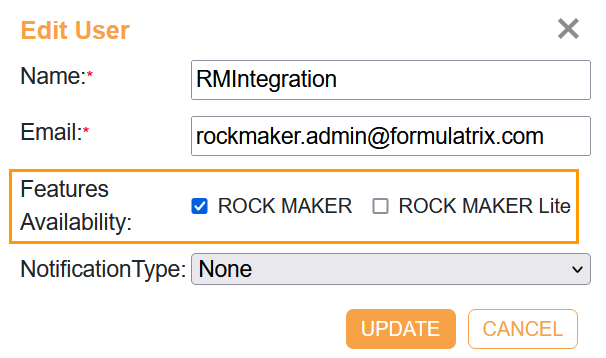
An administrator may allow a user to access both ROCK MAKER and ROCK MAKER Lite or only ROCK MAKER Lite by setting it up from the ROCK MAKER’s Settings menu.
Important
Only the ROCK MAKER administrator can execute this task.
To manage ROCK MAKER or ROCK MAKER Lite accessibility:
User
Editing Your Account
To edit your user account:
In the navigation menu, click User and select Edit User.
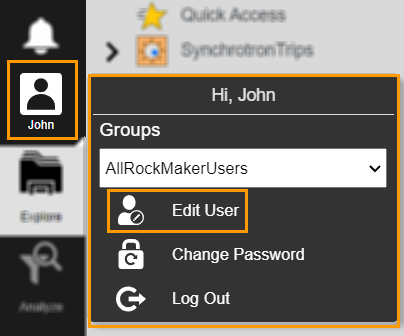
Edit User Option in User Menu
The Edit User dialog box will appear. Update any applicable fields: Name, Email, or both. If you are an administrator, the Name field will be uneditable.
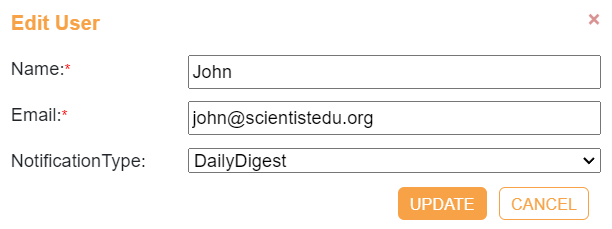
Edit User Dialog Box
Note
The asterisk icons in the two fields indicate that those fields are required.
Click UPDATE.
Managing Your Password
As a new user, you should create a password to log in to your account. You can change and reset your password once it is created.
To create a password
On your ROCK MAKER login page, enter your username in the Username field. Then, click Login or press Enter on your keyboard.
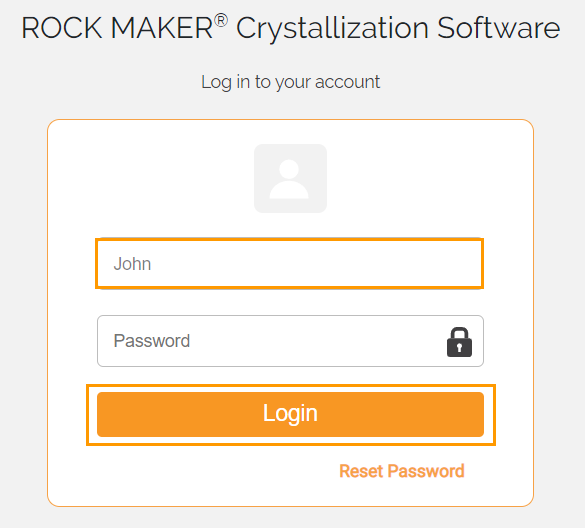
Login Page
The Change User Password dialog box will appear. Type your password and confirm in the corresponding fields.
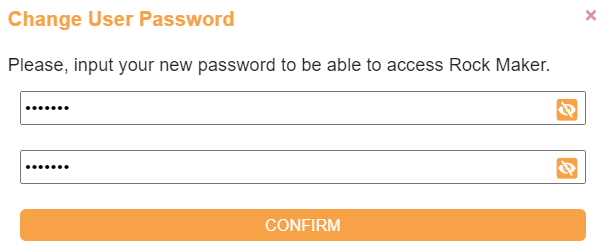
Change User Password Dialog Box
If they are set, click CONFIRM.
You will be redirected to the login page. A message on top of the login page notifies you that your password has been successfully saved.
To change your password
Log in to your ROCK MAKER account.
In the navigation menu panel, click the User menu and select Change Password.
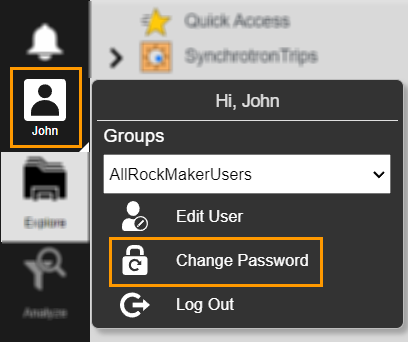
Change Password Option in User Menu
The Change User Password dialog box will appear. Enter and confirm your new password. Then, click CONFIRM.

Change User Password Dialog Box
You will be redirected to the login page. A message on top of the login page notifies you that your password has been successfully changed.
To reset your password
On your ROCK MAKER login page, enter your username in the Username field and click Reset Password.
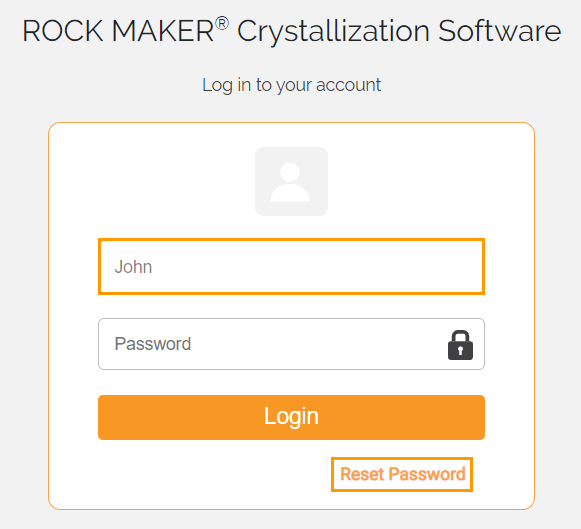
Reset Password Button on ROCK MAKER Login Page
Click the YES, PROCEED button in the Reset Password dialog box.

Reset Password Dialog Box
The ROCK MAKER administrator will receive your request.
Important
You can still log in using your old password if the administrator has not approved your request. After the administrator approves your request, you need to log in without entering a password.
To input your new password
Prerequisite:
Administrator has confirmed the reset password request.
Log in to your ROCK MAKER account without entering a password.
Once you log in, the Change User Password dialog box will appear.

Change User Password Dialog Box
Enter and confirm your new password in the corresponding fields. Then, click CONFIRM.
You will be redirected to the ROCK MAKER login page. A message on top of the login page notifies you that your password has been changed.


