Imaging Settings Tab
This tab allows you to define the settings to image an experiment plate.
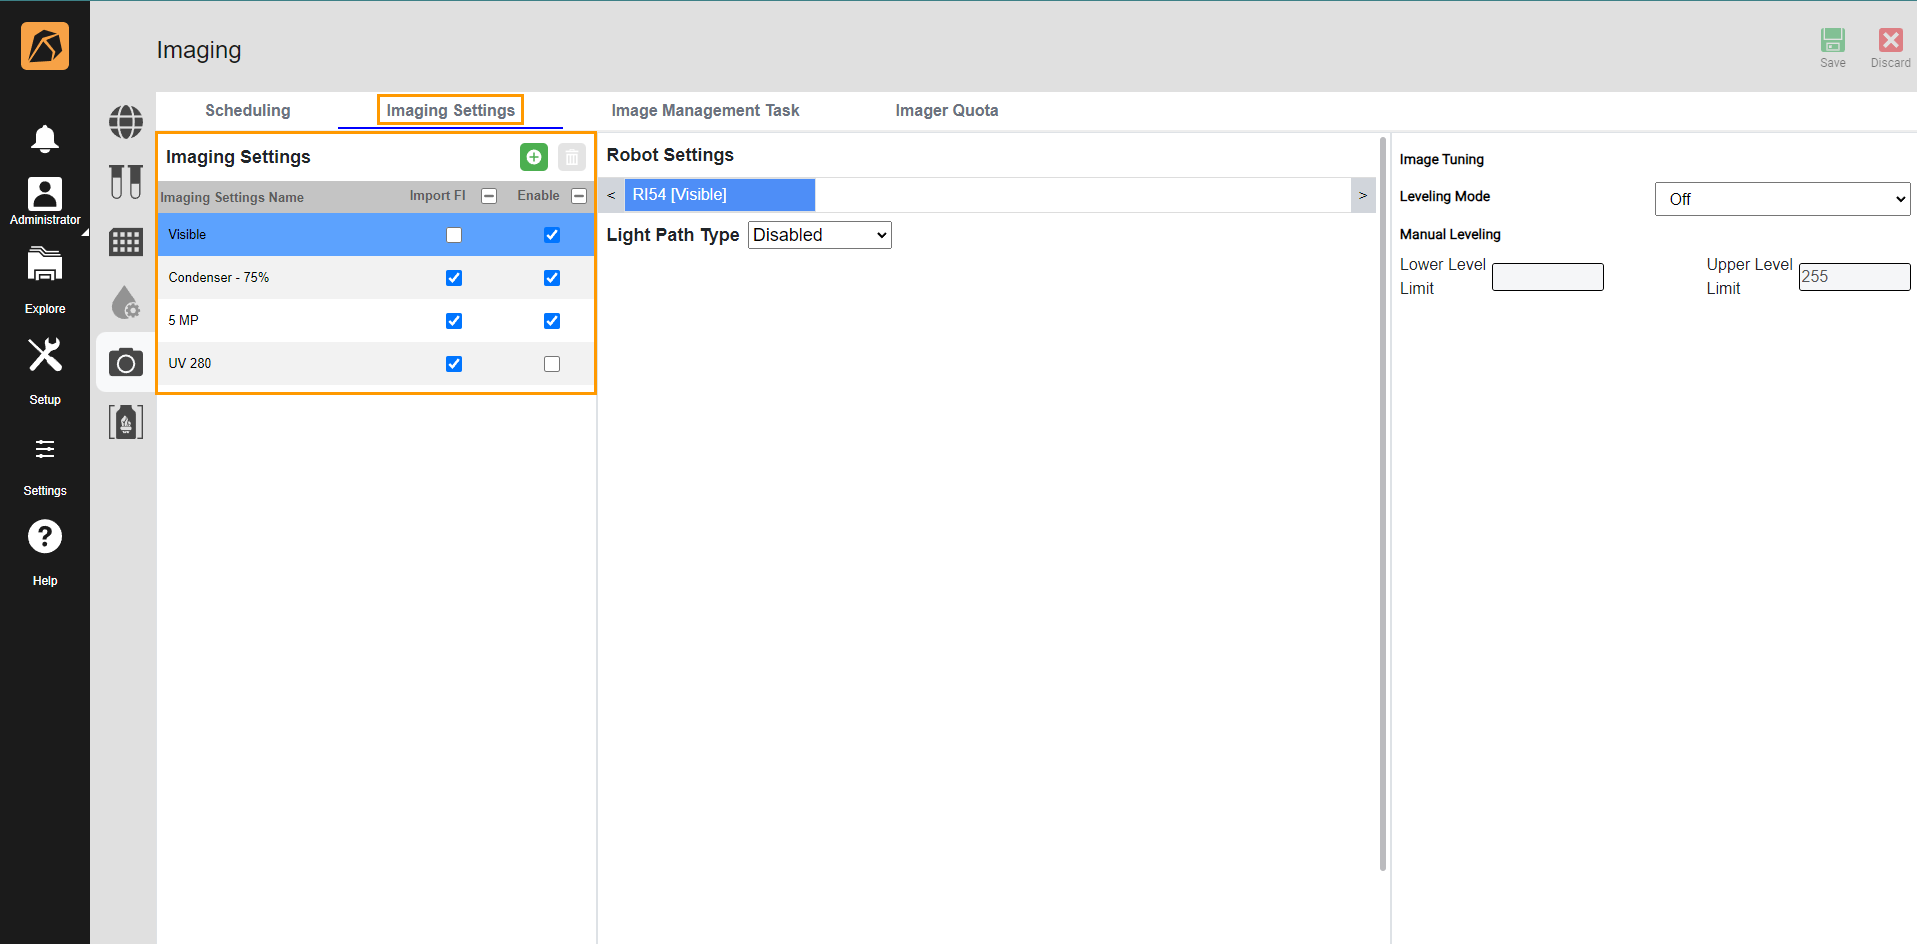
Imaging Settings Tab
Button/Column |
Name |
Description |
|---|---|---|
|
Add |
Adds an imaging setting. |
|
Delete |
Deletes an imaging setting. |
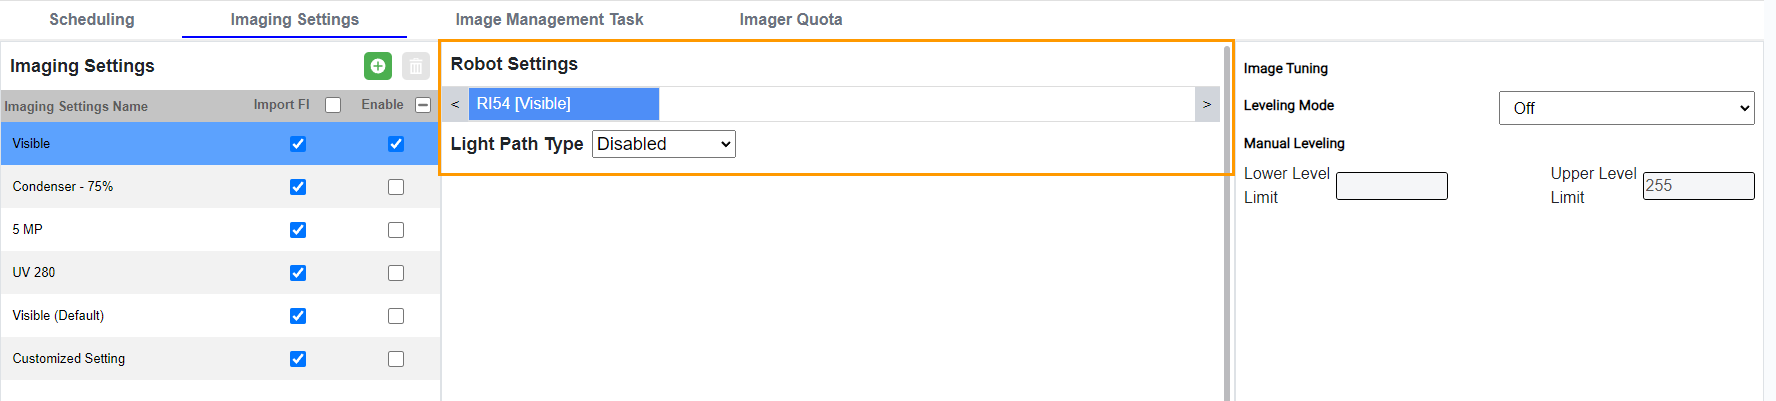
Imaging Settings Name |
Displays the imaging setting’s name. |
|
Import Fl |
Enables a focus level import. |
|
Enabled |
Enables the imaging setting to appear in the Imaging Schedule in the Info menu of the experiment page. |
|


ROCK MAKER provides three default imaging settings: Visible (Default), Condenser - 75%, and 5 MP.
Note
Selecting an imaging setting displays its Robot Settings and Image Tuning sections.
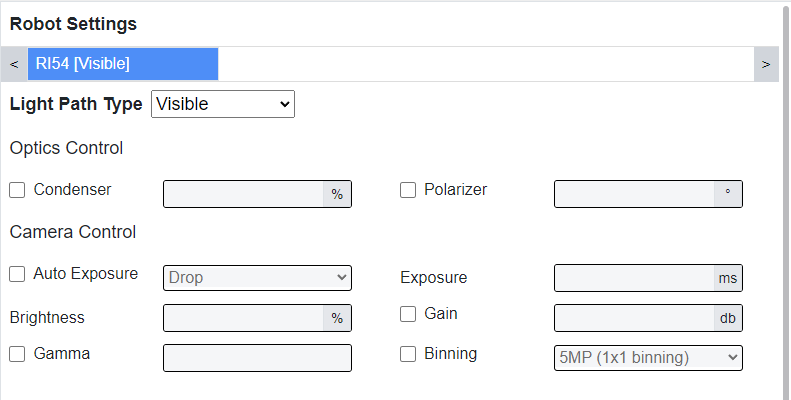
Robot Settings Section
Important
This section is displayed if your ROCK MAKER is integrated into an imager system(s).
Robot Settings Section Location
Each integrated imager system has its imaging settings.
Robot Settings Section
Light Path Type selects the type of light path on the imager system.
Optics Control selects the optics control(s) and defines the percentage(s).
Condenser: This value indicates the position of the condenser, expressed in a percentage at which the condenser’s iris is closed. The condenser collects light from the Kohler light source and concentrates it onto the imaged well. Values range from 0 – 100%. At 0%, the iris is fully open, and the light cone is concentrated at a wide angle. At 100%, the iris is closed, and the light is concentrated in a column rather than a cone.
Hint: Higher condenser values provide greater shadowing around crystals and precipitates in the drop, making them easier to see in the captured image.
Polarizer: This value tells you the angle of the polarizer lens from 0 to 360 degrees through which the light source is projected. A proper polarizer setting can help generate sufficient contrast in the captured image.
Camera Control adjusts how your images appear on the screen through the provided parameters. This is used in the manual imaging session.
Note
The parameters in the automatically scheduled imaging session are defined by the selected imaging setting(s) in ROCK MAKER.
Auto Exposure runs the auto exposure algorithm.
Exposure determines the amount of light allowed to fall on the camera’s sensor, affecting the image’s brightness. The Exposure field populates with the amount of time in milliseconds that the camera’s shutter remains open when capturing an image.
Brightness defines the brightness values. For imaging with ROCK IMAGER 1000 and ROCK IMAGER 2 MFI, set the brightness to 100% as a starting point.
Gain amplifies the signal strength in low-light conditions, increases the pixels’ sensitivity to light, and makes the image brighter by defining the amount of gain.
Note
Increasing the amount of gain can also increase the noise in an image.
Gamma sets the contrast of the midtones in the image. When you modify this setting, only the midtones are affected, not the black and white.
Binning selects the image resolution.
Image Tuning Section
This section defines the image tuning setting of the selected imaging setting in the Imaging Settings section, and it comprises the Leveling Mode and Manual Leveling fields.
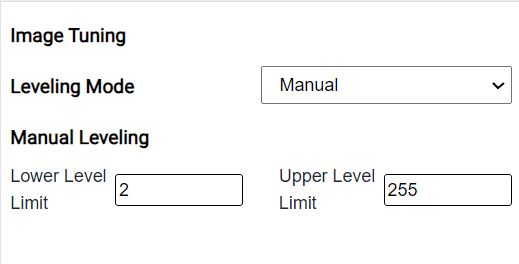
Image Tuning Section
Leveling Mode Section
This section offers 3 leveling mode options: Off, Manual, and Auto.
Off
Selecting Off means no leveling mode is applied.
Manual
The Manual mode lets you set the leveling window manually by defining its lower and upper level limits. The Lower level limit of the leveling window defines the boundary below which all tonal values will be discarded from the image. The Upper level limit defines the boundary above which all tonal values will be discarded from the image.

Manual Leveling Field
Auto
The Auto mode automatically sets the leveling window according to low and high thresholds. The low threshold is the percentage of pixels omitted at the left side of the image histogram before setting the lower limit of the tonal range. The high threshold is the percentage of pixels omitted at the right side of the image histogram after setting the upper limit of the tonal range.