Creating Ingredients
You can manually create an ingredient in ROCK MAKER or import it.
To create an ingredient:
Go to the Setup menu and click the Ingredients submenu.
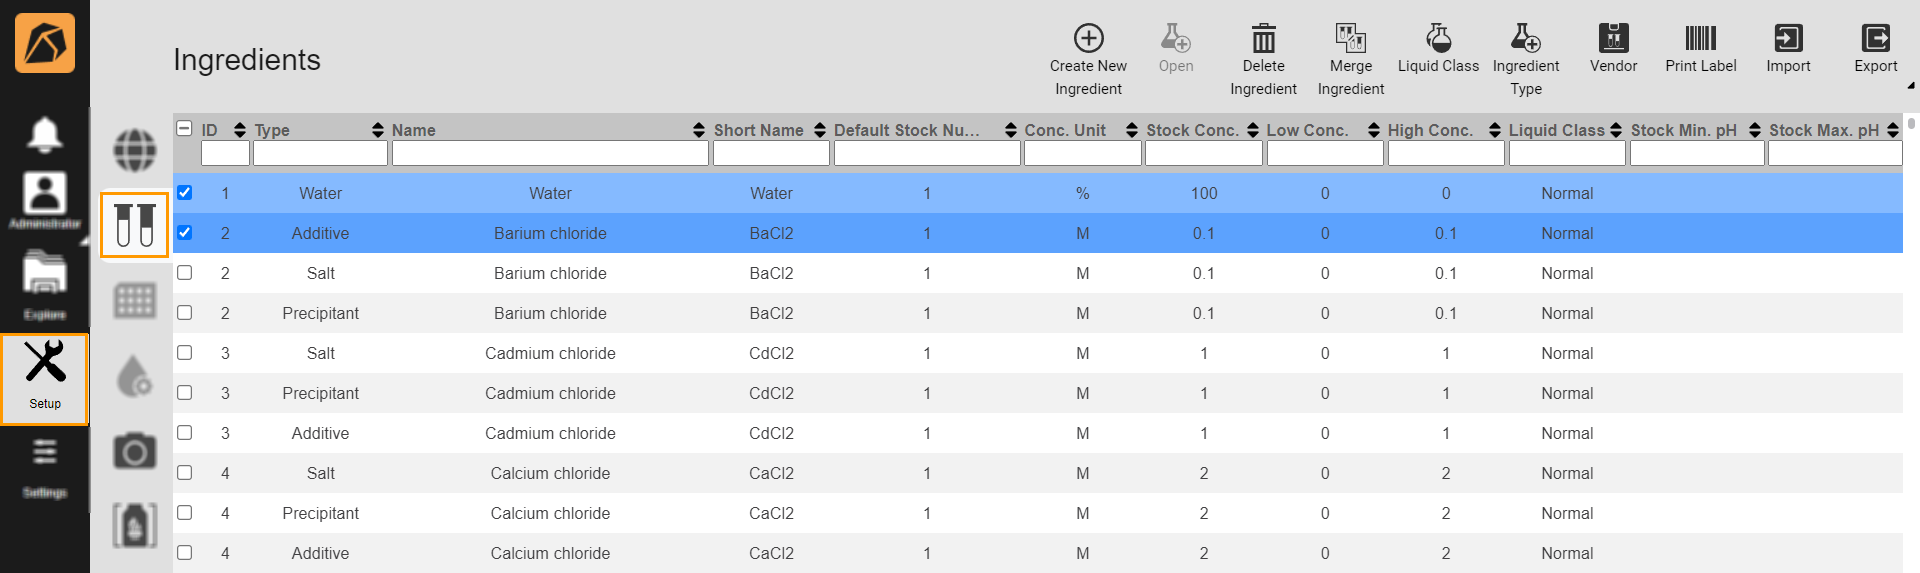
Ingredients Submenu
Click the Create New Ingredient button
 on the top bar.
In the New Ingredient dialog box, do the following:

New Ingredient Dialog Box
Section
Description and Task
Ingredient Info
Note
ROCK MAKER automatically generates the ingredient ID in the ID field.
Type the ingredient’s complete name in the Long Name field.
Type the ingredient’s short name in the Short Name field.
Both names should be unique.
Types
To add an ingredient type(s):
Click
 .
.In the Select Ingredient Type dialog box, select the ingredient type(s) and click SAVE.
Note
Selecting Buffer will create a Buffer Area consisting of Titration Curve and Mixing Curve. This does not apply to other ingredient types.
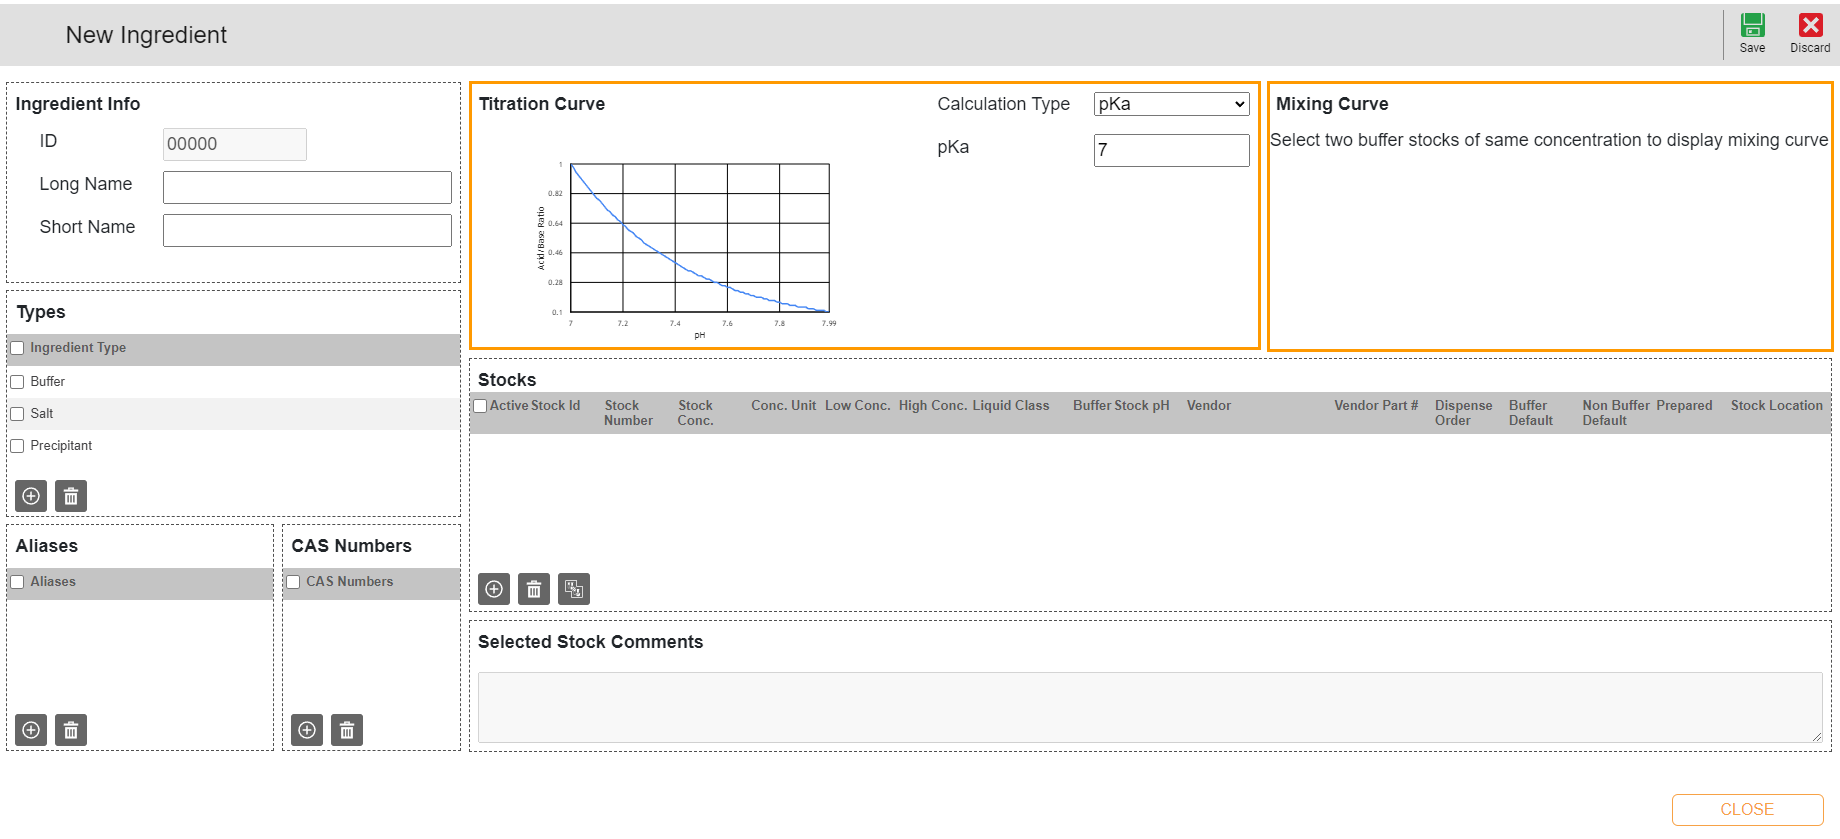
Buffer Area: Titration Curve and Mixing Curve
You can remove an ingredient type(s) by clicking the checkbox(es)
 before clicking
  .
.Aliases
Note
This field is optional.
Click
to add an ingredient alias(es) and enter its name. You can remove an alias(es) by clicking the checkbox(es) before clicking .CAS Numbers
Note
This field is optional.
Click
to add the CAS registry number(s) and enter its number.You can remove a CAS number(s) by clicking the checkbox(es)
before clicking .Stocks
For a one-type ingredient, define at least one stock. If the ingredient has a buffer type and at least one non-buffer type, define at least one buffer stock and one non-buffer stock. All default values are available in the ingredient list.
Note
ROCK MAKER automatically generates Active, Stock ID, and Dispense Order fields.
Enter the stock concentration value in the Stock Conc. column.
Important
The stock concentration value mustn’t exceed the default value in the Stock Conc. column in the ingredient list.
Select the concentration unit from the Conc. Unit dropdown.
Define the default low-concentration value in the Low Conc. column.
Define the default high-concentration value in the High Conc. column.
From the Liquid Class column, select the liquid class your liquid handling robot uses to determine how an ingredient should be dispensed.
Set the stock(s) as the default buffer stock pH by clicking the checkbox(es) in the Buffer Stock pH column.
Note
The checkboxes will be active if you have at least a buffer type.
From the Vendor column, select the vendor where you purchase your ingredient.
Enter the vendor part number in the Vendor Part # column.
In the Buffer Default column, set the stock as the default buffer stock by clicking the checkbox.
Note
If the ingredient has a buffer type and at least one non-buffer type, you can select a default buffer stock and a default non-buffer stock.
In the Non Buffer Default column, set the stock as the default non-buffer stock by clicking the checkbox. The default stock number appears in the Default Stock Number column in the ingredient list. ROCK MAKER automatically designates the first ingredient stock you create as the default stock.
In the Prepared column, mark the stock as Prepared by clicking the checkbox(es).
In the Stock Location field, enter the stock location to help you locate stocks if you keep them in multiple places around your lab.
Selected Stock Comments
Type relevant notes about the stock. This field is optional.
If everything is set, click Save
 on the top right bar.
This dialog box also provides the following buttons:
Discard
 on the top right bar to cancel tasks or changes.
Close
 on the bottom right bar to close the window.