Configuring Imaging Profile
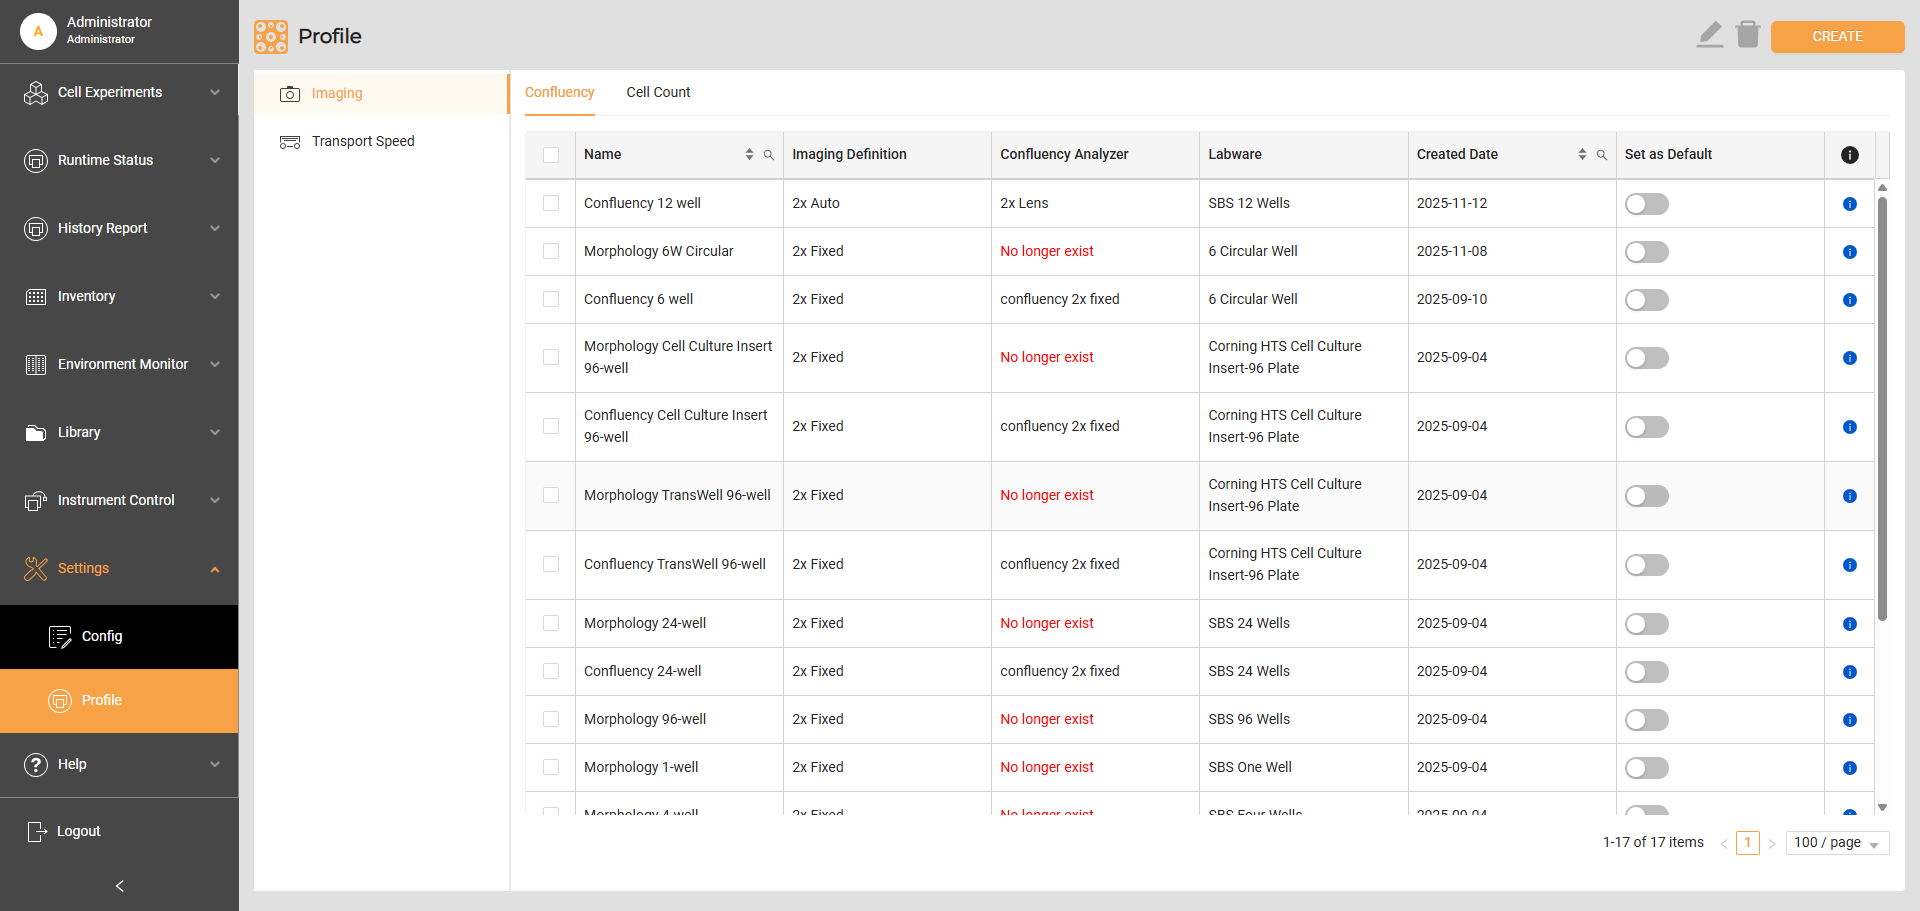
Imaging Profile
Imaging profiles offer distinct profile options for Confluency and Cell Count. These profiles require you to set specific parameters for optimal data acquisition. You can choose the optical magnification for confluency imaging, opting between 2x for a broader overview or 10x for a more detailed view of individual cells. To configure the profile, go to Settings > Profile > Imaging.
When creating a profile, you must define specific wells and regions within a plate to image. This focused approach allows you to target specific areas of interest, eliminate irrelevant data, and maximize the value of your imaging analysis.
Confluency
The Confluency profile configures the optical magnification and imaging patterns to observe the confluency in a specific plate.
To create a Confluency profile:
On the Confluency tab, click CREATE on the top right corner.
Insert a descriptive name for your confluency profile.
Under Imaging Definition, select Optic 2x to observe confluency or Optic 10x to examine the cell morphology. Upon selection, the imaging settings appear in the box underneath.
Go down to Confluency Analyzer and select Default Profile.
In the Pattern column, select a labware from the dropdown menu.
Define a pattern for the wells and regions to image. Each plate shows a different number of wells and regions. You must select at least one well and region for each plate. No exact pattern is required; you can just select a random well or region as you desire or all at once.
Note
Selecting all wells and regions on a plate increases the imaging time.
After completing the configuration, click SAVE on the top right to store your profile settings. The new confluency profile will appear in the table. Turn on Set as Default if you want the system to use the same settings for imaging for confluency.
Cell Count
The Cell Count profile configures the number of counting chips to use and the imaging pattern to count cells.
To create a Cell Count profile:
On the Cell Count tab, click CREATE on the top right corner.
Insert a descriptive name for your Cell Counting profile.
Move to Imaging Definition and select Optic 10x. Upon selection, the imaging settings appear in the box underneath.
For Cell Count Analyzer, select Default Profile.
Select the number of the counting chip you intend to use.
Note
More counting chips can prolong imaging time and dry trypan blue due to long exposure to positive pressure.
Under the Imaging Pattern lies a counting chip layout with six regions. Select regions to specify which part of the counting chip to image.
After completing the configuration, click SAVE on the top right to store your profile settings. You will return to the Instrument Profile Manager page and see the currently created profile in the table. Turn on Set as Default if you want the system to use the same settings for imaging for cell counting.
Related Topics