Creating a New Experiment
Prerequisite:
Required cells, reagent, and labware have been registered to the system.
To Create a New Experiment:
In Cellmatic Suite, go to Cell Experiments > Create Experiment, and select one of the options below:
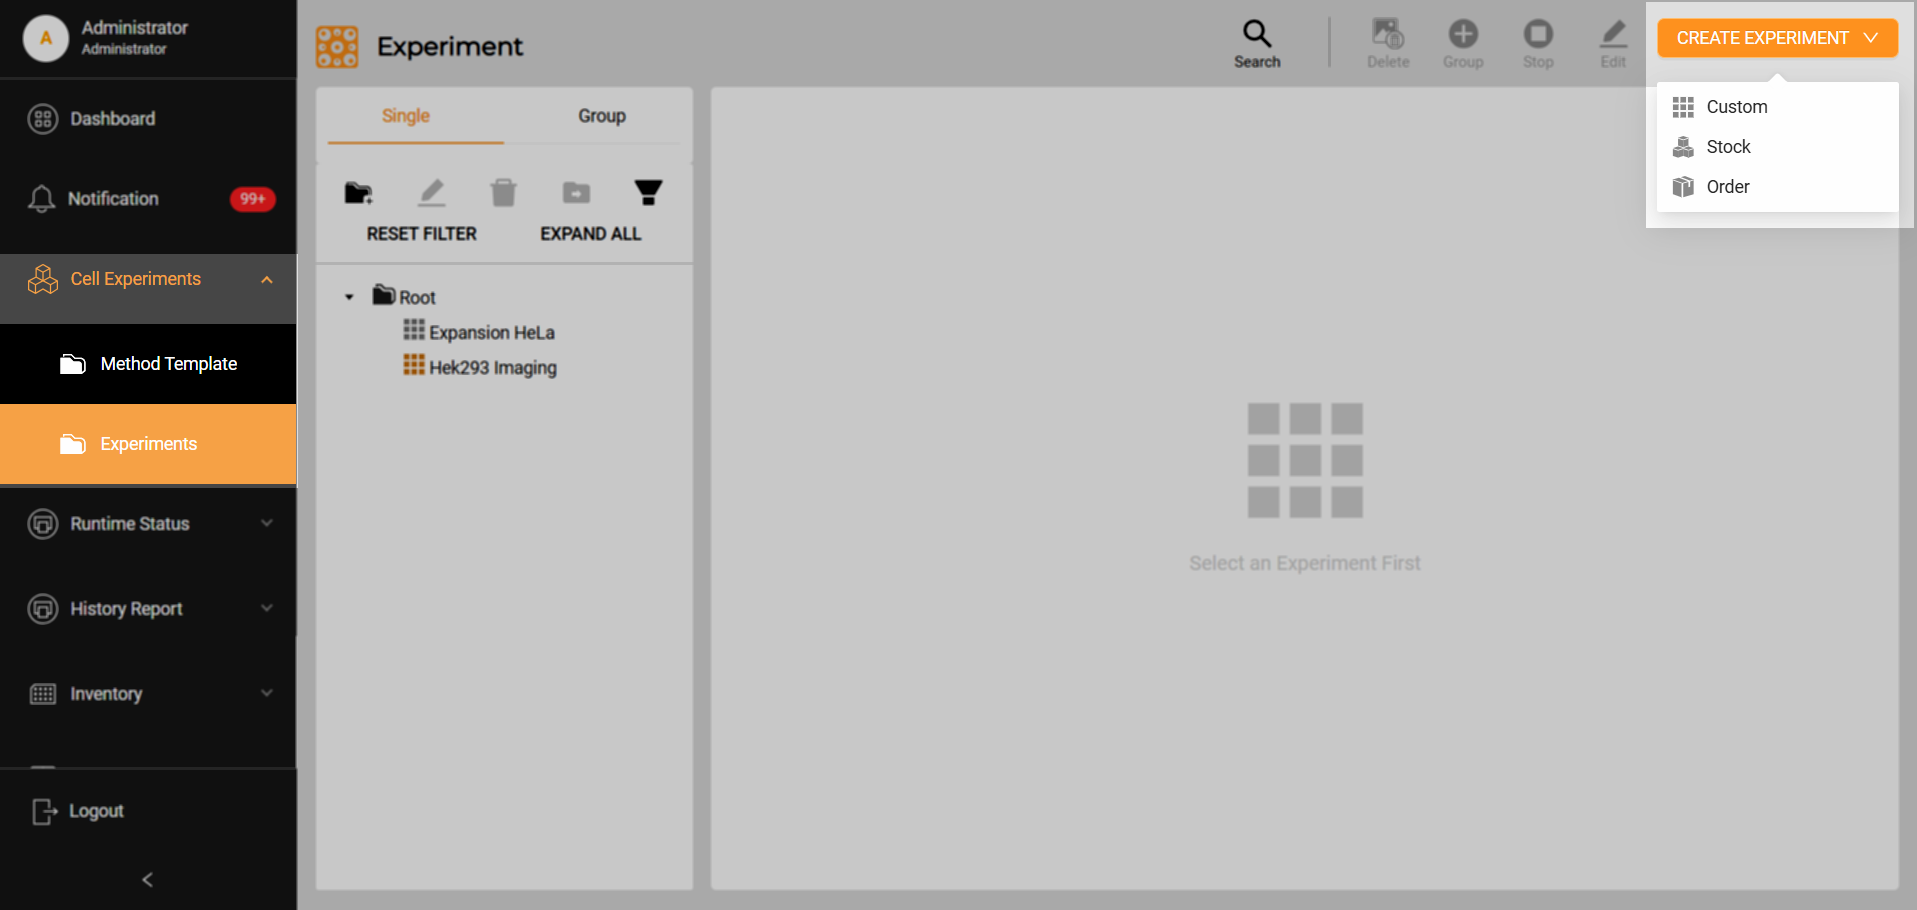
Create Experiment Options
Custom: Designs an experiment from scratch.
Stock: Maintains a cell line continuously using a two-stage template.
Stage 1: Imaging and media exchange tasks.
Stage 2: Passaging task and then looped back to Stage 1.
The number of plates in maintenance stays fixed once they reach the quantity specified by the user. Profiles and parameters for all tasks are left blank to be customized per cell line and experiment.
Order: Creates an ordering assay plate template based on the stock plate.
Stage 1: Plating task
Stage 2: Imaging and media exchange tasks (if needed)
Profiles and parameters for all tasks are left blank to be customized per cell line and experiment.
Fill out the General Information column on the left column.
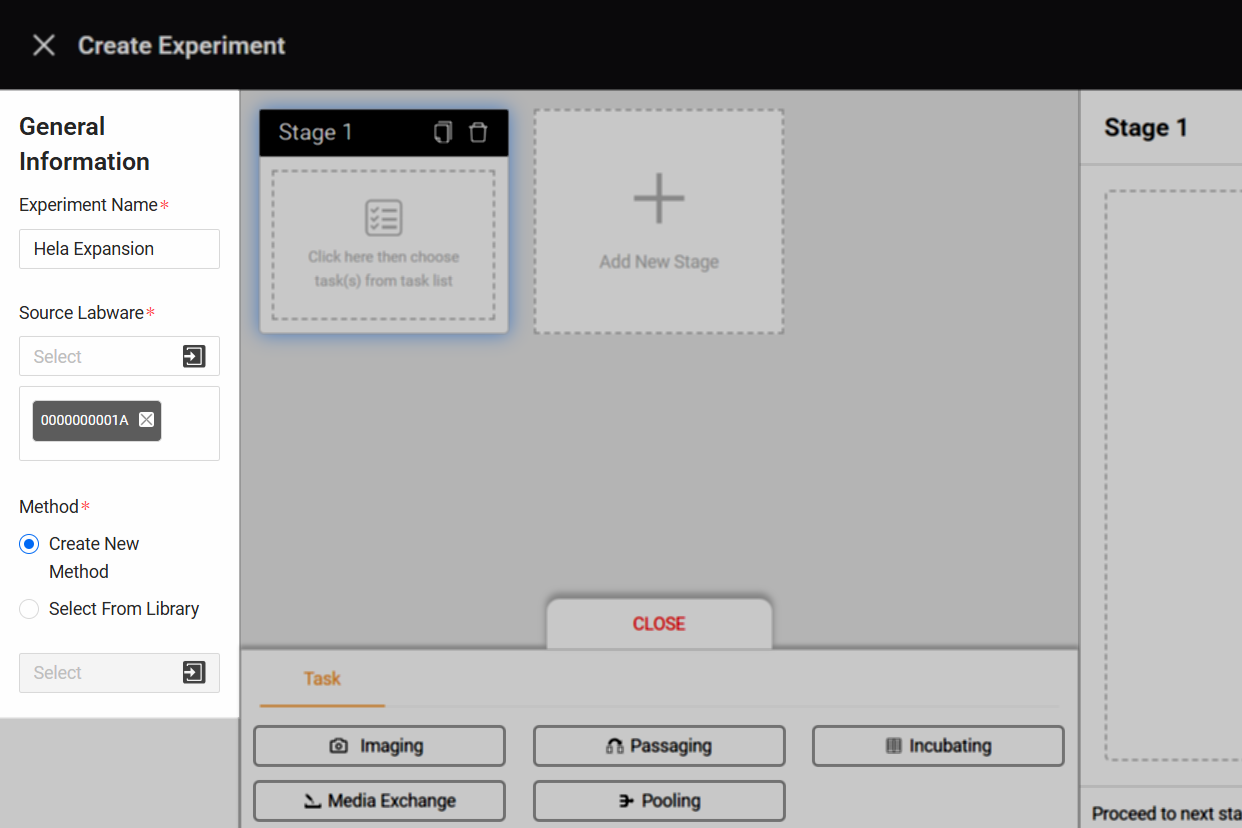
General Information
Enter a descriptive name for your experiment.
Select the source plate. If multiple plates are selected, ensure they have the same type of labware.
Note
Selecting a plate already assigned to an experiment will stop its current task and be assigned to this new experiment.
Selecting multiple plates as the sources of your experiment assigns the same stages and parameters to them at once.
Select the experiment method.
Create New Method: Designs a new experiment method from scratch, including defining the task profiles, parameters, and conditions for each stage.
Select From Library: Adopts an existing method from the library and applies it to this new experiment. The task profiles, parameters, and conditions of each stage are adjustable according to the experiment requirements.
Add a task(s) to the stage. Make sure to complete the stage before adding a new one. Refer to Task List for more details.
Select a task at the bottom to add to the stage.
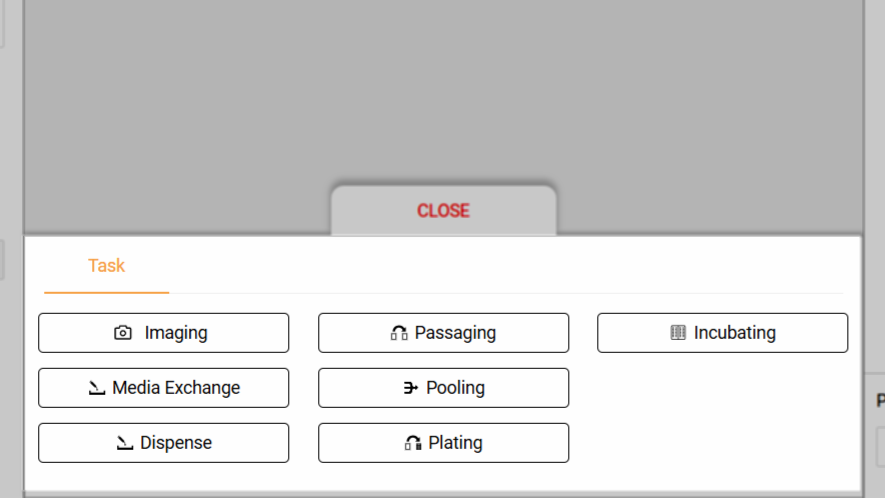
Selecting a Task
Select the task profile in the pop-up window and select OK. Make sure to read the description before selecting one.
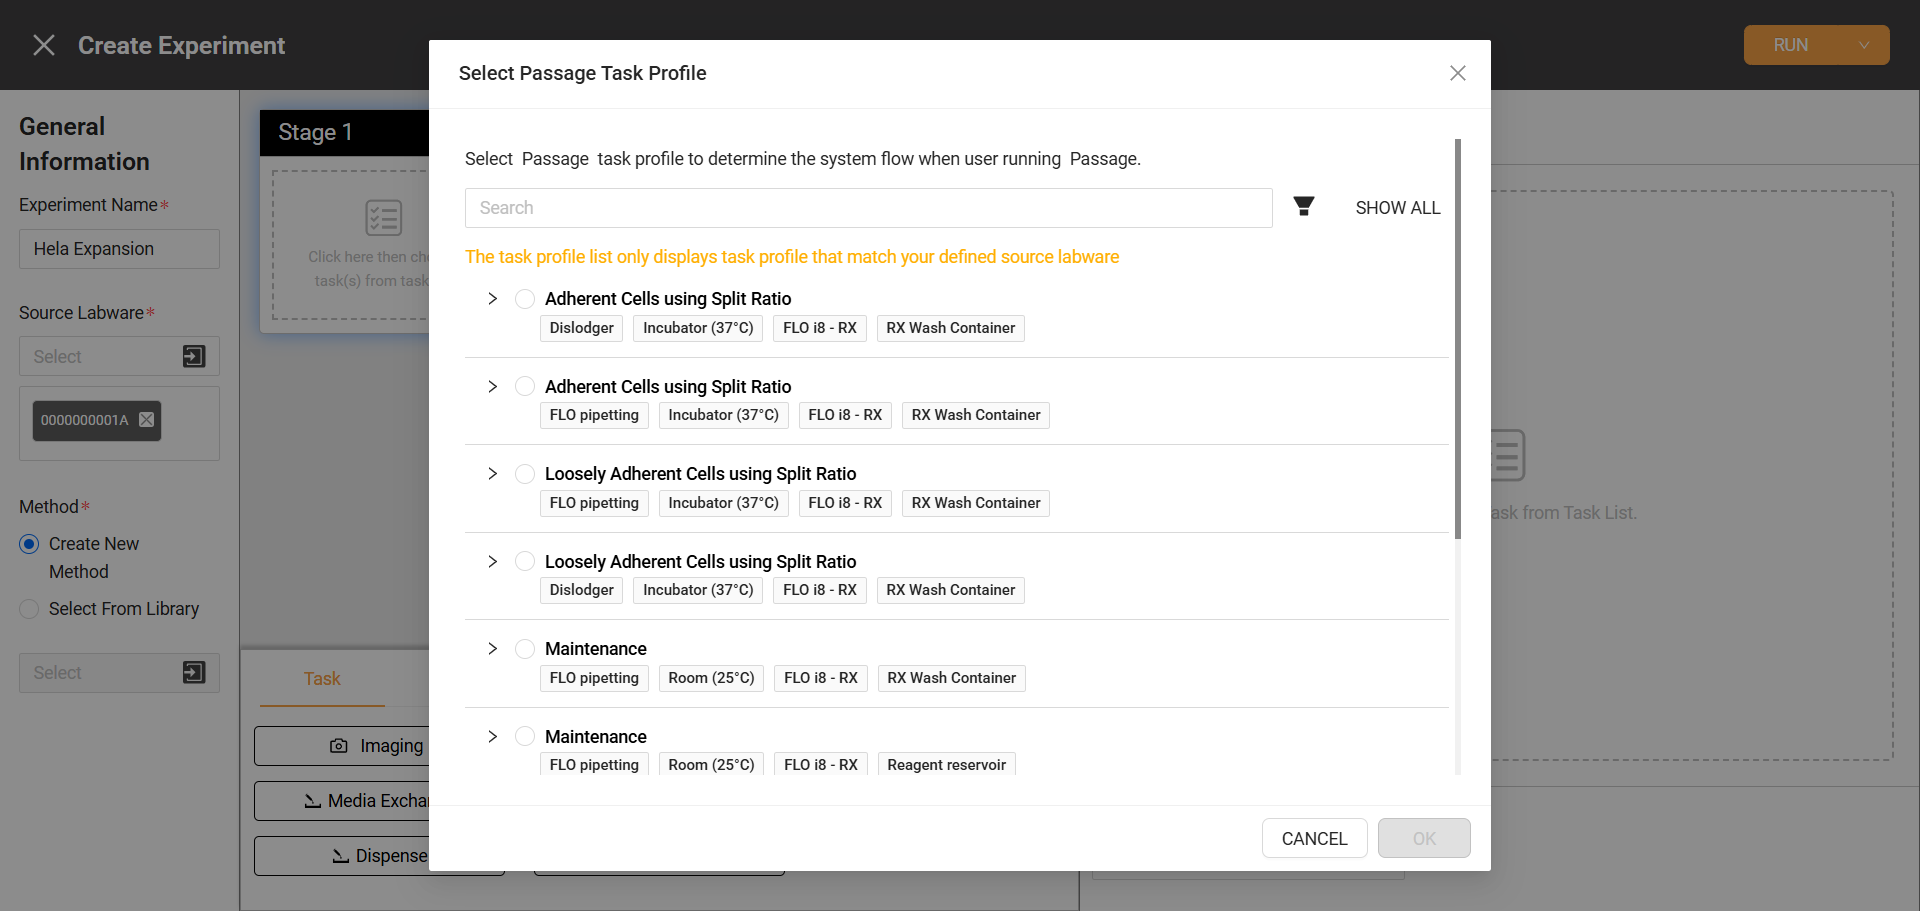
Selecting a Task Profile
Note
Media Exchange and Imaging tasks can be combined in one stage.
- For Media Exchange, Imaging, and Dispense tasks:
Define the execution time when adding these tasks to the stage: Immediately or After Set interval/
Select +Add Schedule to open the Add Schedule window or add multiple schedules within a single task.
All subsequent runs (in other stages or loops) will use the After Set Interval option, which is based on the specified time.
Schedules within a task run sequentially, meaning each schedule must be completed before the next one begins. Therefore, the earlier schedule must not have unlimited repetitions.
Fill out the parameters for the automation to run correctly.
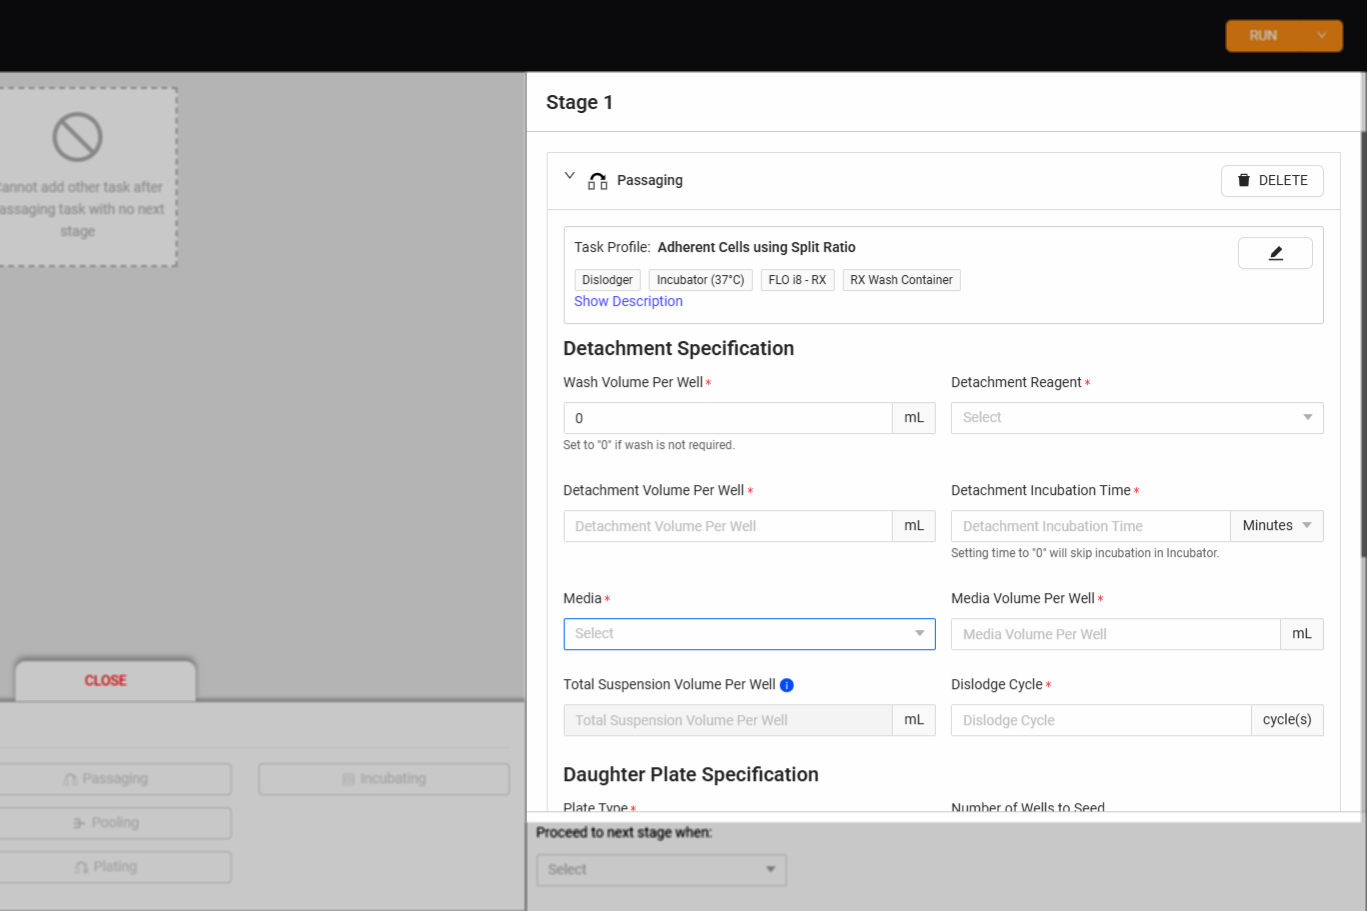
Task Profile Parameters
Select a condition for each stage in the Proceed to next stage when dropdown menu, located on the bottom right, before adding a new stage. You can select one of these five conditions to go to the next stage:
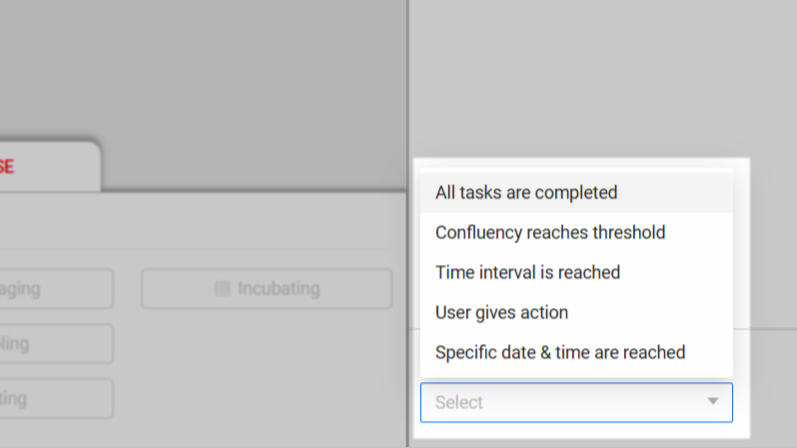
Selecting a Condition for Each Stage
All tasks are completed: The experiment moves to the next stage once the current stage is complete. To use this option, the task must have a limited repetition.
Confluency reaches threshold: The experiment continues to the next stage after achieving the confluency threshold. Do not select this option if the stage has no imaging confluency task.
Time interval is reached: The duration that the experiment should be fulfilled before moving to the next stage.
User gives action: The active experiment requires the user to select Continue Stage to proceed to the next stage. Refer to the Continue Stage section for the details.
Specific date & time are reached: The experiment continues to the next stage after the specified date and time.
All plates are finished: This option is only available for Pooling, indicating the system has finished collecting cells from all source plates.
Note
The preceding conditions may appear differently depending on the task.
Some conditions like Confluency reaches threshold, Time interval is reached, and Specific date & time are reached require unlimited repetitions.
Repeat steps 3-4 to add new stages and tasks to your experiment.
Select one of the following options to store your experiment:
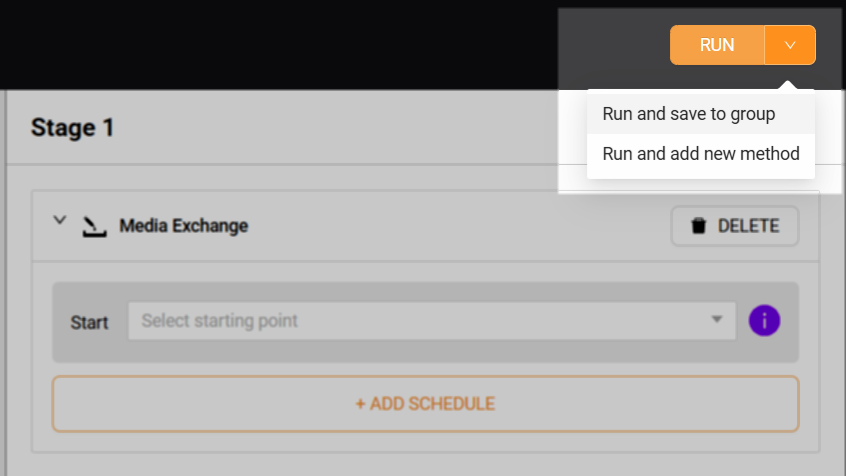
Run Experiment
Run: Executes your experiment immediately.
Run and Save to group: Executes and stores your experiment in a particular group. The group must be created before setting up the experiment.
Run and add new method: Executes and makes your experiment as a template.
Note
Tasks in different stages are executed sequentially, meaning the system completes tasks in one stage before moving on to the next.
Related Topics: