Refrigerator
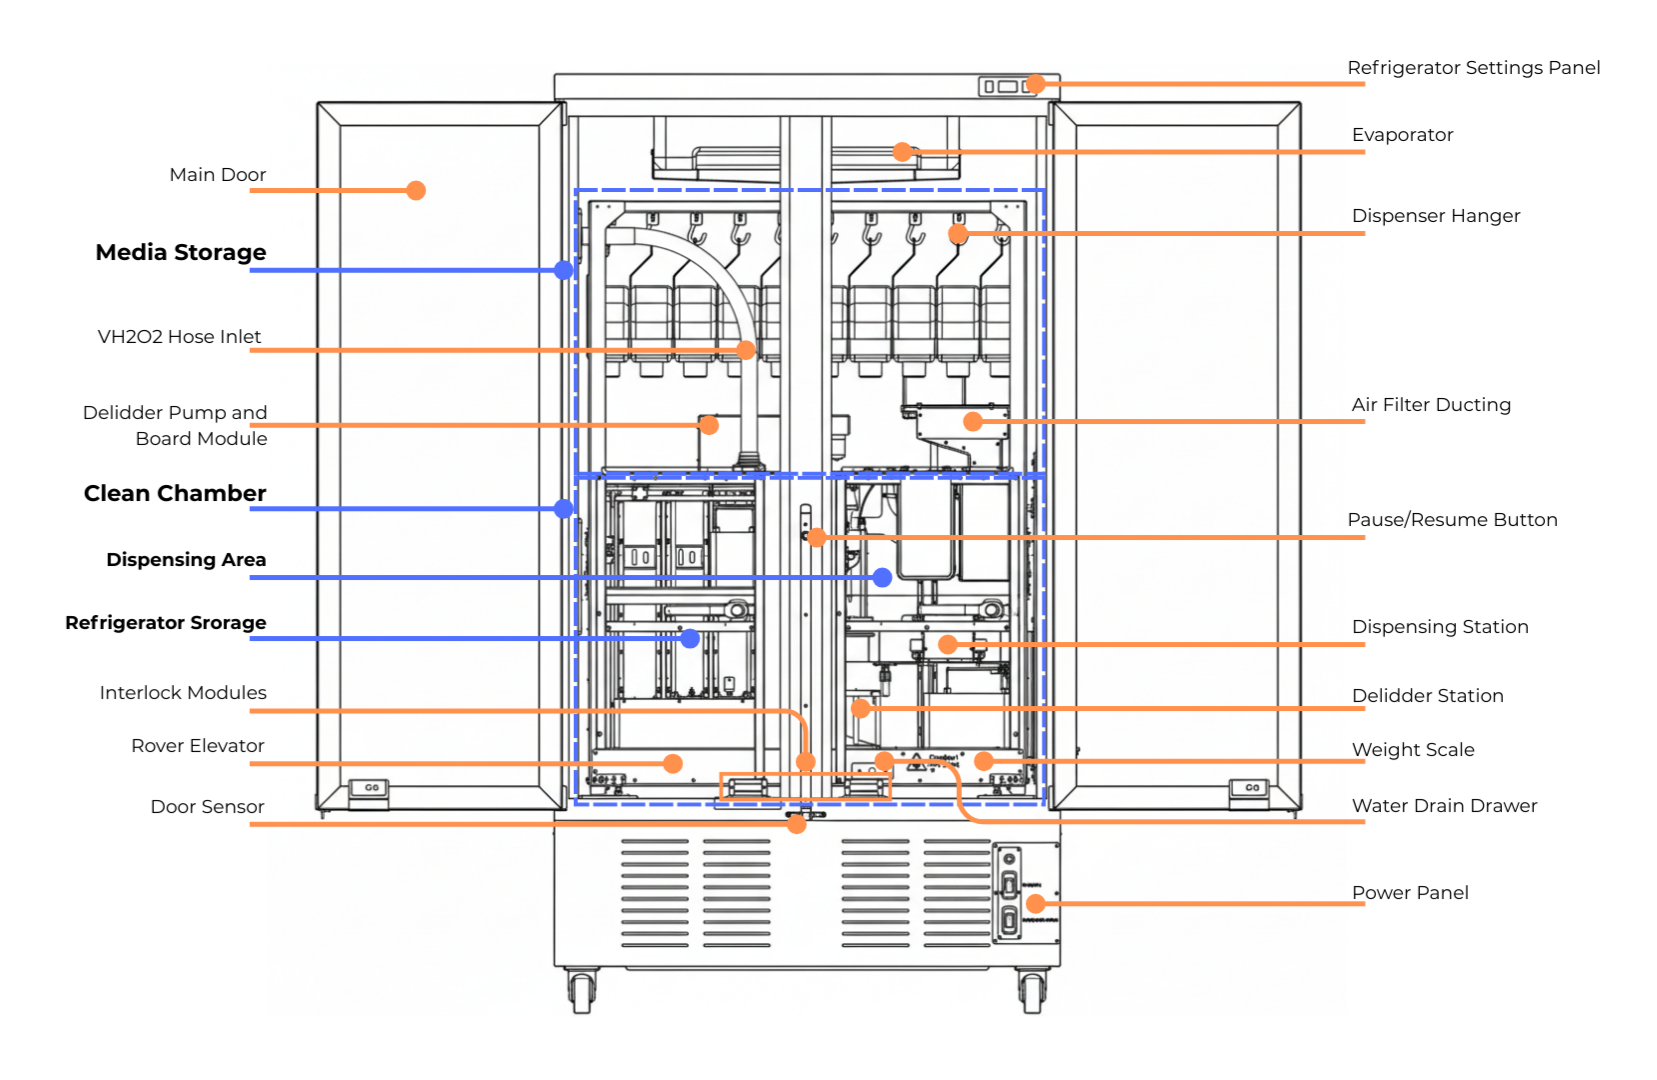
The Refrigerator Parts Overview
The Refrigerator stores cell culture media, reagents, and labware that need to be kept cold (4 to 8oC). It is divided into two sections, upper and lower.
Upper Section: Media Storage
Media Storage has ten hangers for Gibco bottles (500 mL and 1000 mL) or media bags (5 L). These bottles hang inverted and connect via tubing to a pinch valve dispenser station in the lower right section (Dispensing Area).
A customized bottle cap, provided by FORMULATRIX, is used to connect the tubing from the reagent bottle to the dispensing station. These caps have two ports with connected tubes.
The bottle dispensing tube extends down to the Dispensing Area on the right side of the lower section.
The vent tube is secured near the dispenser reagent with a filter on the end to allow airflow and prevent a vacuum from forming when dispensing into the reservoirs below. It is important to make sure the filter does not get wet when installing the reagent and tubing.
Clamps are used to pinch both tubes closed during installation or media bottle/bag refilling to prevent leaking.
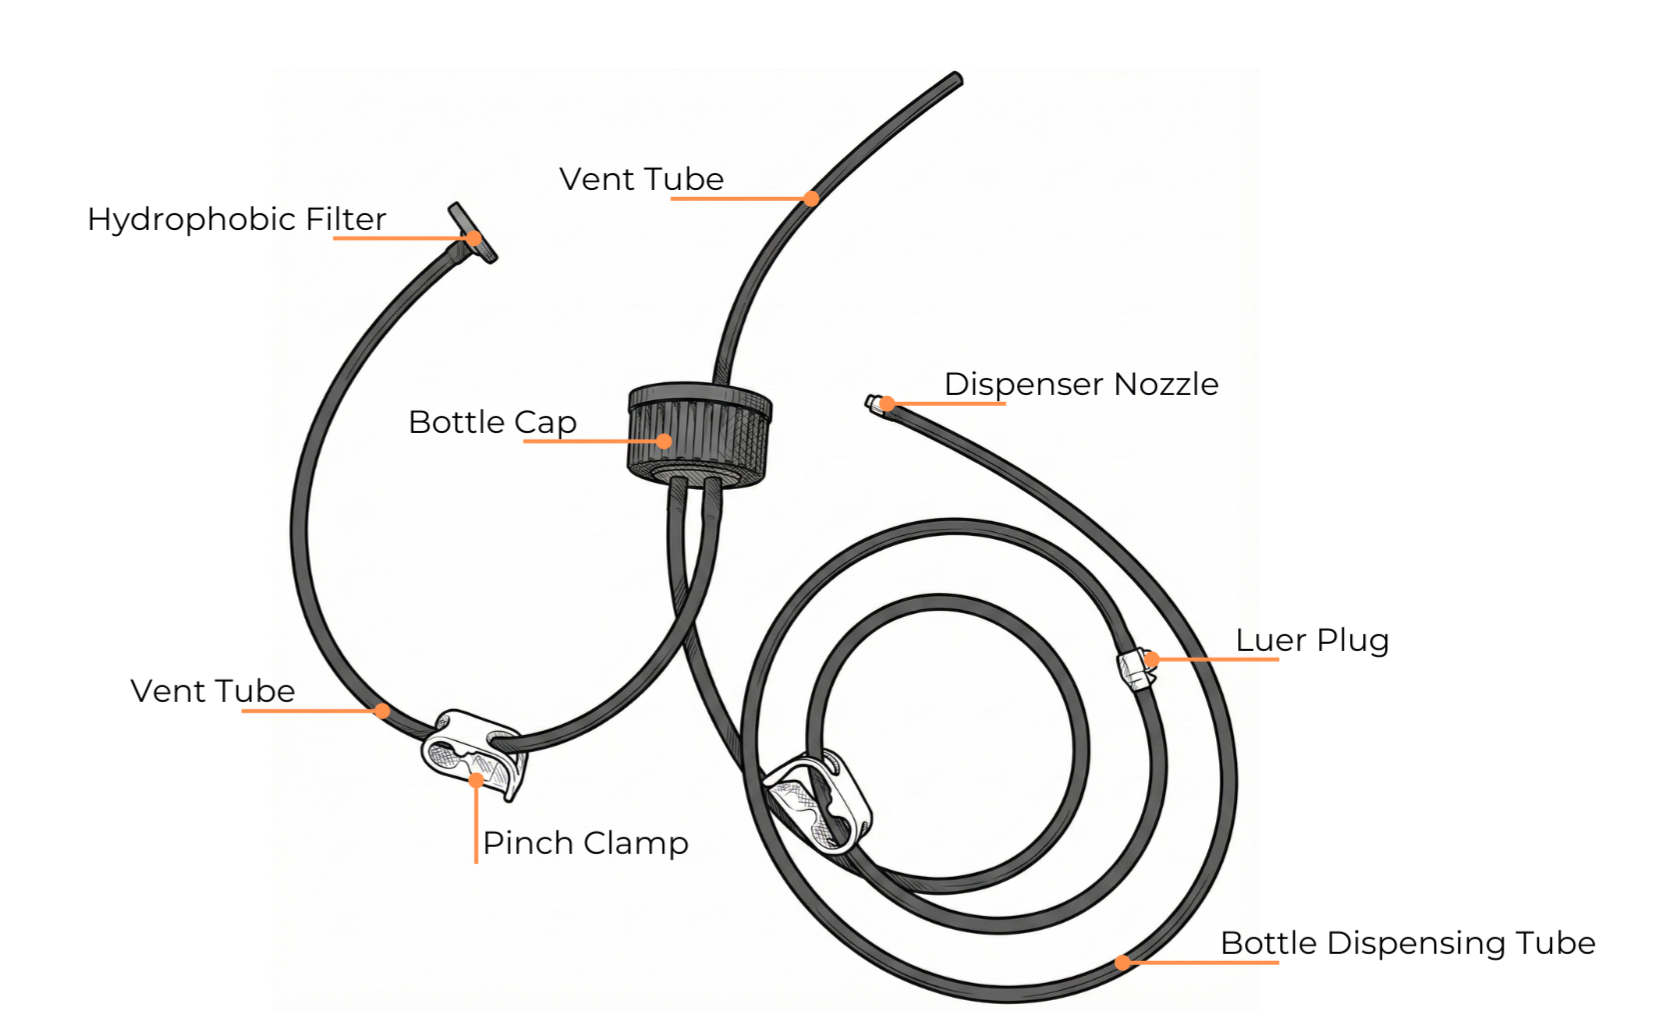
The Formulatrix Customized Bottle Cap
Lower Section: Clean Chamber
Clean chamber is divided into refrigerator storage and a dispensing area. This chamber has its sliding doors behind the refrigerator doors, which remain closed during normal operations but can be opened for maintenance and set-up. Rovers enter the clean chamber through the rover sliding door on the lower right, between the Refrigerator and Labware Storage.
Refrigerator Storage
Refrigerator storage has 20 slots compatible with three labware types: SBS reservoirs, SBS deep wells, and SBS microplates. Any coated plates containing reagents can be stored here prior to their use in a culture protocol. Rovers drive directly into the Refrigerator Storage area to store or collect reagent labware to bring to liquid handlers for cell processing.
Dispensing Area
The dispensing area contains a weigh scale, delidder, dispenser module, water drain drawer, and UVC lights. These UVC lights turn on for a set period every time a refrigerator door opens and closes to prevent contamination.
Reagents are dispensed directly into the reagent reservoir inside the Refrigerator. Rovers enter with a reservoir from Labware Storage or pick up a reservoir from refrigerator storage. The reservoir is delidded on one side of the dispenser station area using a delidder. The Rover then positions itself on the weight scale, with the reservoir under the correct pinch valve (these valves are numbered and connected via tubing to the same number hanger). The valve releases and a reagent flows into the reservoir until the weigh scale detects the appropriate volume has been dispensed. The lid is replaced, and the Rover then carries the reservoir into protocol service.
Note
A seam between the rover mats, located under the delidder and to the left of the dispenser module, is designed to manage spills, delidding, or dispensing. If liquid enters this seam, a liquid drain drawer underneath catches it. The drawer can be pulled out, emptied, cleaned, and put back in place. Spills should not happen, but if one does, slide open the clean chamber doors to wipe up the spill. Always use aseptic technique when accessing Cellmatic cabinets.
Buttons on Refrigerator
The Refrigerator has three panels, pictured and labeled below, for various buttons and their status or display indicators.
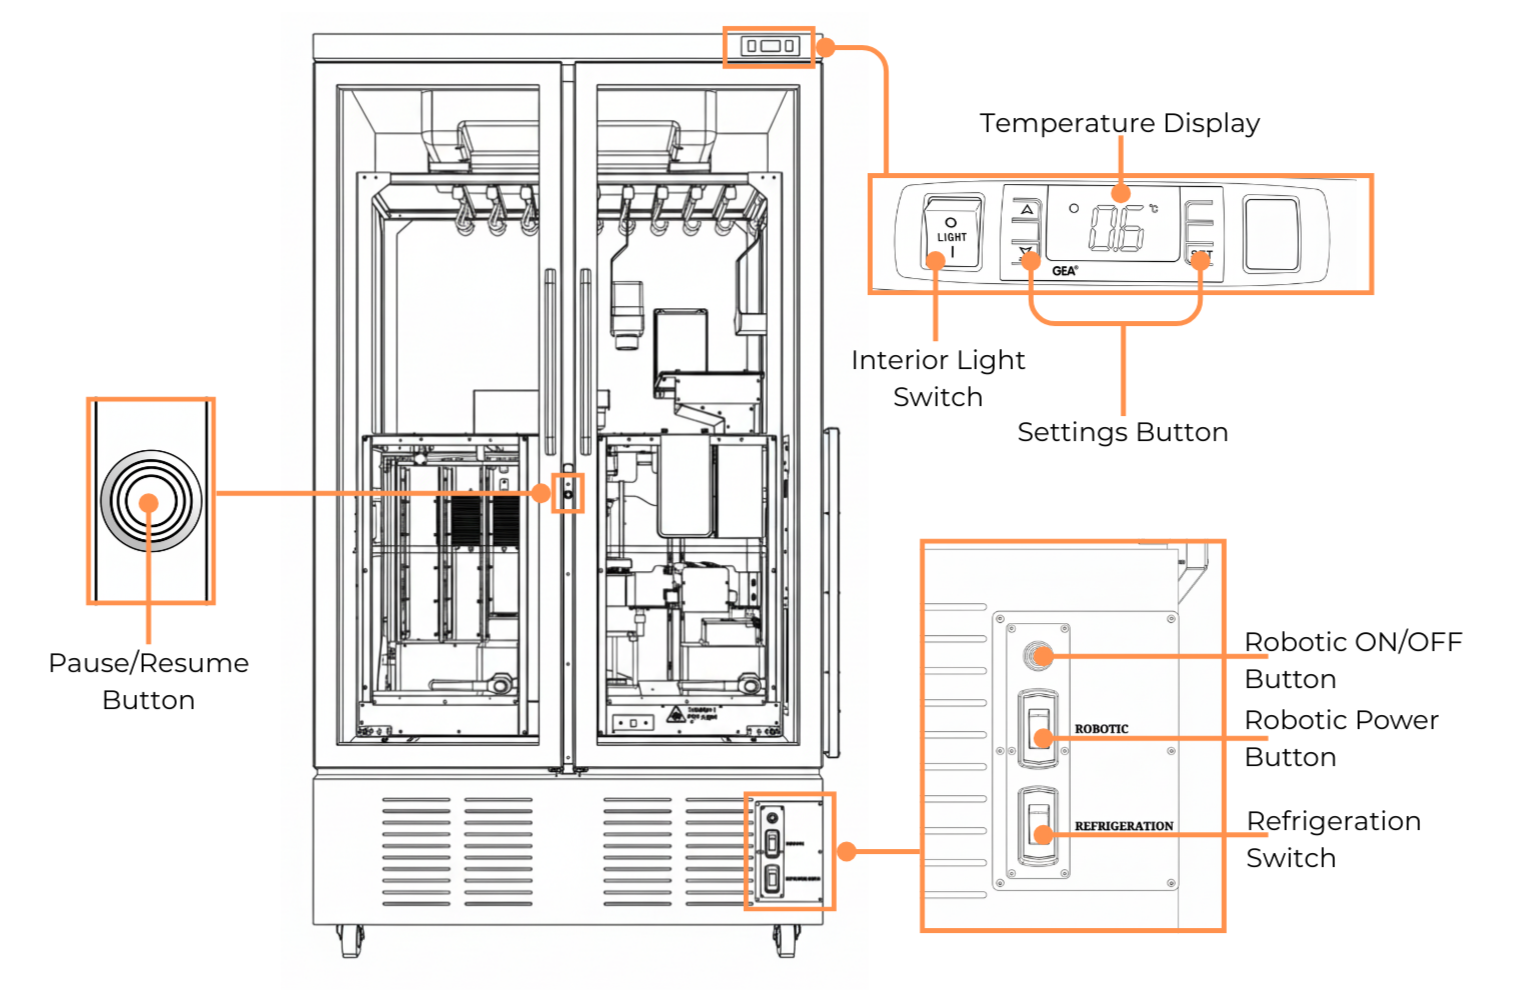
Refrigerator Buttons
Buttons |
Function |
|---|---|
Access Panel |
|
Pause/Resume Button |
Switches between automatic and manual mode, also shows the current state and safety condition of the system.
|
Refrigerator Settings Panel |
|
Interior Light Switch |
Turns ON/OFF the Refrigerator’s main lamp. |
Temperature Display |
Displays the Refrigerator’s temperature. |
Settings Buttons |
|
Power Panel |
|
Robotic ON/OFF Button |
Turns ON/OFF the Refrigerator’s robotic system.
|
Robotic Power Switch |
Enables/disables the power line to the robotic system. |
Refrigeration Switch |
Turns ON/OFF the Refrigeration system (compressor, evaporator, etc.). |
Related Topics: