Emptying FLO Tip and Liquid Waste
The Instrument Cabinets 2 features a FLO waste bin assembly, designed to dispose of FLO tips and liquid waste safely. The bin is mounted on a trolley for easy transport to central waste disposal.
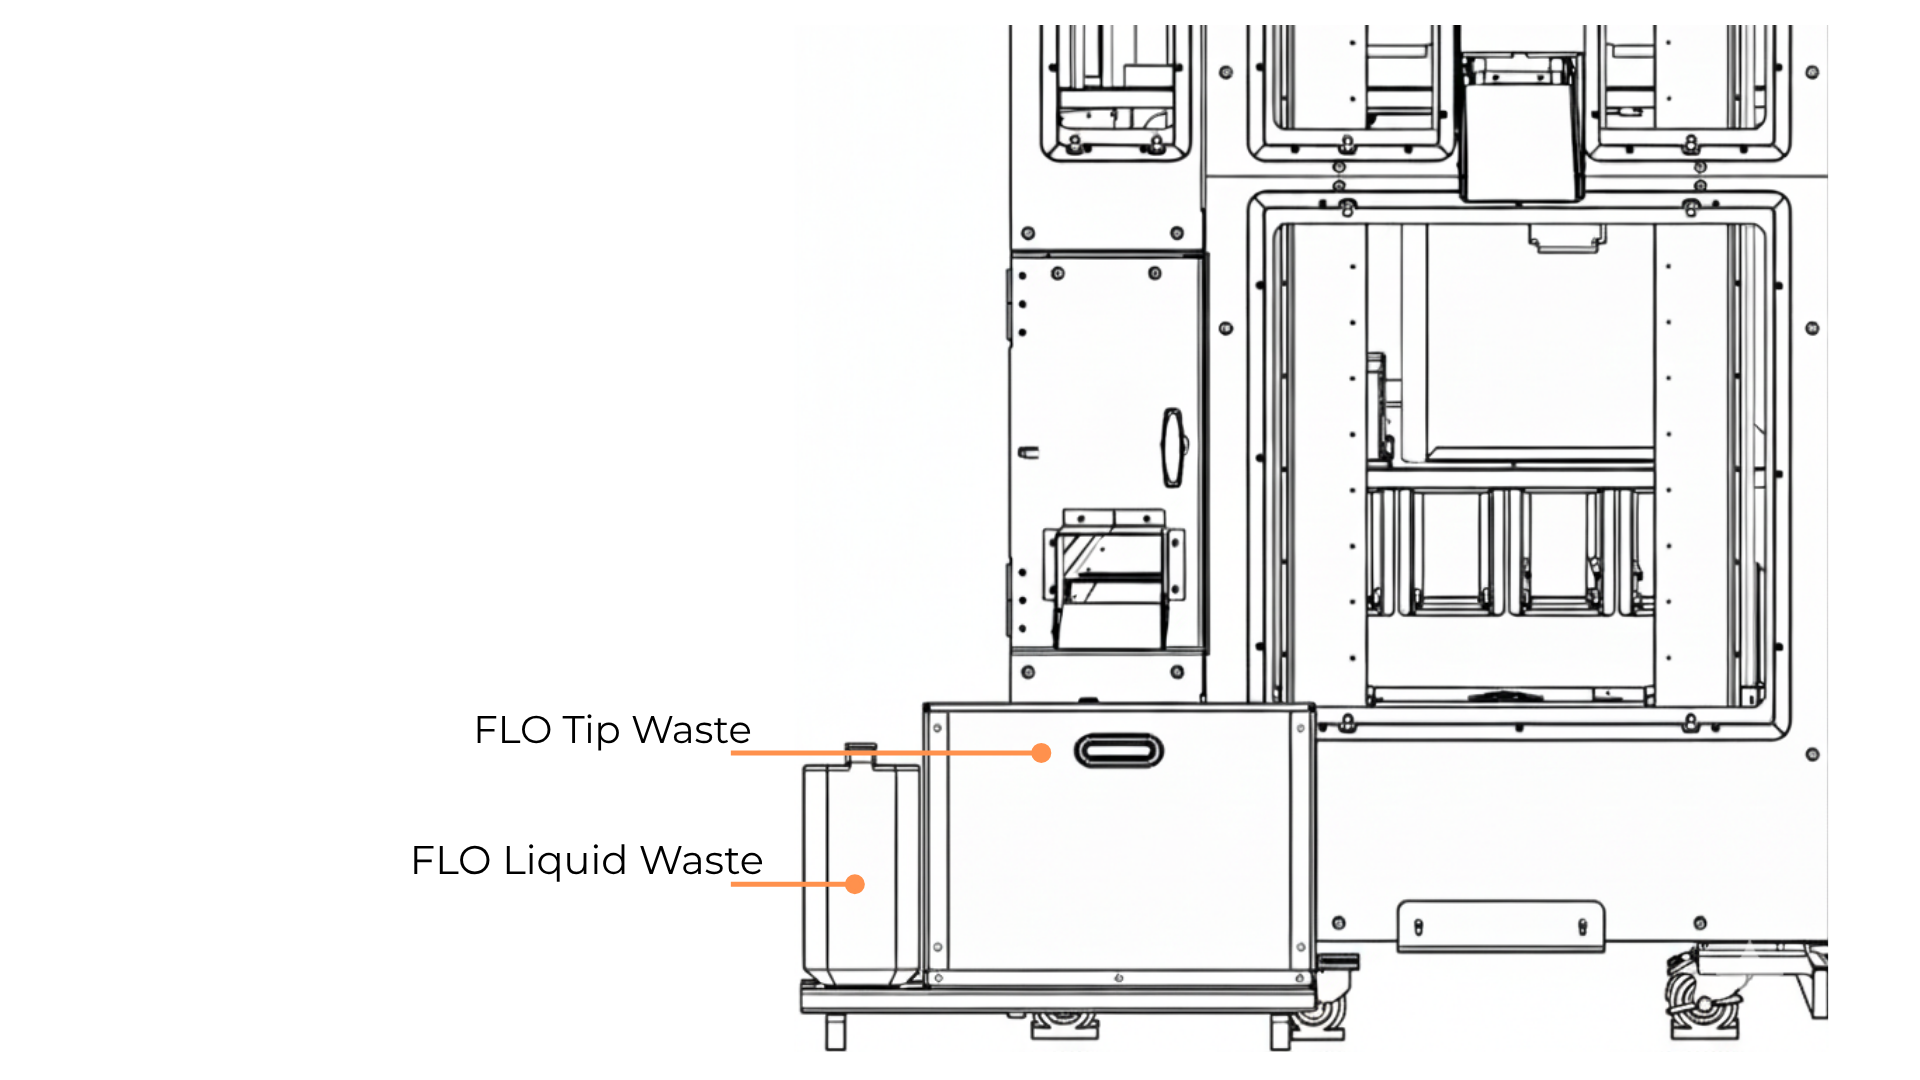
The FLO Tip Waste Assembly
The following tutorials describe how to empty the FLO waste bin assembly:
Emptying FLO Tip Waste
The FLO tip waste is designed to hold a maximum of 6200 tips.
Required items:
1 ea - 120 x 180 cm Biohazard Waste Bag
1 ea - 70% Ethanol Spray
Prerequisite:
Wear PPE. At a minimum, gloves should be worn.
To empty the tip waste bin:
Section 1: Turning OFF the scheduler via the Cellmatic Suite software
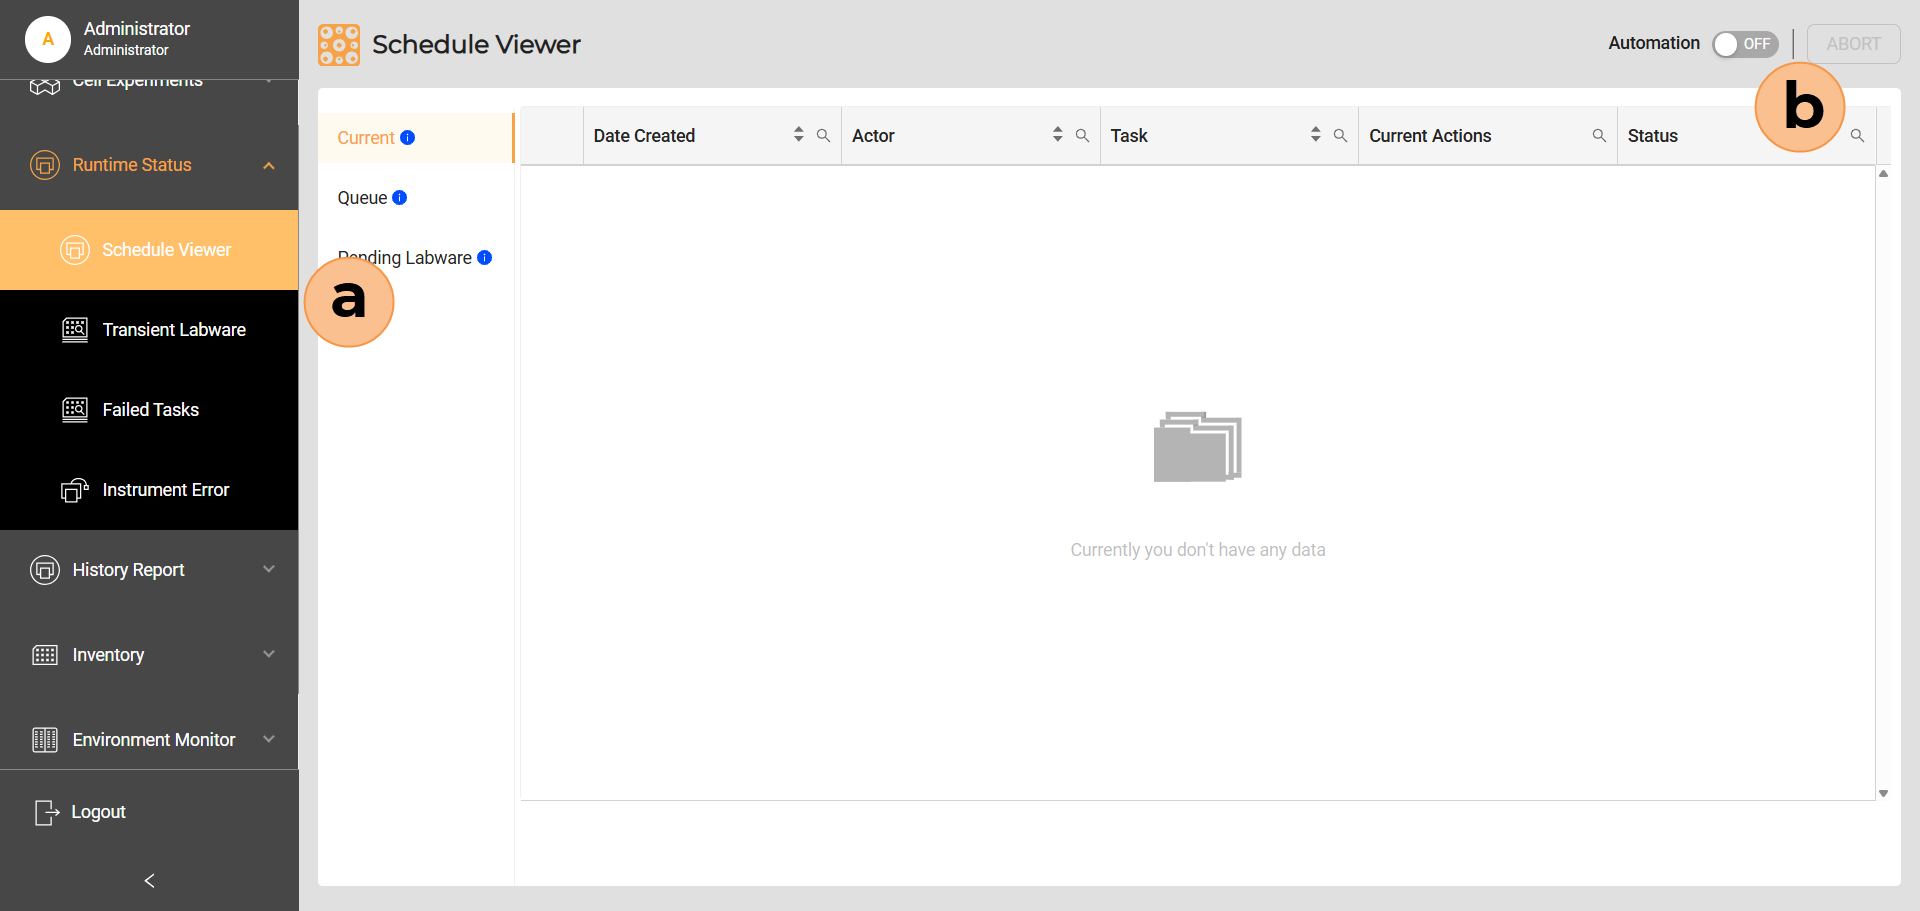
Turning Off the Automation from the Schedule Viewer Page
Go to Runtime Status > Schedule Viewer (a).
Toggle OFF the Automation (b) in the top right corner.
Section 2: Replacing and Disposing of the FLO Tip Waste Bag
Remove the used biohazard waste bag in the FLO Tip Waste Bin and replace it with a new one.
Disinfect the biohazard waste bag using 70% ethanol.
Dispose of the used FLO tip waste bag following the hazardous waste procedures.
Section 3: Resetting the Tip Waste Status via the Cellmatic Suite Software
Turn ON the scheduler.
Select Dashboard > Instruments, and select Update in the Waste Container table to open the Update Waste Container State window.
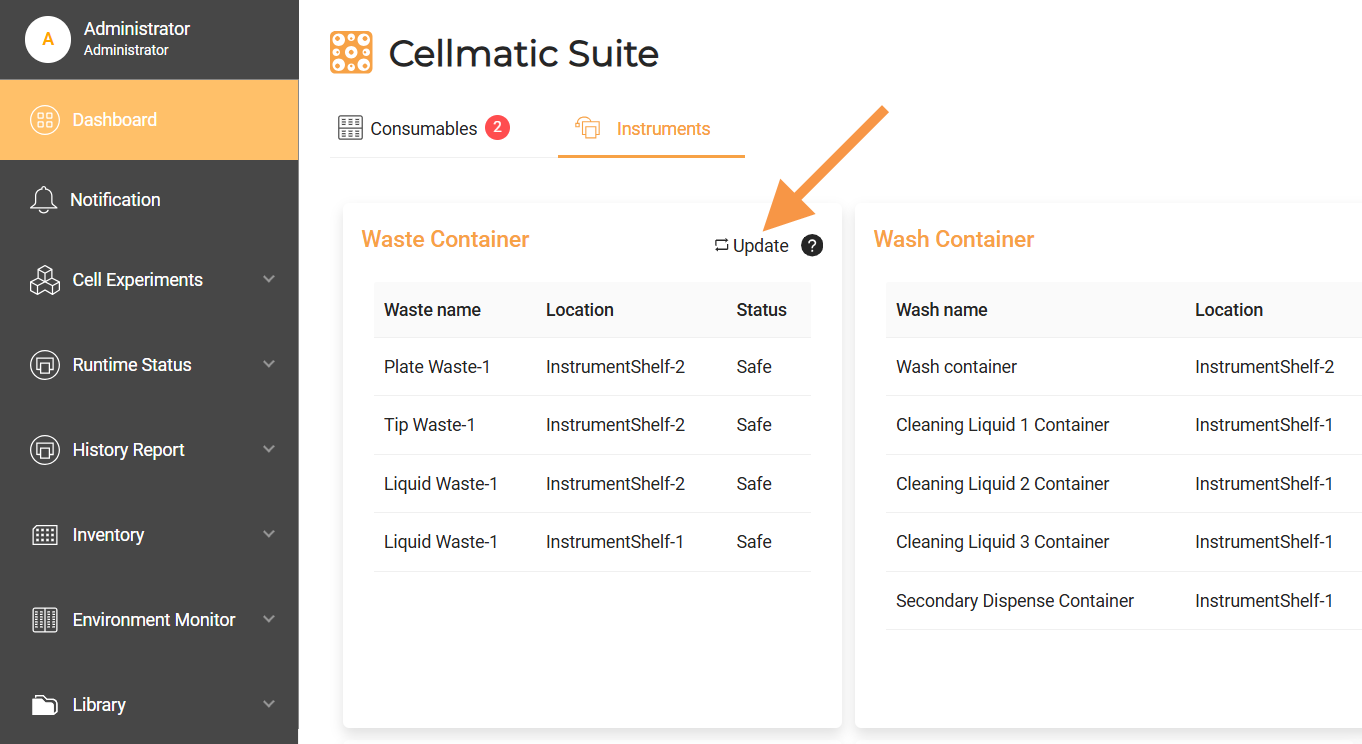
Updating the TipWaste Status in the Waste Container Table
Select TipWaste > YES. The TipWaste status updates to Empty.
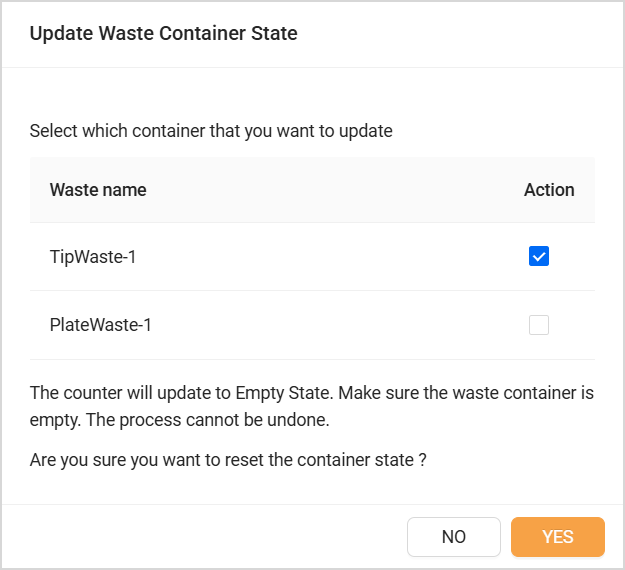
Selecting the TipWaste Container to Reset
Emptying FLO Liquid Waste
The FLO liquid waste jerrycan is designed to hold a maximum of 10 litres of liquid waste.
Note
The Cellmatic Suite alerts you to empty the liquid waste container at 8 liters by default.
Required Item:
1 ea - 10 L Empty FLO Liquid Waste Container
Prerequisite:
Wear PPE. At a minimum, gloves should be worn.
To replace the FLO liquid waste container:
Section 1: Turning OFF the scheduler via the Cellmatic Suite Software
Turning Off the Automation from the Schedule Viewer Page
Go to Runtime Status > Schedule Viewer (a).
Toggle OFF the Automation (b) in the top right corner.
Section 2: Replacing the FLO Liquid Waste Container
Position the empty container next to the full FLO liquid waste container.
Transfer the cap and tubing from the full FLO liquid waste container to the empty one.
Swap the full FLO liquid waste container with the empty one.
Once the swapping is complete, turn ON the scheduler via the Cellmatic Suite.
Note
In the Cellmatic Suite dashboard, check the Waste Container table in the Instruments tab. The status of the Liquid Waste should be updated to Safe, indicating that replacing the waste container was successful.
Section 3: Disposing of the Liquid Waste and Cleaning the Container
Dispose of the liquid waste following the hazardous waste procedures.
Clean the FLO liquid waste container for reuse.
Related Topics