Registering Labware Via Cellmatic Suite
Prerequisites:
Connect the barcode printer to Cellmatic Suite or use prebarcoded plates.
Define labware and cell lines in the Library.
Prepare labware.
Perform an aseptic technique when loading and unloading labware.
Wear Personal Protective Equipment (PPE).
Use 70% ethanol to disinfect gloves, labware, and tools.
To register labware via Cellmatic Suite:
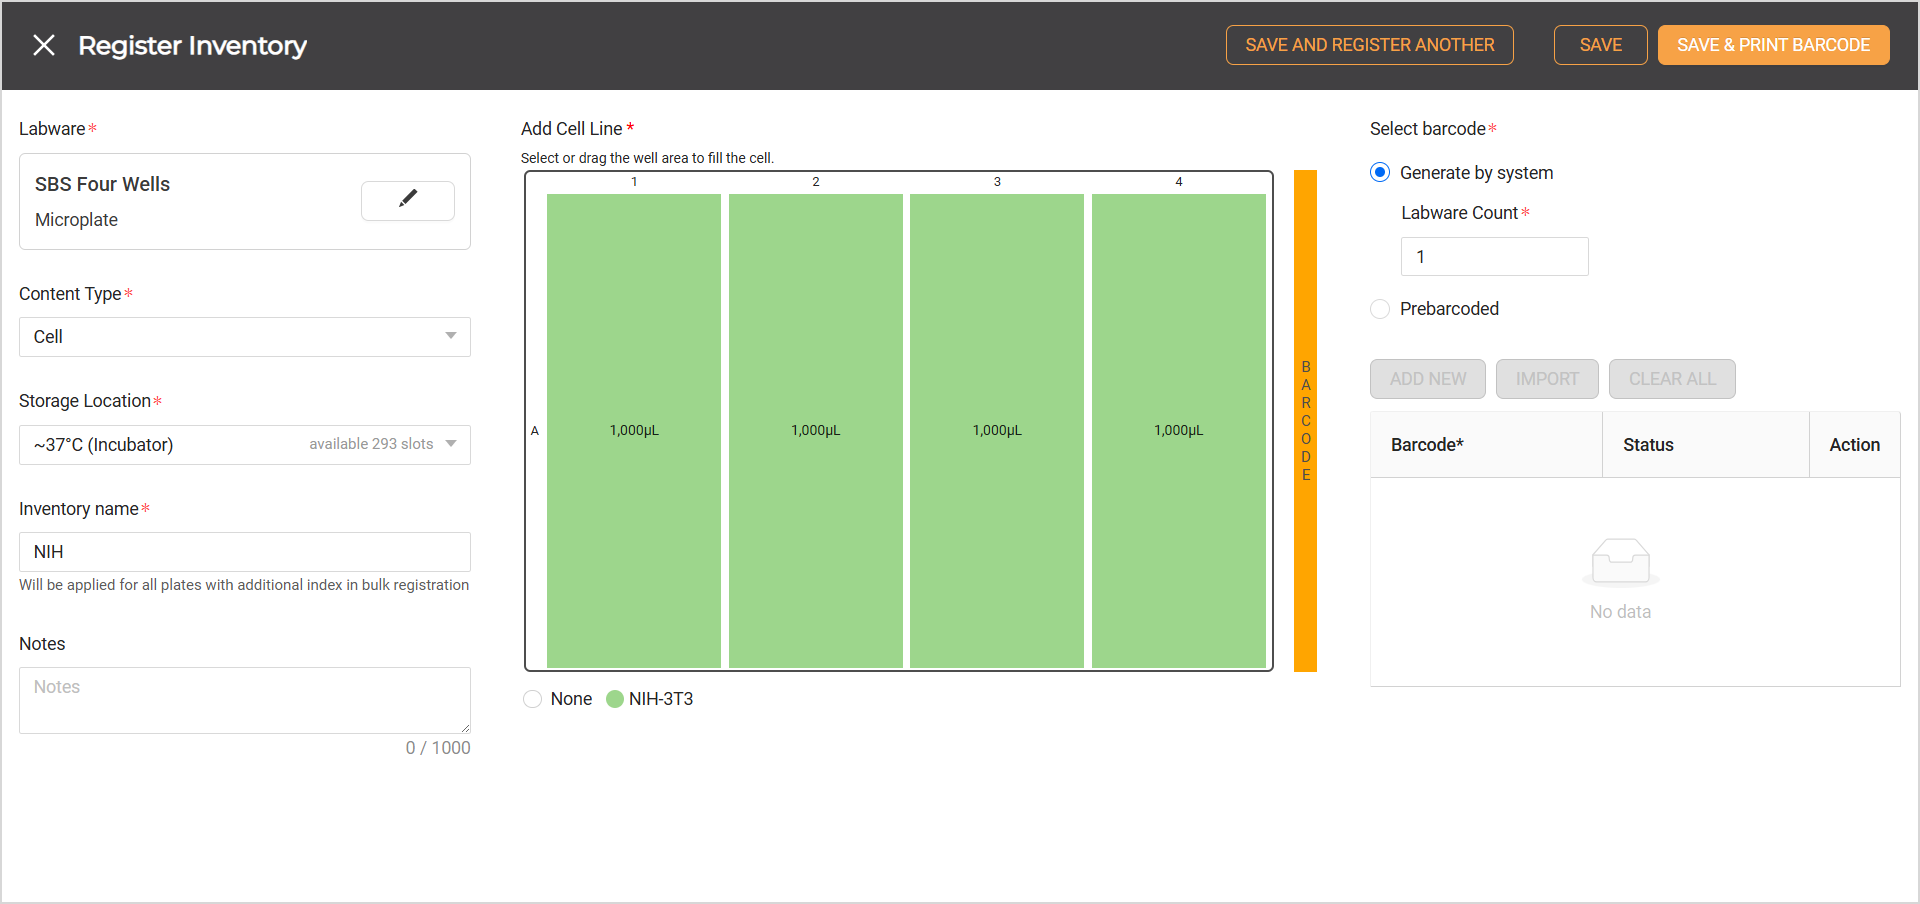
Registering a Plate with Cells
Go to Inventory > Labware > REGISTER. A Select Labware window should appear on the screen.
Select the labware type and click OK.
On the Content Type dropdown, select one of the following:
Note
Additional forms may appear as you select different types of content.
Empty: Supports all labware types. Some labware will have necessary location restrictions (e.g., tube & rack labware can only be stored in the Incubator).
Reagent: Supports deep wells, reservoirs, and SBS-well plates. Reagent-filled labware goes to Labware Storage. If selected, define the Expiration Date.
Cell: ONLY supports SBS-well plates and Falcon tube. If selected, write an inventory name for the plate. All plates with cells are loaded via the Incubator load port.
Select the Storage Location:
4°C (Refrigerator)
25°C (Room Temperature)
~37°C (Incubator)
Optional: Write additional information about the labware or content in the Notes box.
Write a descriptive name for the plate in the Inventory Name field.
Note
The inventory name, along with an additional index, is applied to each plate during the bulk registration process.
Select ADD to add the cell line or culture reagent, depending on the content type selected earlier.
On the Add Content window, select the Cell Line Name or Culture Reagent Name, enter the Volume, and define the well maps. Then, select OK.
Note
If a deep well (Type) registered with trypan blue will be used for counting cells, check the Mark empty well as reservoir checkbox.
Use the Stamp button to fill the wells and the Eraser button to remove the content from the well.
Each SBS well plate has a specific volume range. Make sure to fill the volume within this range.
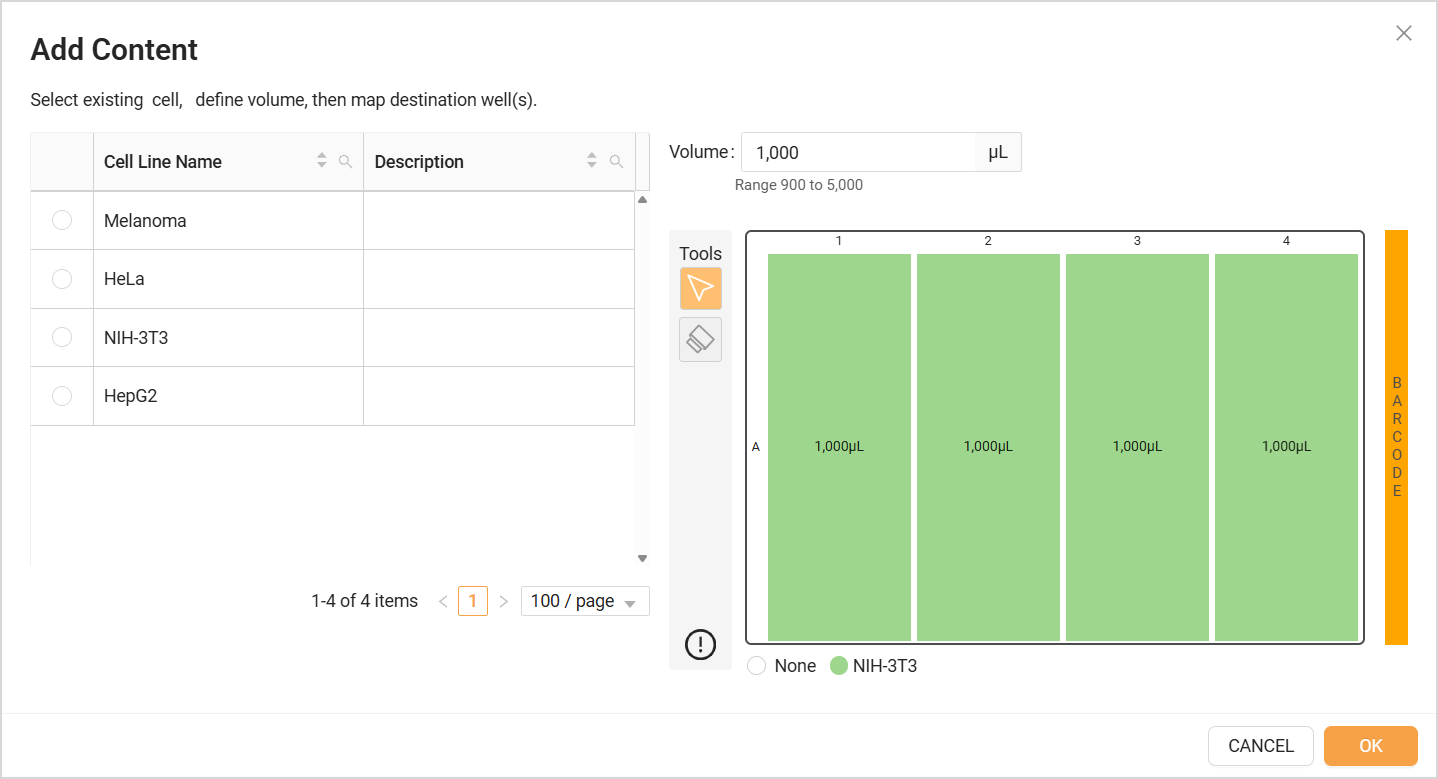
Adding Reagent Details
Select the barcode from the following options:
Generate by system
Select this option if the plate needs to be barcoded. The system will automatically generate and identify the barcode when the plate is loaded.
Upon choosing this option, the Labware Count field will be available. Define the number of labware if registering several plates with cells with identical cell line configurations.
Prebarcoded
Select this option if the plate has barcodes. Then, add barcodes manually using ADD NEW or upload them in bulk from a CSV file using IMPORT.
Note
The CSV file must have “Barcodes” in A1, followed by the barcode entries, as shown in the image below.
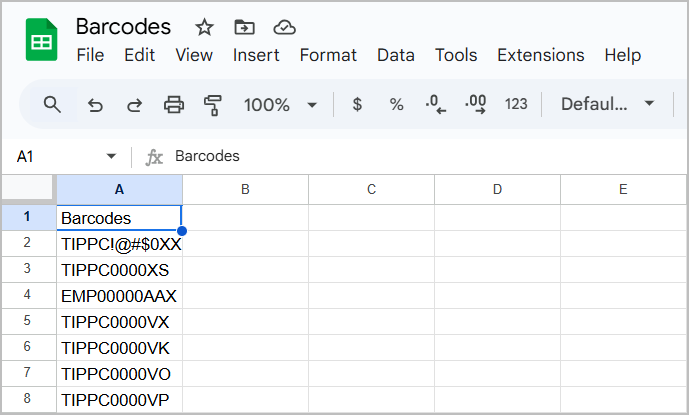
CSV Format to Upload Bulk Barcode Entries
Select one of the options below to complete the labware registration process.
Note
Choosing ”SAVE & REGISTER ANOTHER” or “SAVE” during the registration of plates with cells will not prompt the system to print barcodes. To print the barcodes, read Printing Barcodes.
SAVE & REGISTER ANOTHER: Select this option to store the current plate and register an additional plate immediately.
SAVE: Select this option to store the current plate.
SAVE & PRINT BARCODE: Select this option to store the plate and print the barcode. It is only available for barcodes that are generated by the system.
Read the pop-up message and select OK to close it.
Related Topics: