Merging Contacts
You may come across contacts in TIGA that are duplicate entries of the same contact. These entries can be merged in order to keep all of the information for a particular contact in one place.
To merge contacts:
Find the contacts you want to merge using the filters in the Contacts table. Try typing the last name of the customer into the Name box as a starting point.
Hold the Shift or Ctrl keys, and then click the desired contacts.
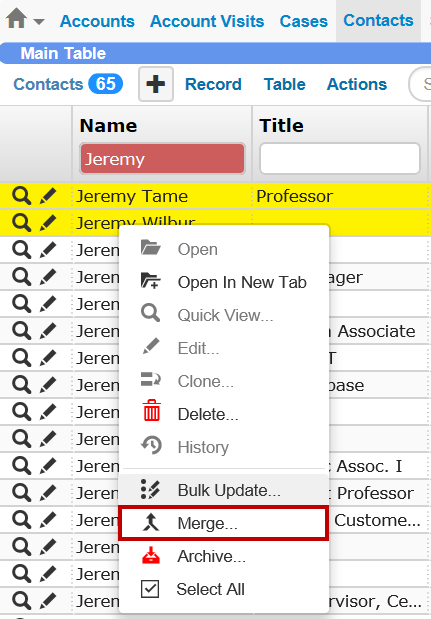
Right-click a record and select Merge.
OR
Go to the Record menu and click Merge.
The Merge Option
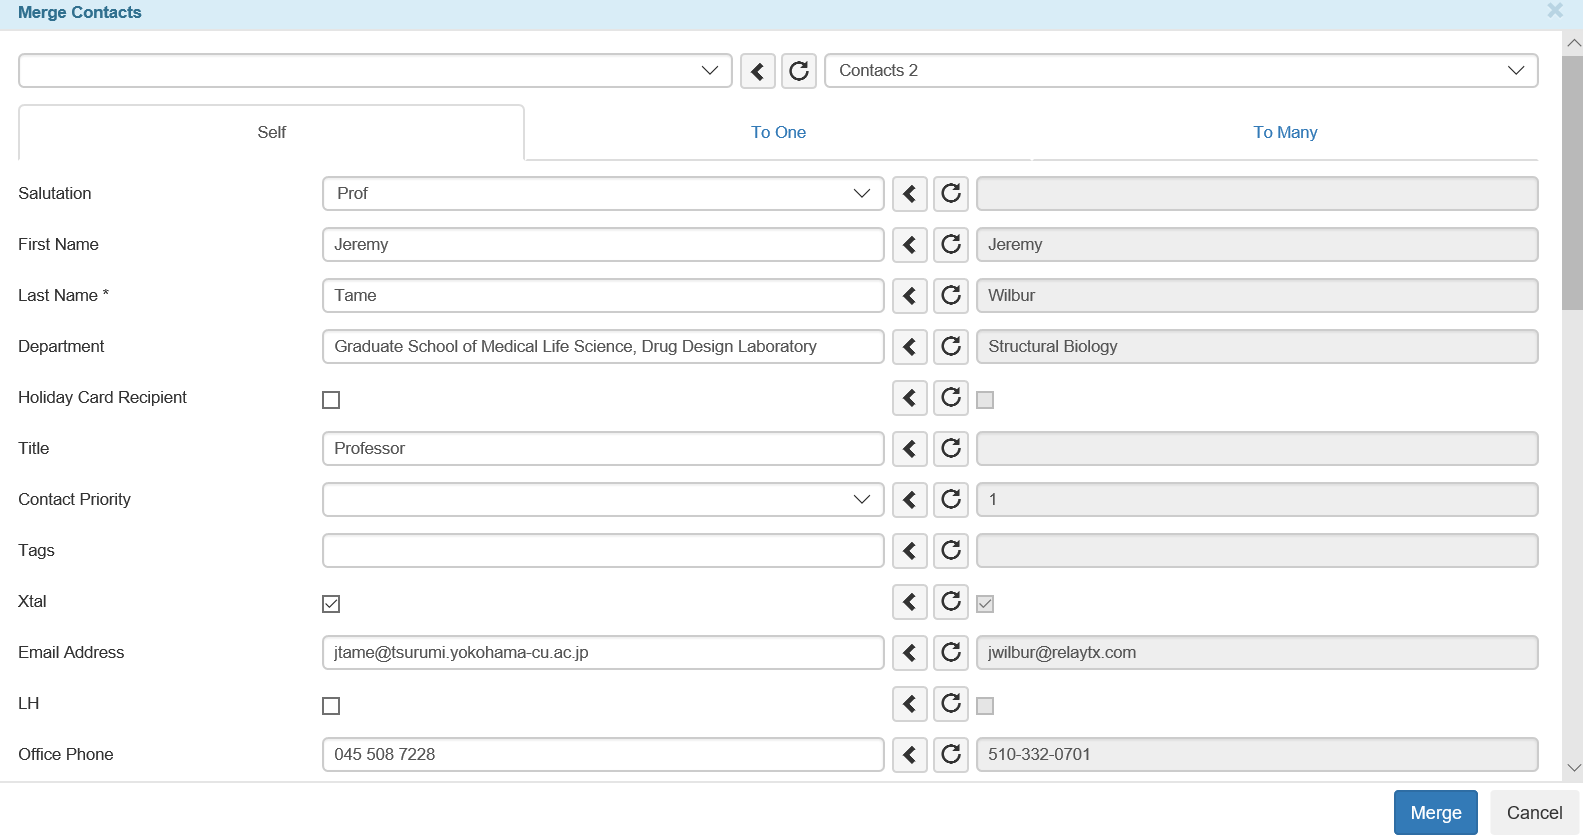
TIGA will open a Merge Contacts window. This window displays the information from each contact by category side-by-side. The information on the left is the information that will be kept in the resulting merged contact.
Contacts are referred to as Contact 1 and Contact 2.
The Merge Contacts Window
Clicking the Left arrow button will overwrite all information that was in the Contacts 1 list with the information from the Contacts 2 list. The information on the left is the information that will be kept after the merge is complete.
Clicking the Reset button reverts all changes.
The Self tab contains information about the contact such as Salutation, First Name, and Last name. Required fields are marked with an asterisk. Review each item and set up the fields so that the information on the left is the information you want to appear in the merged contact.
The To One tab contains a contact’s related tables that can only have one entry. For example, a contact can only belong to one account, one employee (typically a sales person), one country, and so on. Review each item, again making sure that the information on the left is the information you want to appear in the merged contact.
The To Many tab contains a contact’s related tables that can have more than one item in a table, such as interactions, issues, and account visits. On this tab, when you move information from the right to the left, you are adding it to one table instead of replacing existing information. If you want to delete anything from the table on the left, select the check box next to the information you want to delete, and then click the Delete button above the table. The Delete button appears as a red trashcan, when active.
When you’re done merging all of the information, click the Merge button at the bottom-right of the Merge Contacts window. All changes are stored in the contact that you selected on the left; the other contact is deleted.